How to create an A record using DNSaaS
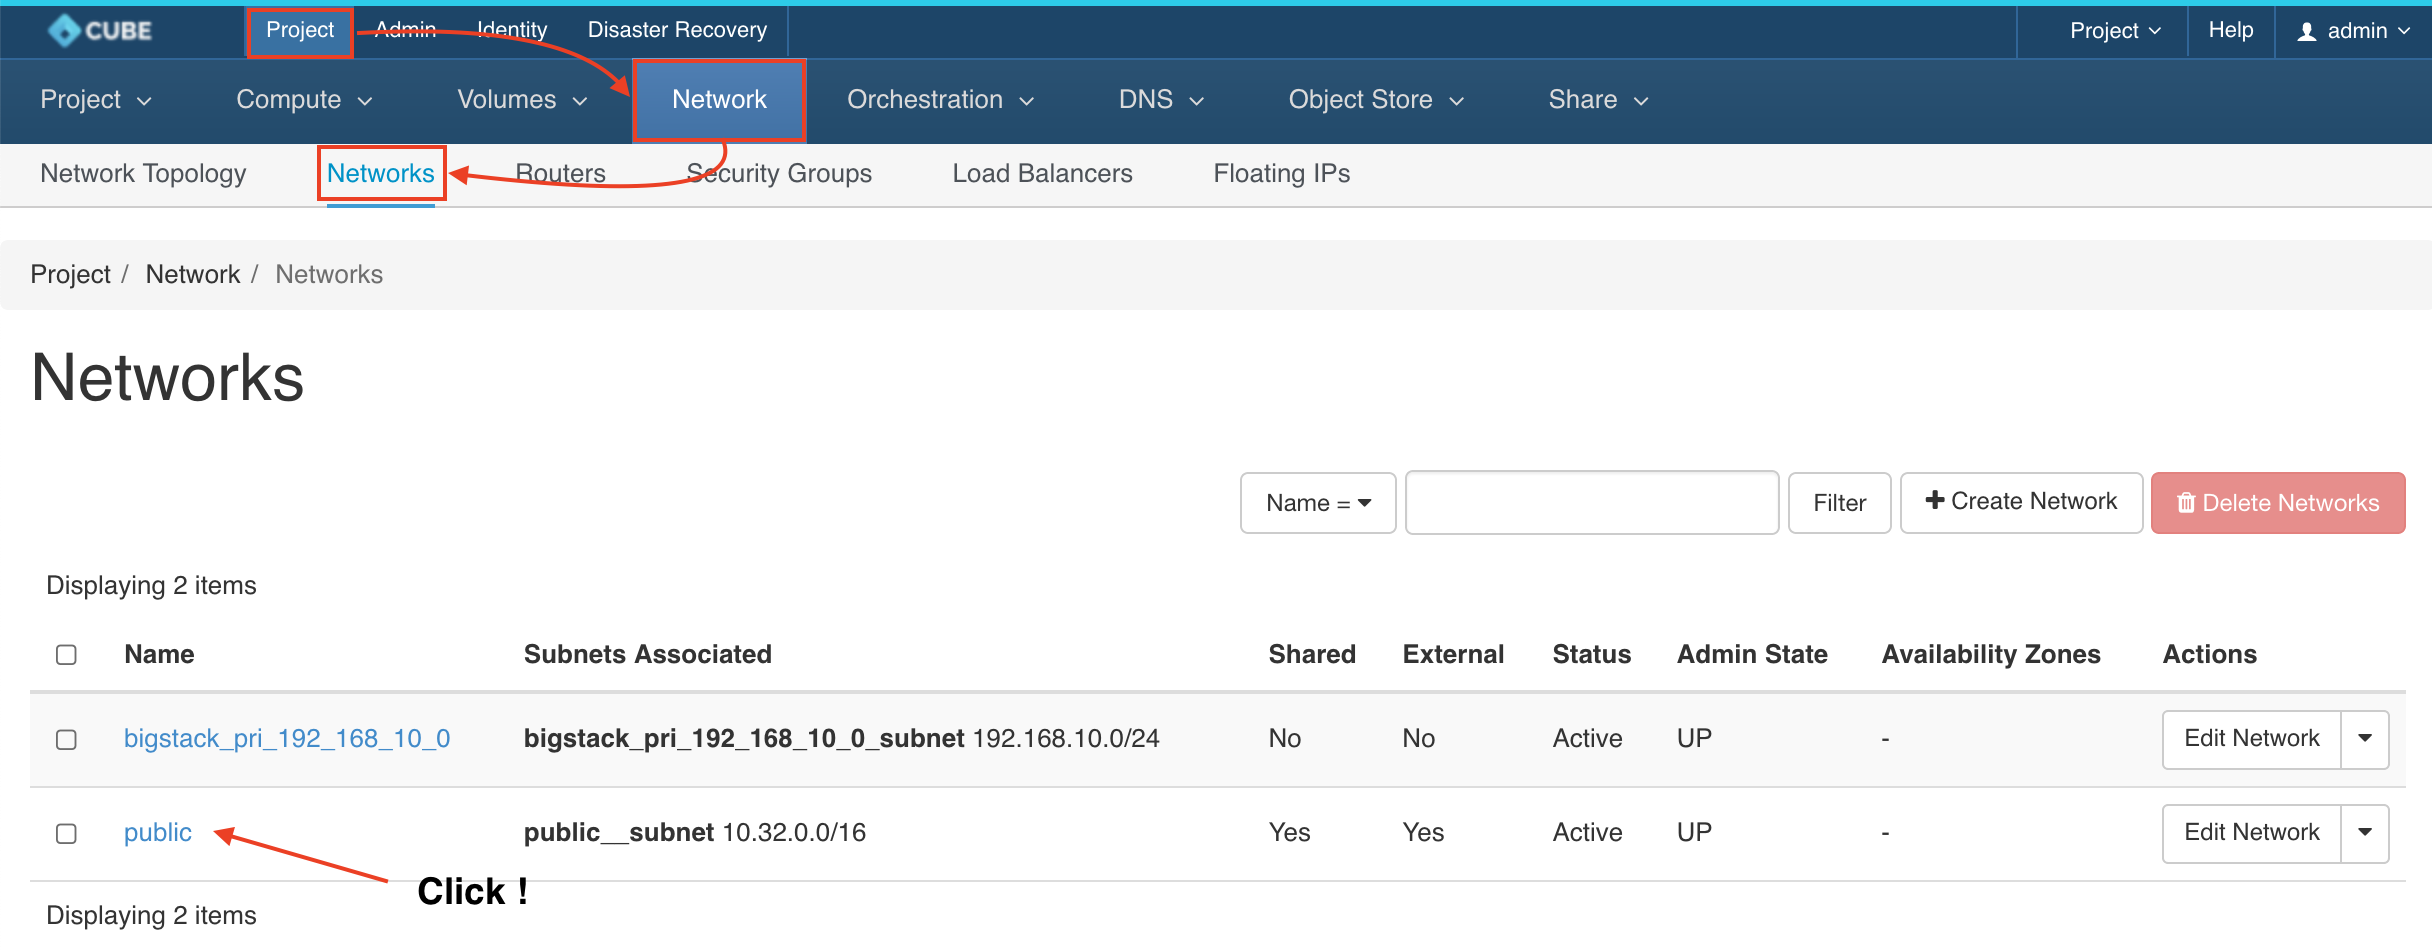
Setting the DNS of Network
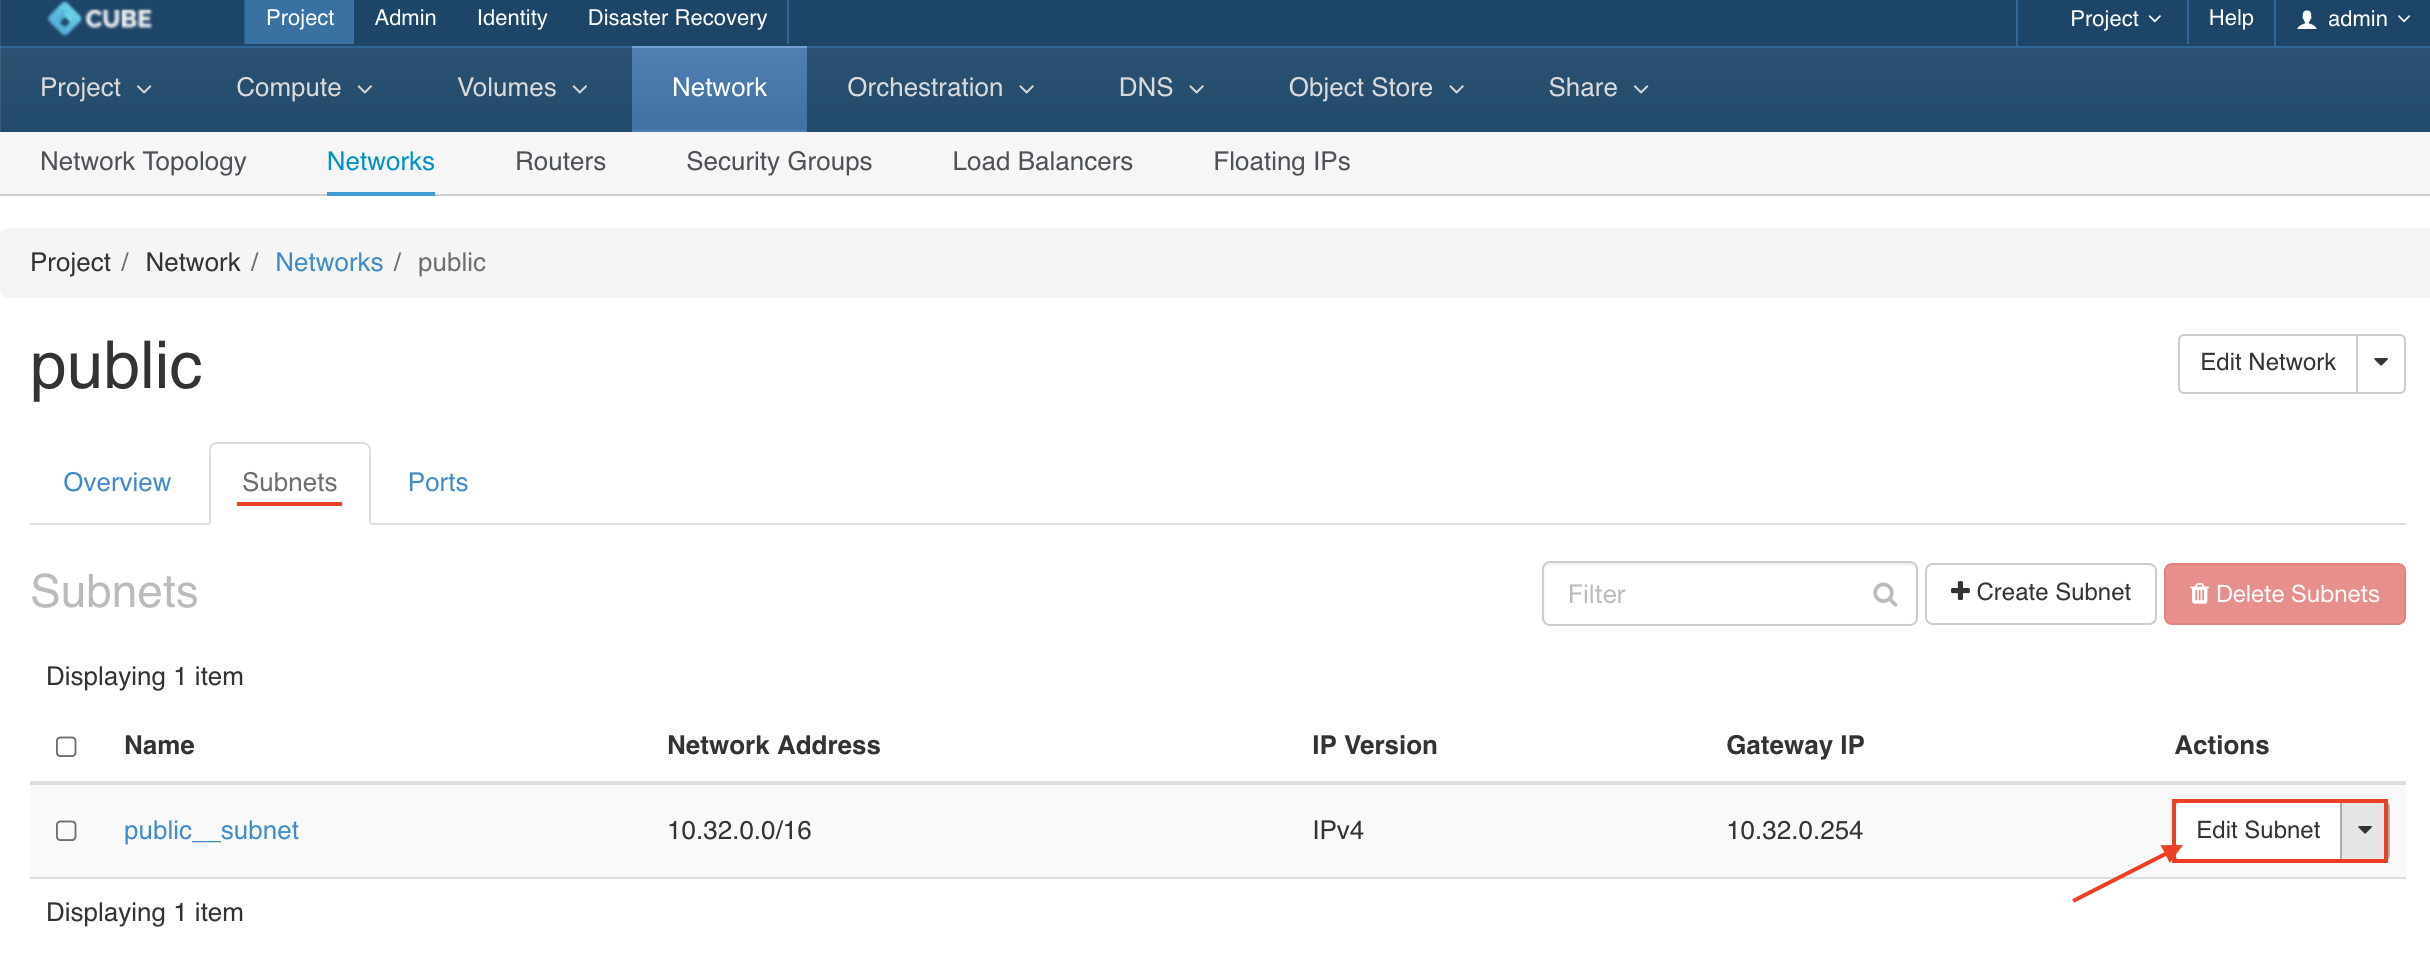
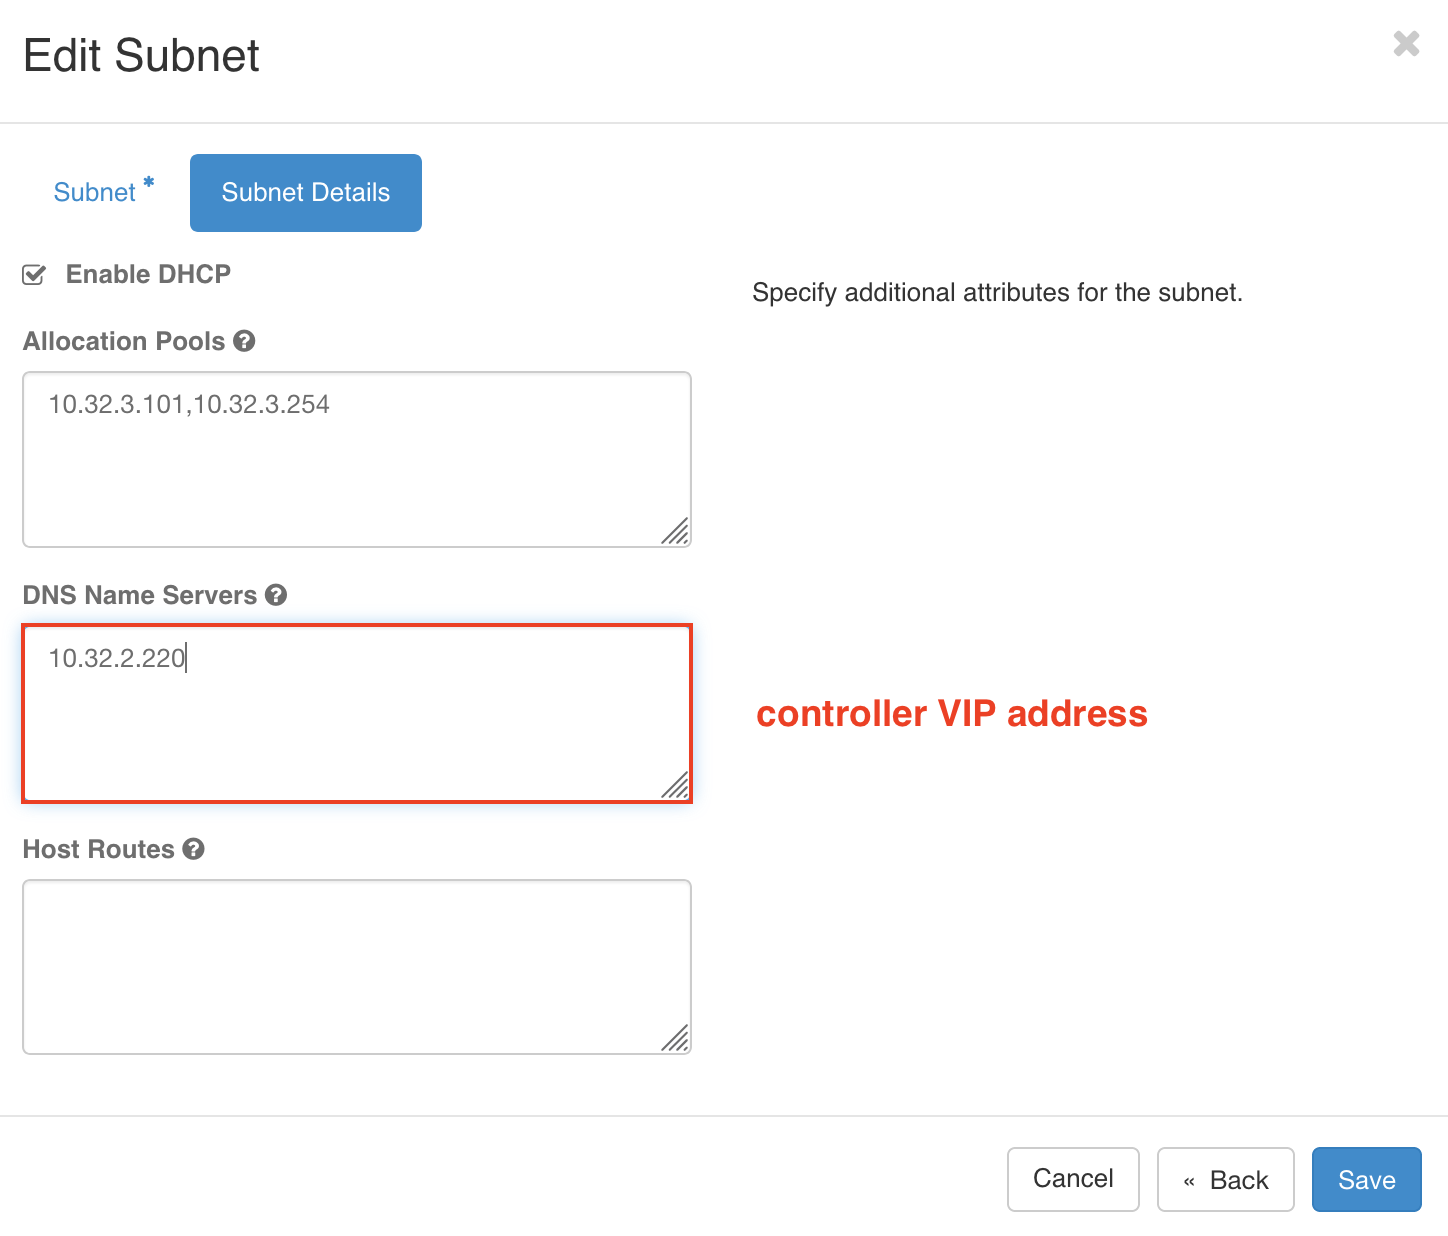
Goto Admin > Network > Networks, click on the Network Name from the list of your Networks then hit the action button EDIT SUBNET, go to Subnet Details and type in your DNS Name Servers, it should be your controller IP address or VIP and SAVE
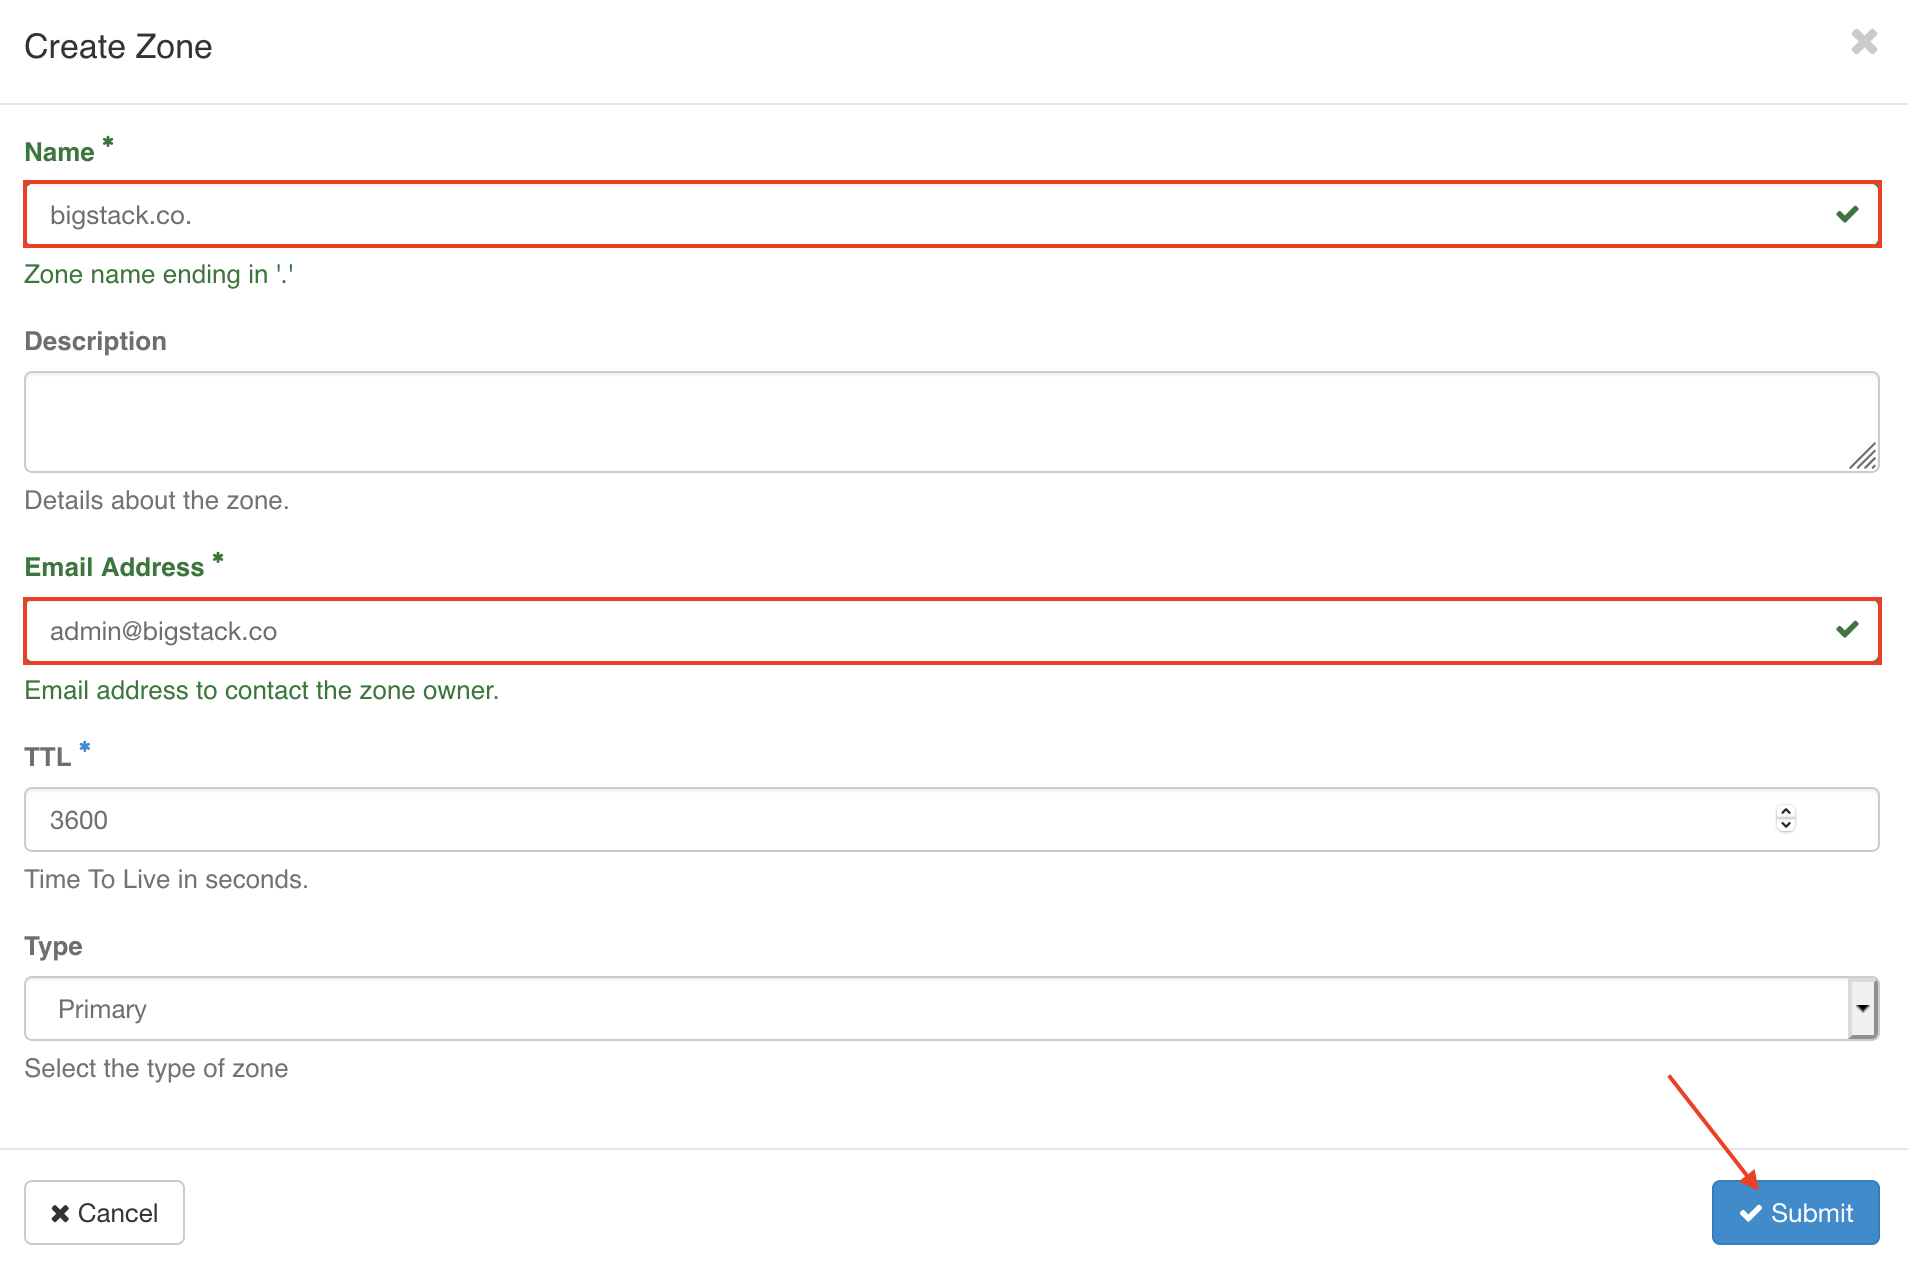
Create DNS Zone
Goto Project > DNS > Zones, click on the CREATE ZONE
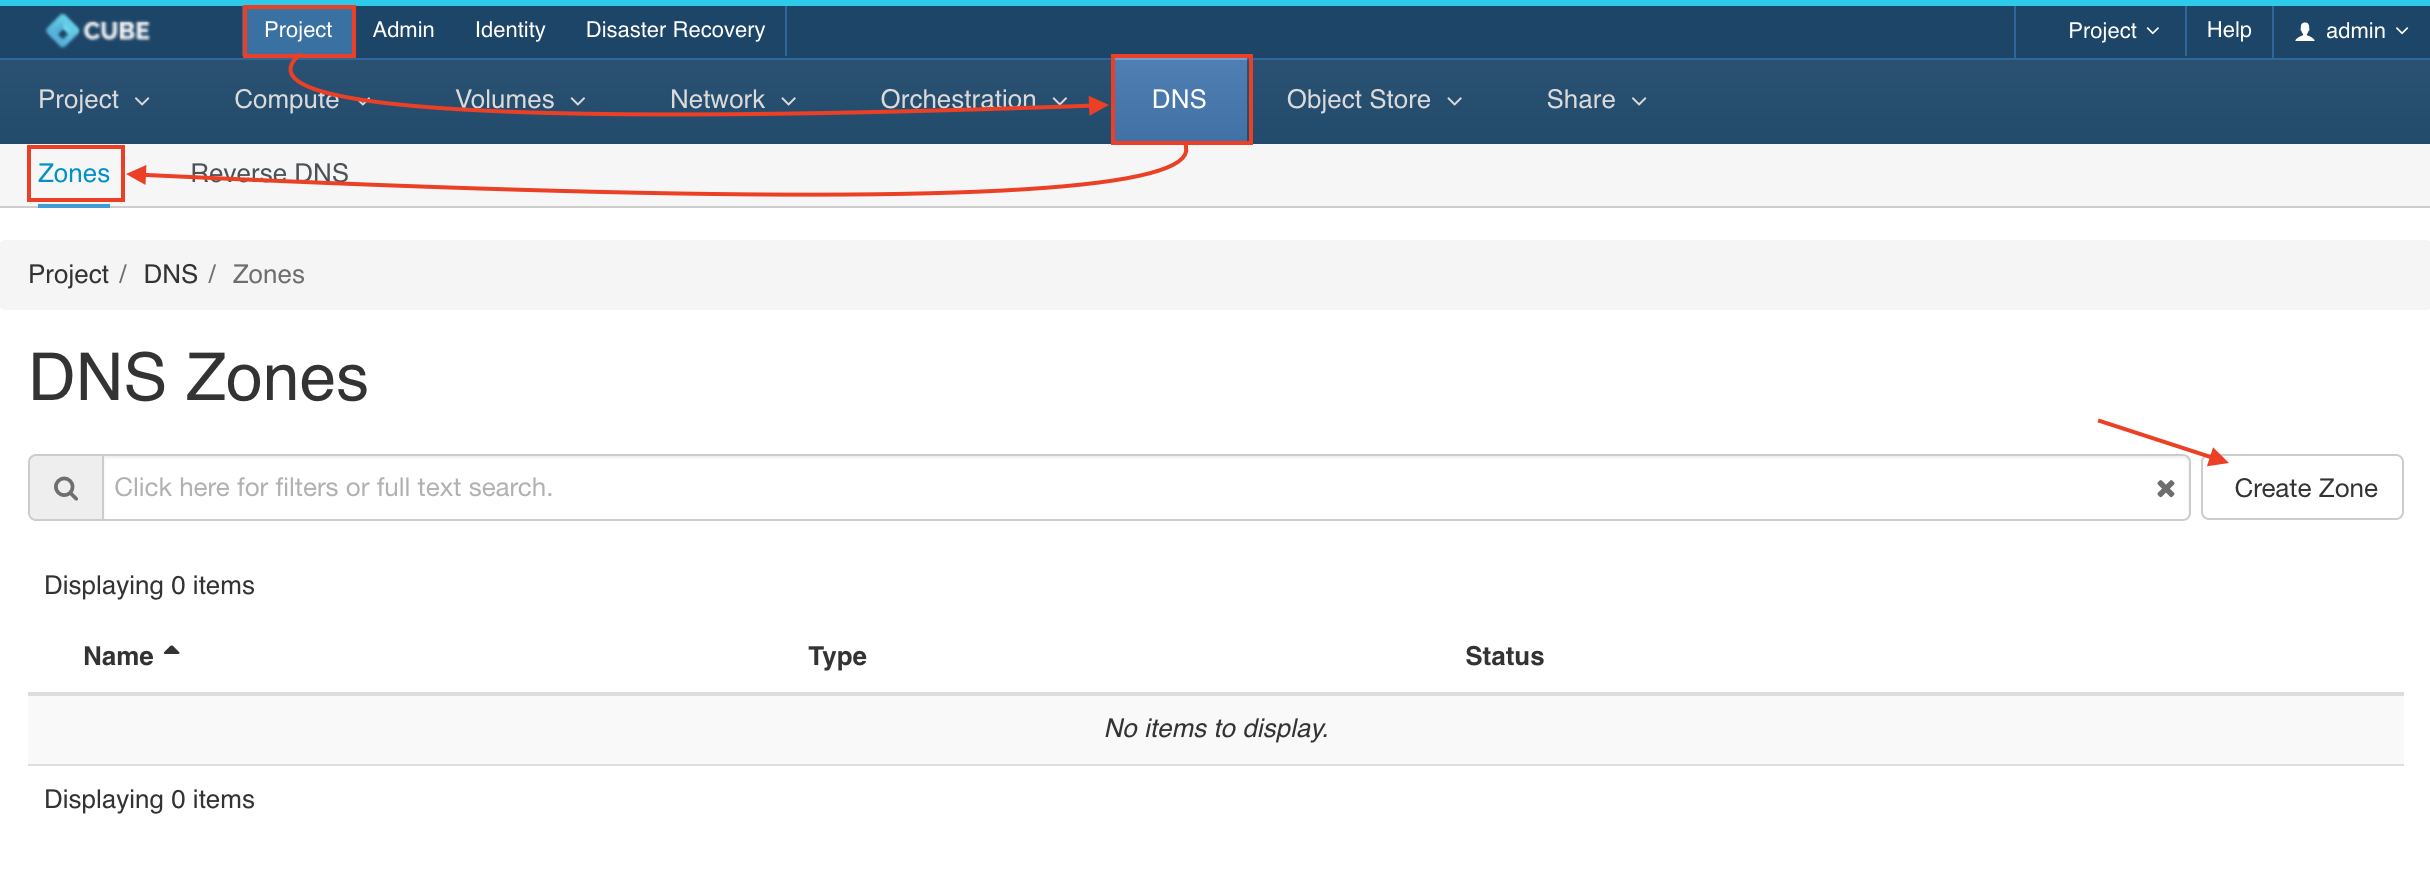
- create zone with a preferred/registered domain name
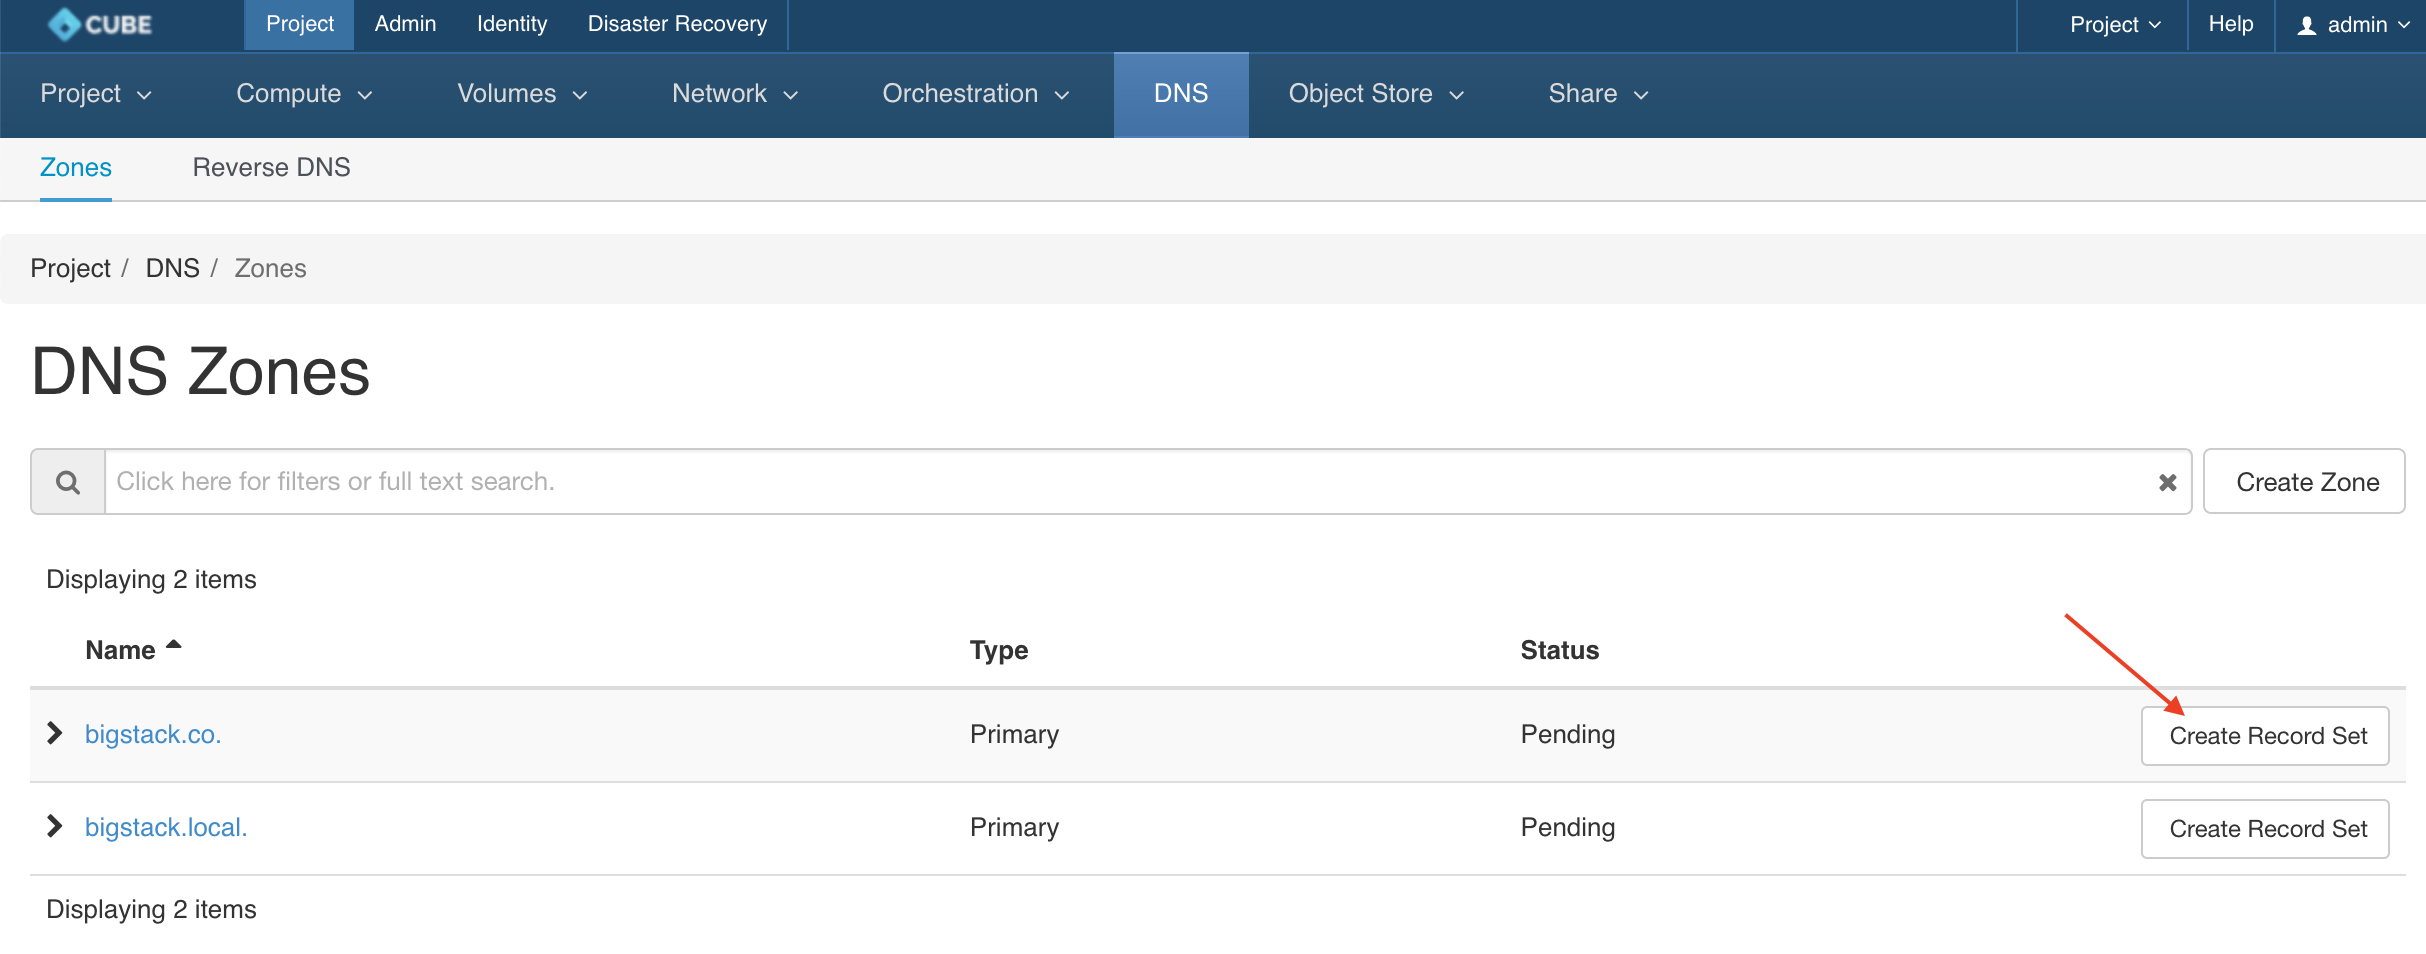
Create Record Set
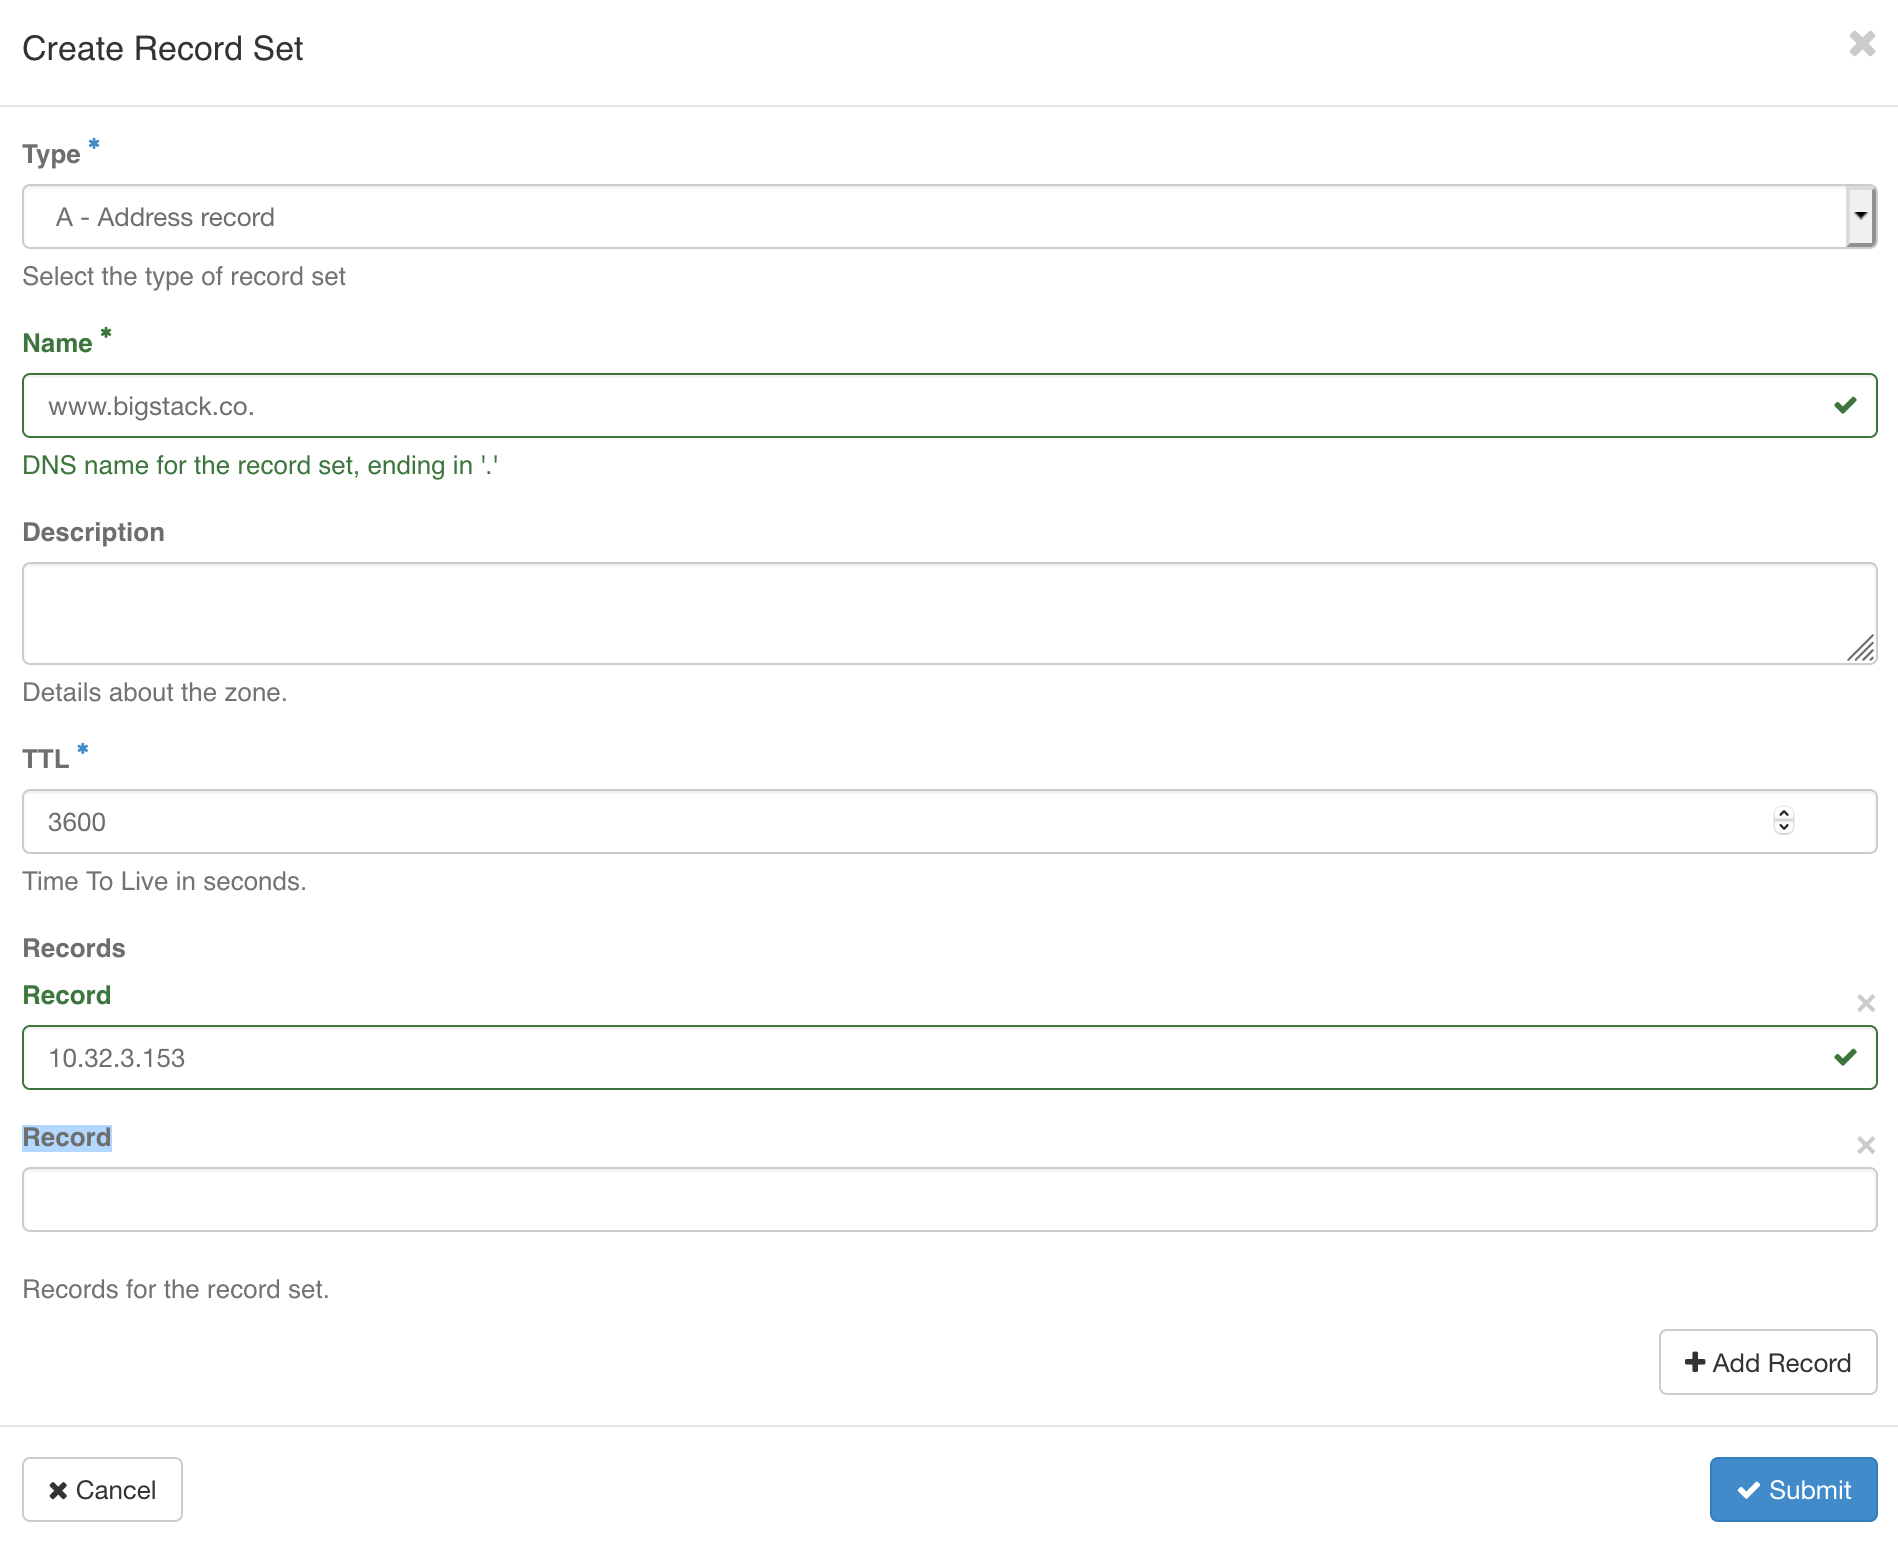
Create an A Record with your Virtual Machine IP address
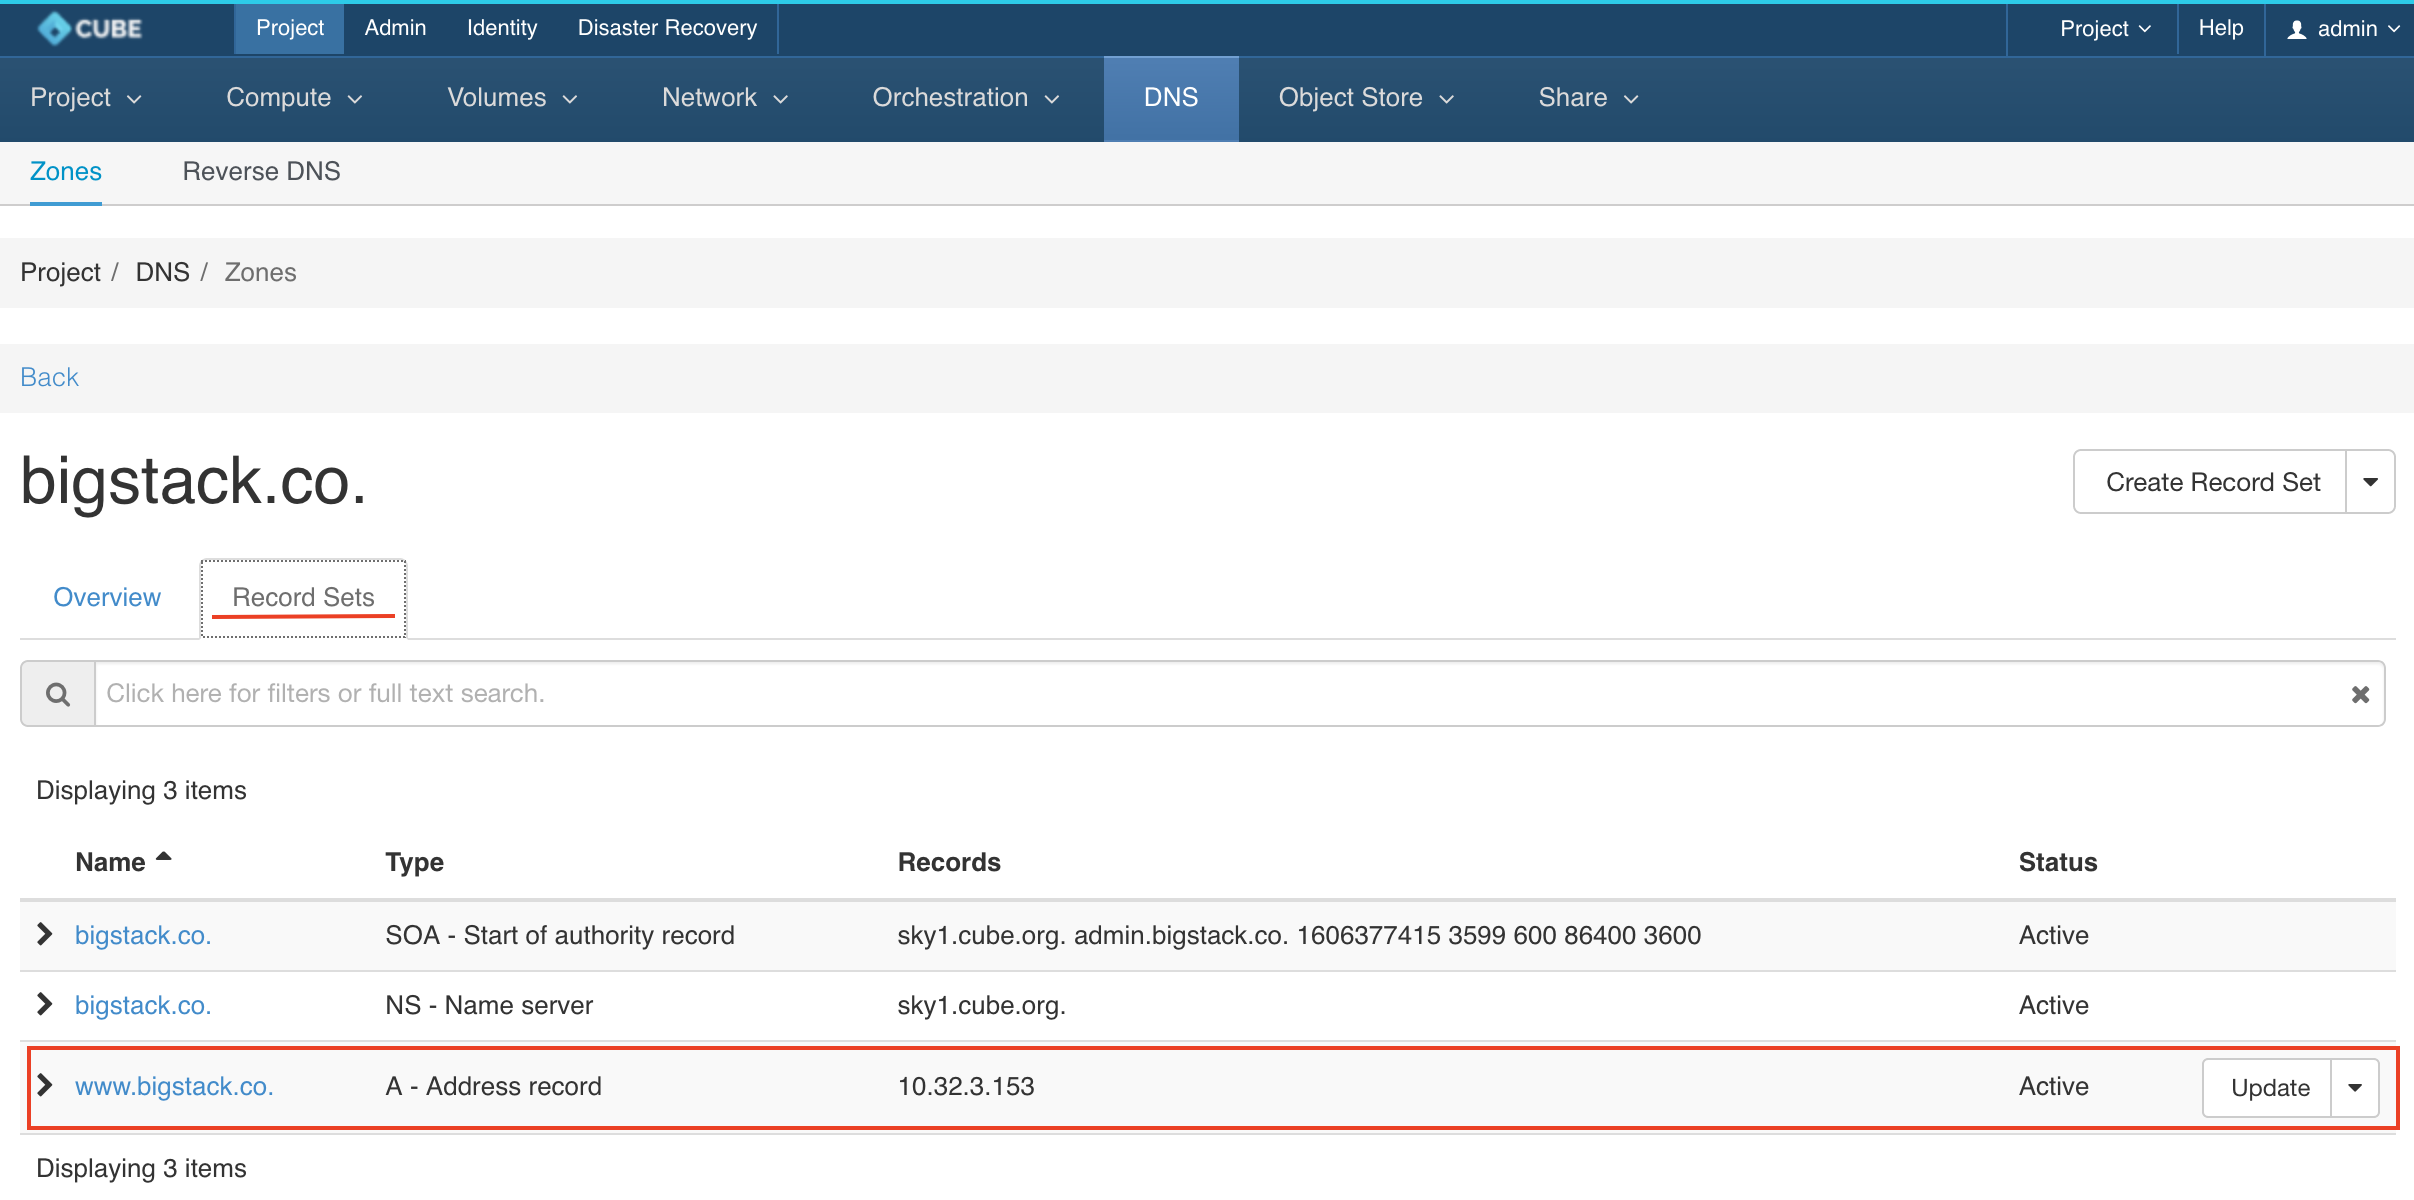
Check the Record Set
Test the DNS
connect your virtual machine and
ping www.bigstack.coAlternatively, you can change your compute DNS and try it out
$ ssh [email protected]
Warning: Permanently added '10.32.3.153' (ECDSA) to the list of known hosts.
$ ping www.bigstack.co
PING www.bigstack.co (10.32.3.153): 56 data bytes
64 bytes from 10.32.3.153: seq=0 ttl=64 time=0.019 ms
64 bytes from 10.32.3.153: seq=1 ttl=64 time=0.062 ms
64 bytes from 10.32.3.153: seq=2 ttl=64 time=0.040 ms
64 bytes from 10.32.3.153: seq=3 ttl=64 time=0.067 ms
64 bytes from 10.32.3.153: seq=4 ttl=64 time=0.035 ms