Create an instance (virtual machine)
This page explains how to create a new compute instance, also known as a virtual machine, through the CubeCMP management interface.
Virtual machine creation overview
Creating a compute instance allows you to provision virtualized resources to run workloads in your CubeCMP environment. This section walks you through the instance creation workflow and the required configuration options.
Create an instance
-
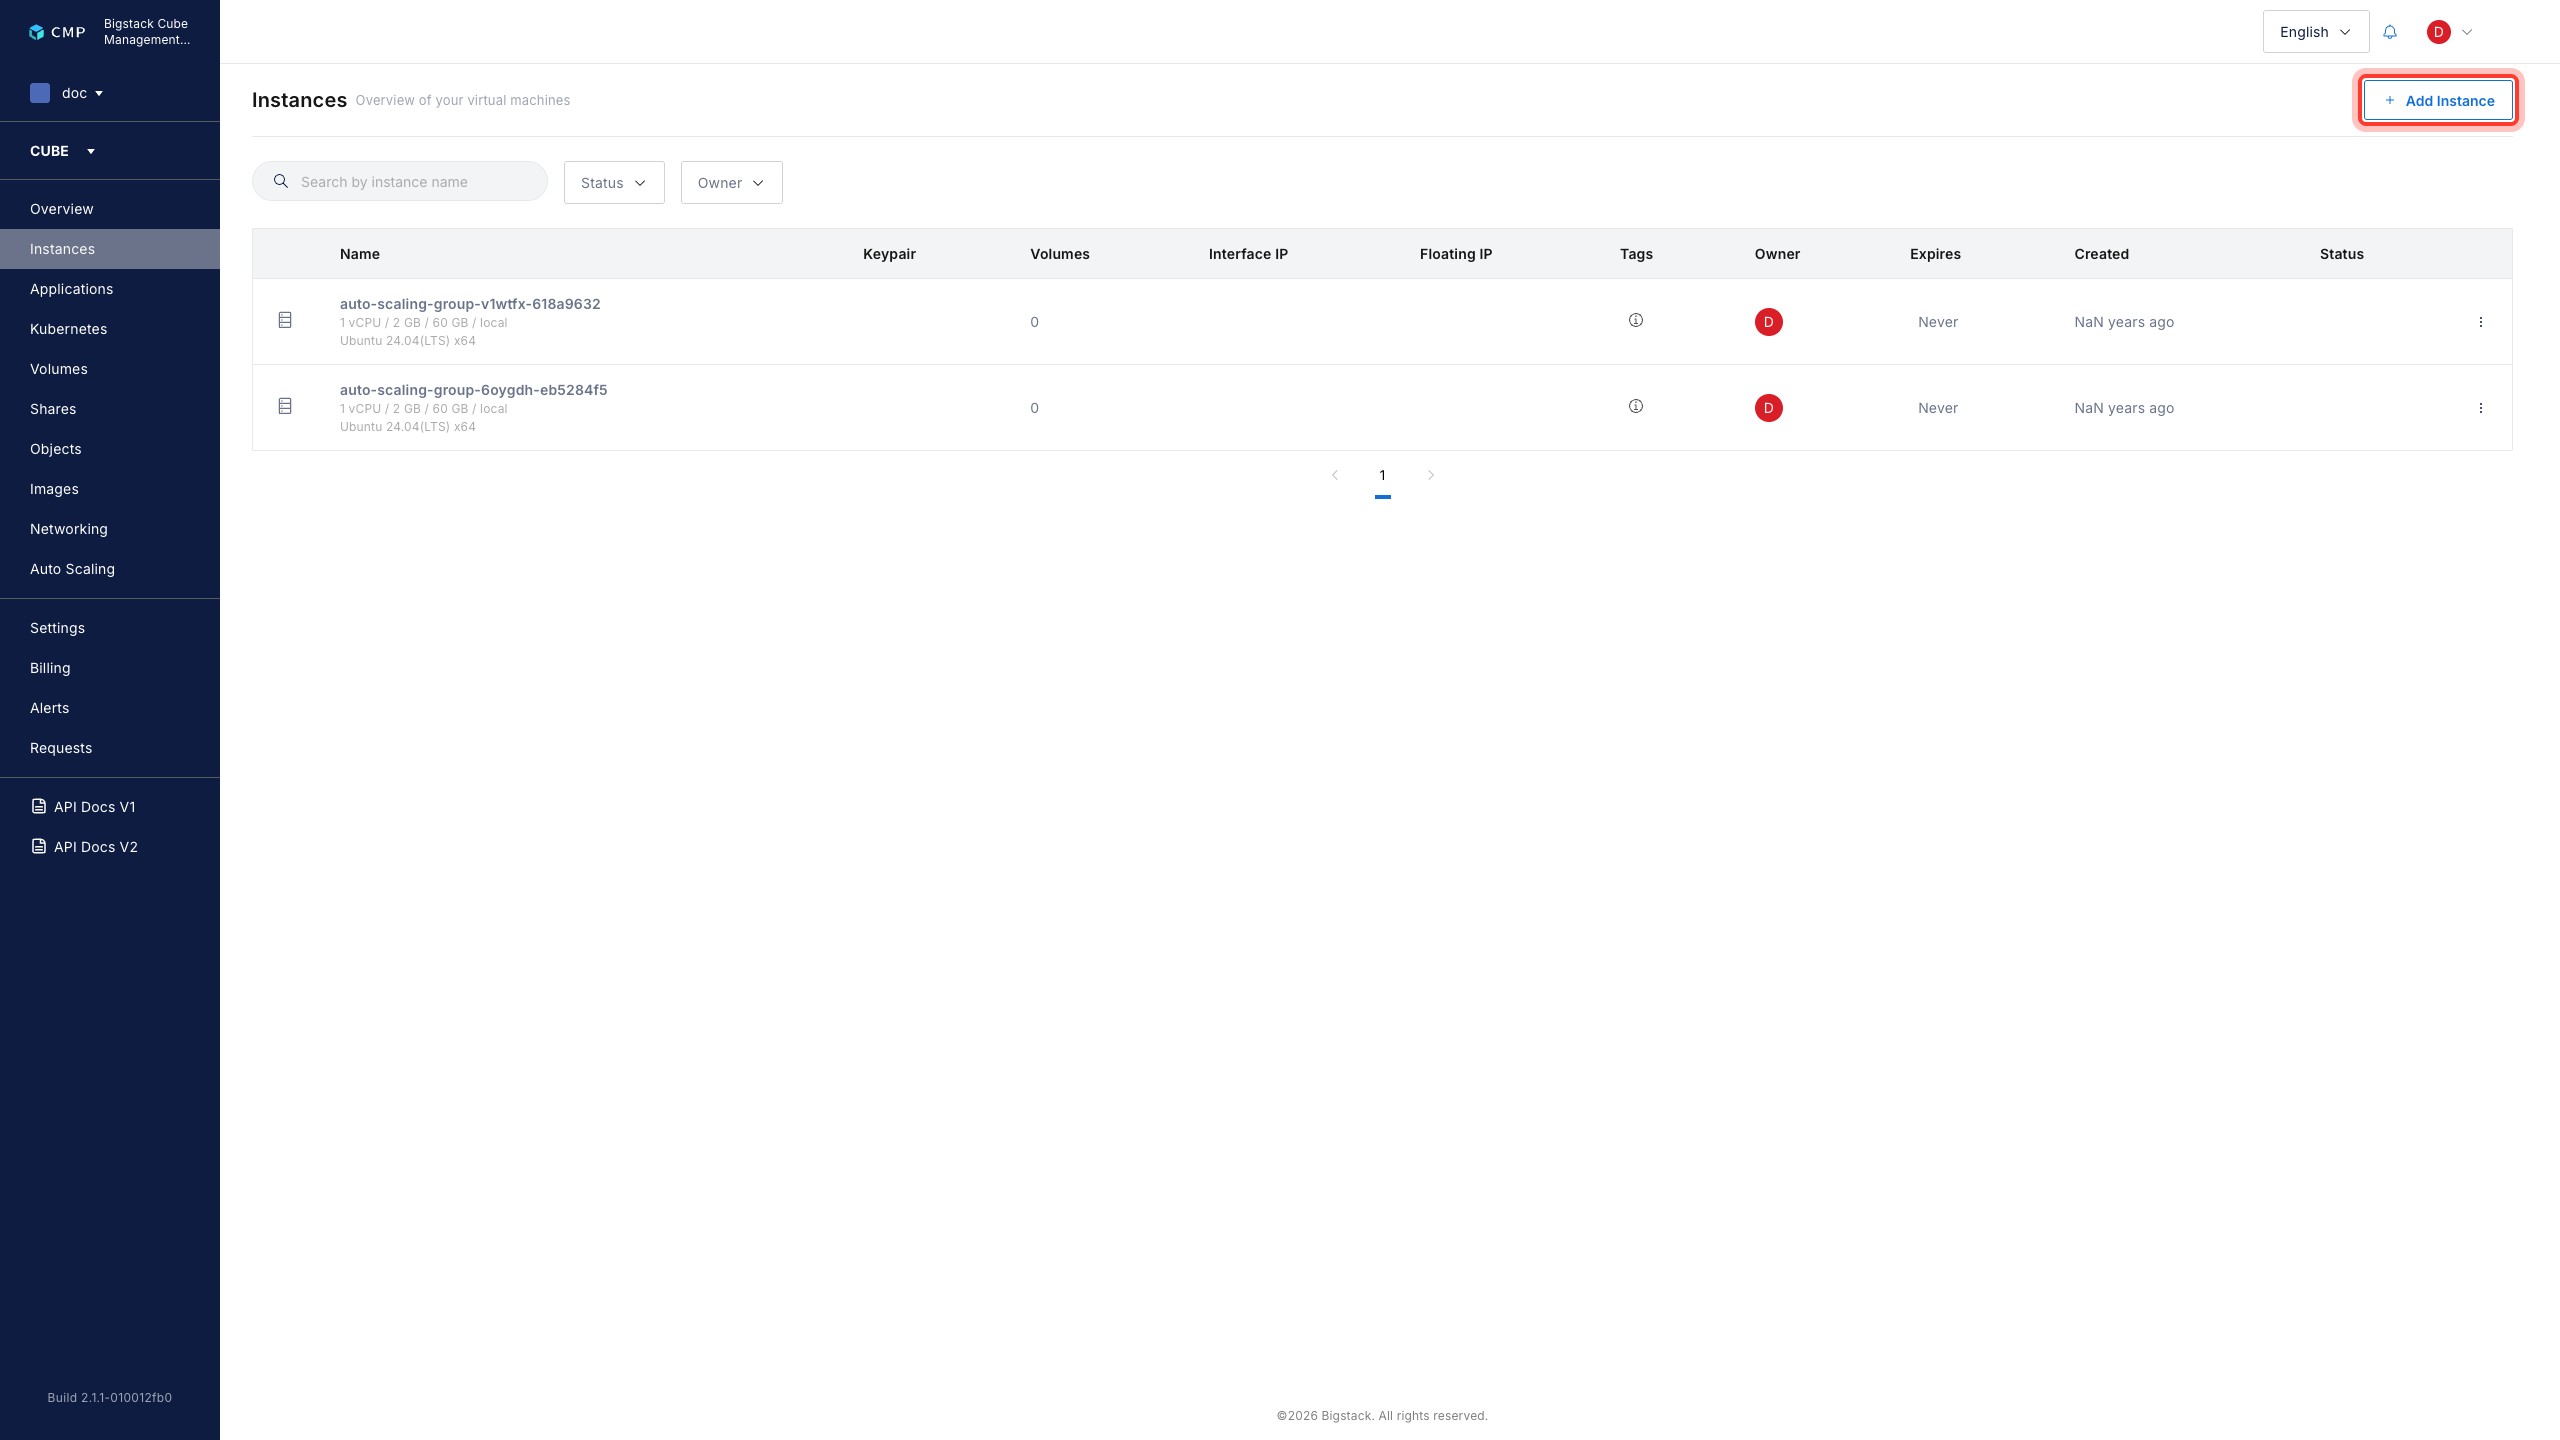
In the CubeCMP management console, go to the Instances page. The Instances screen appear and the + Add Instance tab appears.
-
Click on + Add Instance to start the instance creation workflow.
-
Configure the instance parameters:
-
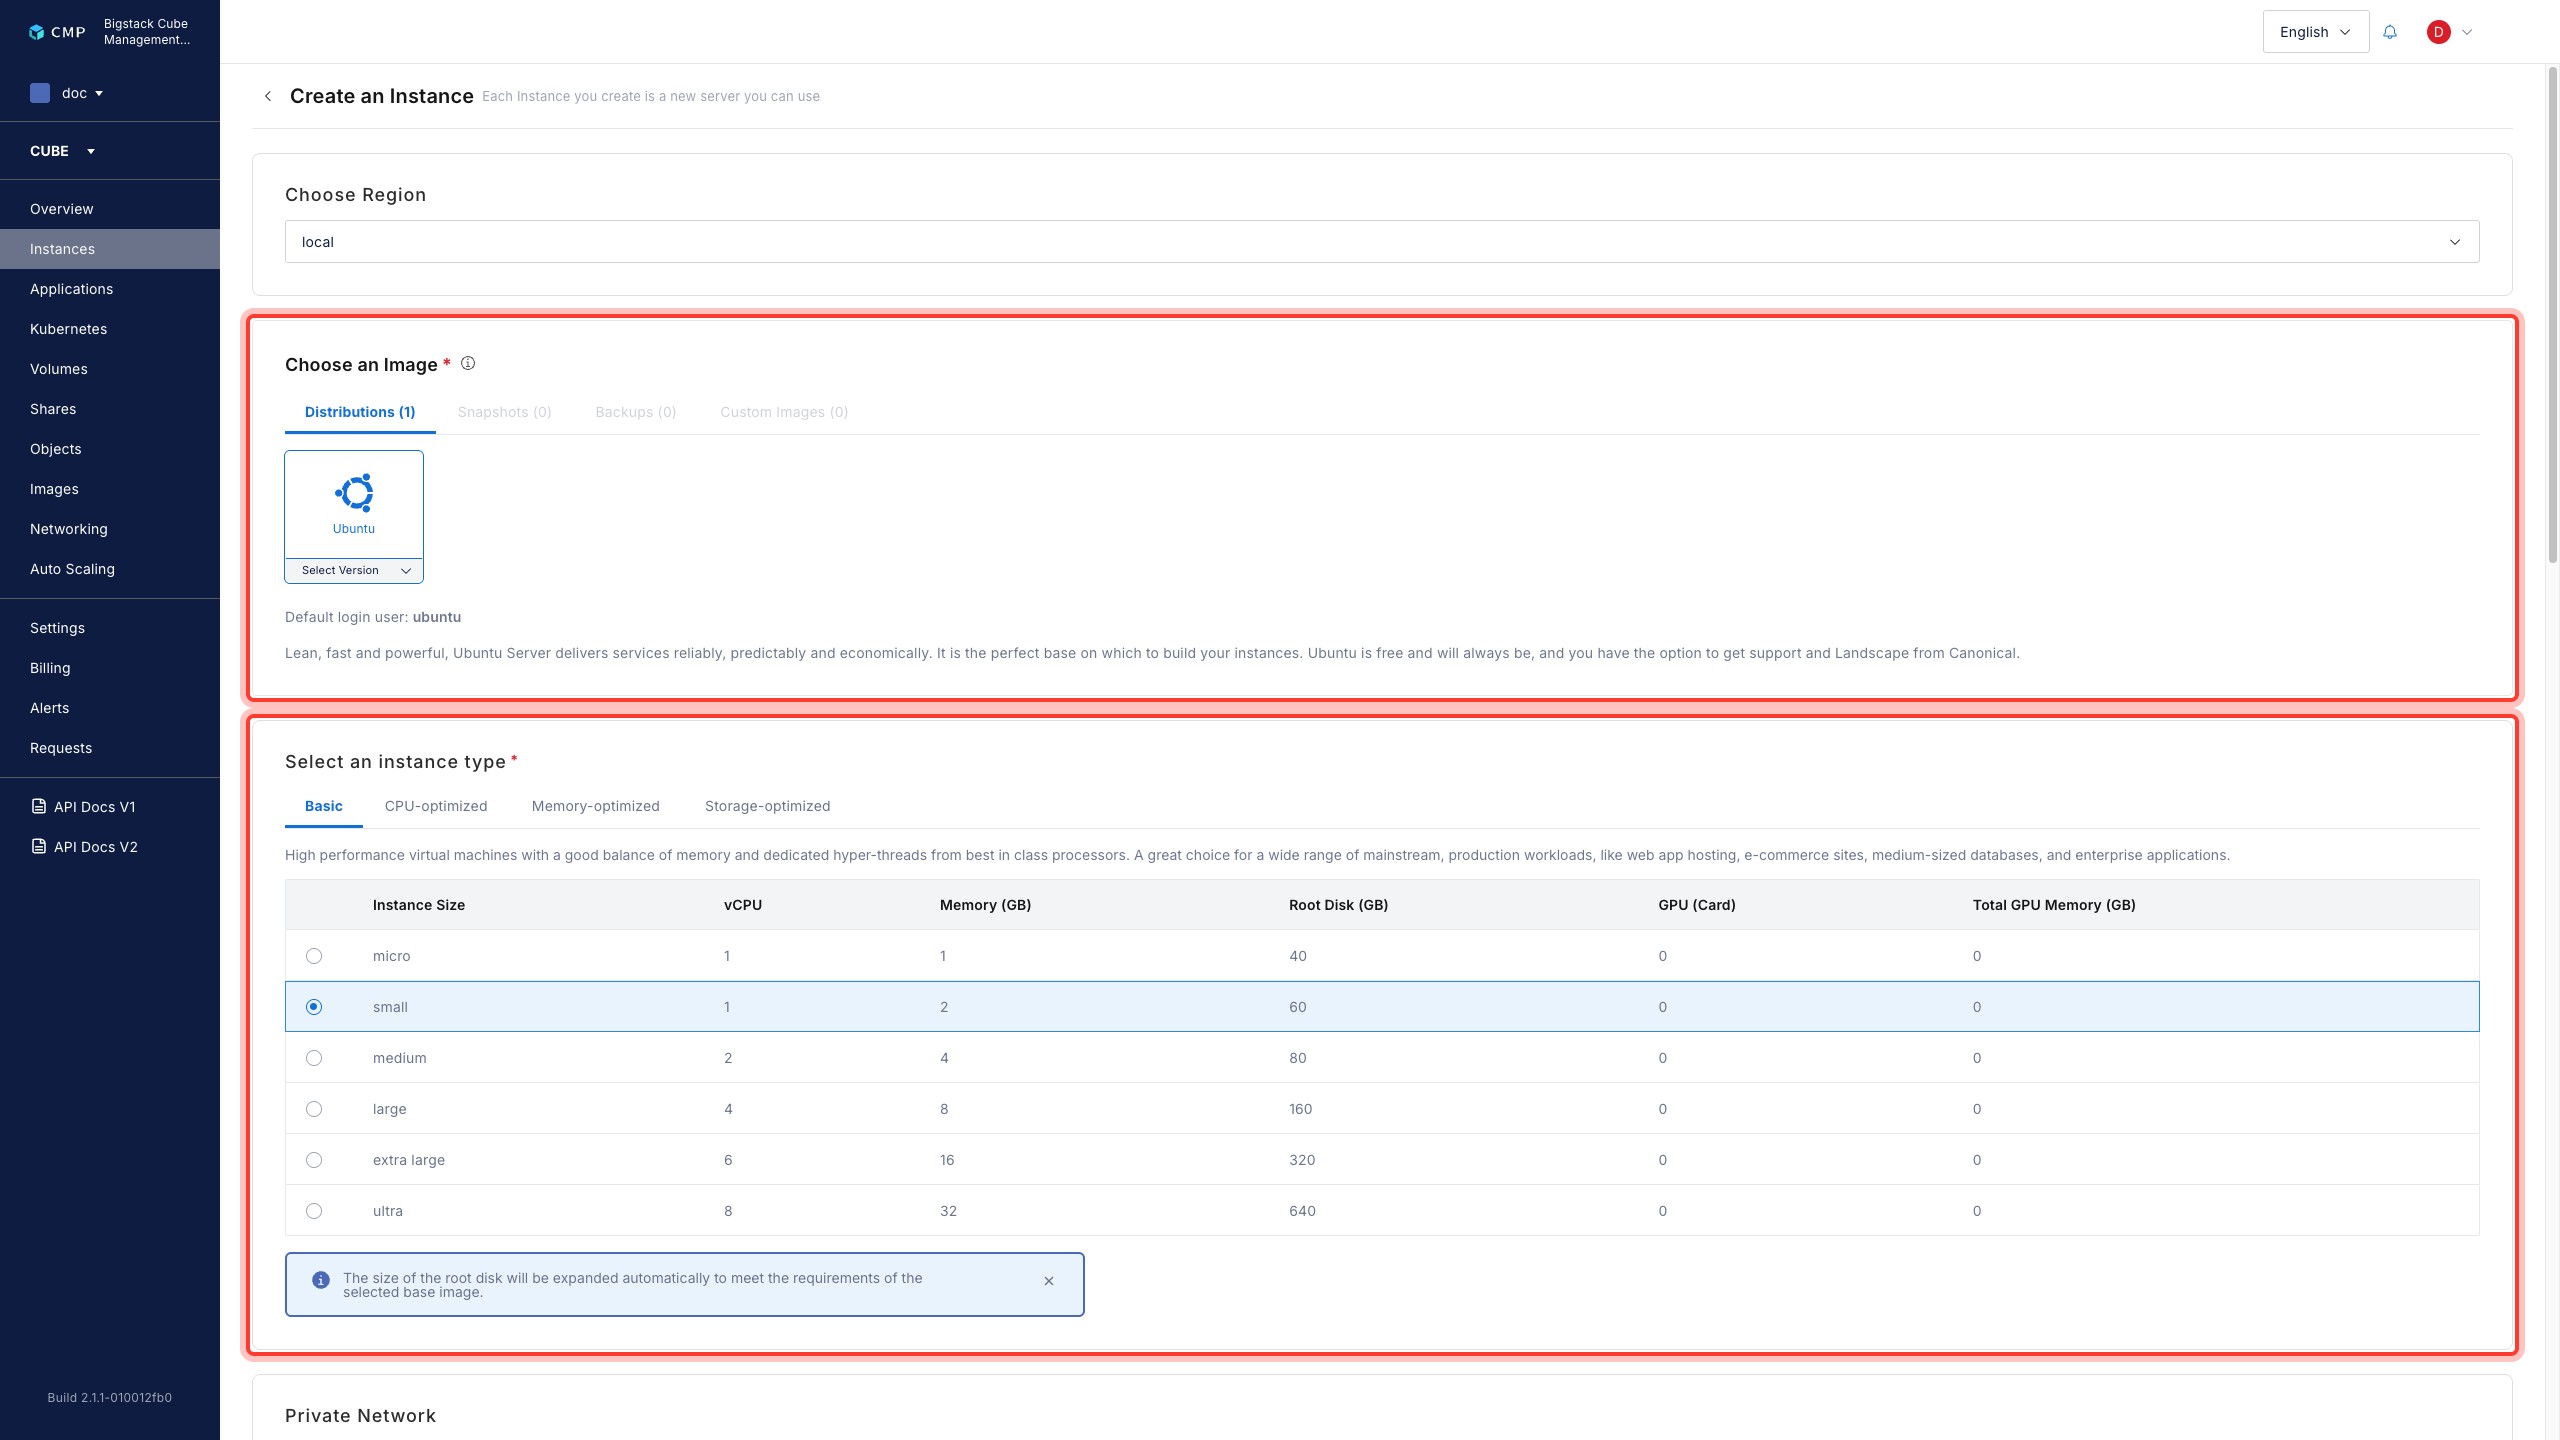
To configure the instnace image type, choose an image from the available Distributions, Snapshots, Backups, or Custom Images options.
-
To configure the resources allocated to the instance, select an instance type based on performance requirements.
-
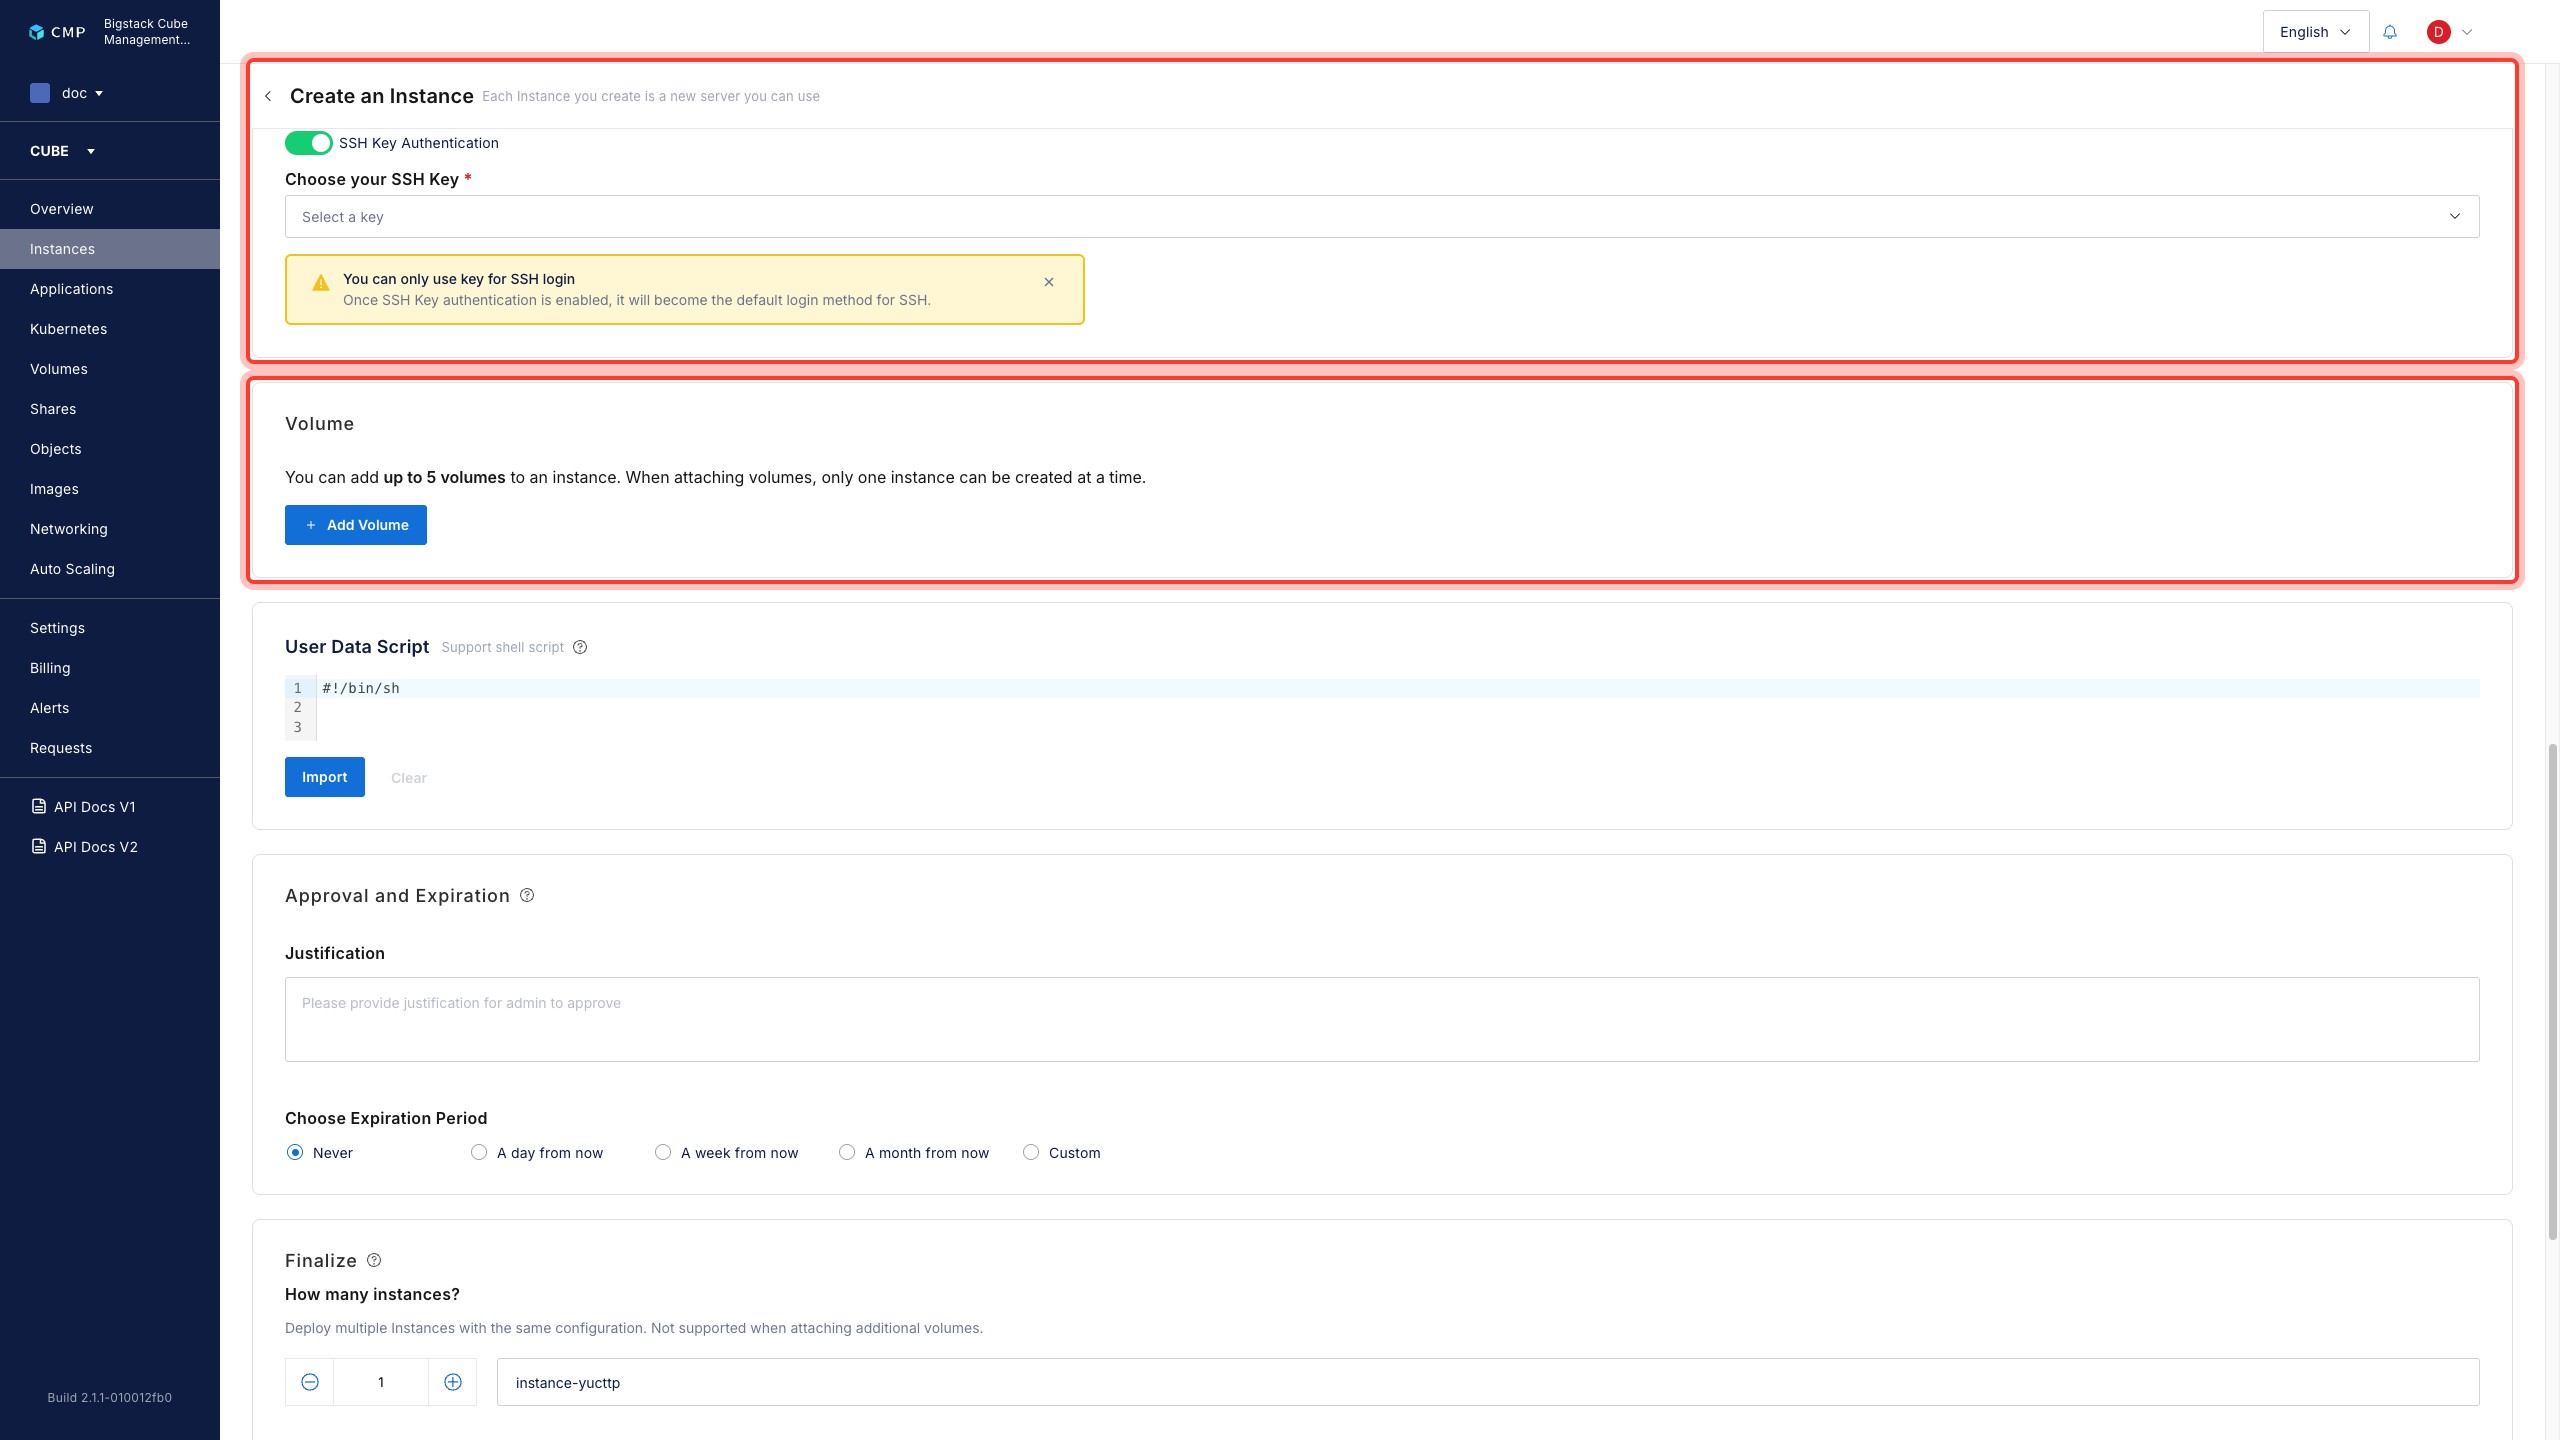
To enable remote and console access, configure SSH Key Authentication toggle to choose an authentication method.
- To use an SSH key for authentication, toggle on the SSH Key authentication method. To learn how to upload and use an SSH key, reference Security Keys.
-
To configure additional storage for your instace, add volumes in the Volume section.
-
To add in additional first time setup processes, click Import. The import process allows you to choose a custom setup script for the newly create instances.
-
-
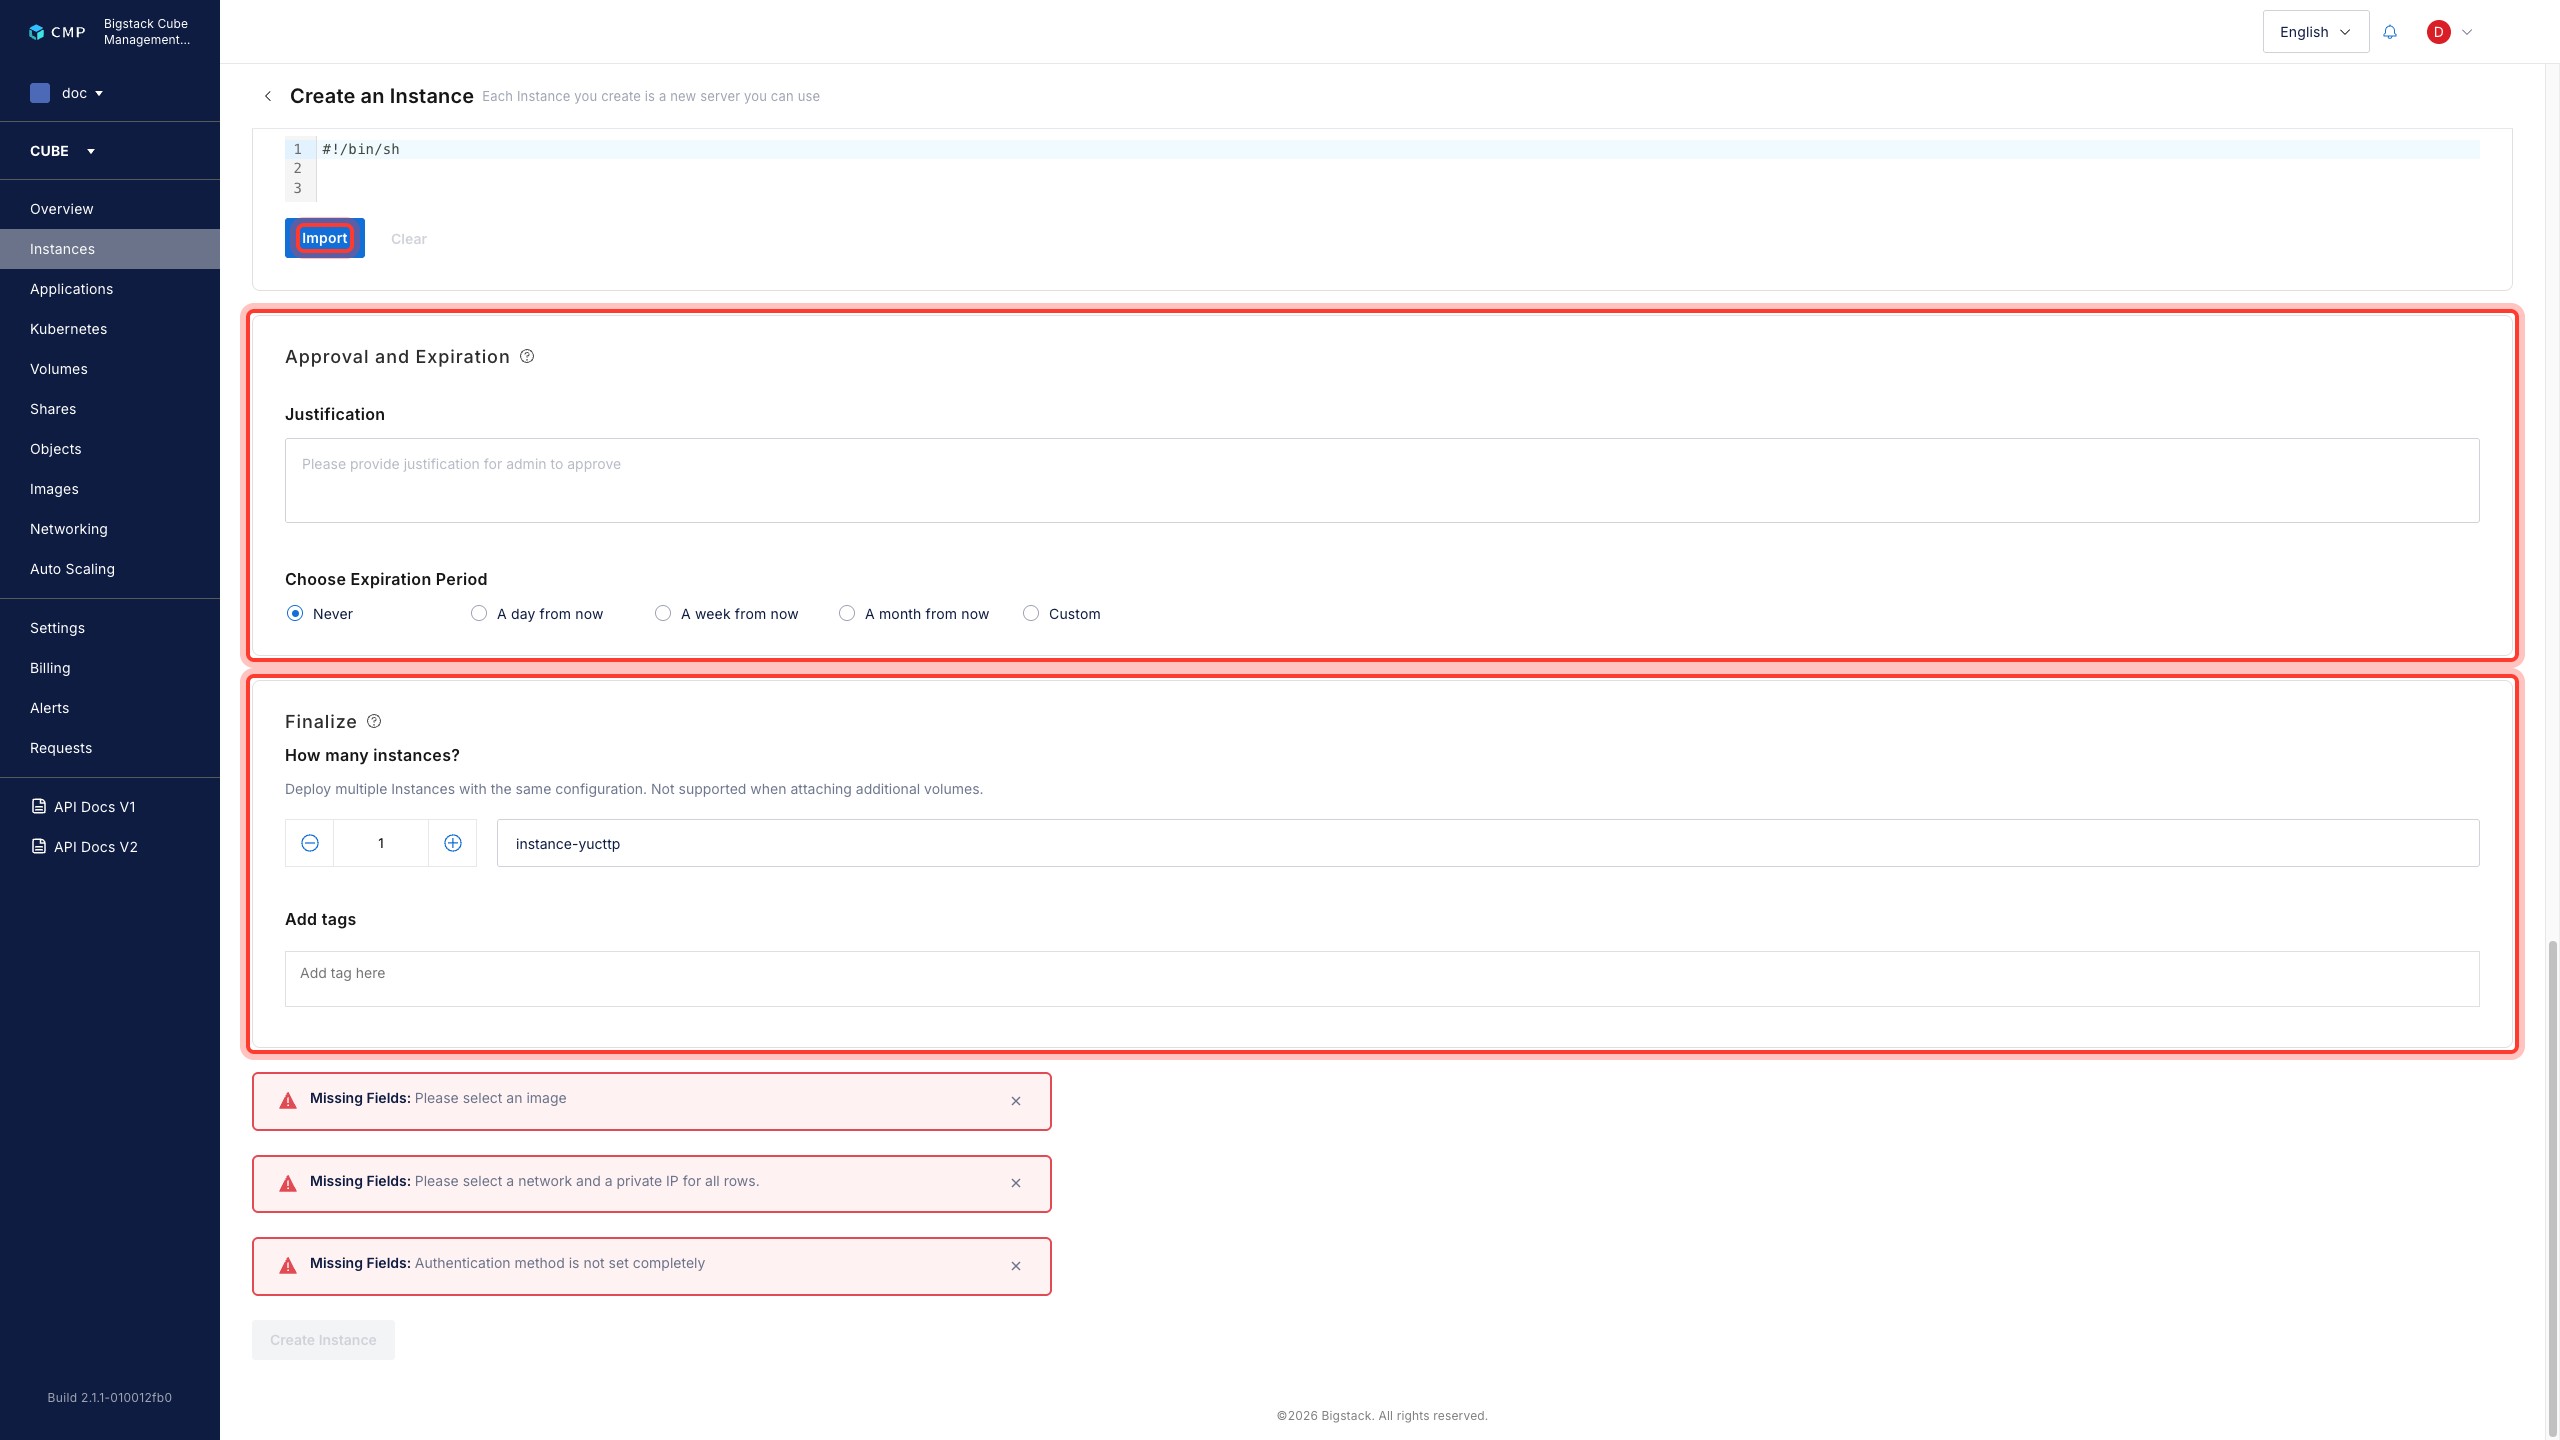
If approval and instance resource expiration is required:
- Go to Approval and Expiration. Click Justification and enter a justification for resource request for administrator approval.
- Click Choose Expiration Period and set an expiration date for the request resource if required.
-
To set how many instances to create, click How many instances?, and set the desired instance name and tags.
-
To create the instance, click Create Instance.
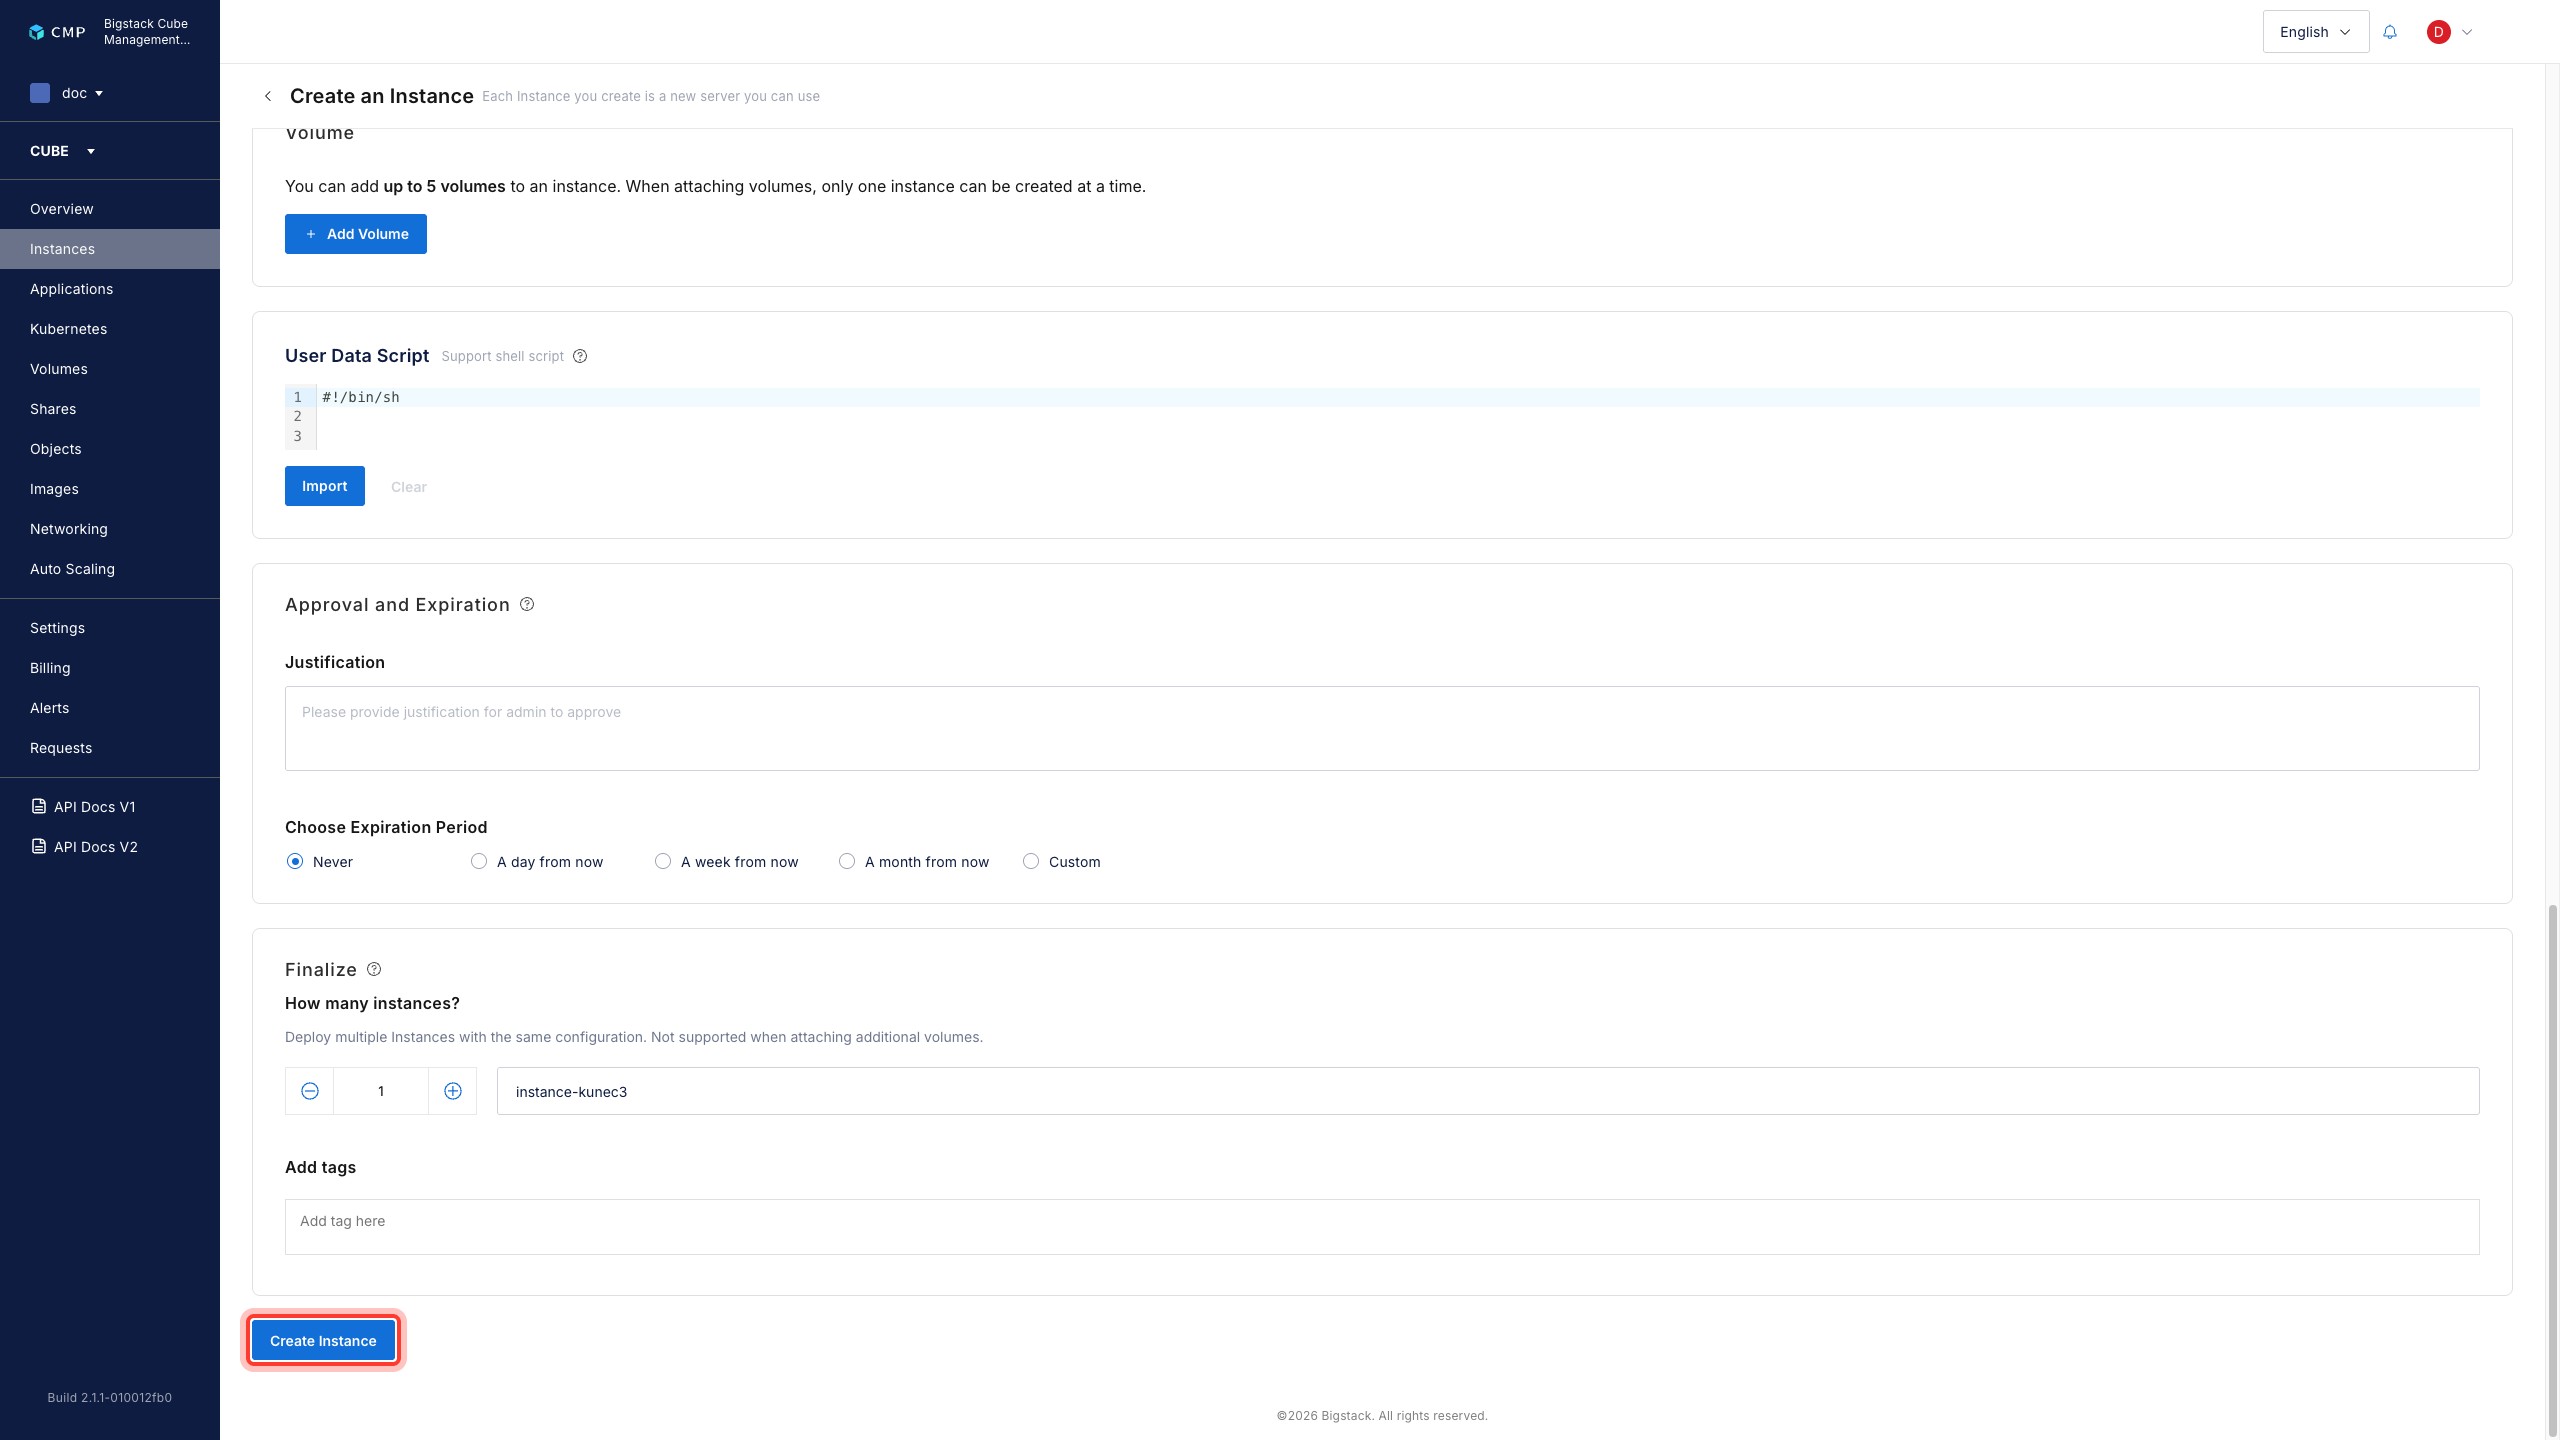
After creation, the instance appears on the Instances page with its current status and resource details.
Rename instance
-
In the CubeCMP management console, go to the Instances page.
-
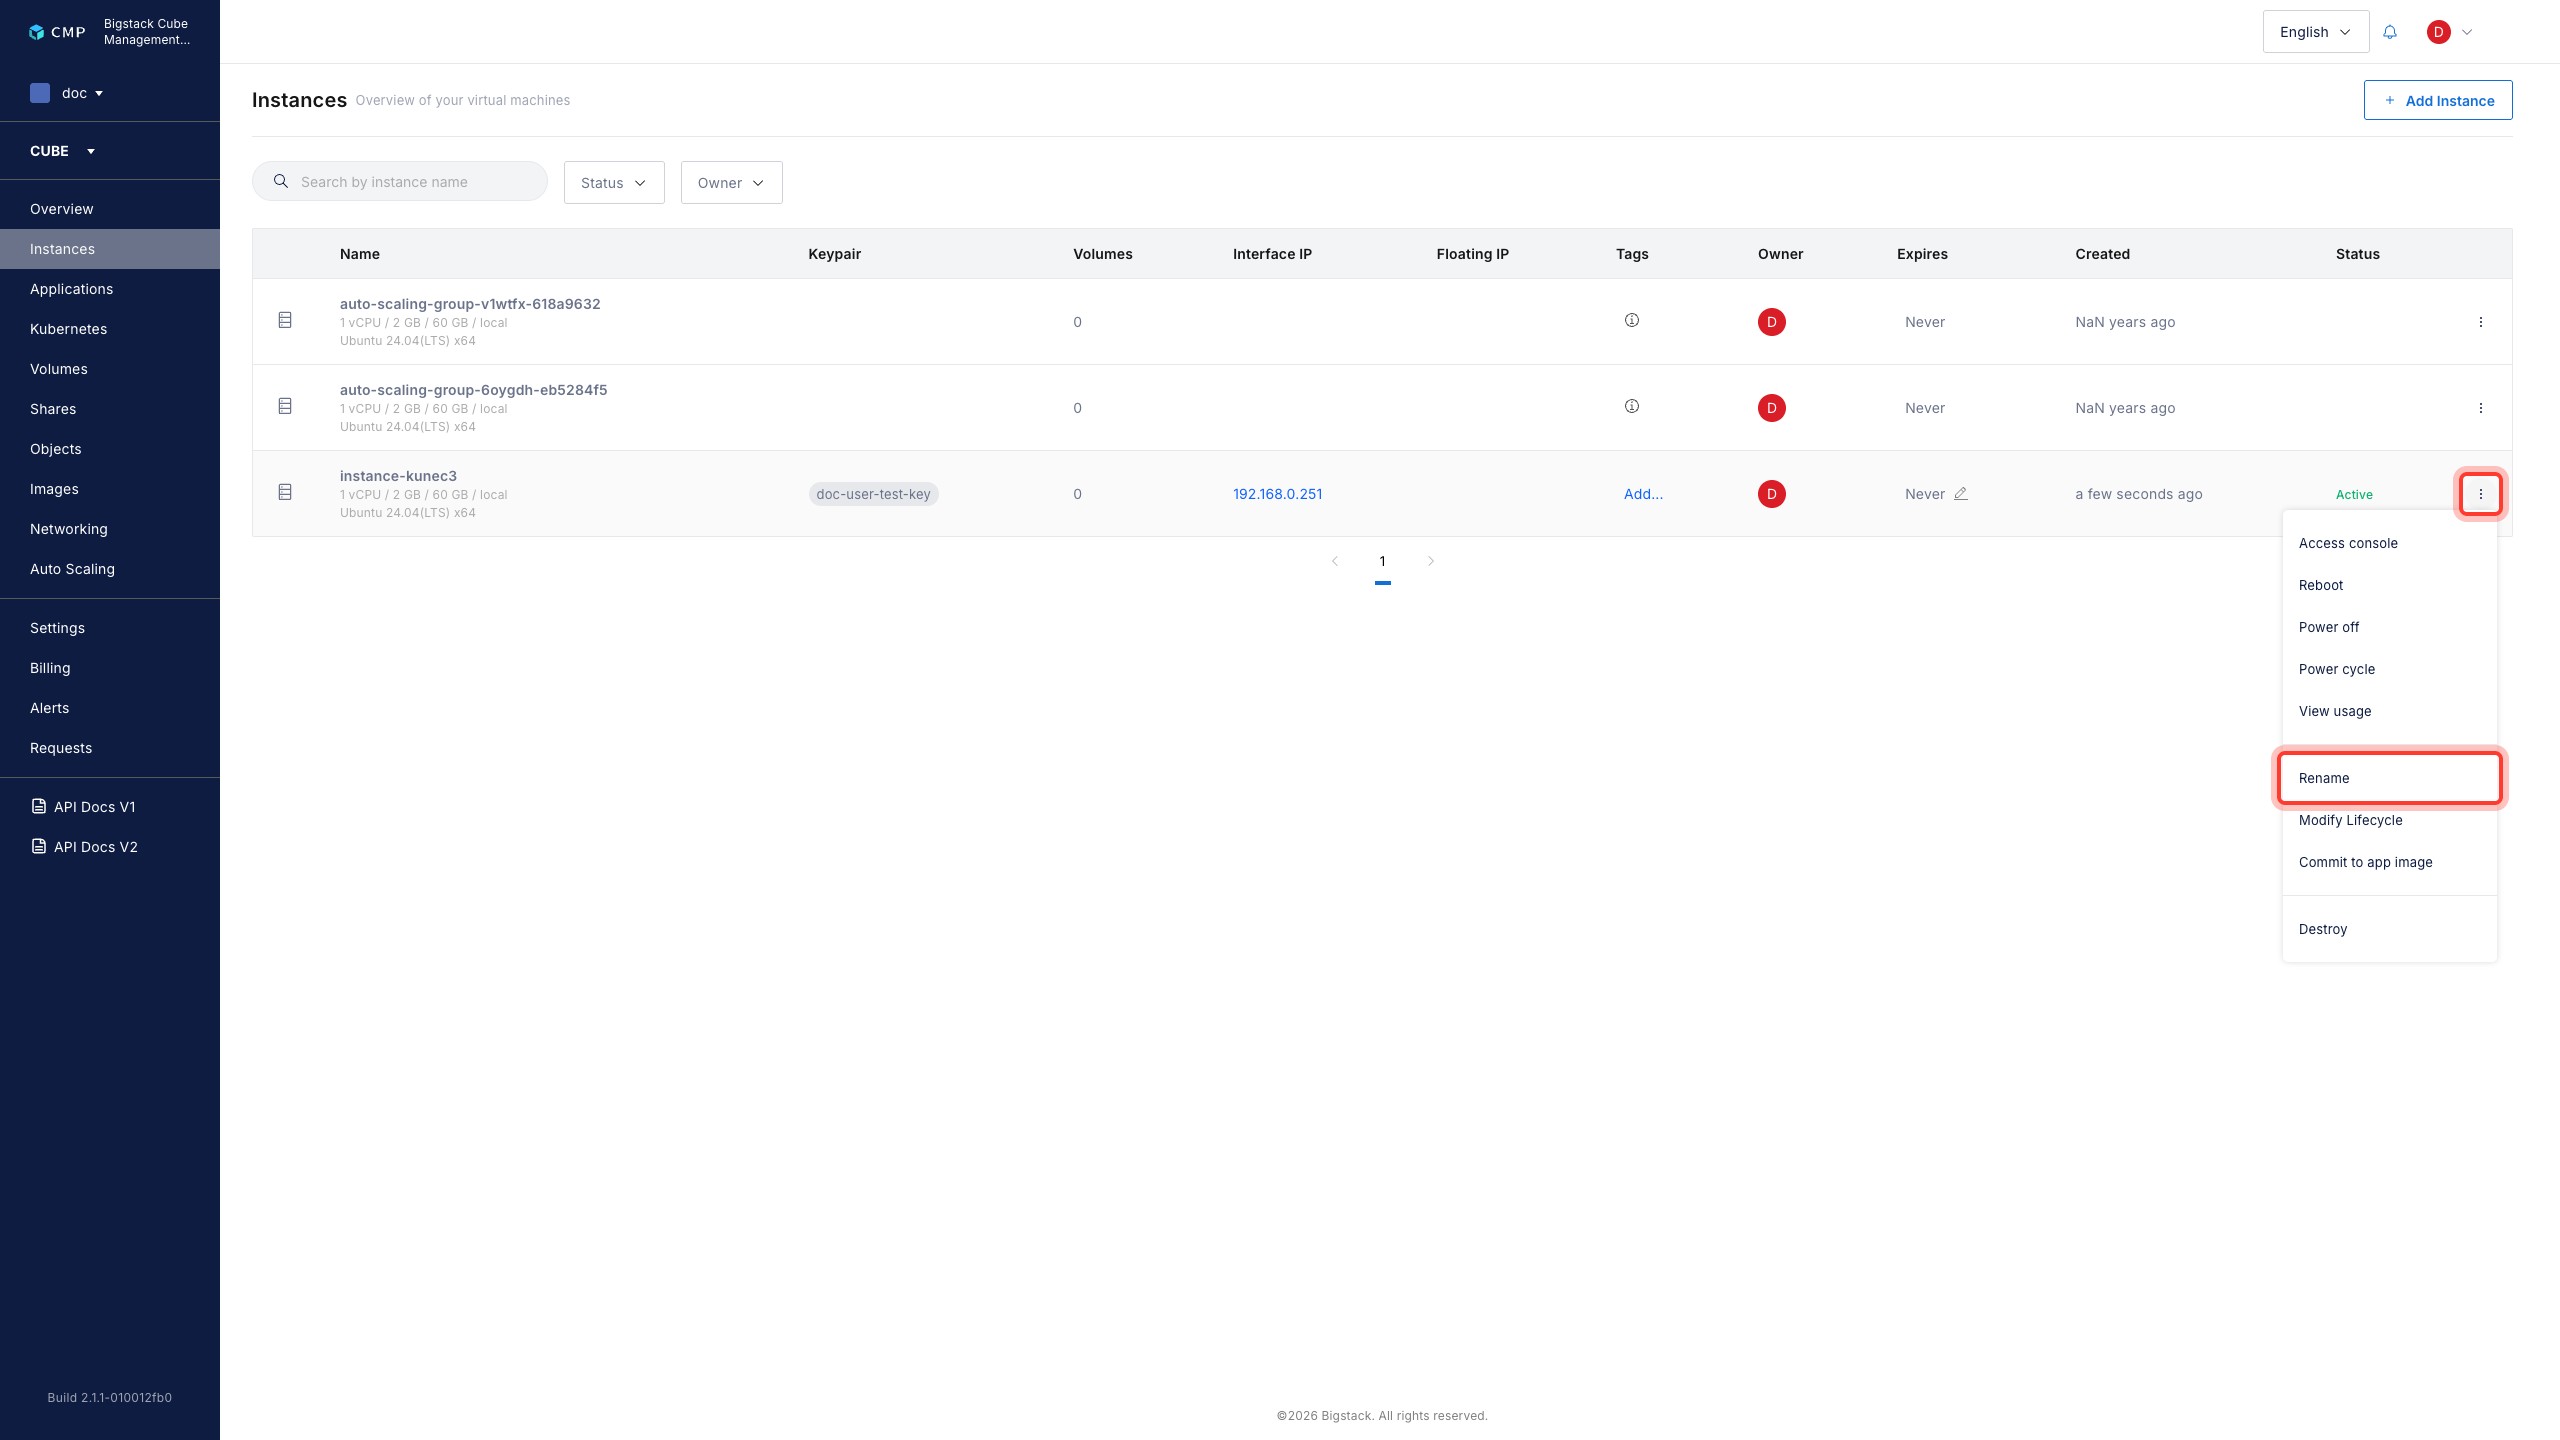
Click on ellipsis icon (three dots) to the right of instance status.
-
Select Rename.
-
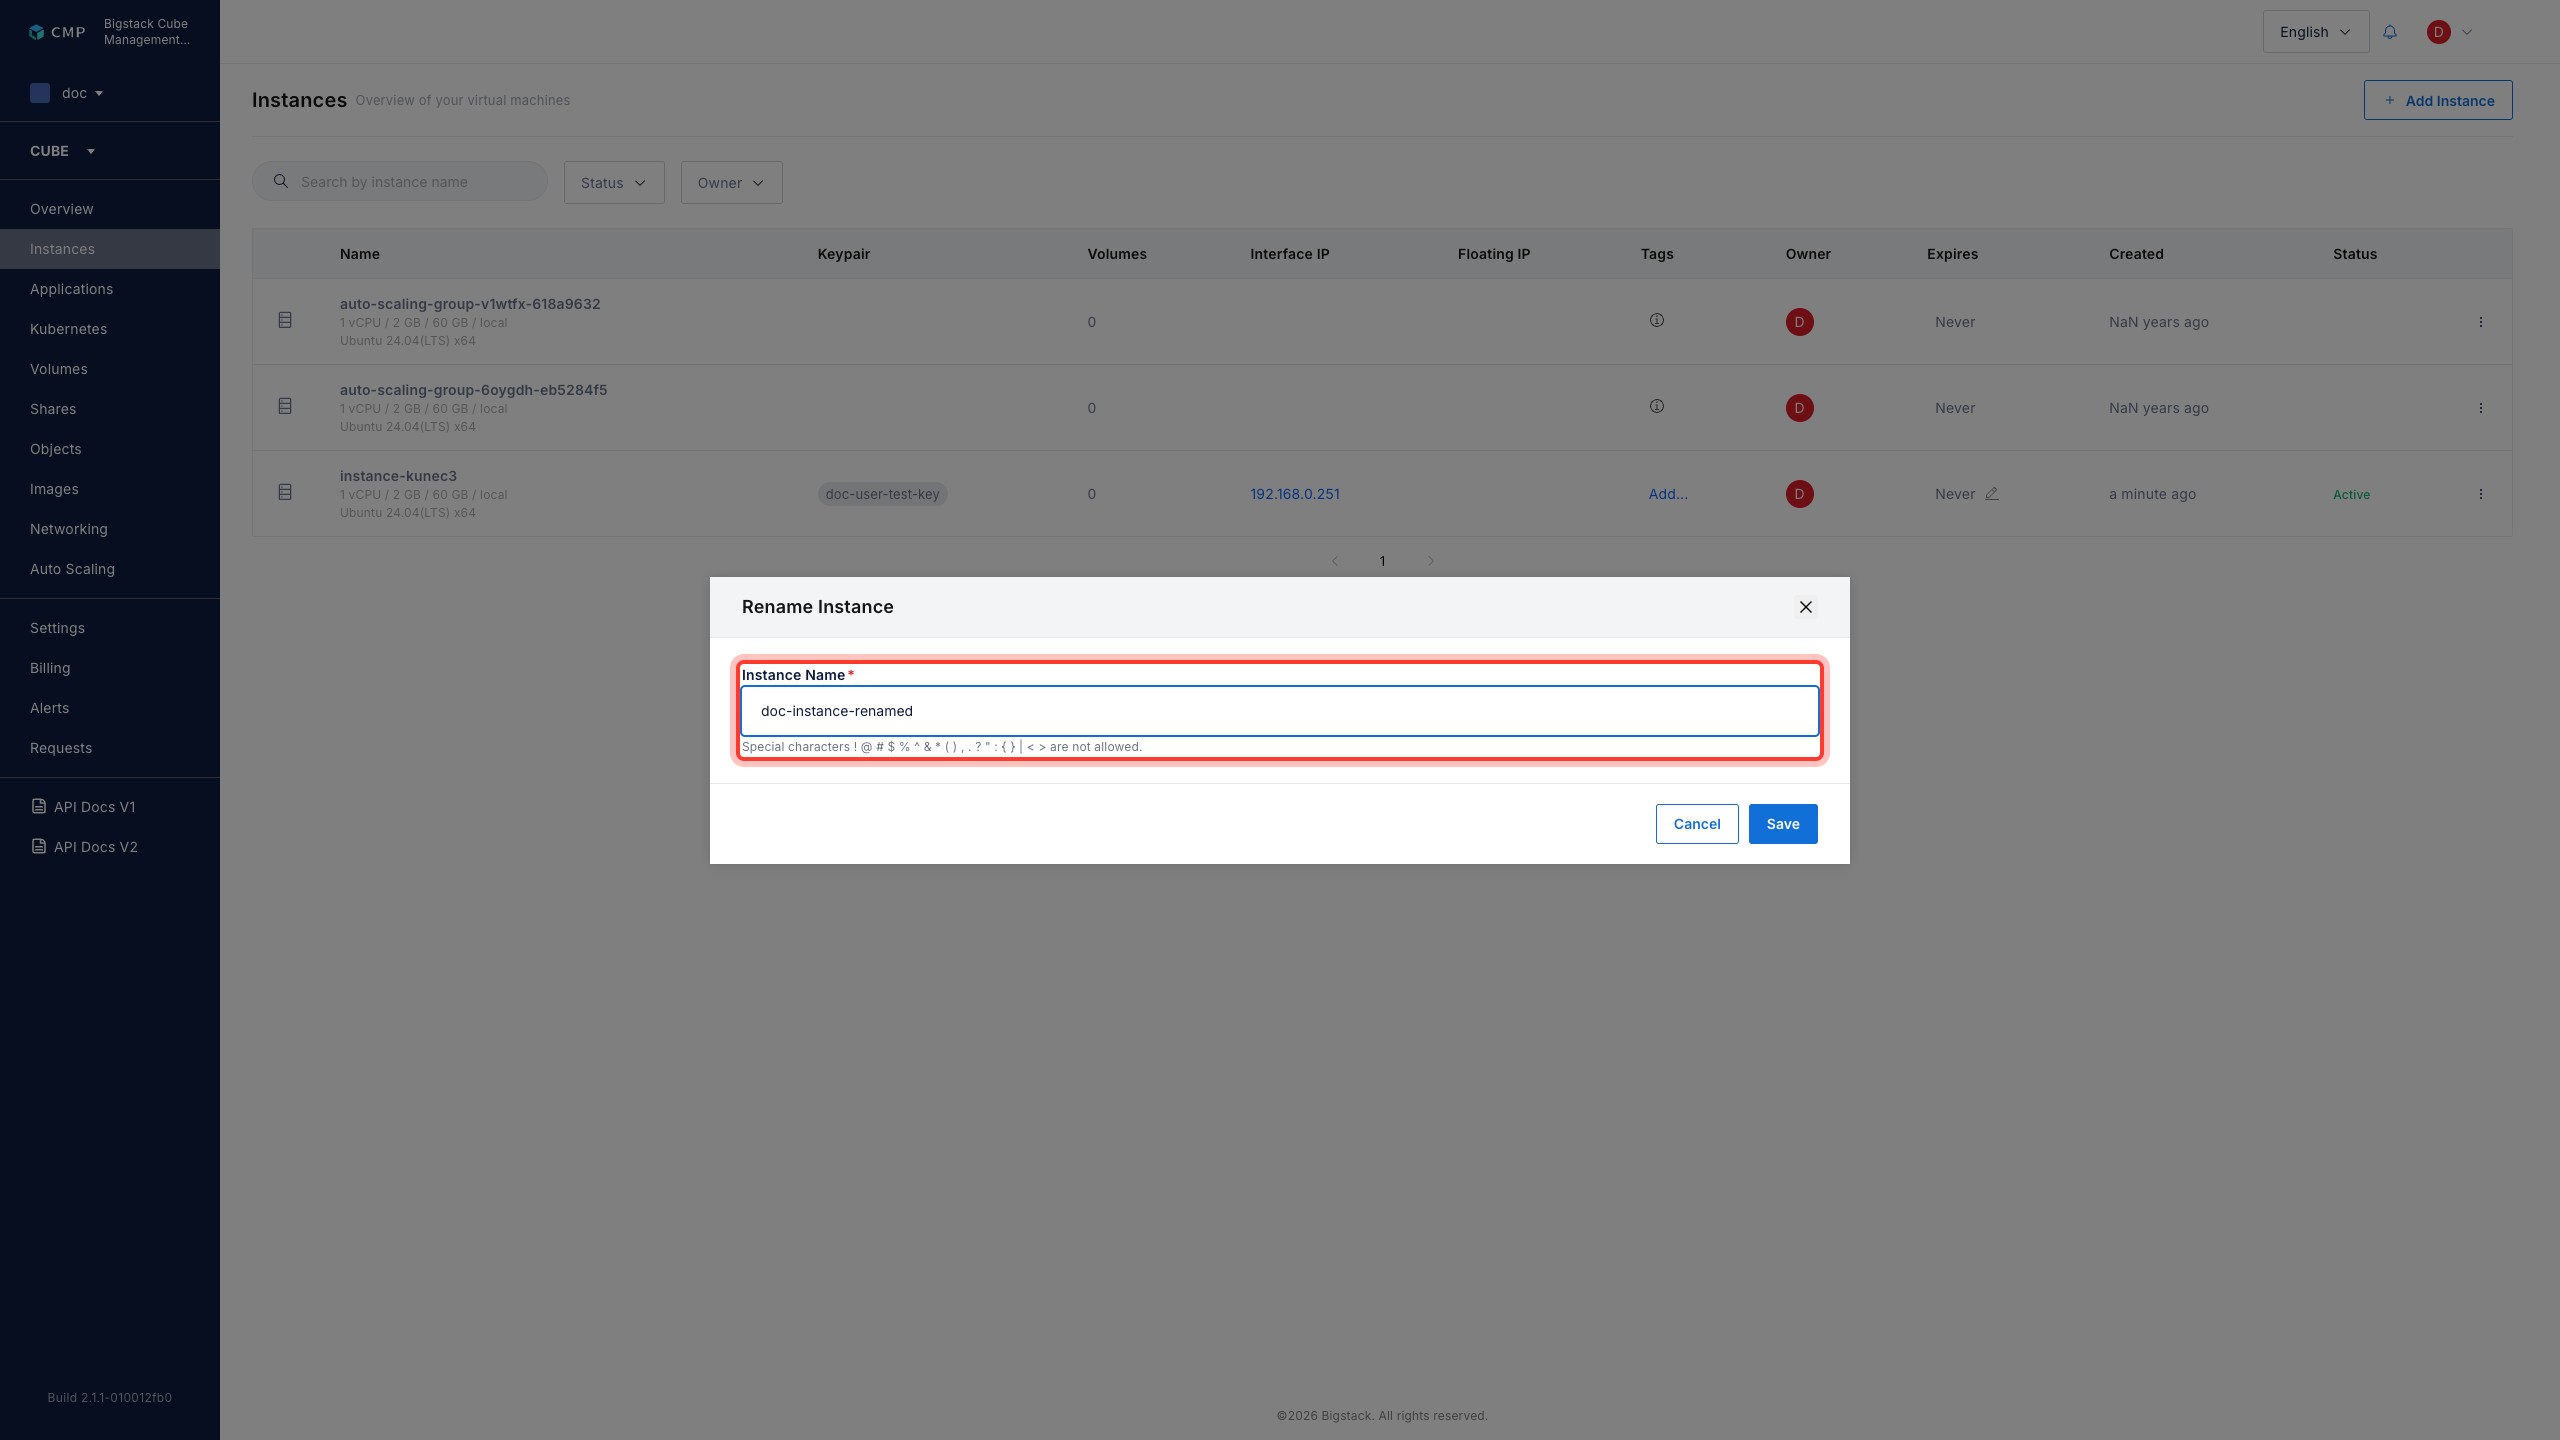
Enter a new Instance Name.
-
Click Save.