Create a remote Kubernetes cluster
Cloud-based Kubernetes cluster overview
This guide explains how to create and manage a remote Kubernetes cluster on the Amazon Web Services (AWS) platform using CubeCMP.
You will learn how to configure cluster settings, select node templates and deploy a production-ready Kubernetes environment, all while maintaining centralized management through CubeCMP.
Prerequisites
First, configure public cloud integration to create and manage a remote Kubernetes cluster.
For more information on setting up a public cloud connection in CubeCMP, refer to the Add a public cloud connection section.
Create cloud-based Kubernetes cluster
-
In the CubeCMP user portal, switch to the AWS cloud provider.
-
Go to Kubernetes.
-
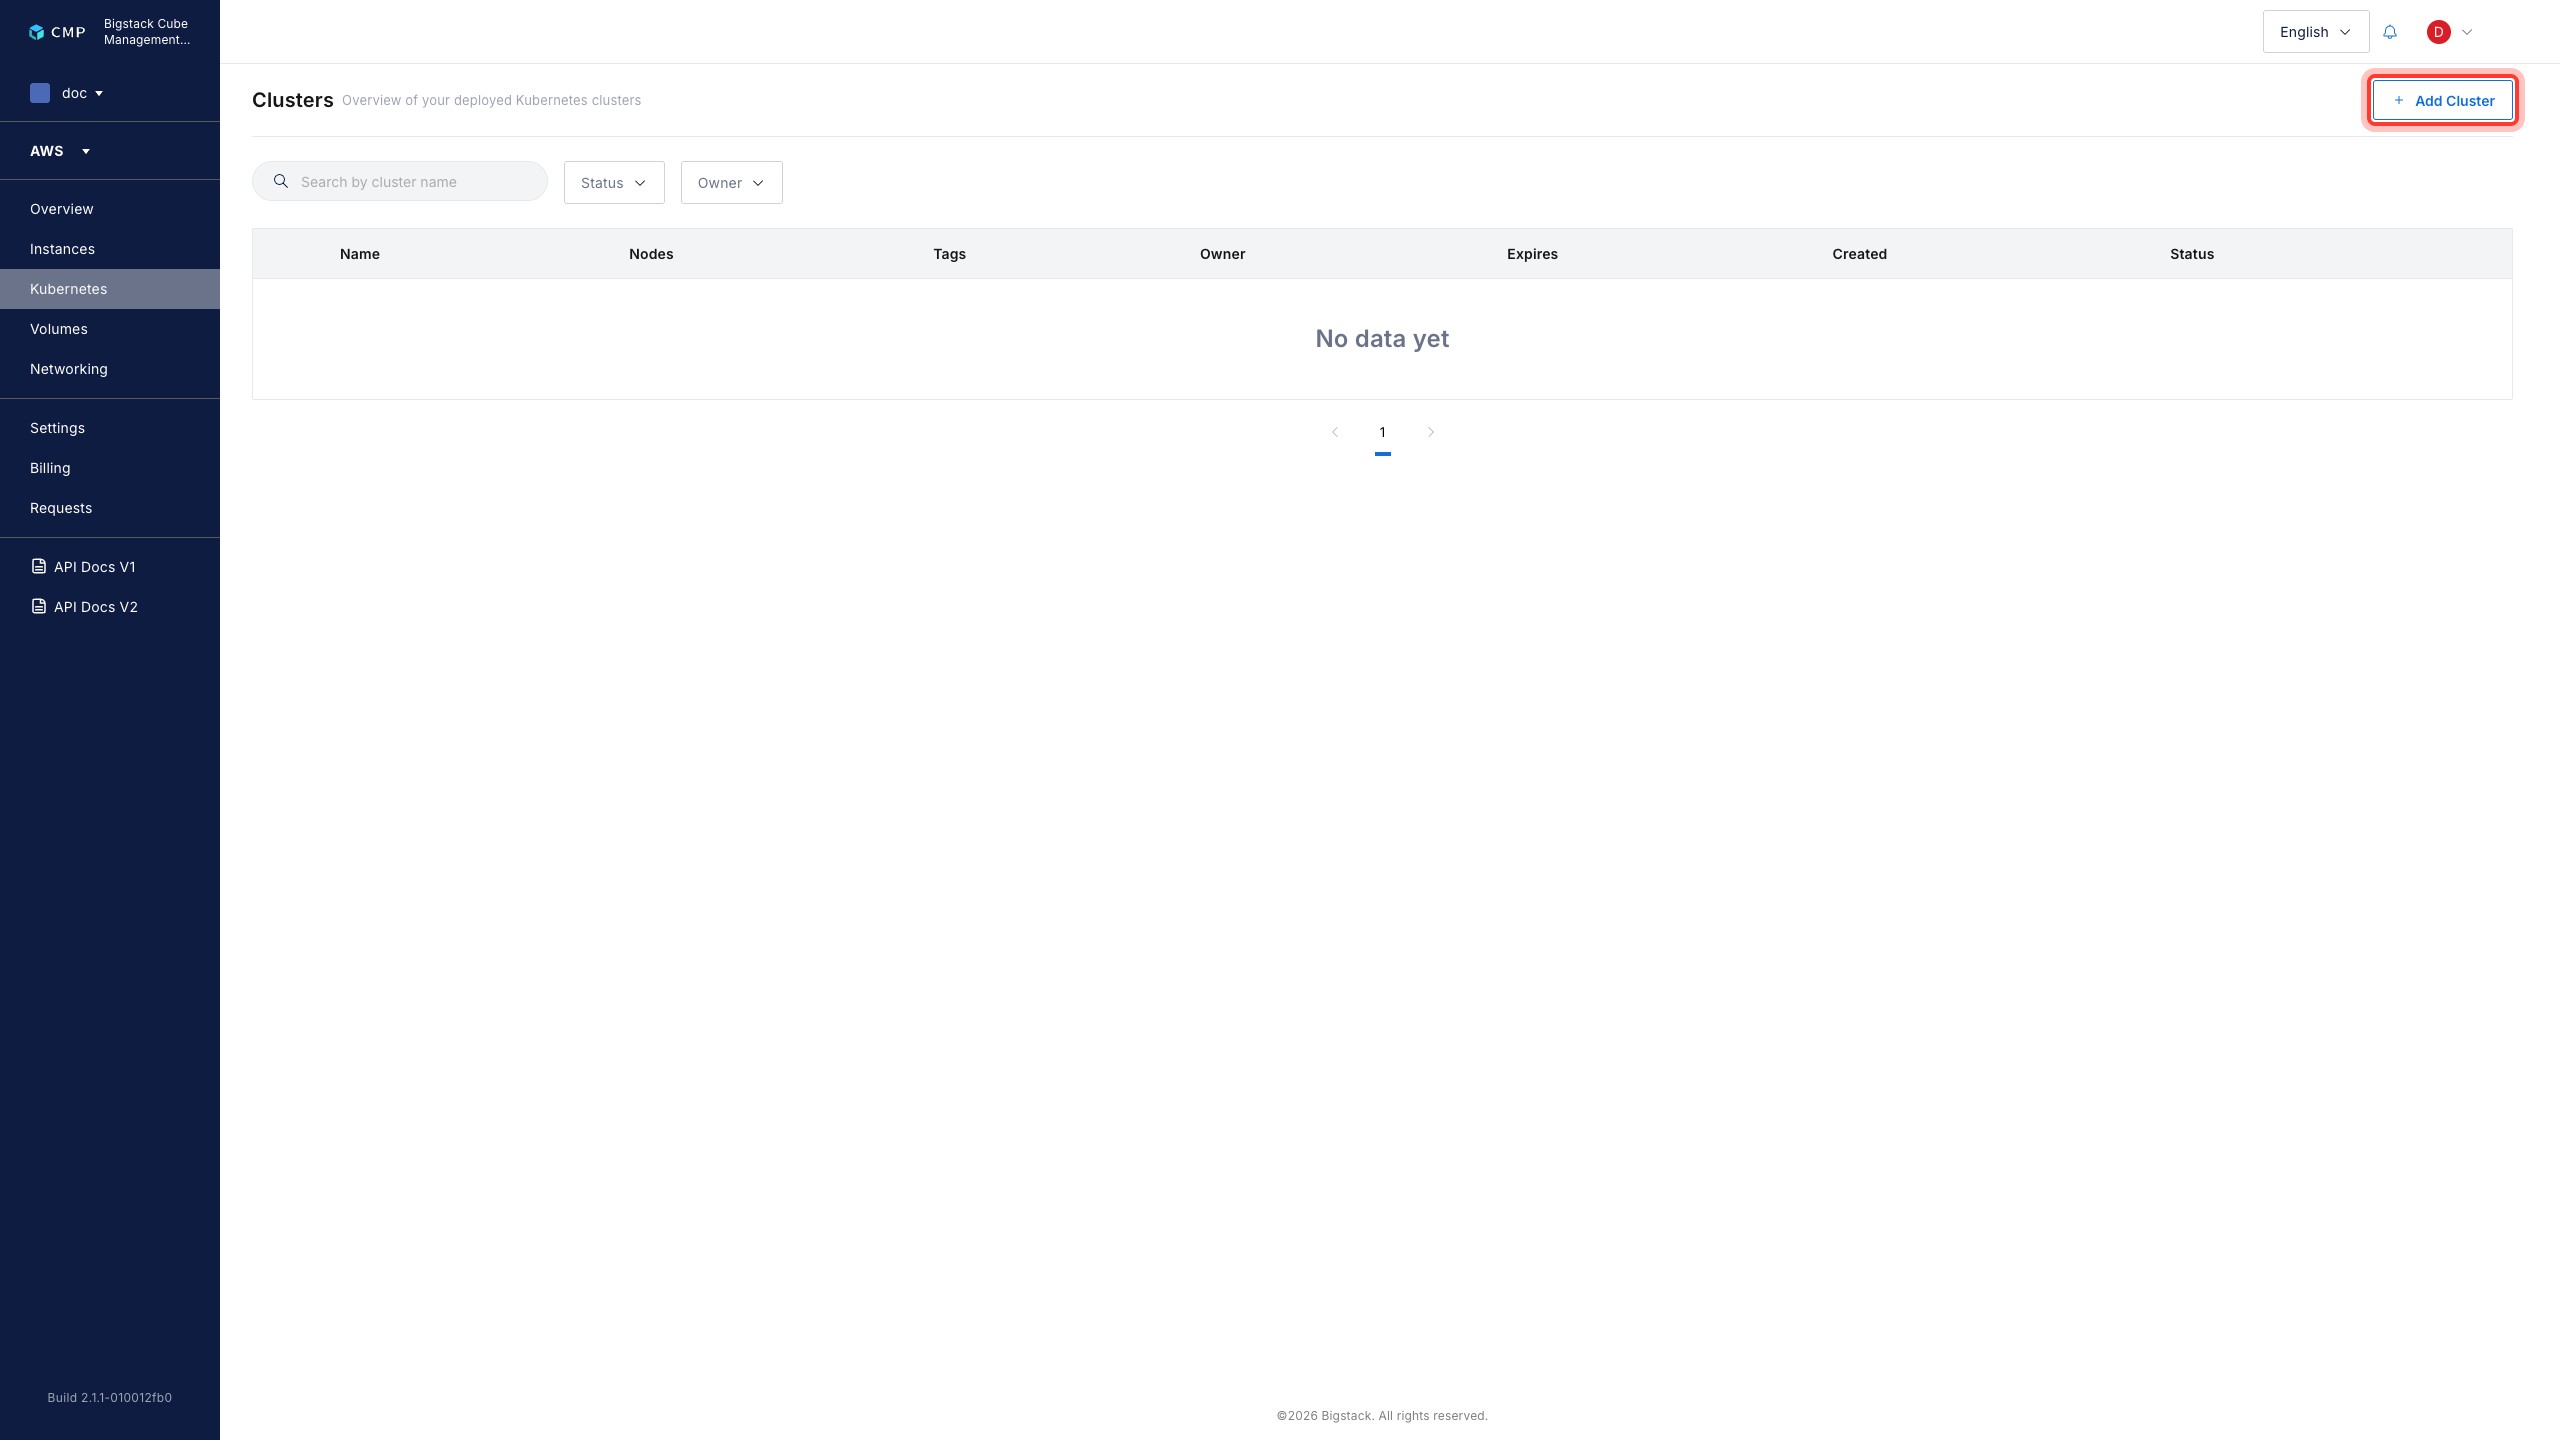
To configure basic cluster properties, click + Add Cluster.
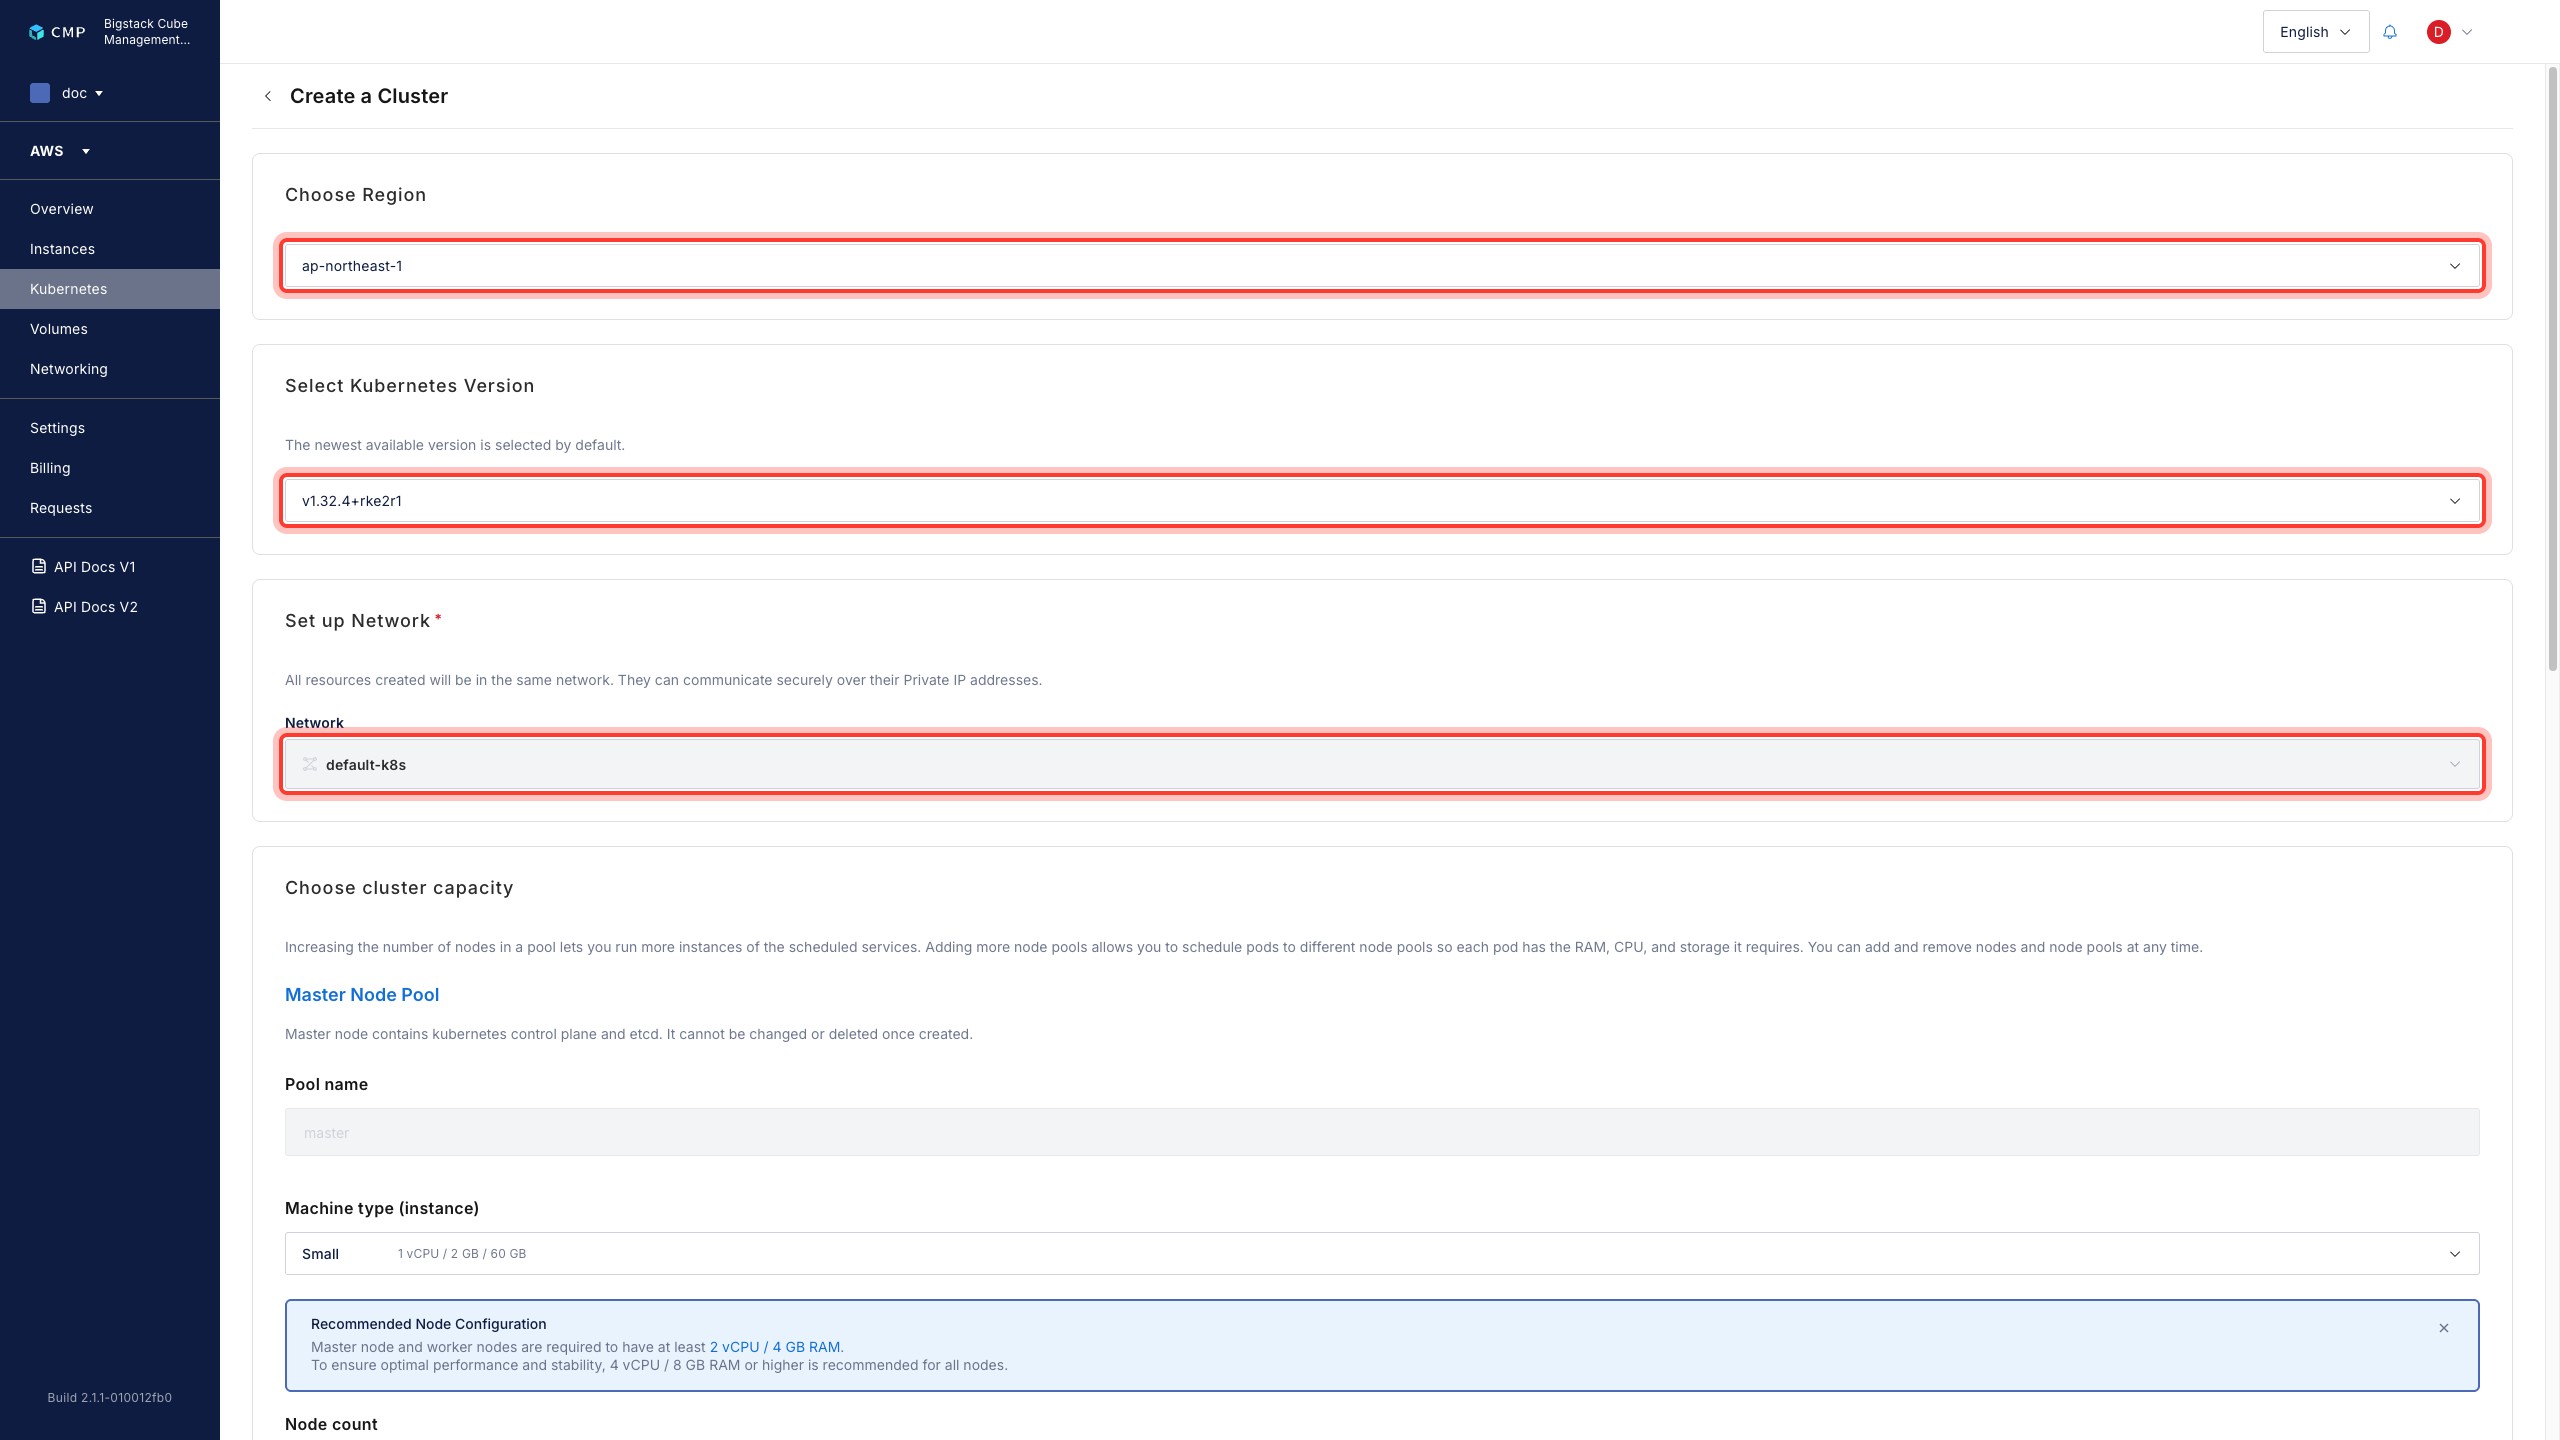
- Select the AWS Region to deploy the cluster into.
- To select a Kubernetes version for creation, click the Select Kuberntes Version dropdown.
- Under Set up Network, select the network for the cluster's resources.
-
In the Choose cluster capacity configure the following master and worker information.
-
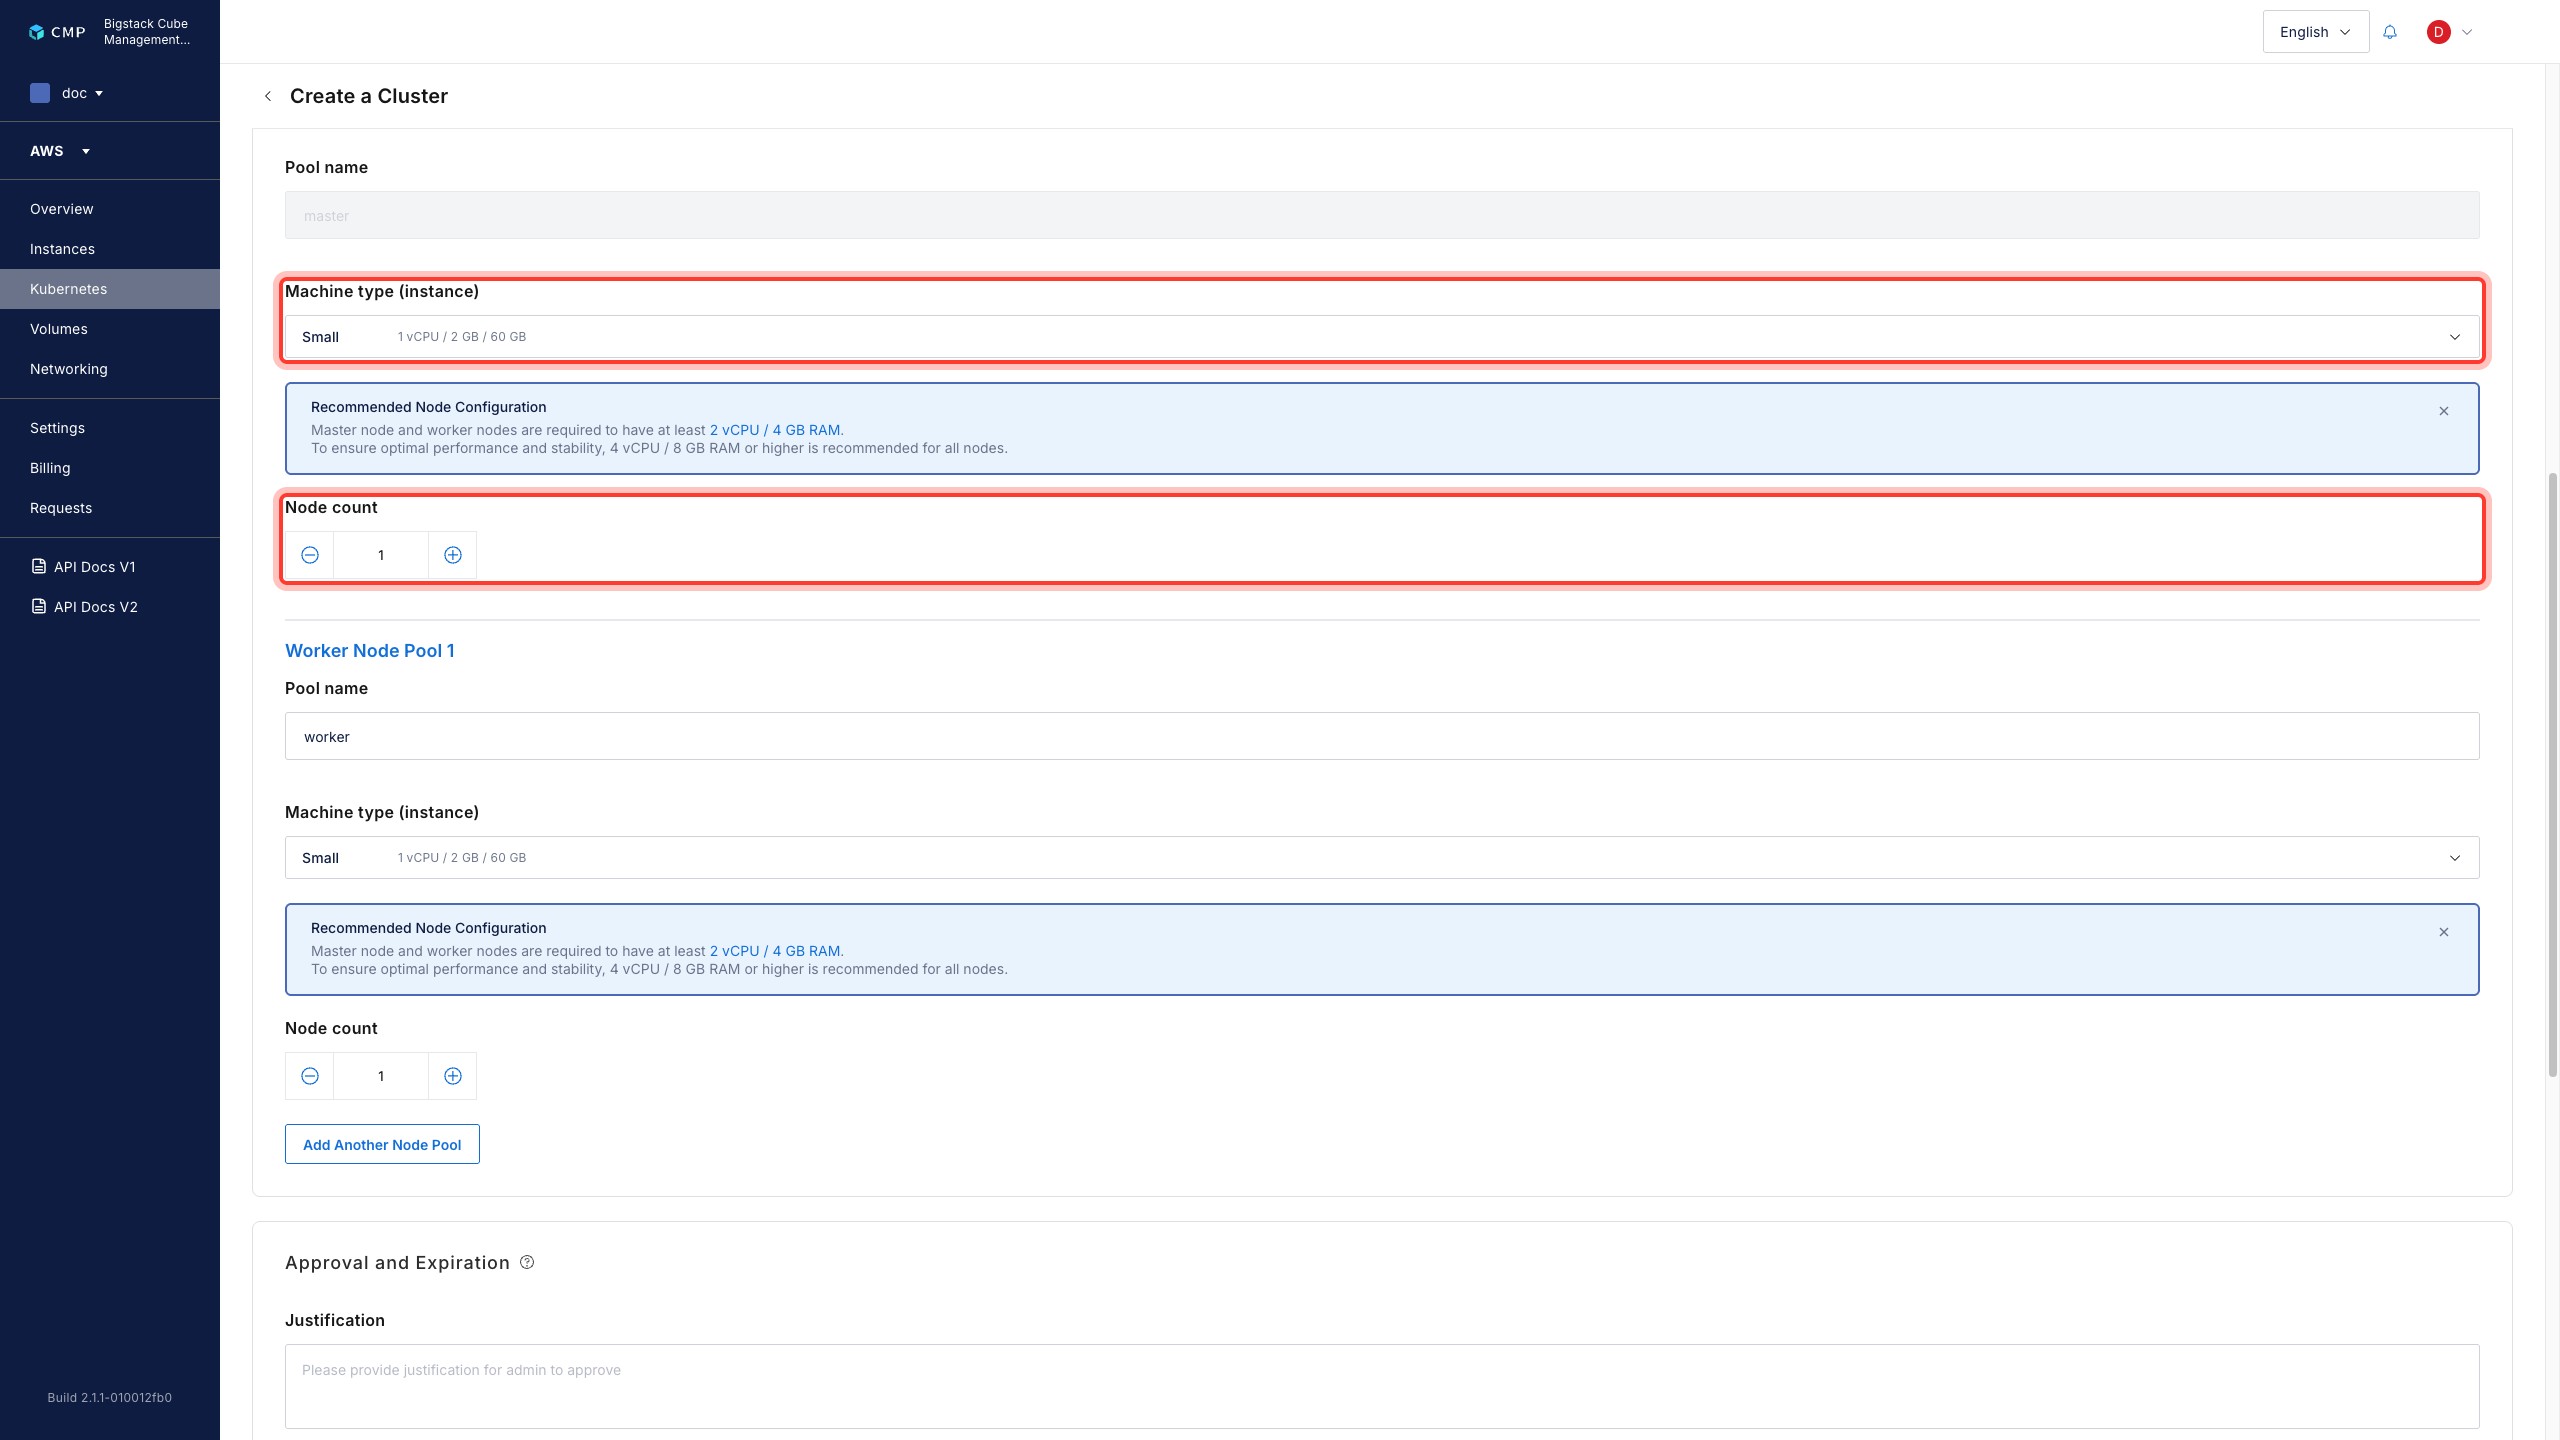
To configure the number of master Kubernetes node running in the clicker, go to the Master Node Pool workload sizes and functions. In the Master Node Pool section, set the Machine type (instance) for the resources allocated to the master node and set how many nodes to create by configuring Node Count.
-
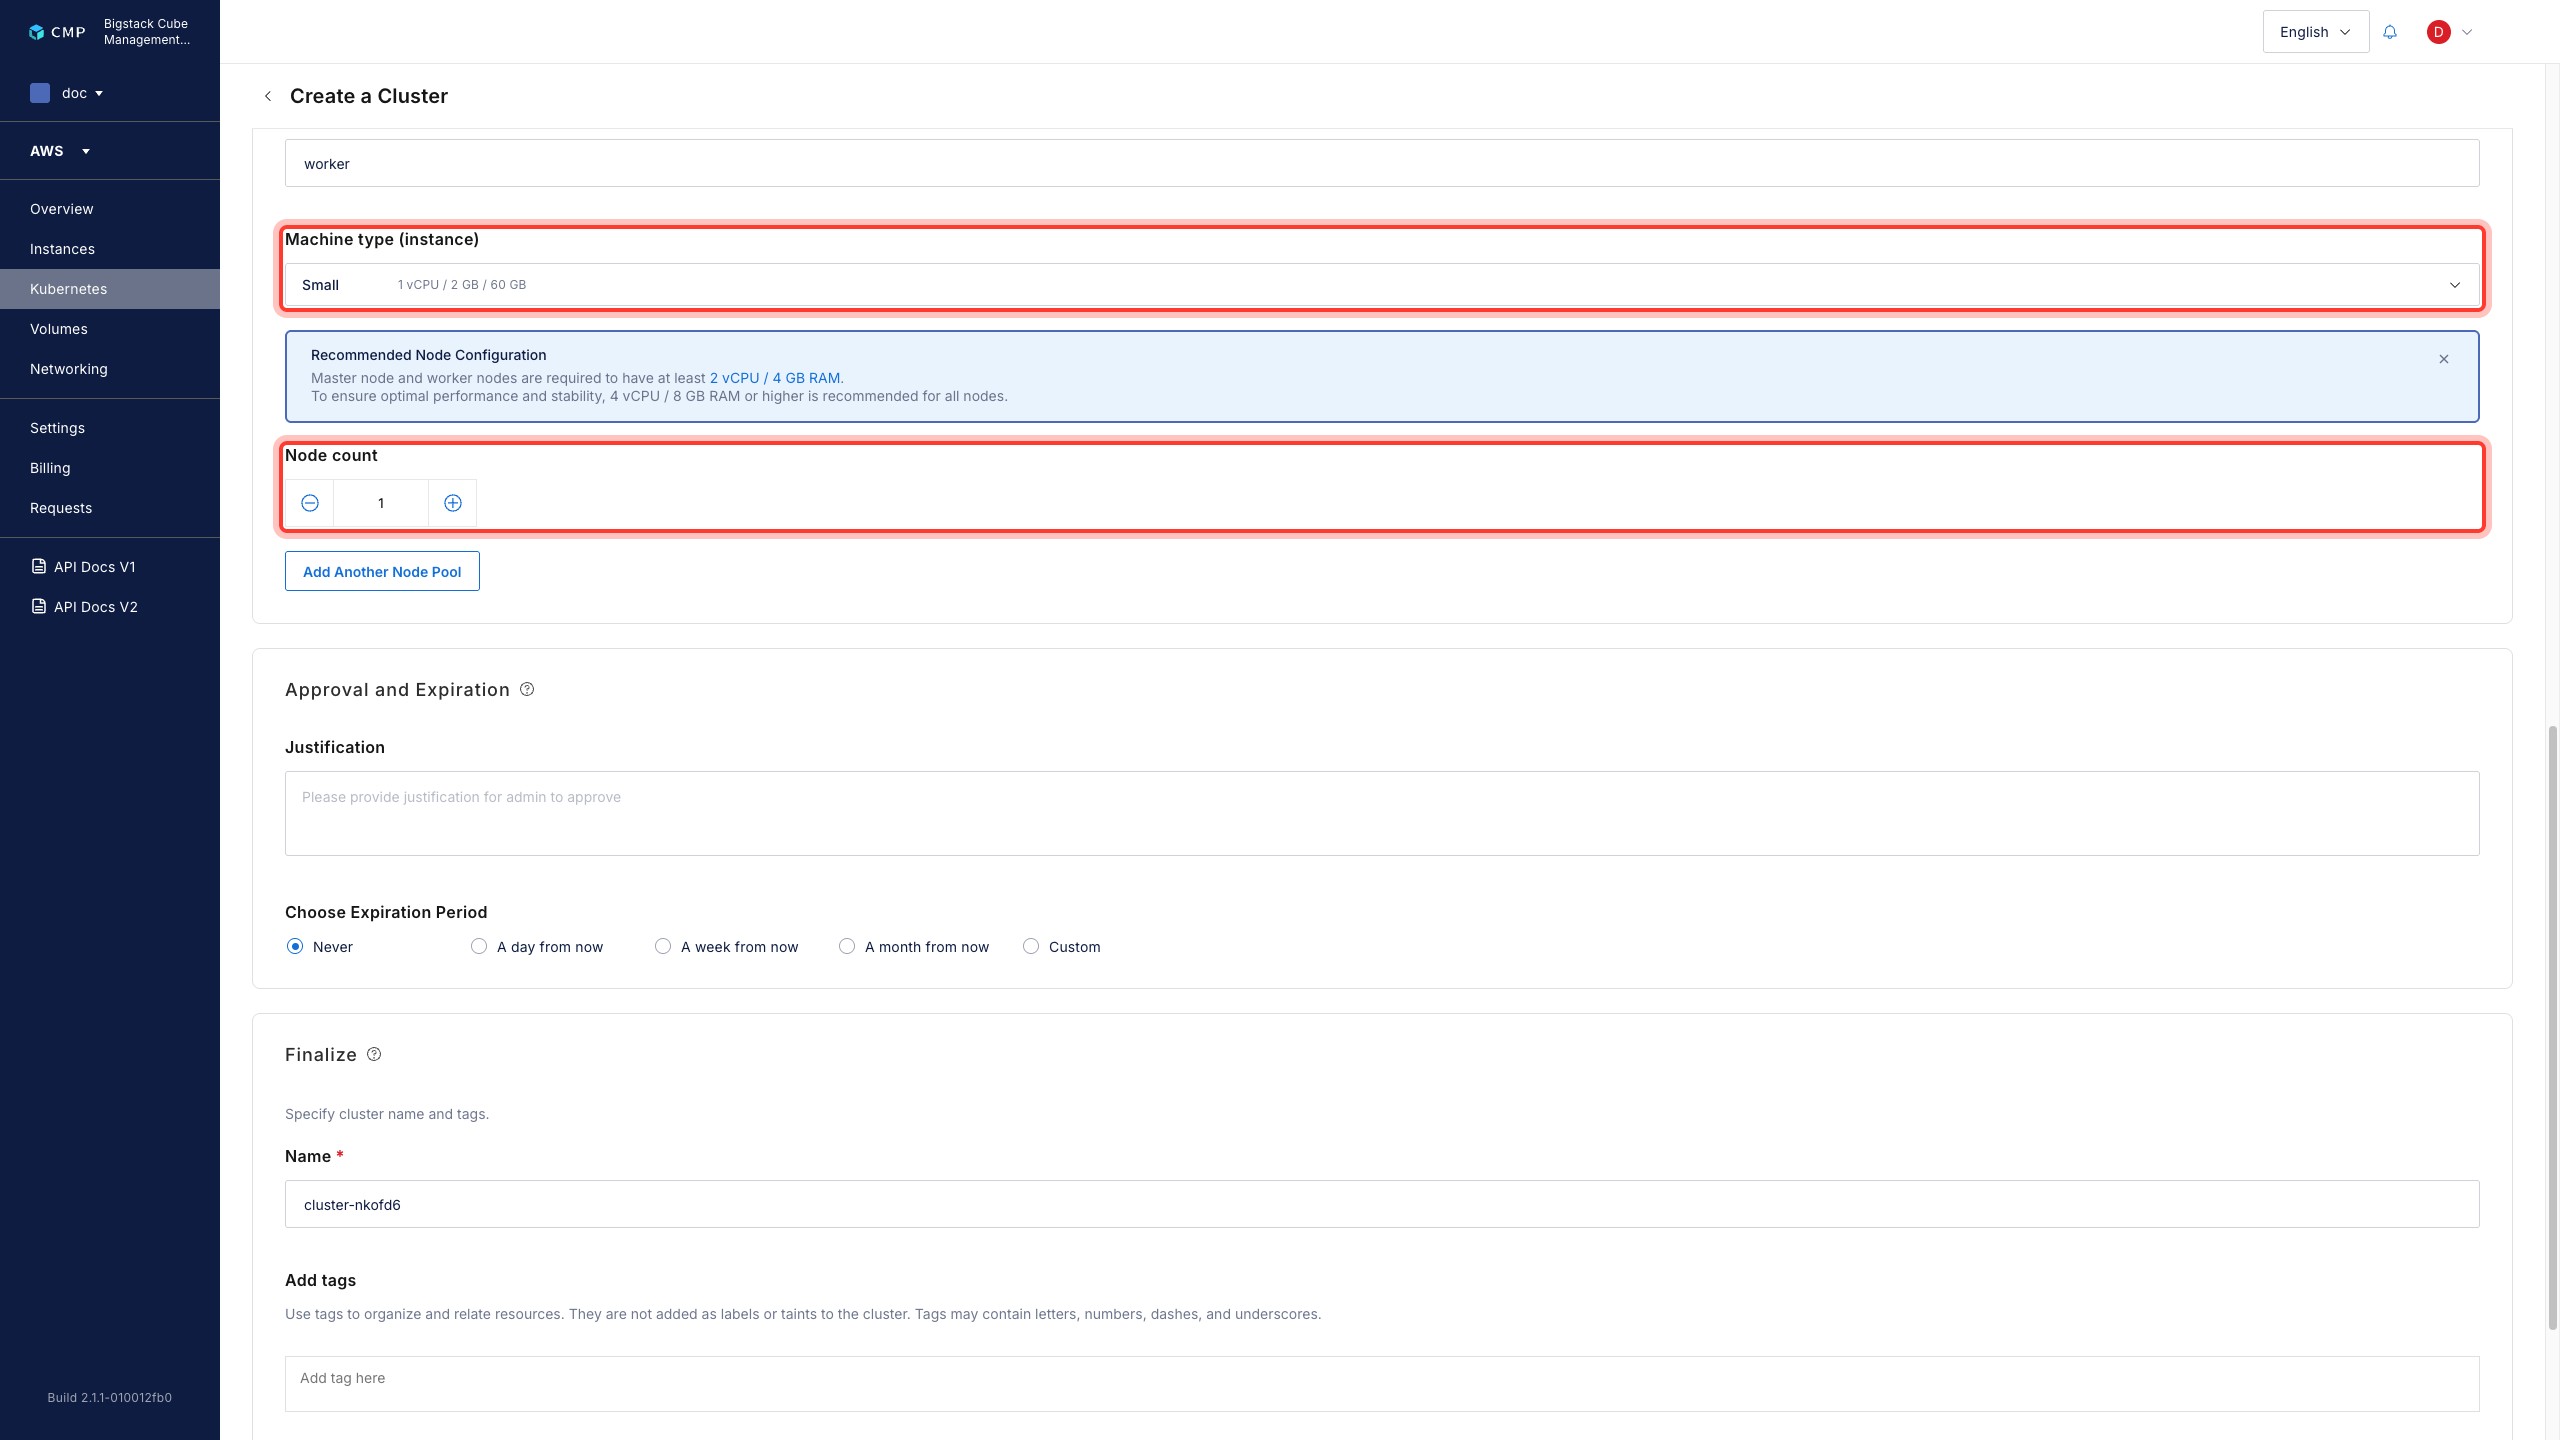
To configure the number of worker pools performing the workload, go to the Worker Node Pool. Set the machine type (instance) for the resources allocated to the worker node and configure the node count to determine how many nodes to create. Add additional worker node pools and nodes as required.
-
-
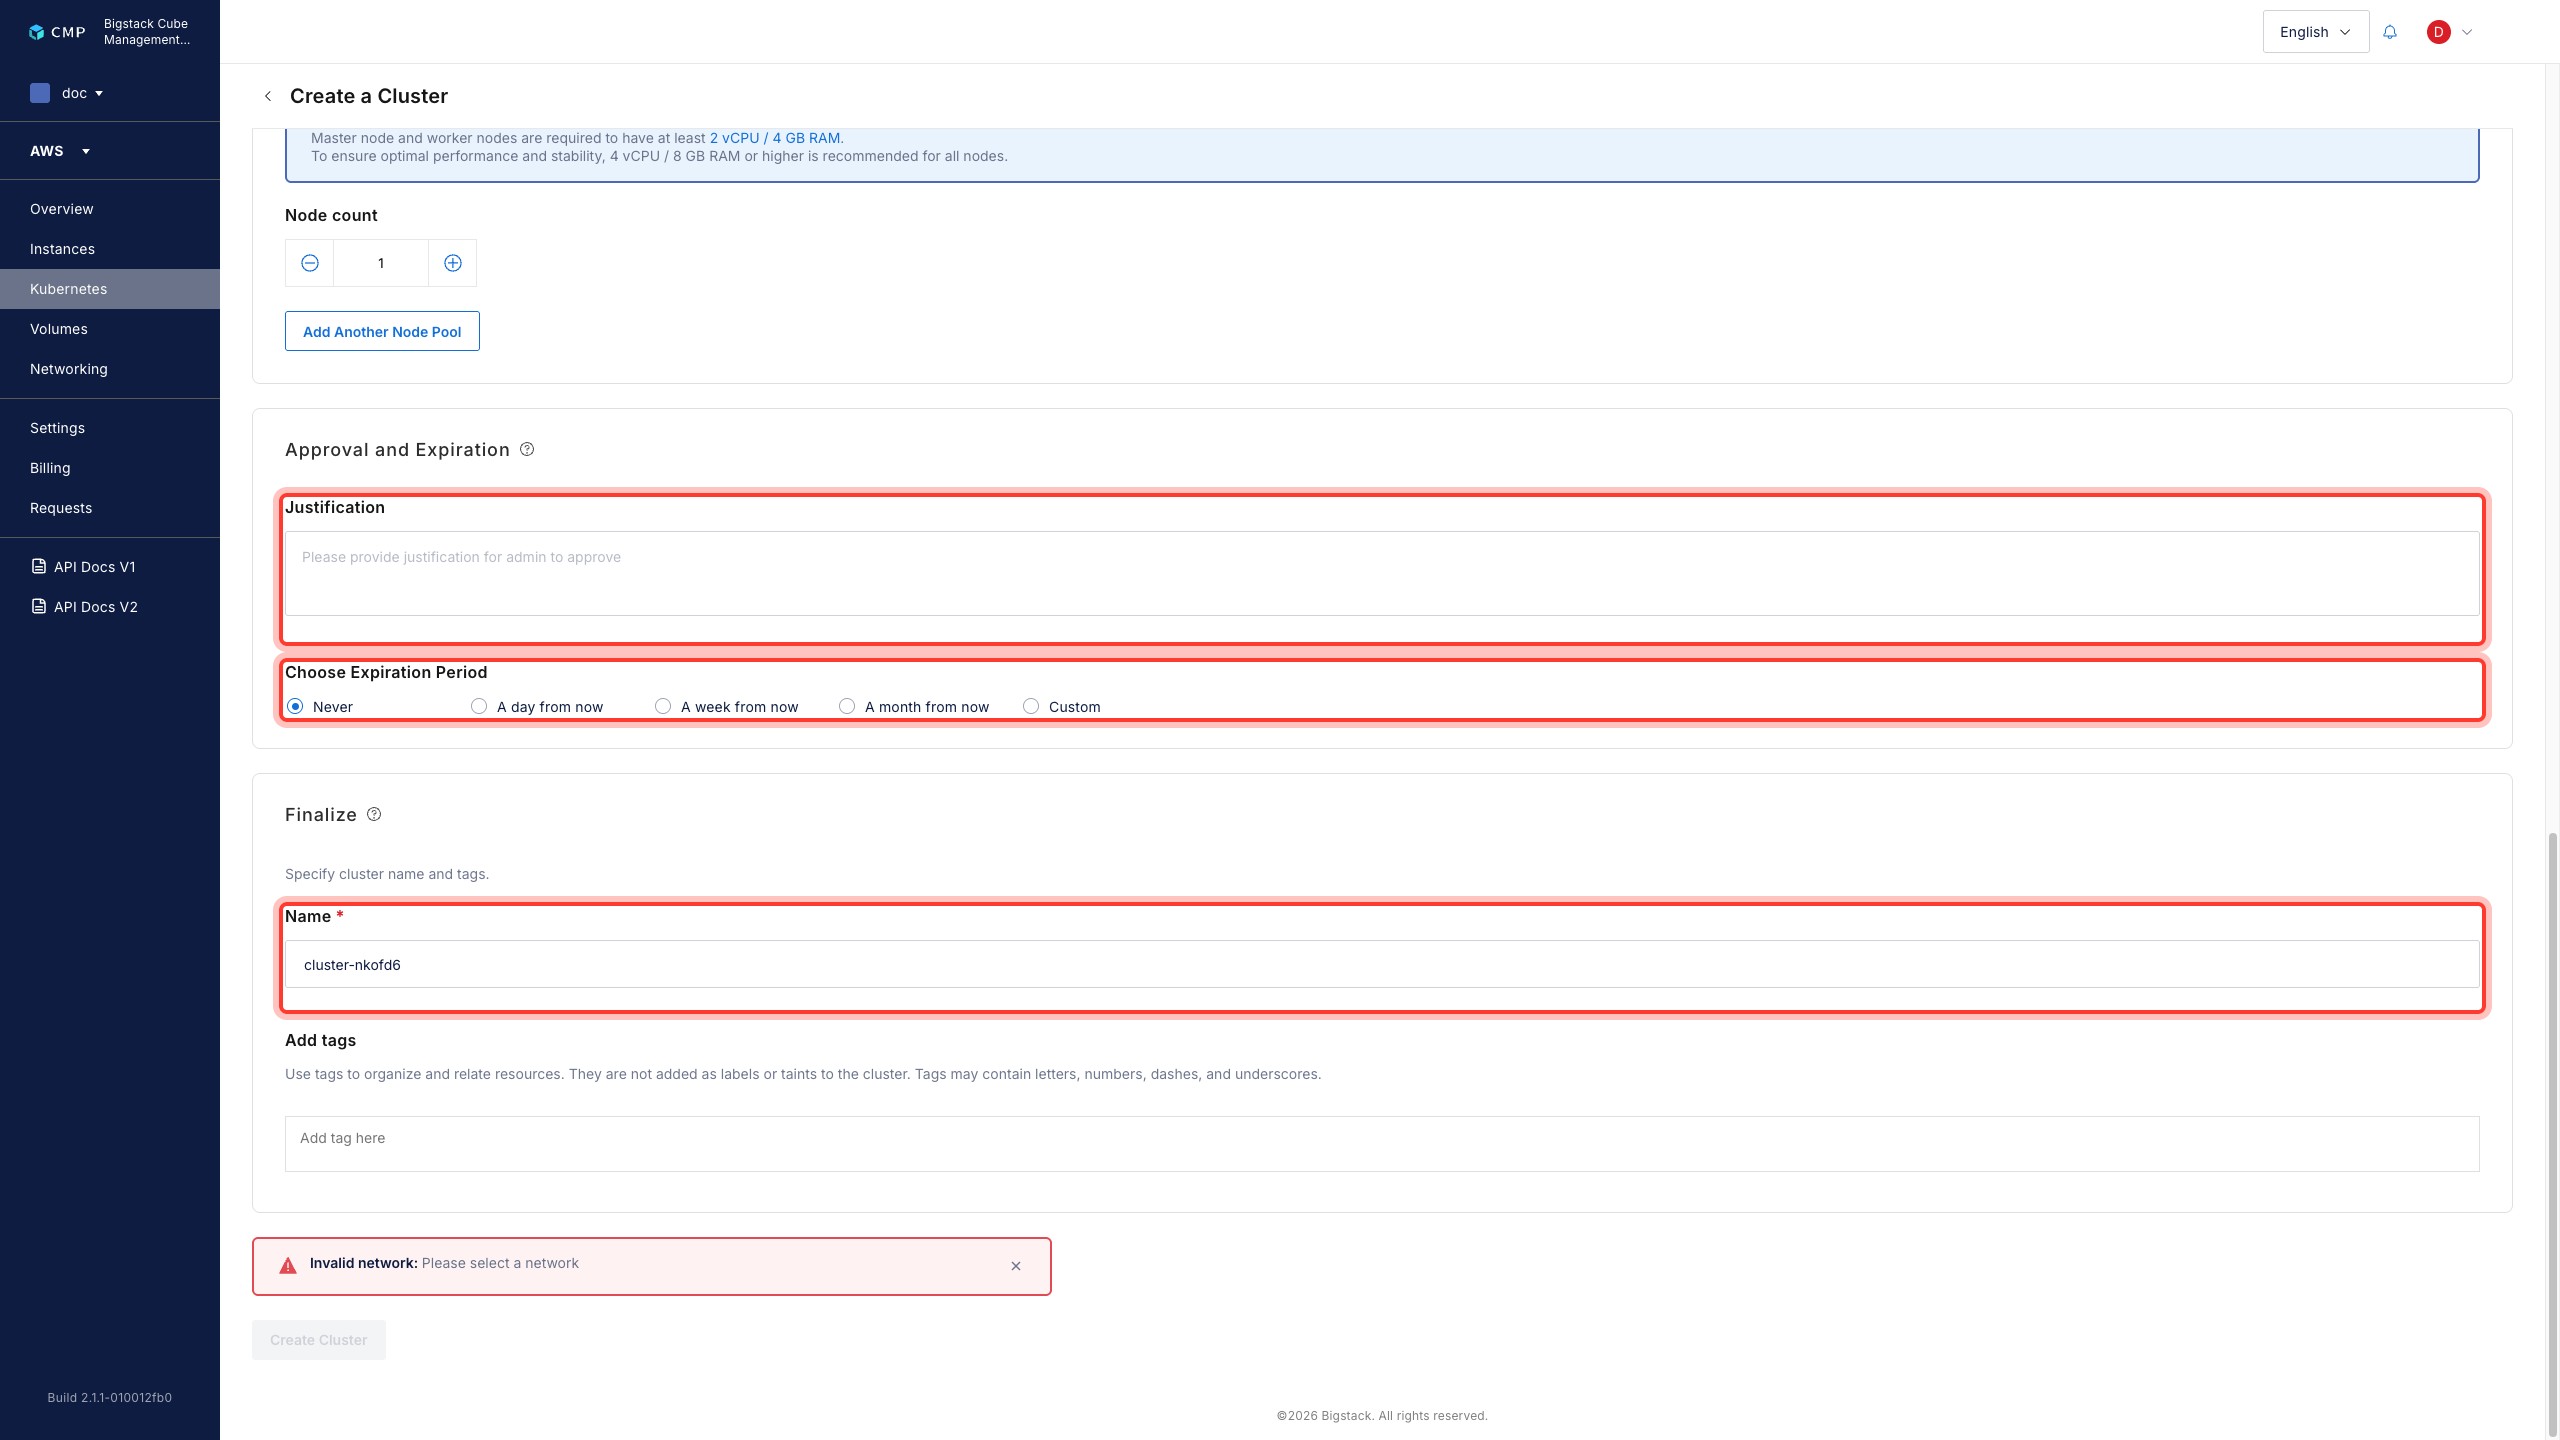
To begin cluster creation, complete the following steps:
- To get administrator resource approval, go to Justification and enter the cluster usage justification.
- If you have a resource expiration date, set the Choose Expiration Period.
-
In order to finalize the cluster creation, go to Finalize section.
- Enter a descriptive name for the cluster.
- If you need to set a tag for the cluster, enter a tag in Add tags section.
-
To begin cluster creation, click Create Cluster.