Create a router for projects (tenants)
Learn how to create a router for a project (tenant) to use the available provider and spine networks.
Before you begin
- Create a spine network. For more information, see Create a spine network.
Create and attach a router
-
In the CubeCMP cloud admin management console, go to the PROJECTS tab.
-
From the ALL PROJECTS dropdown menu, select the project to modify.
-
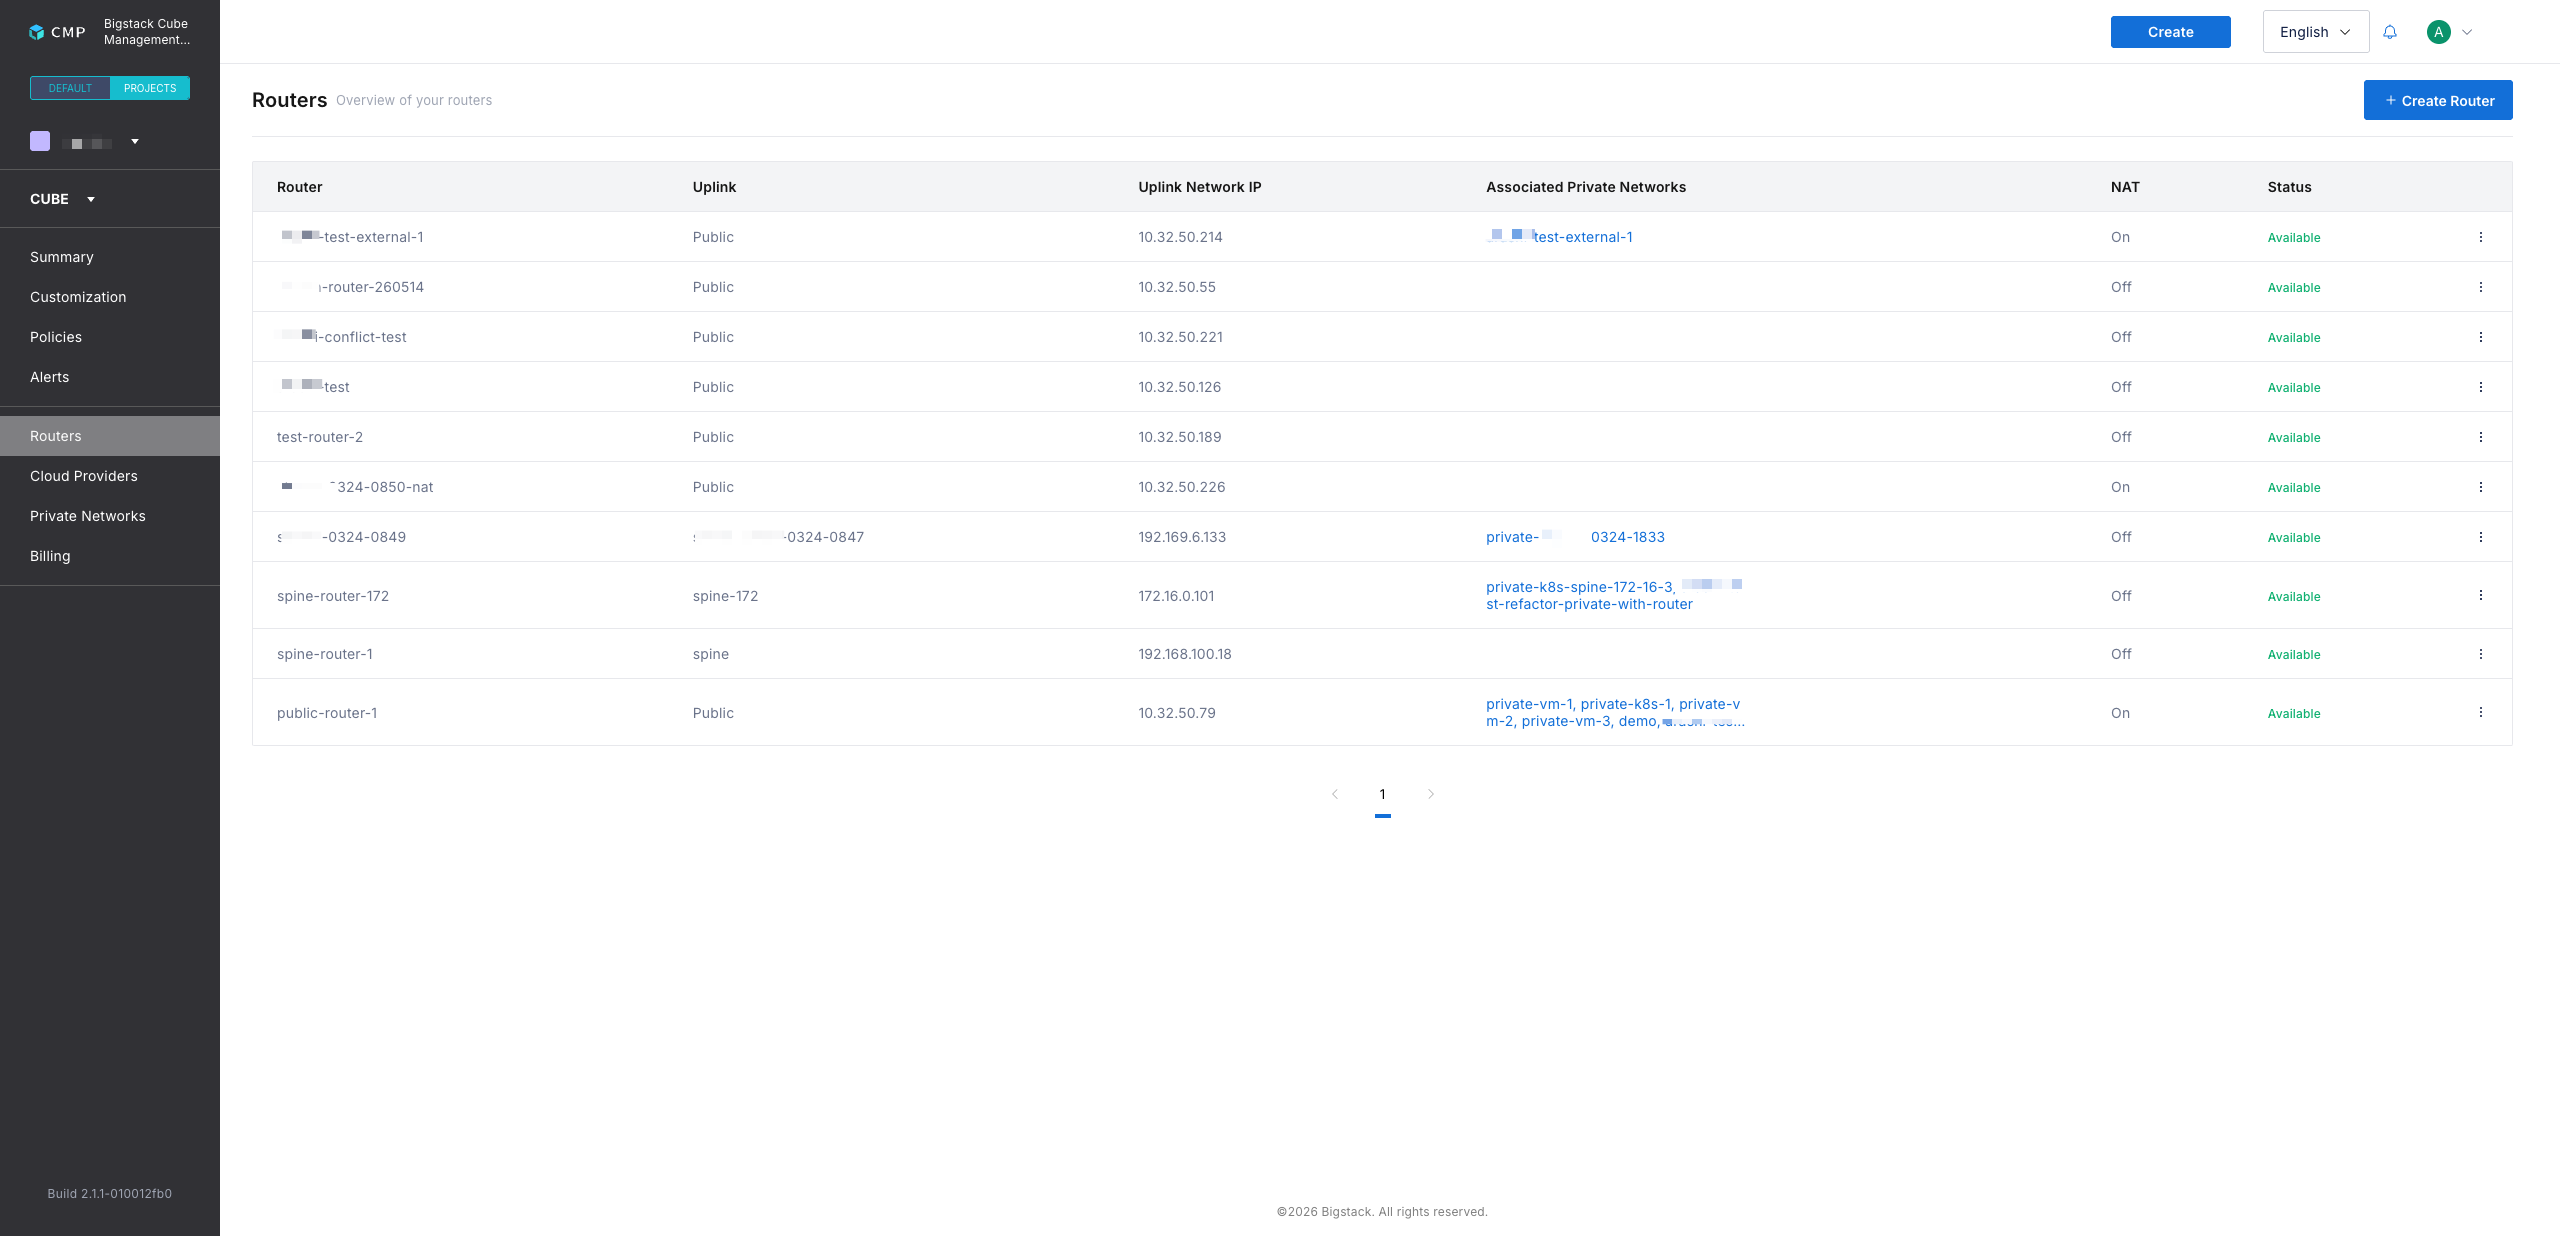
On the CUBE provider page, navigate to the Routers tab.
-
Click + Create Router to create a new router.
-
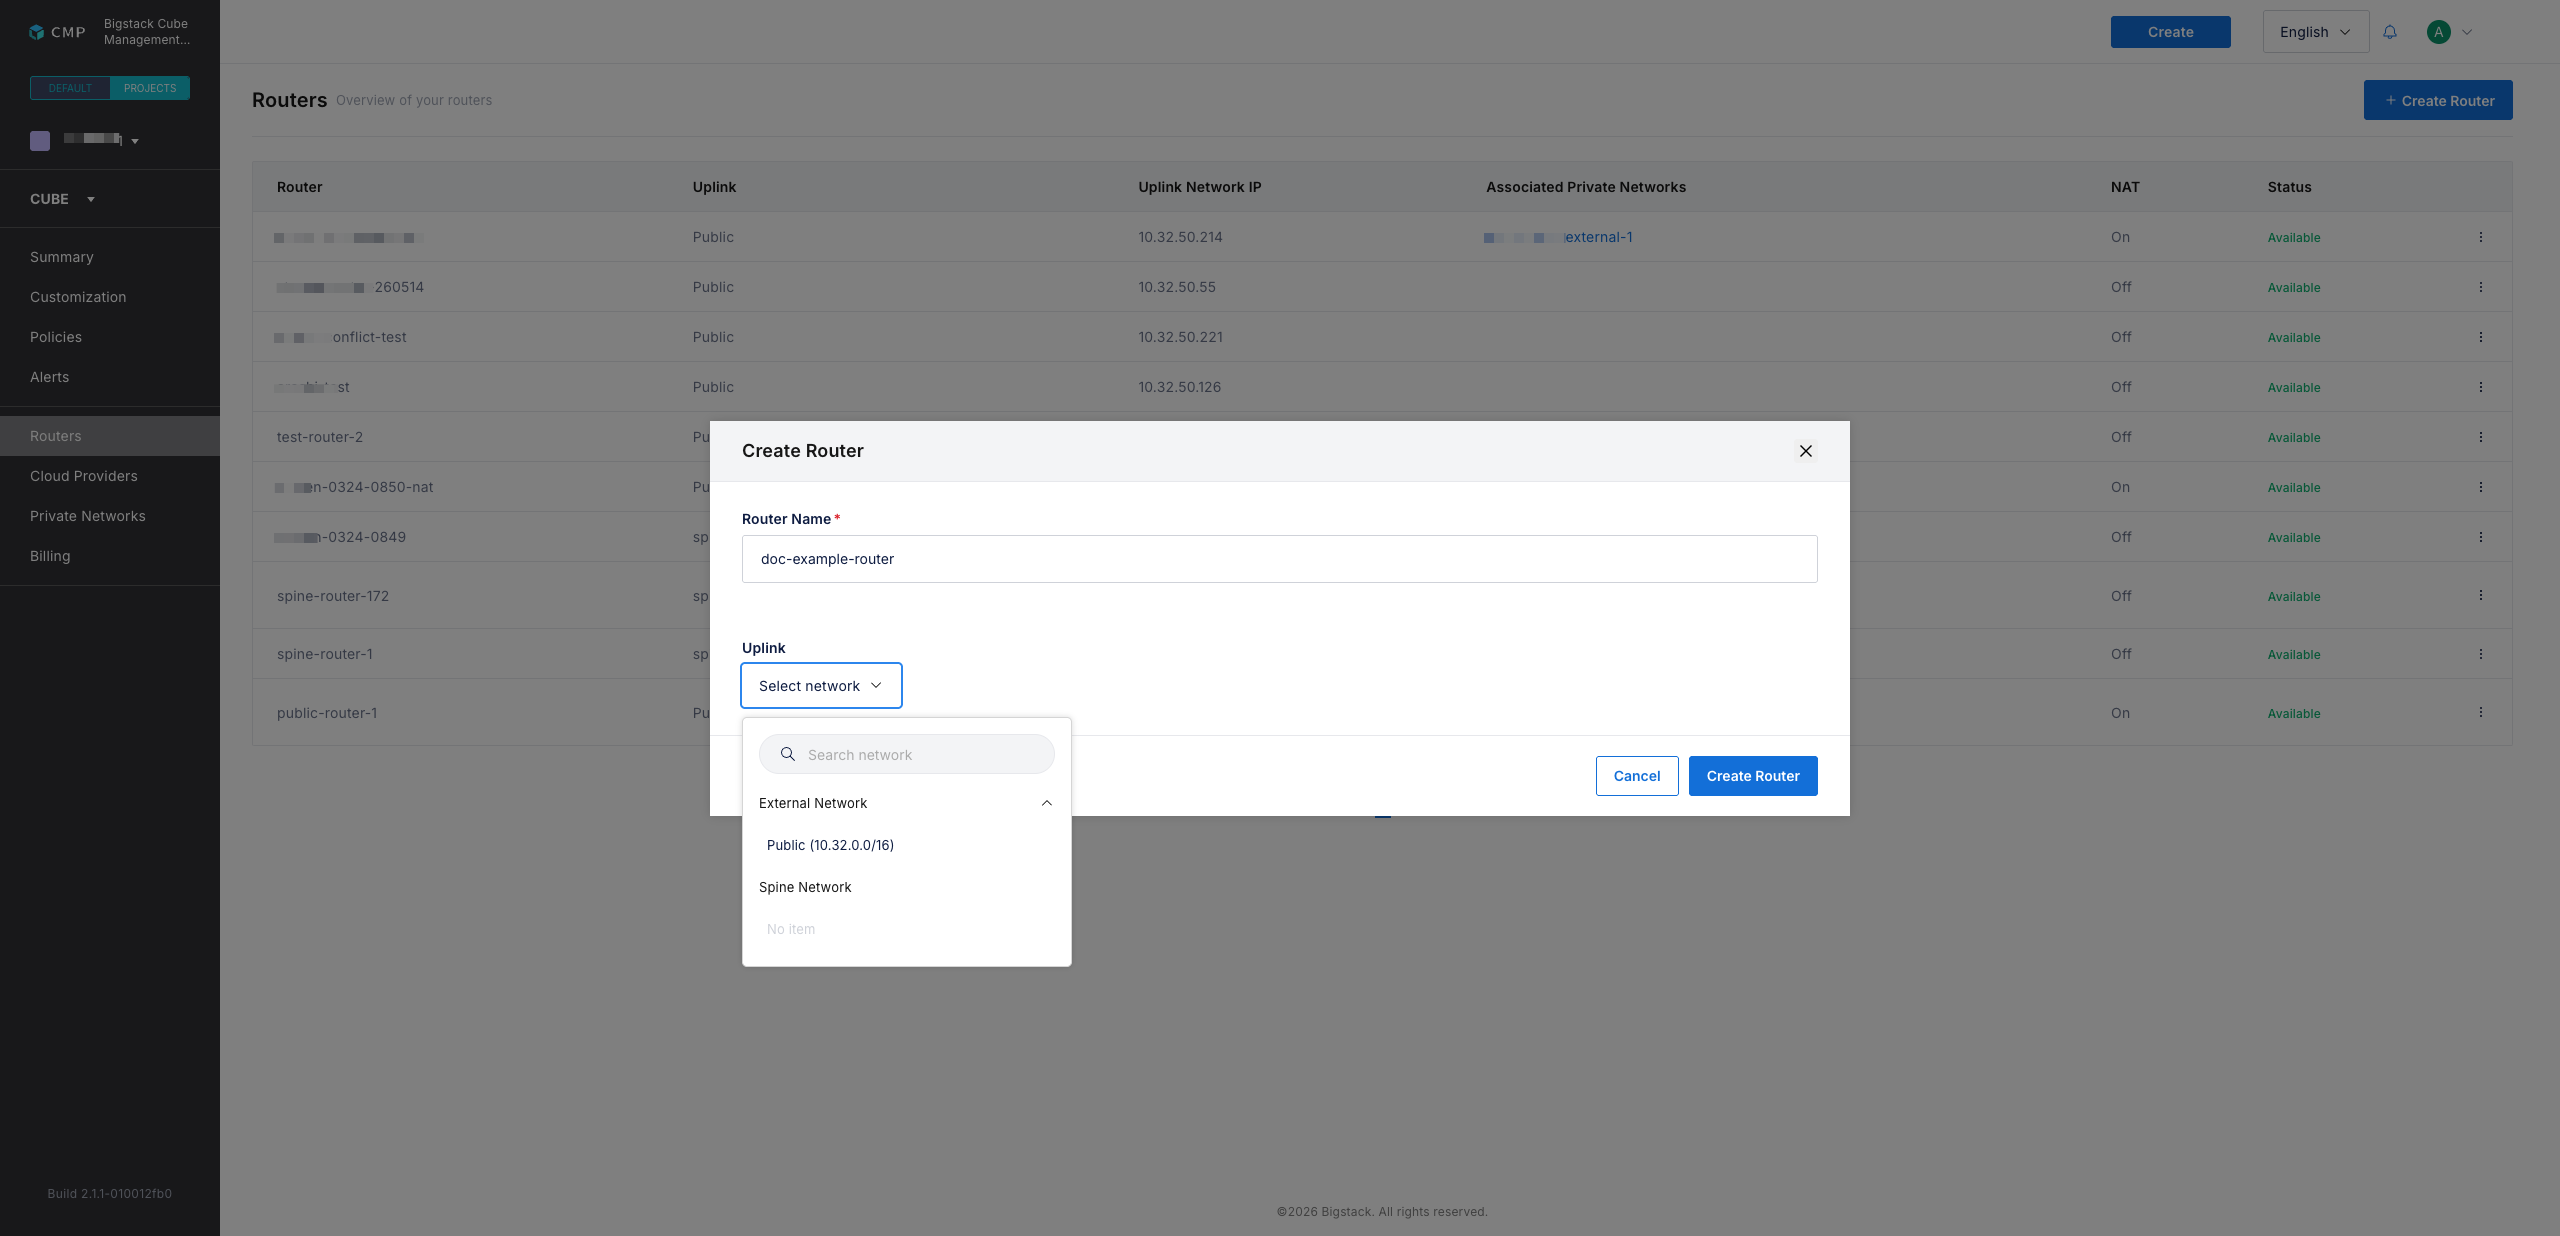
In the Router Name field, enter a name for the router.
-
Select an Uplink to use for the router:
- External Network: Overlay network used for project (tenant) traffic. NAT is enabled.
- Spine Network: Spine network architecture used for project (tenant) traffic. NAT is disabled.
-
Click Create Router.