Assign users to CubeCOS projects
This guide provides instructions on how to assign users to a project within CubeCOS. Projects enable administrators to control access and permissions for different users, ensuring that resources are used efficiently and securely.
Assign users to CubeCOS projects
-
Follow 1-Access the administration panel to enter the administrator view.
-
Navigate to
Identity > Projectsto view a list of all projects.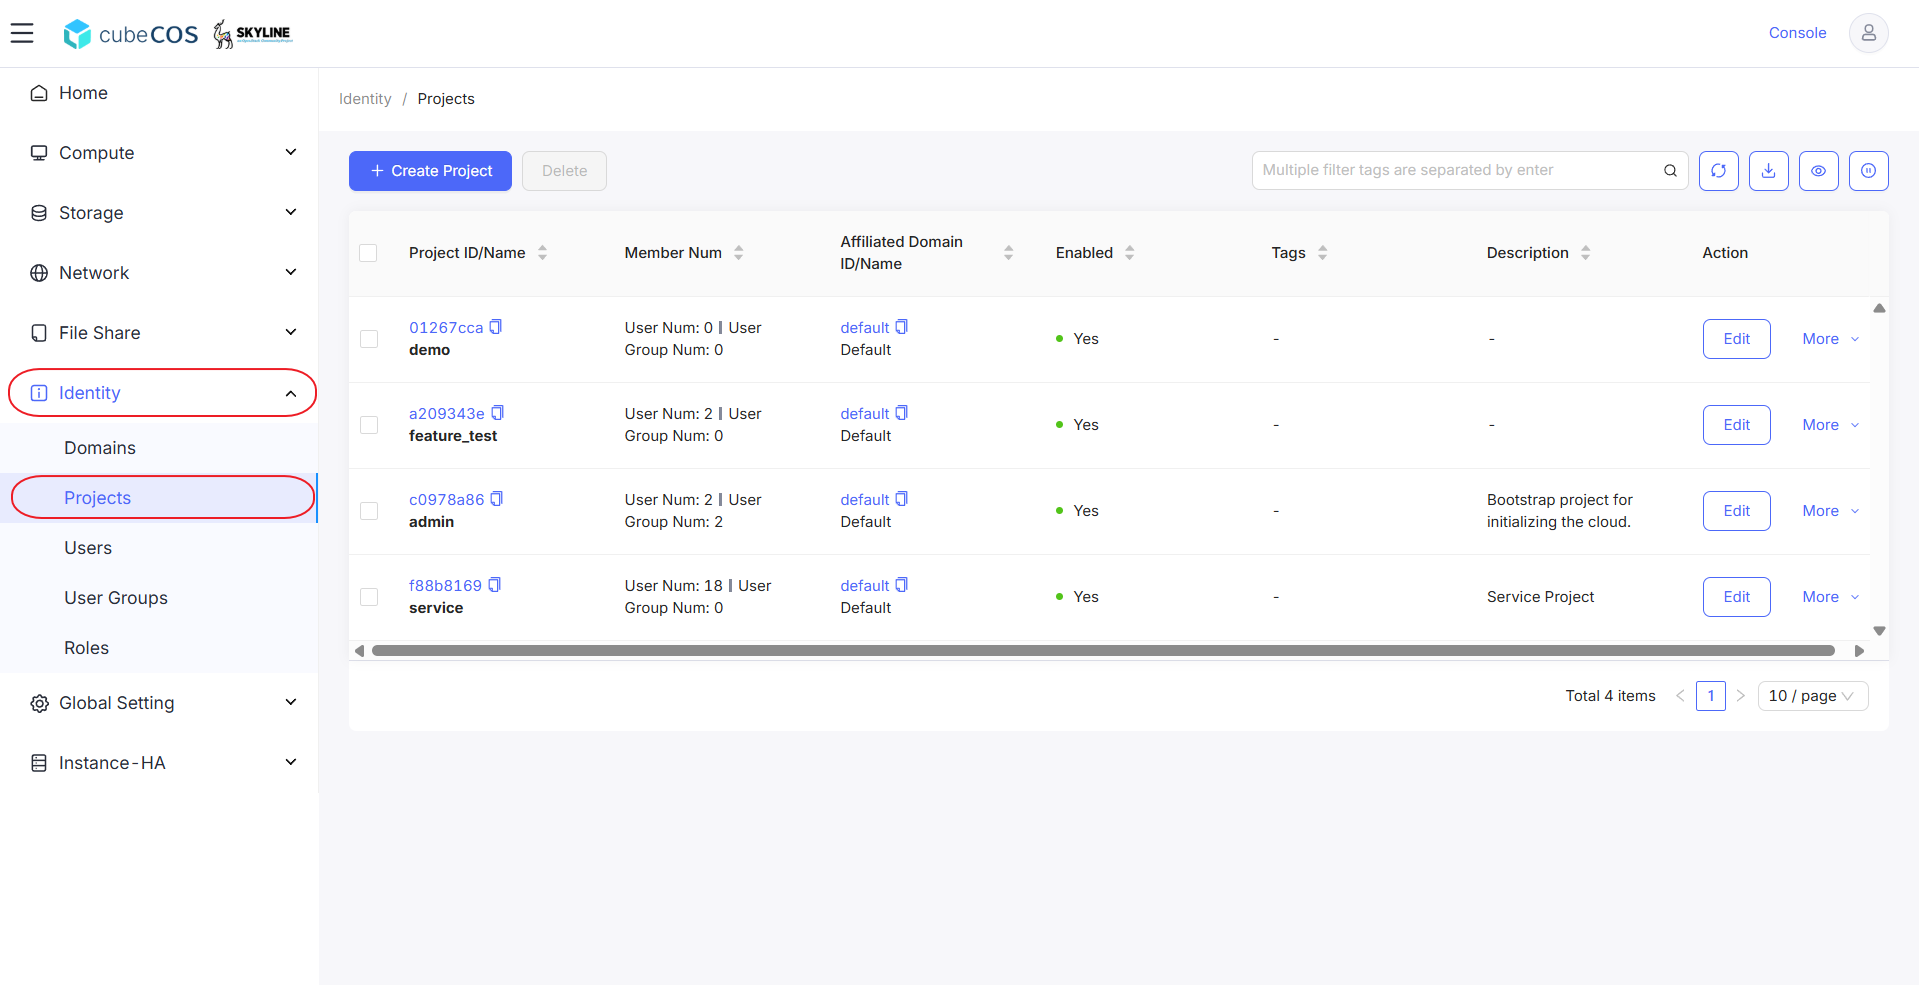
-
Select your project, then click
More. SelectManage Userat the drop-down menu.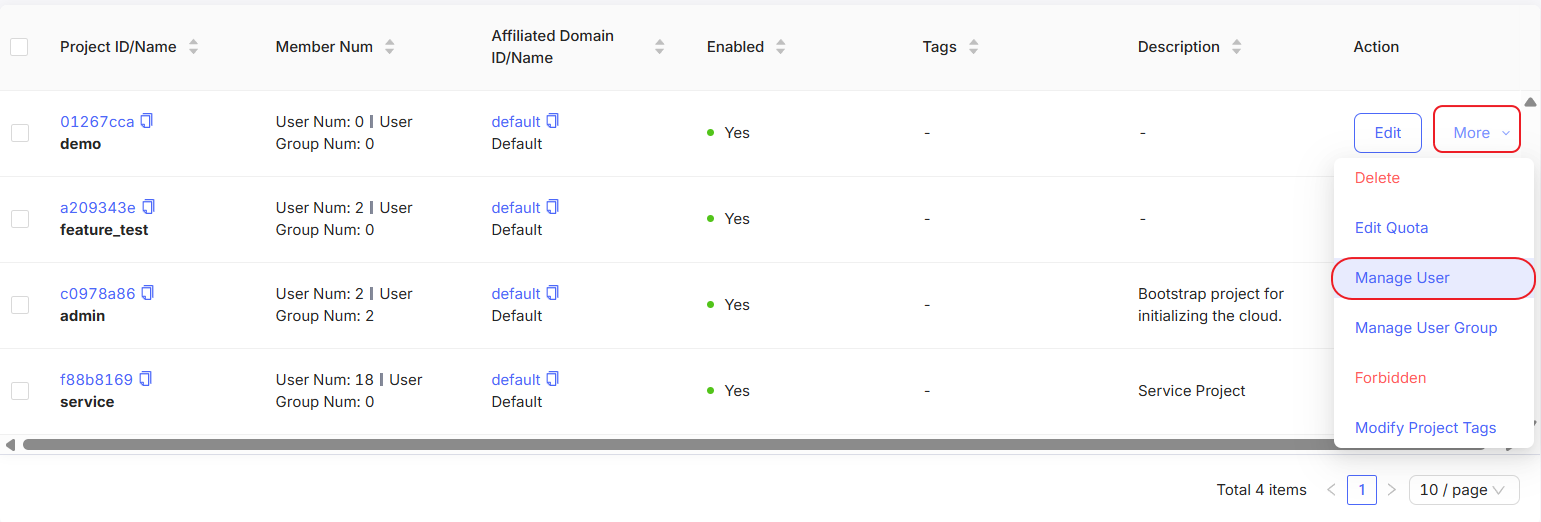
-
On the
Manage Userpage, select the user(s) you want to add to the project. Click the>button to assign them to the project.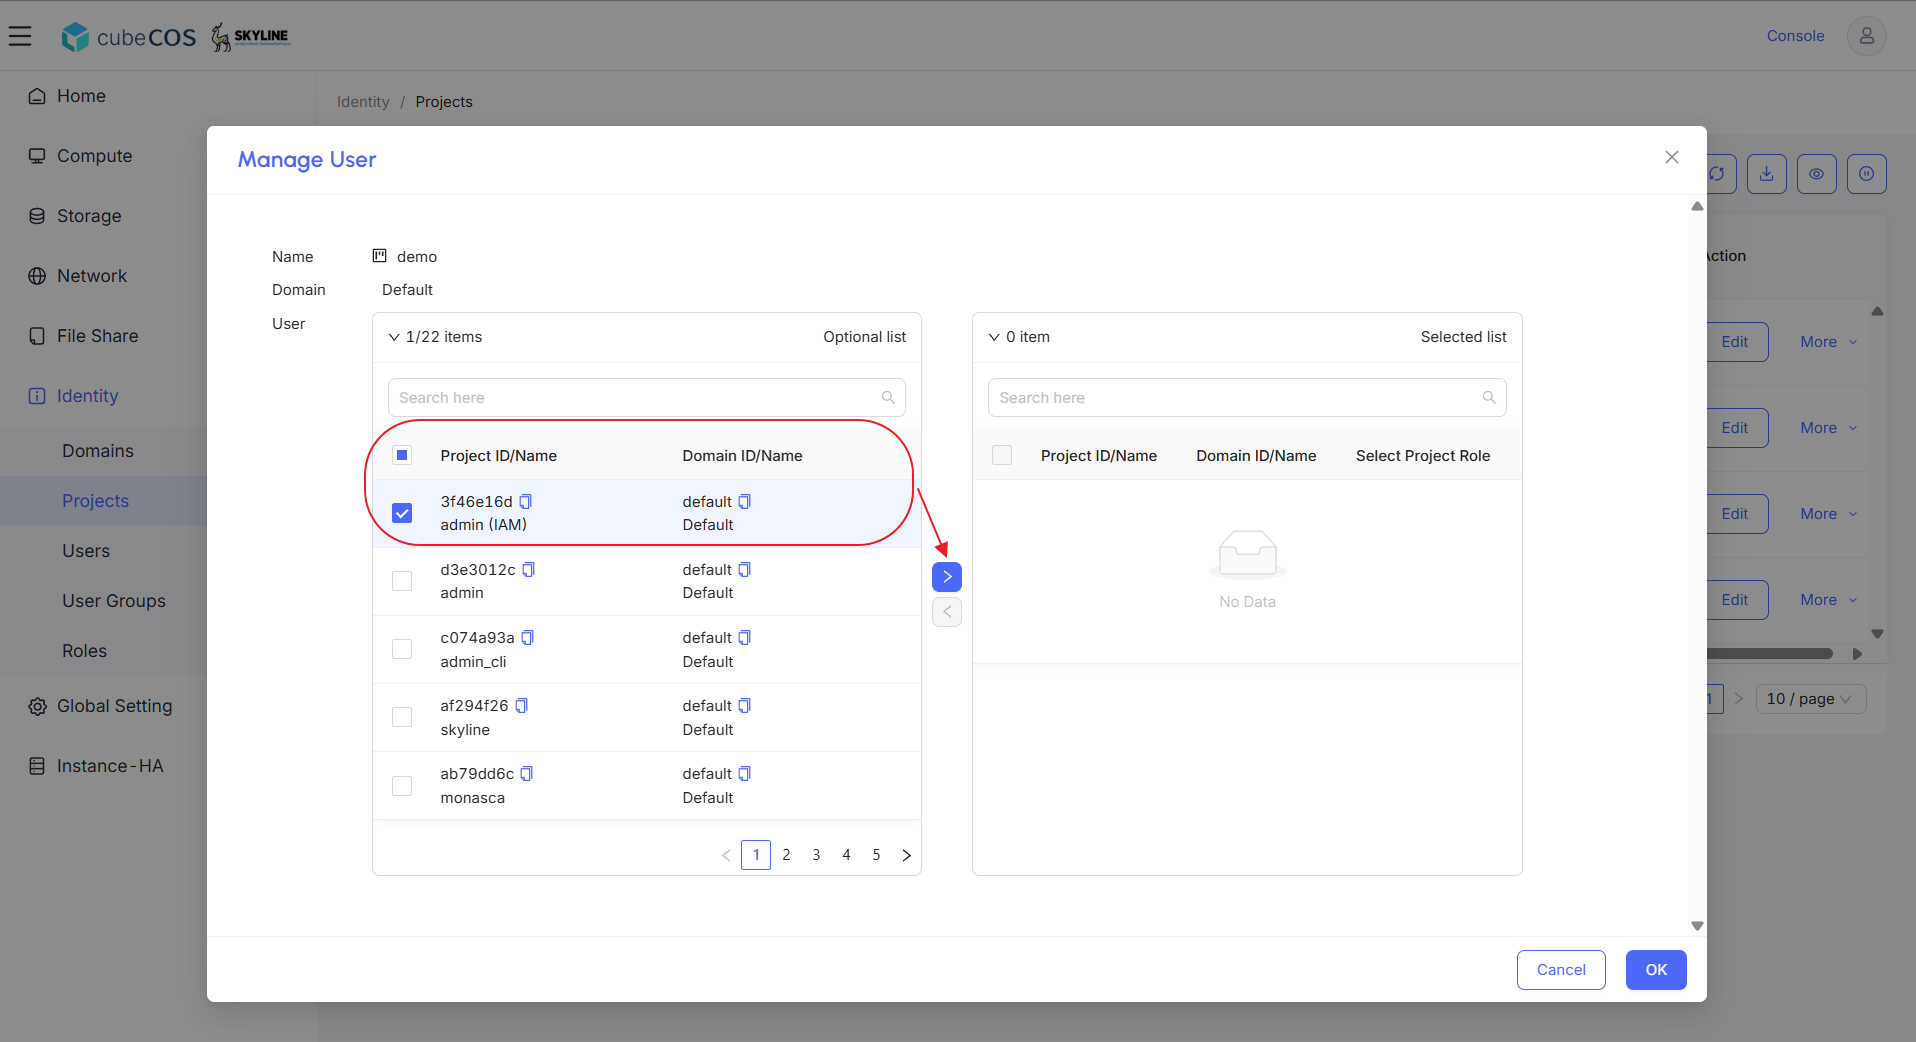
-
Assign the newly added user either
adminor_member_role for project-level privileges in the Selected list.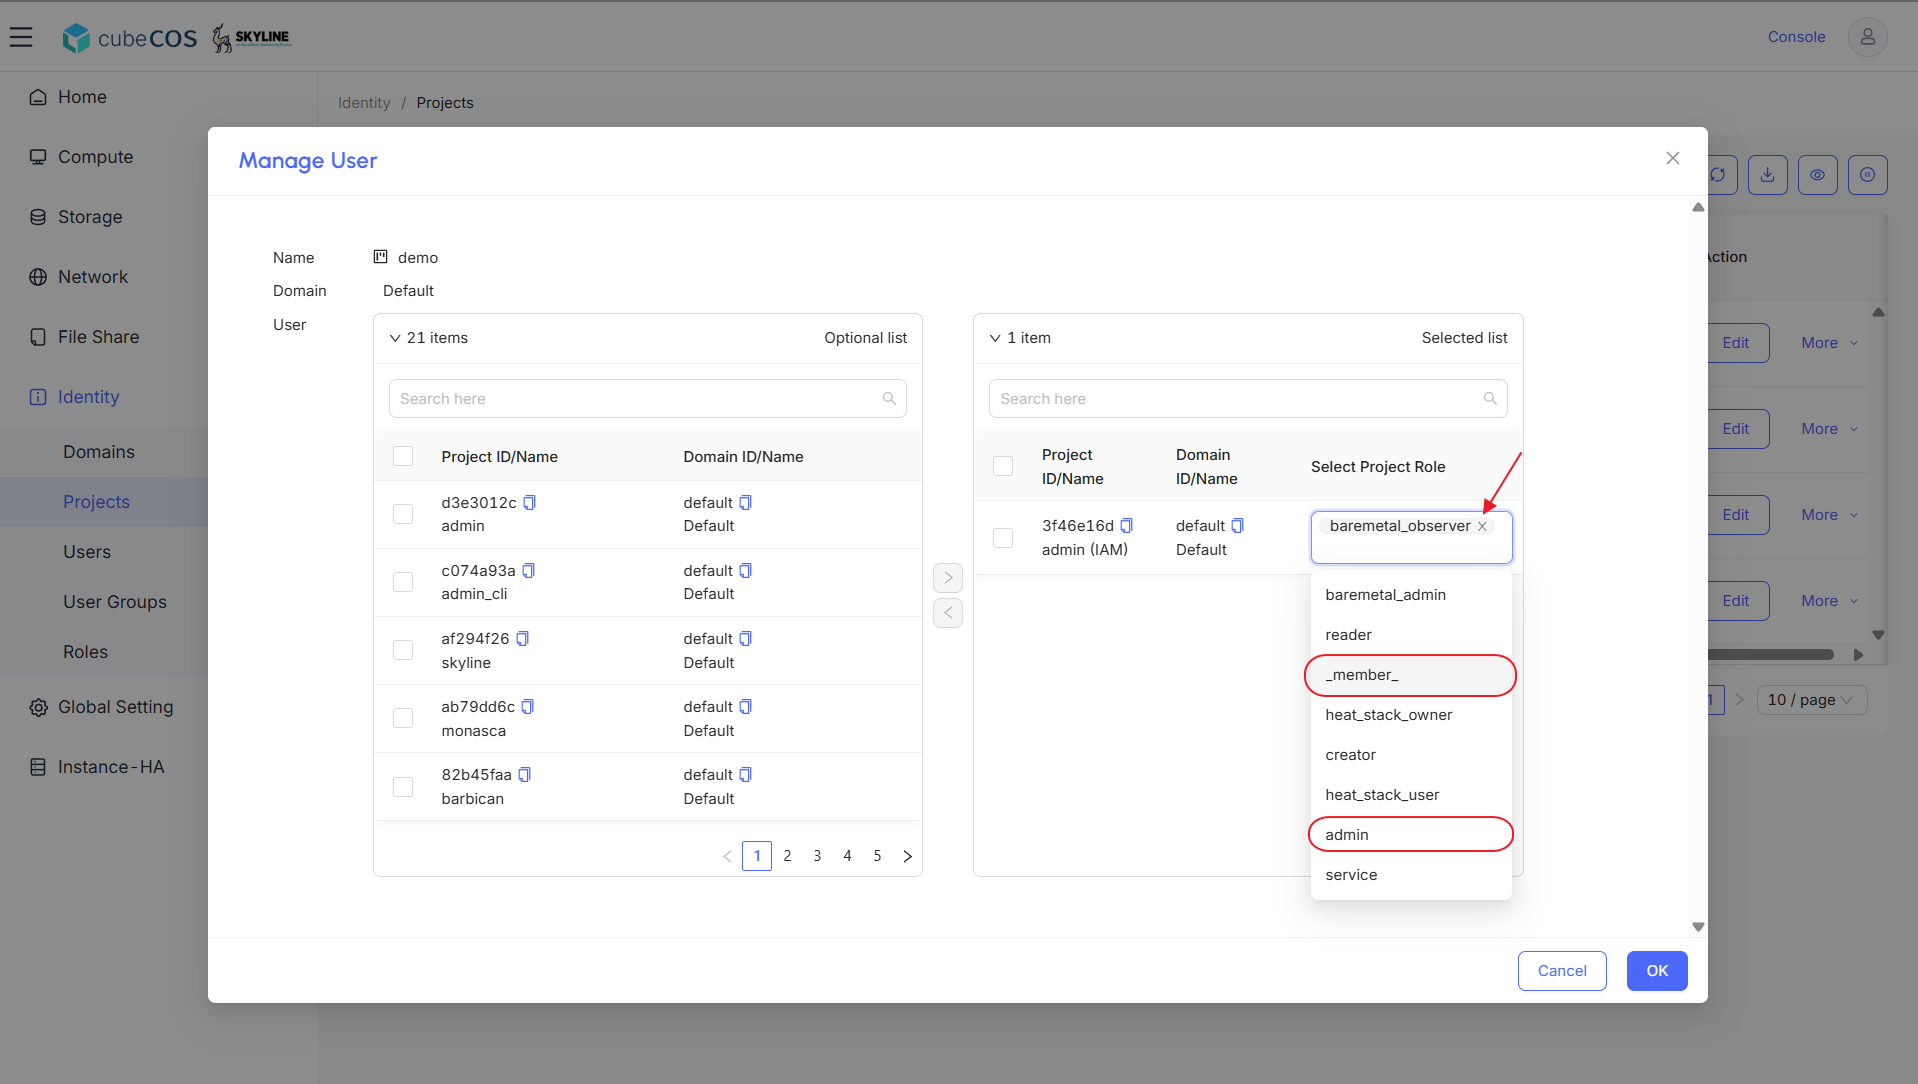
-
After assigning all Project Role privileges in the Selected list, click
OKto apply the changes.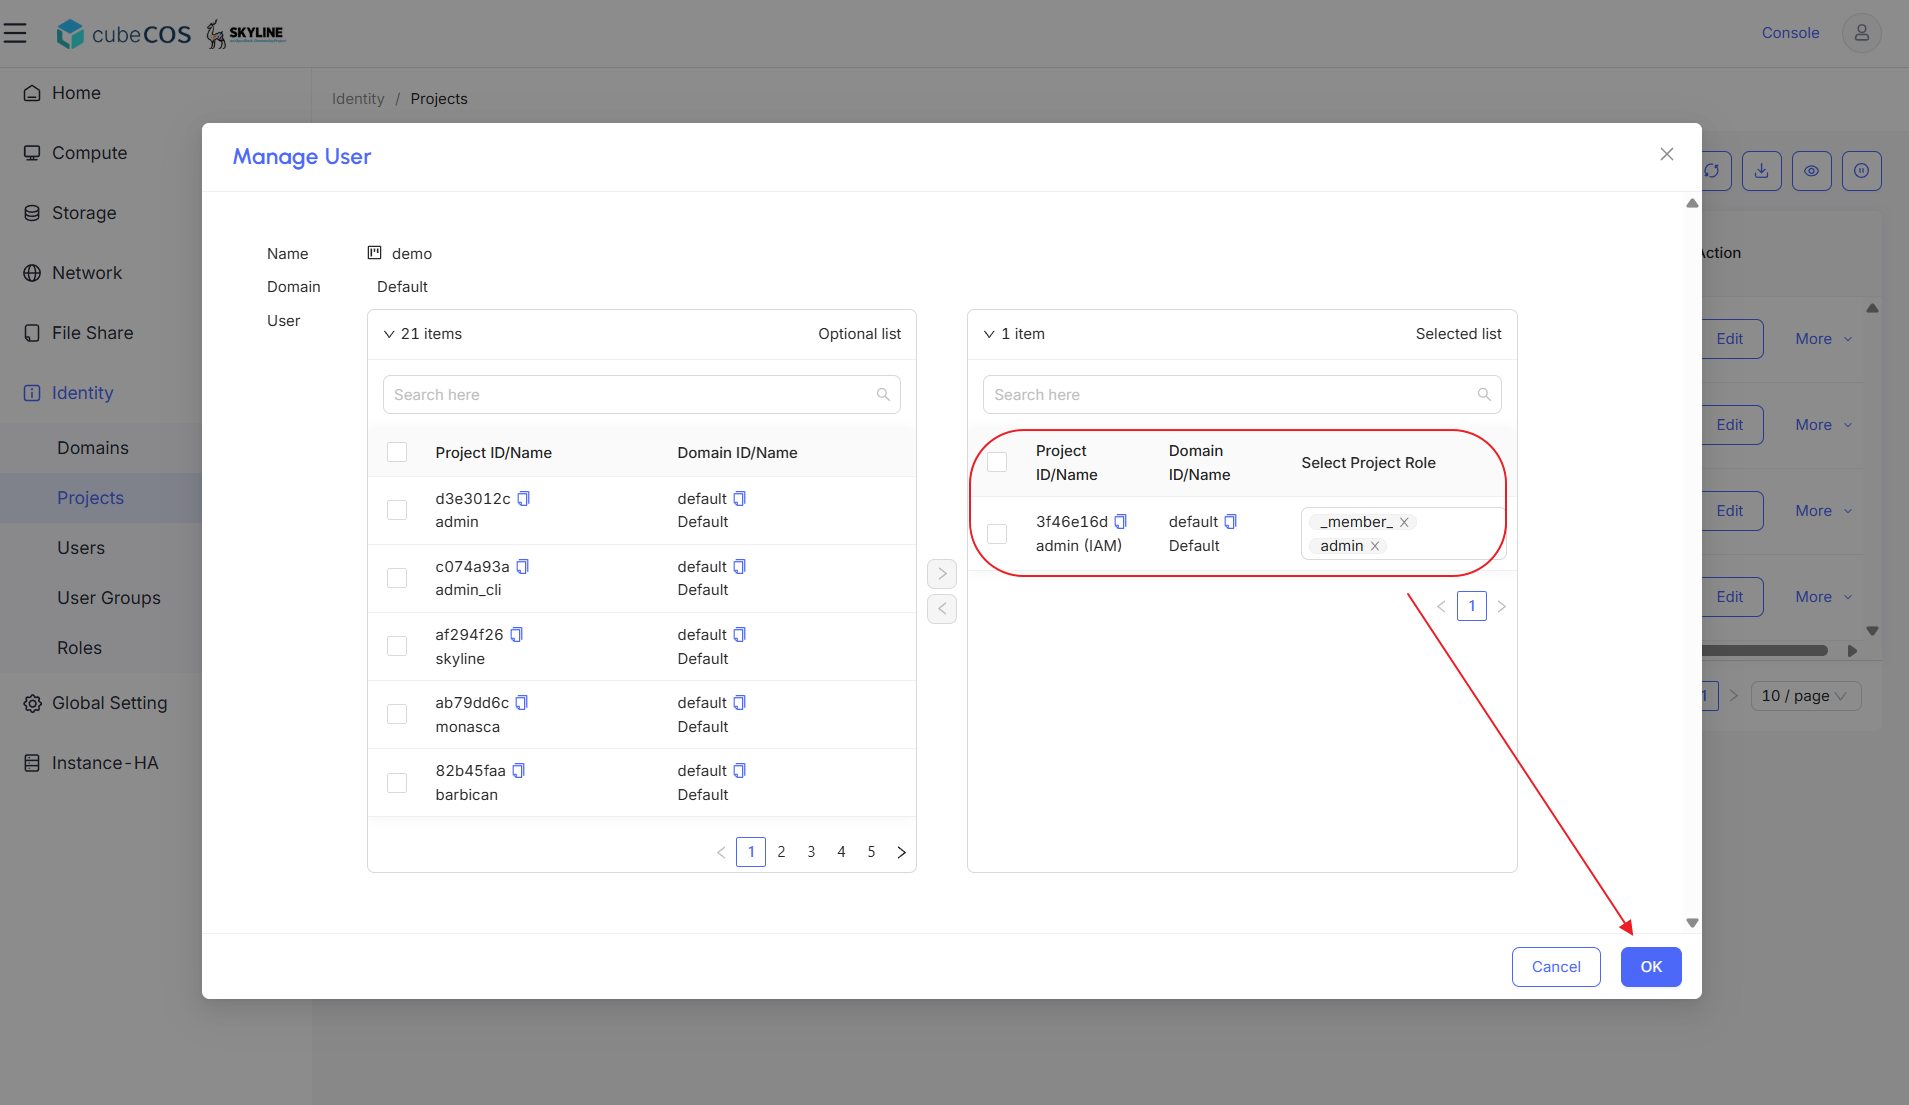
-
Navigate to
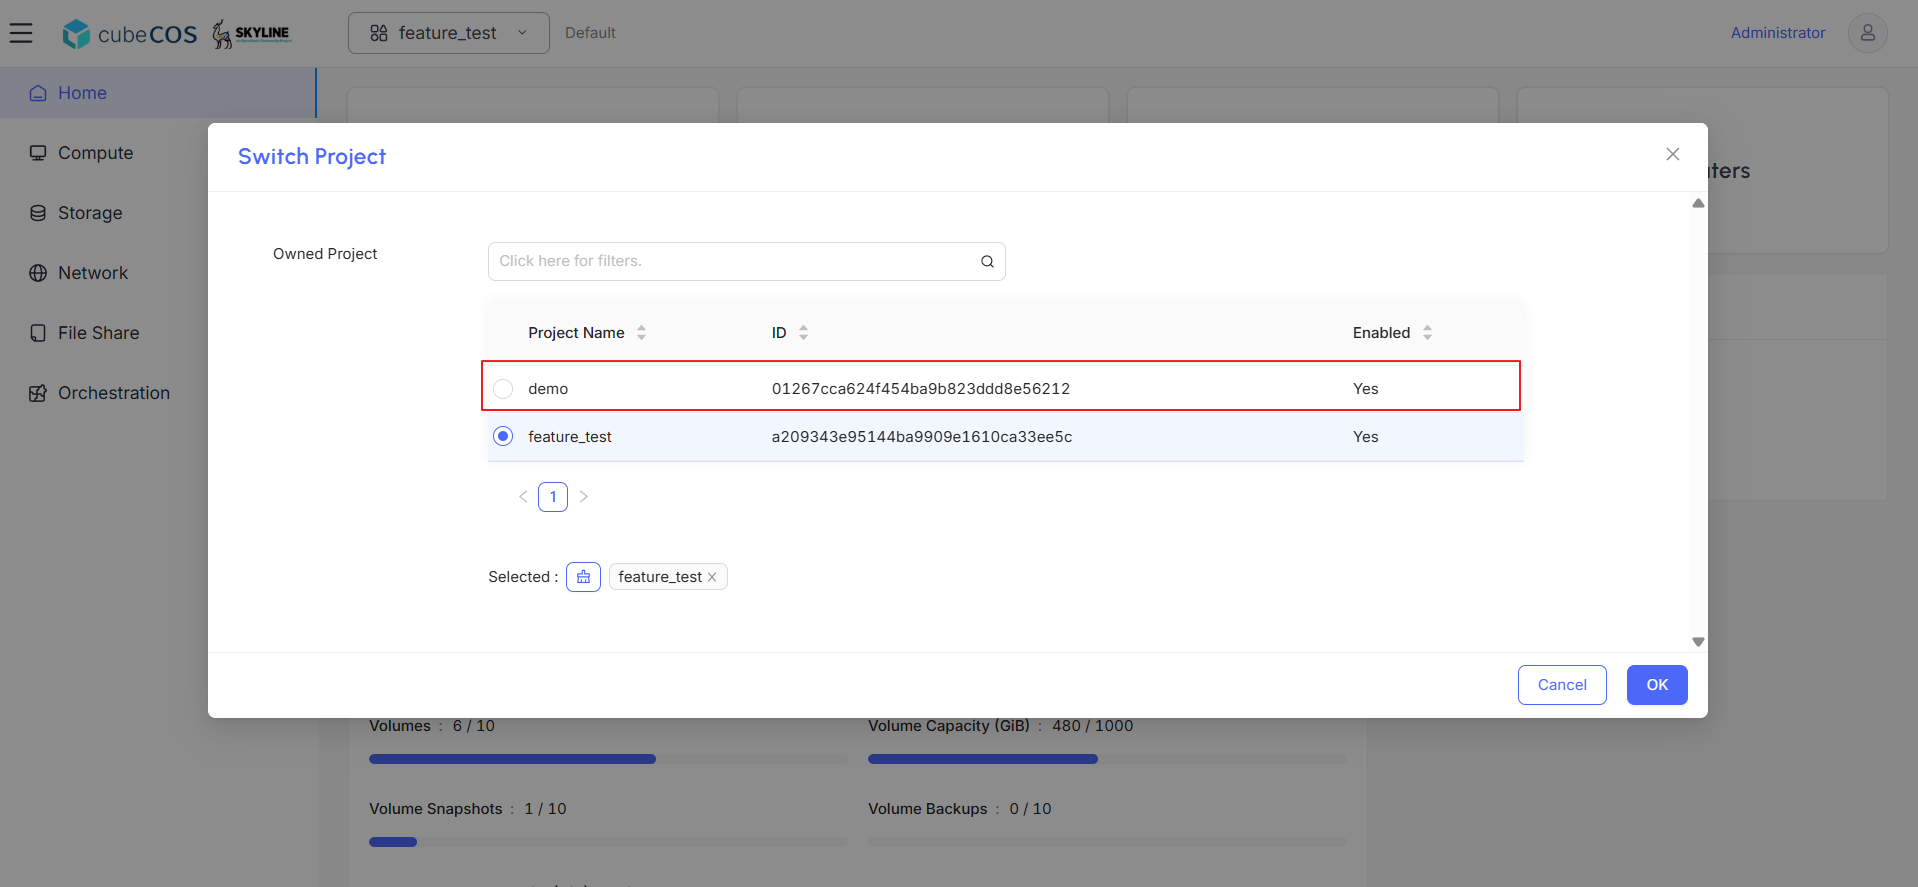
Project, then click the project list dropdown in the top-left corner.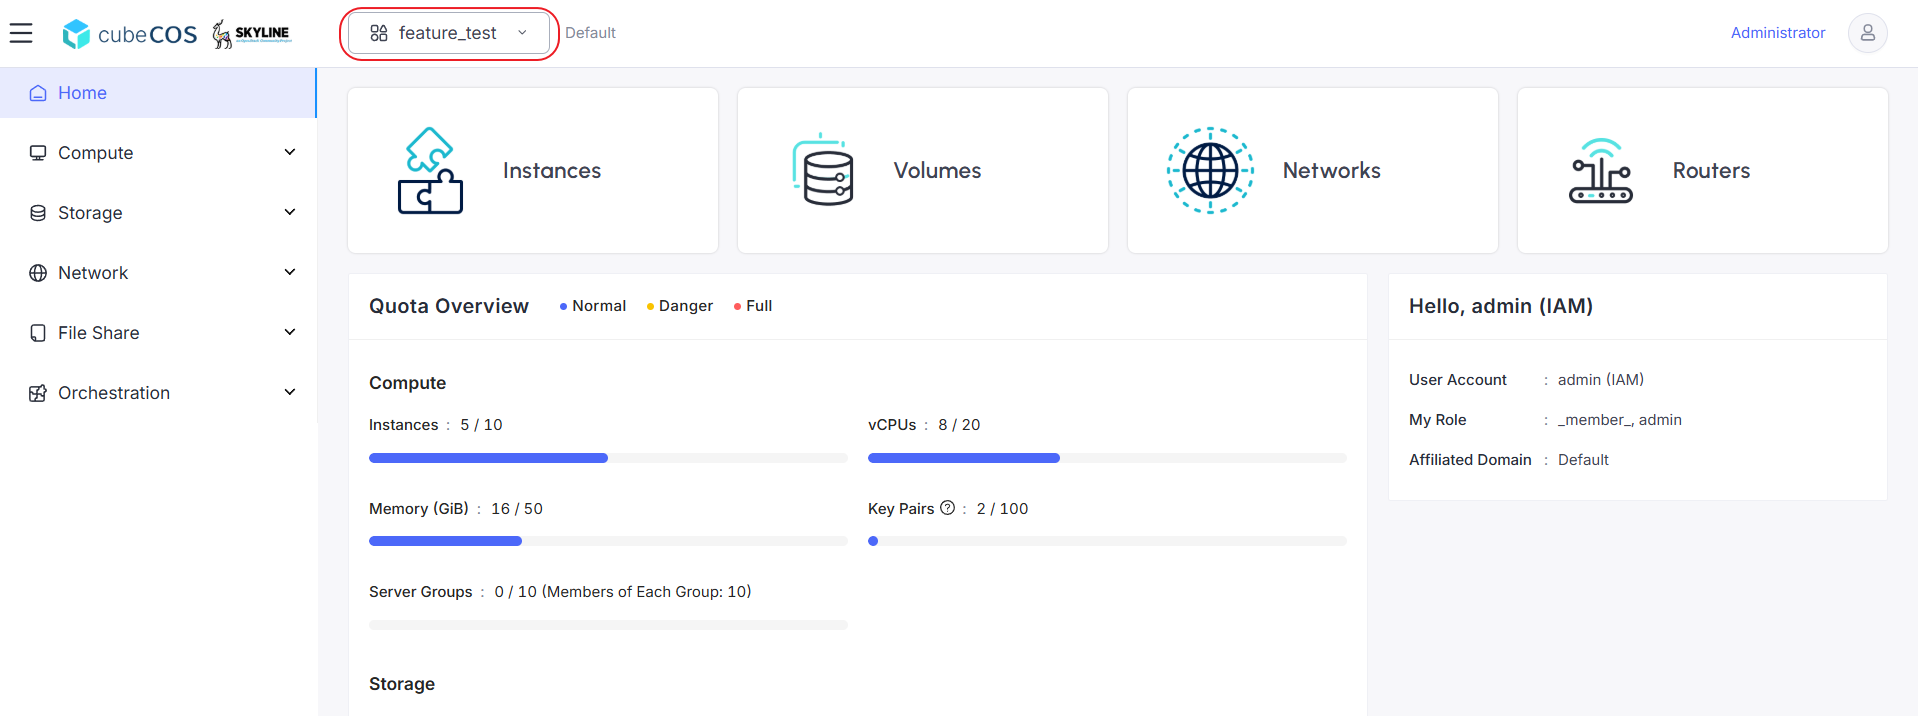
-
After modifying project role permissions, verify that the newly added project appears in the
Owned Projectlist.