Create and manage local user groups in CubeCOS
Create and manage user groups overview
This guide explains how to create and manage user groups within the CubeCOS system using the local identity management interface. User groups provide a centralized way to manage permissions and access control by organizing users into logical groups and assigning project roles collectively.
Benefits of User Groups:
- Centralized Permission Management: Assign roles to groups instead of individual users
- Simplified Administration: Add or remove users from groups to manage their access
- Consistent Access Control: Ensure all group members have the same project privileges
- Scalability: Easily manage large numbers of users through group-based assignments
Prerequisites
- Administrator access to the CubeCOS dashboard
- Users created following the Create User (Local) guide
- Understanding of project roles and permissions
Create and assign users to local user groups
-
Follow 1-Access the administration panel to enter the administrator view.
-
Navigate to
Identity > User Groupsand click+ CREATE USER GROUPto begin creation.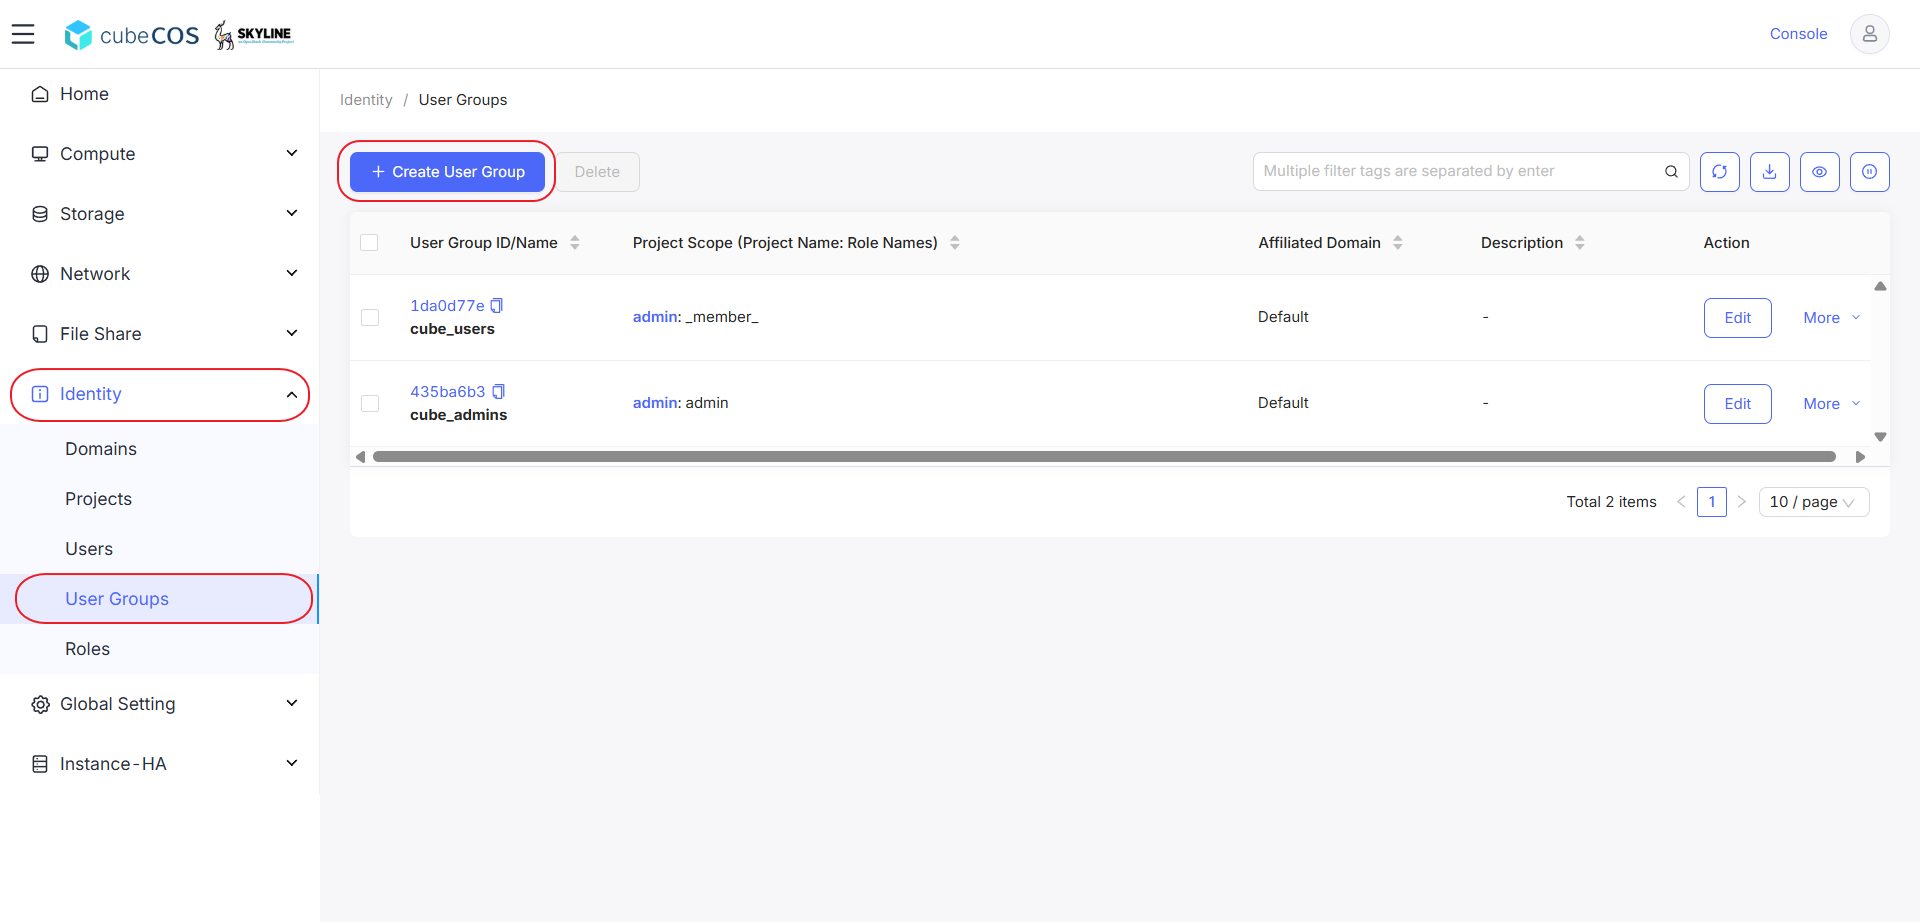
-
Enter
User Group Nameand selectAffiliated Domainfrom its drop down menu, clickOK.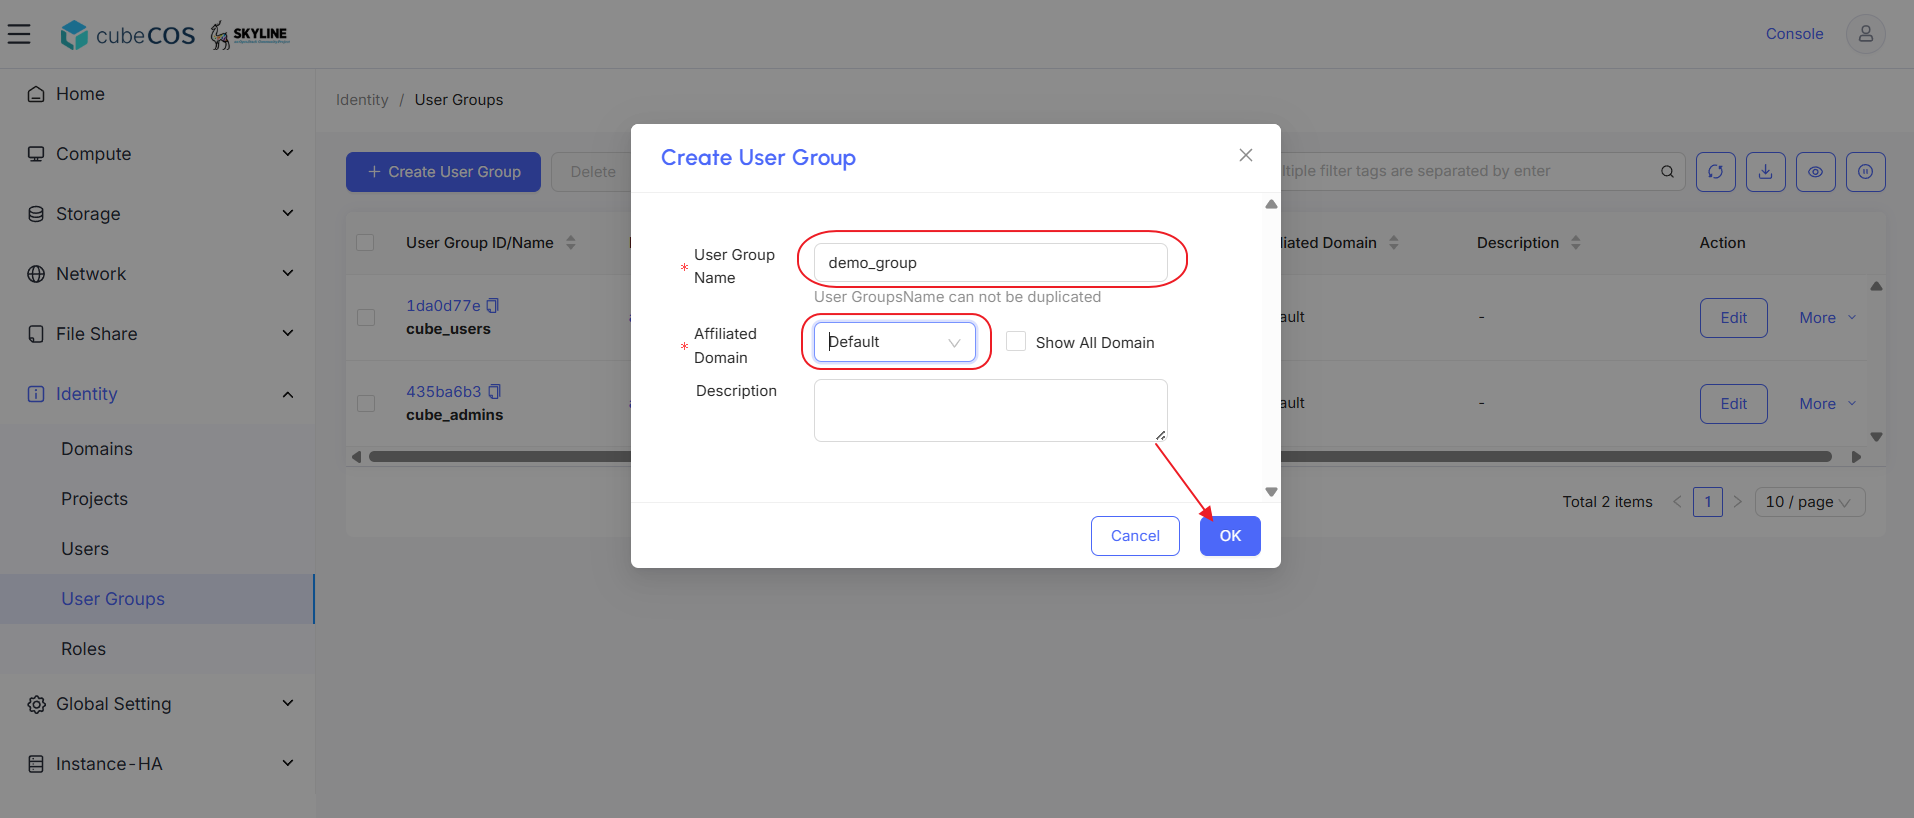
-
Choose your
User Group, then clickMore. SelectManage Userat the drop-down menu after creation.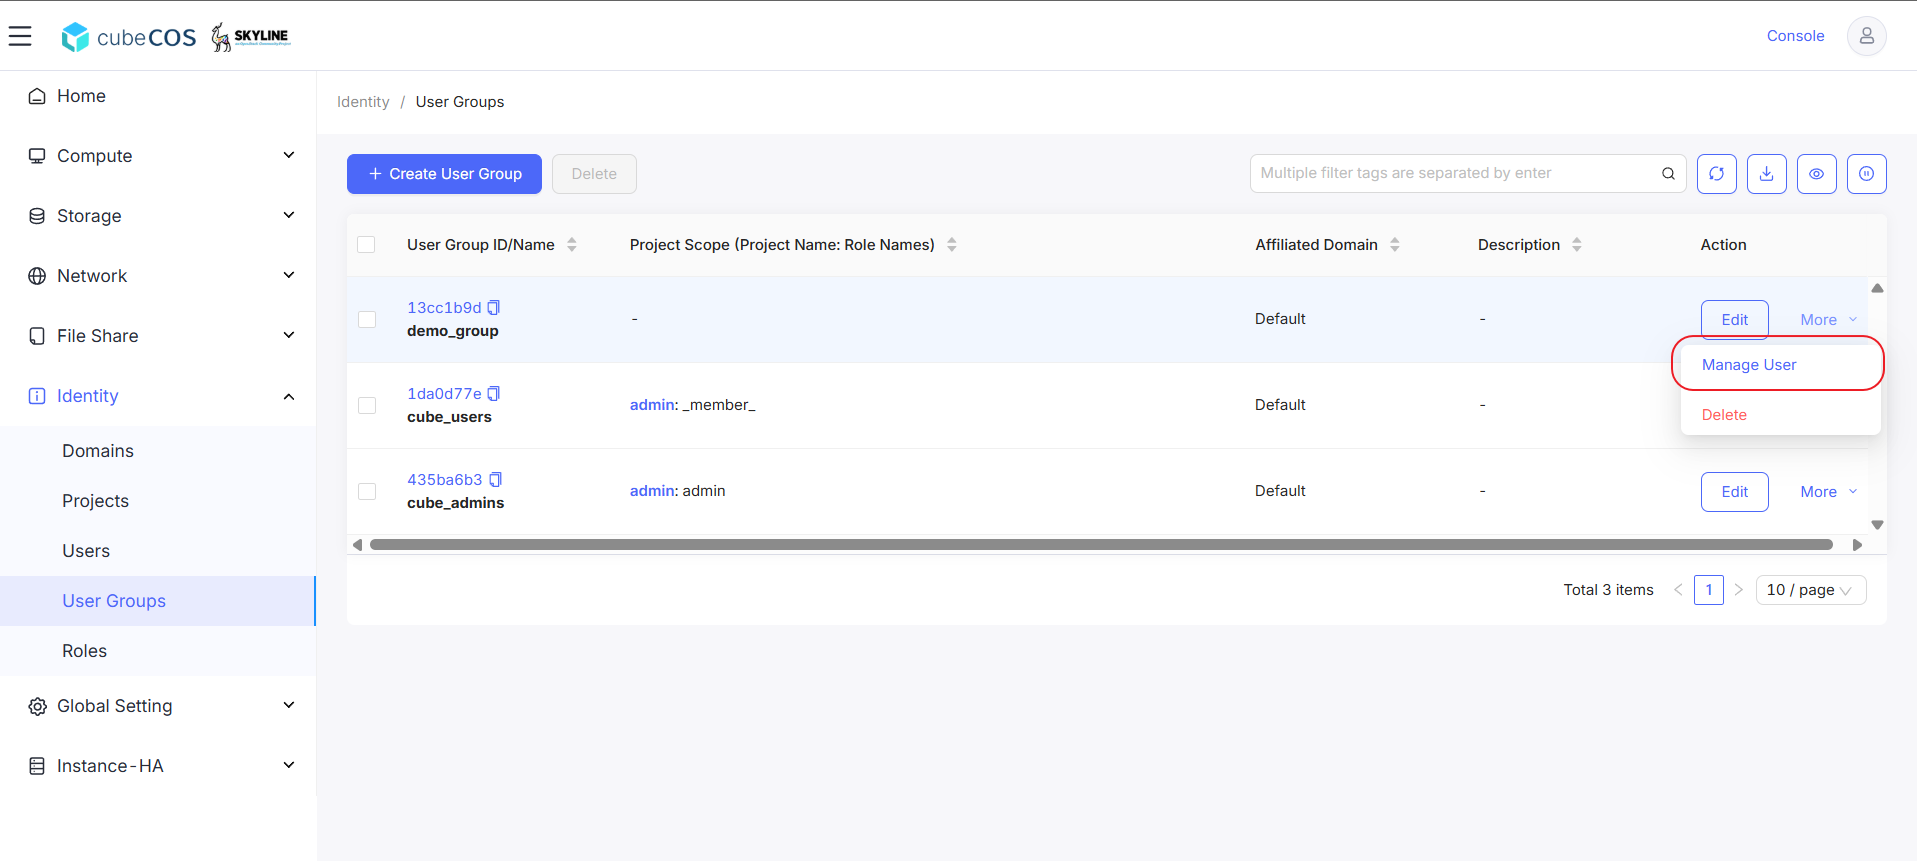
-
Add users to the
Selected listby selecting them from theOptional listand clicking the>icon to move them to theSelected list.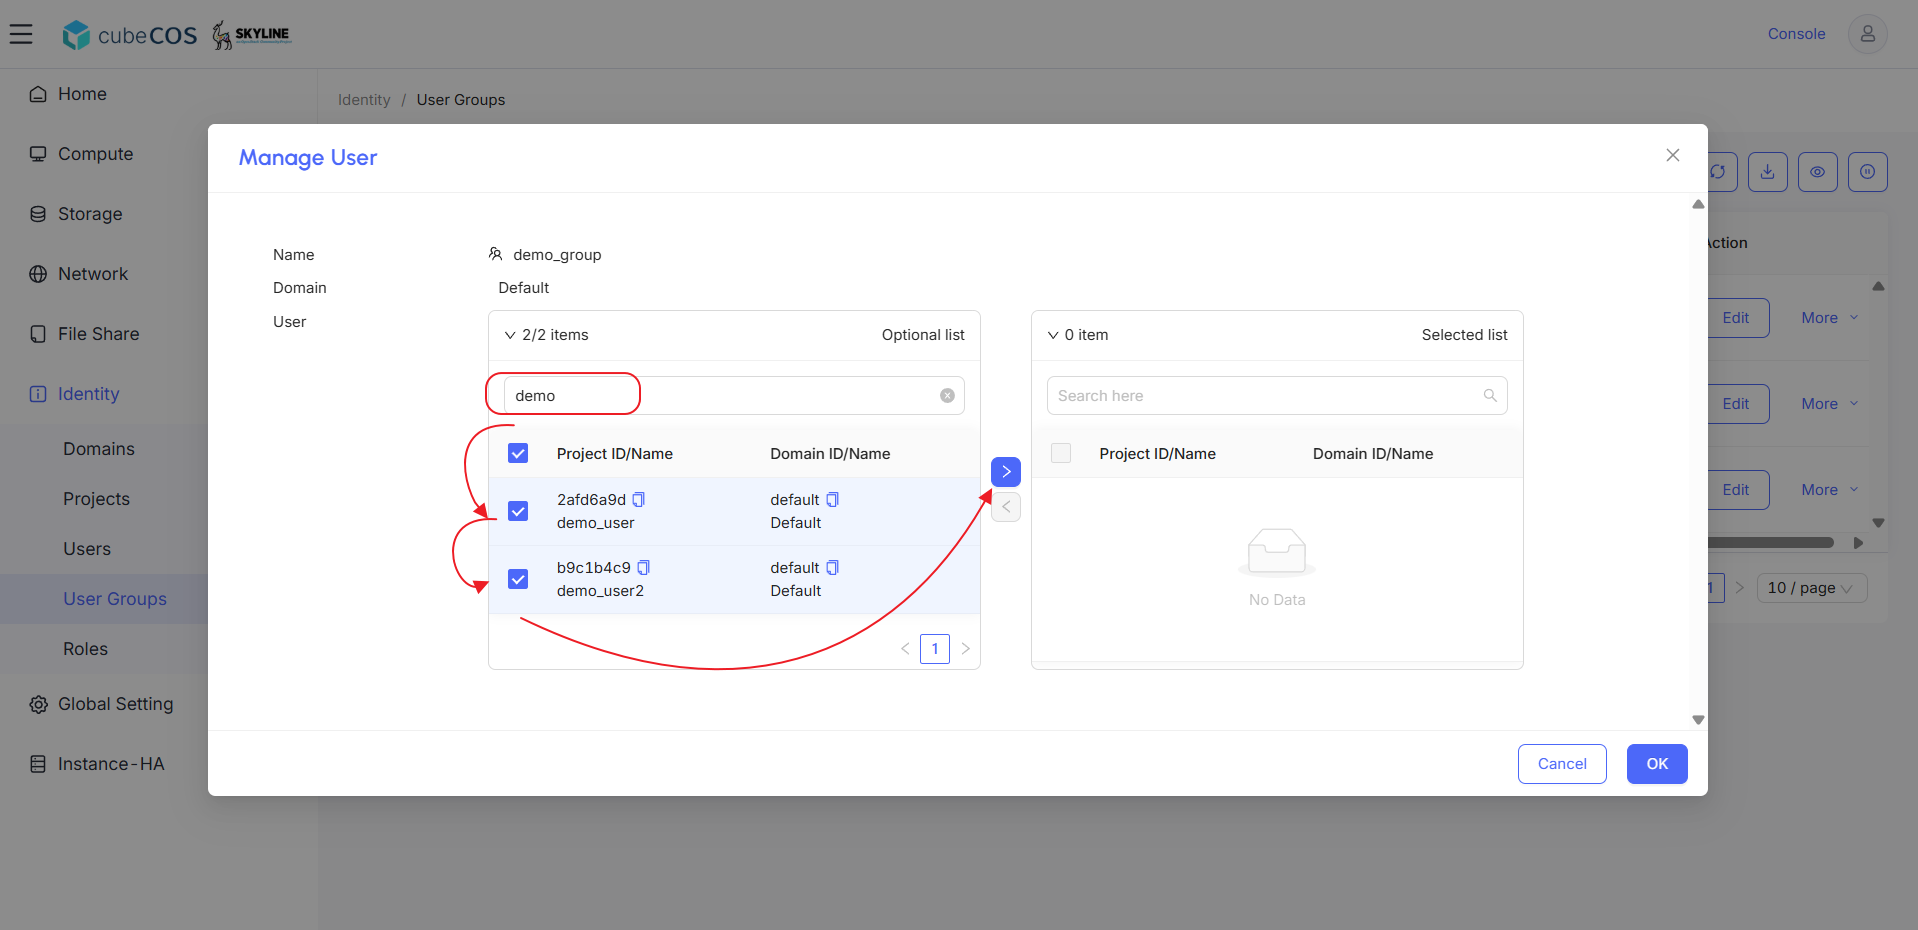
-
Verify users appear in the
Selected list, clickOKto apply.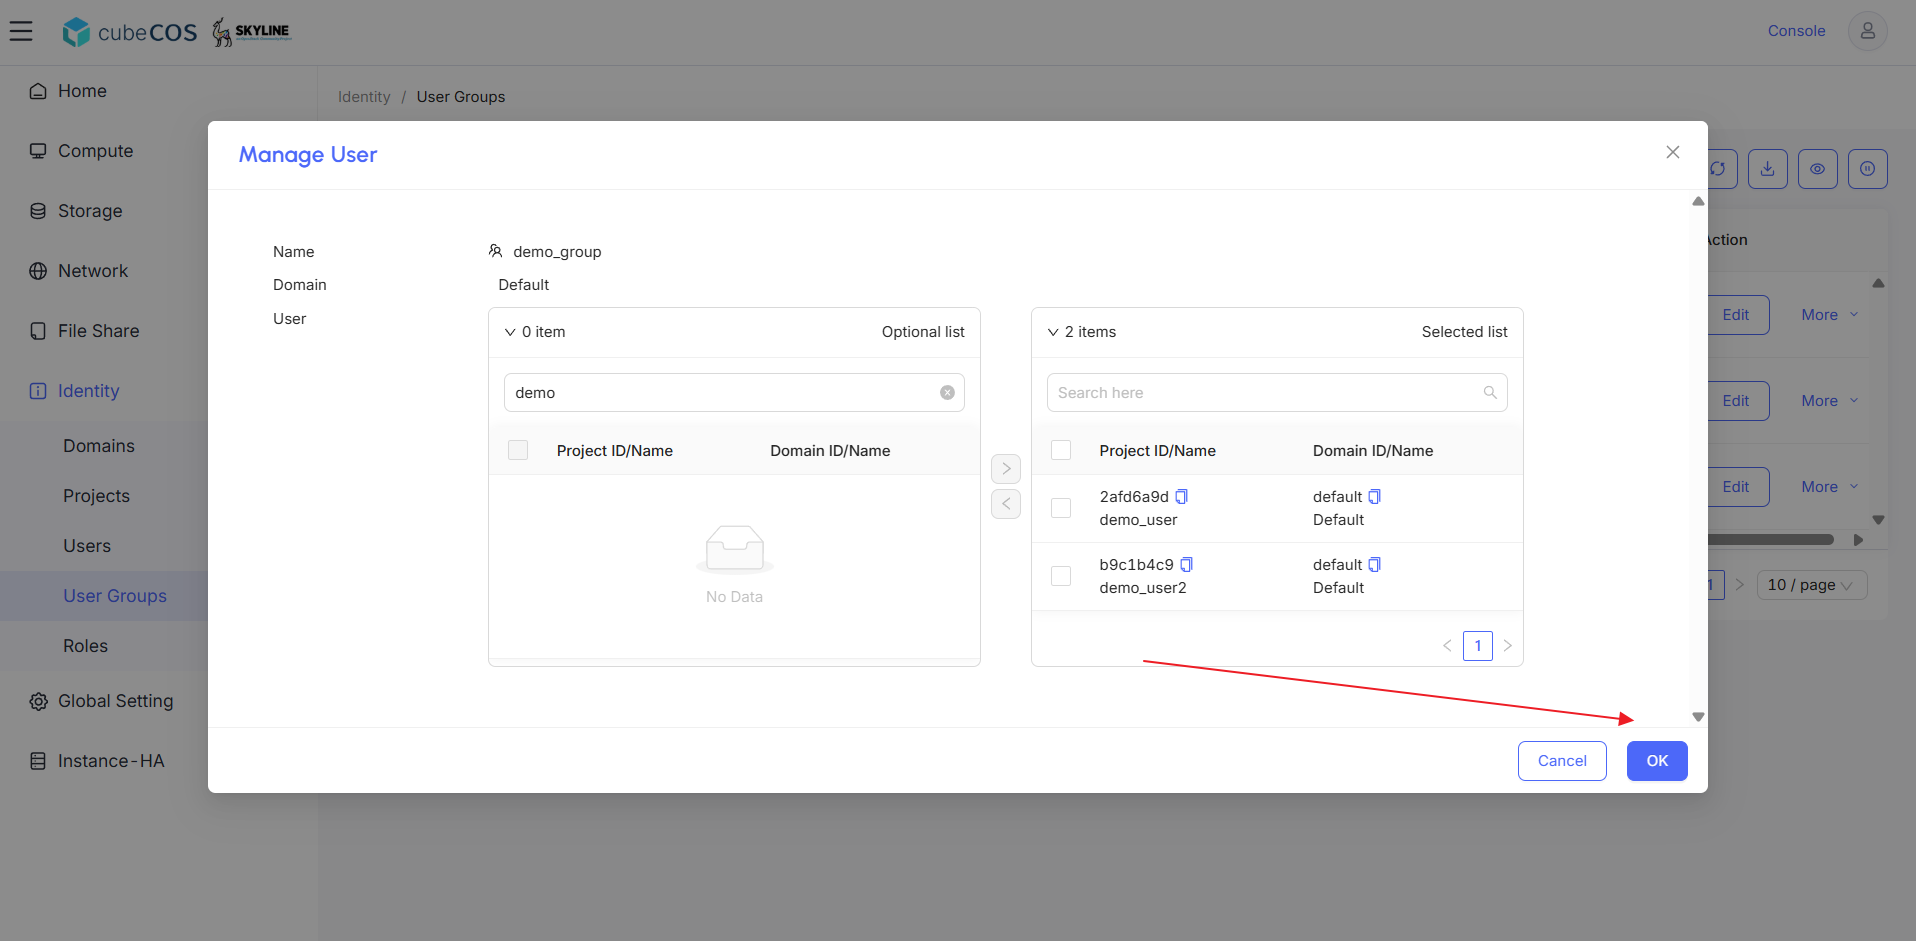
-
Users are now added into the project. Next, assign and mange user permissions within a group.
Assign and manage user permissions within local user groups
-
Follow 1-Access the administration panel to enter the administrator view.
-
Navigate to
Identity > Projects, choose the desired project, then clickMore. SelectManage User Groupfrom the drop-down menu.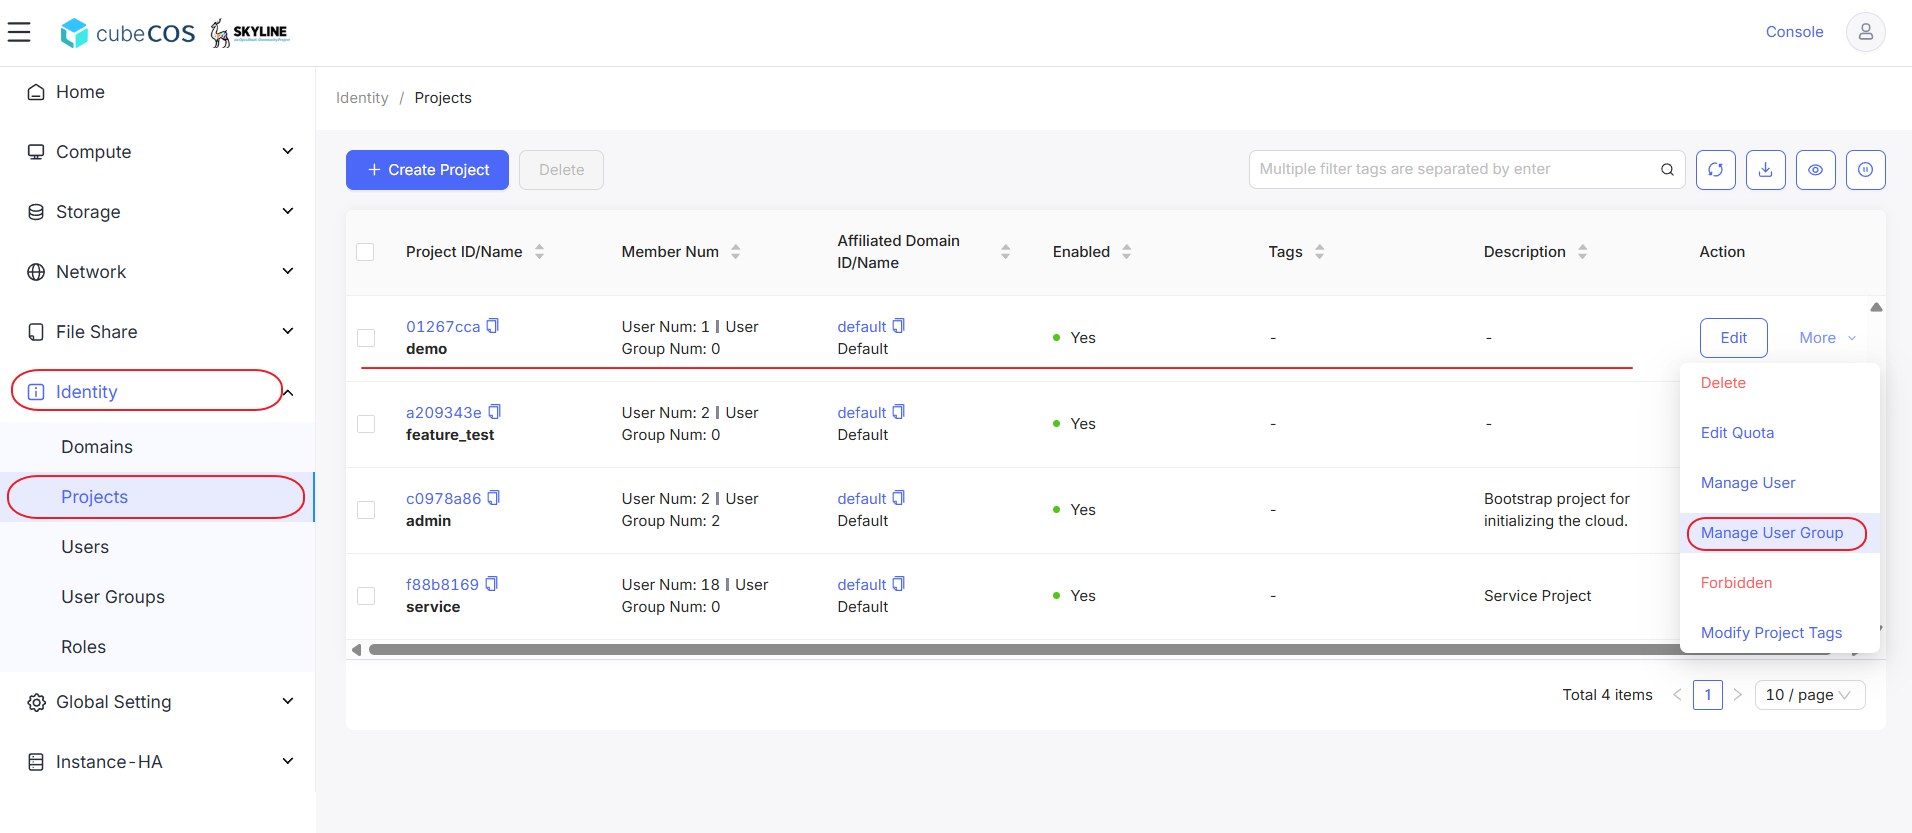
-
To add user groups, select them from the
Optional listand click the>icon to move them to theSelected list.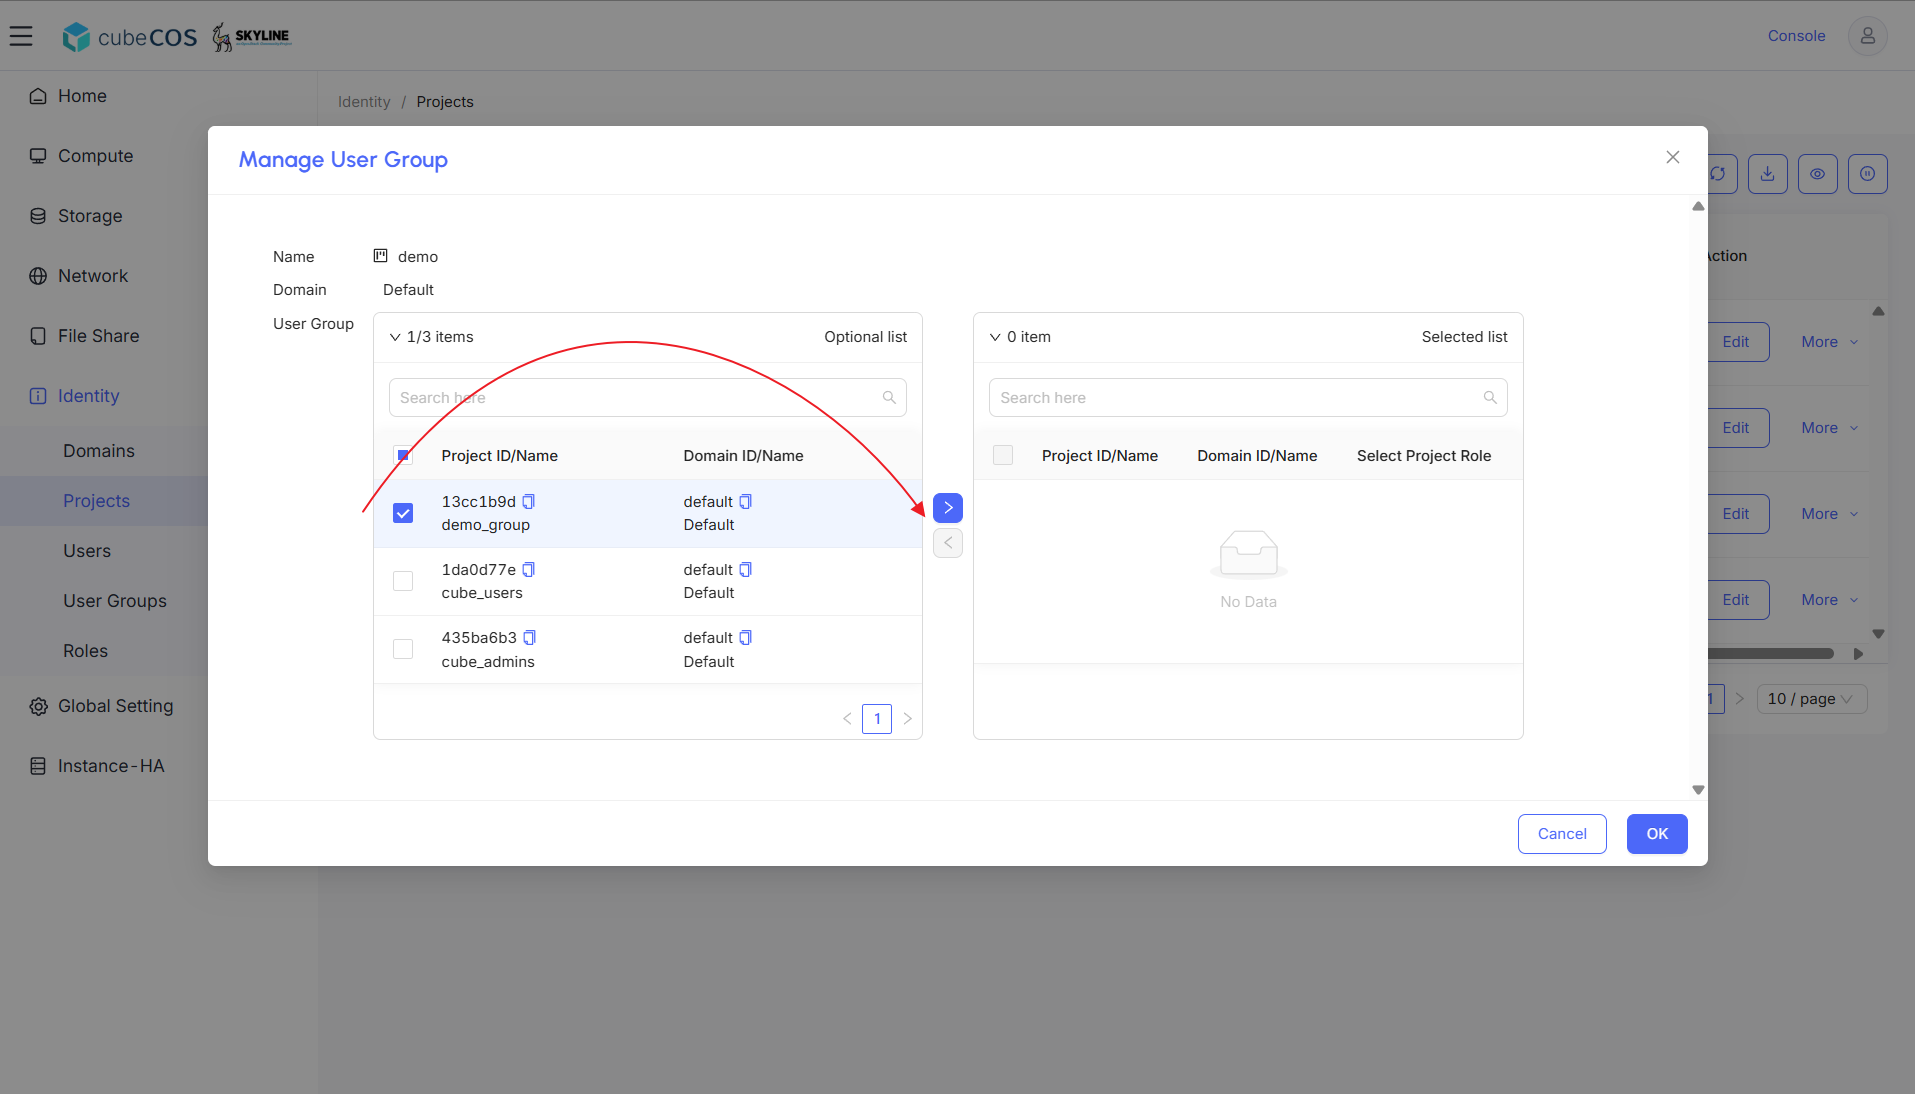
-
In the Selected list, assign
adminand_member_Project Role privileges.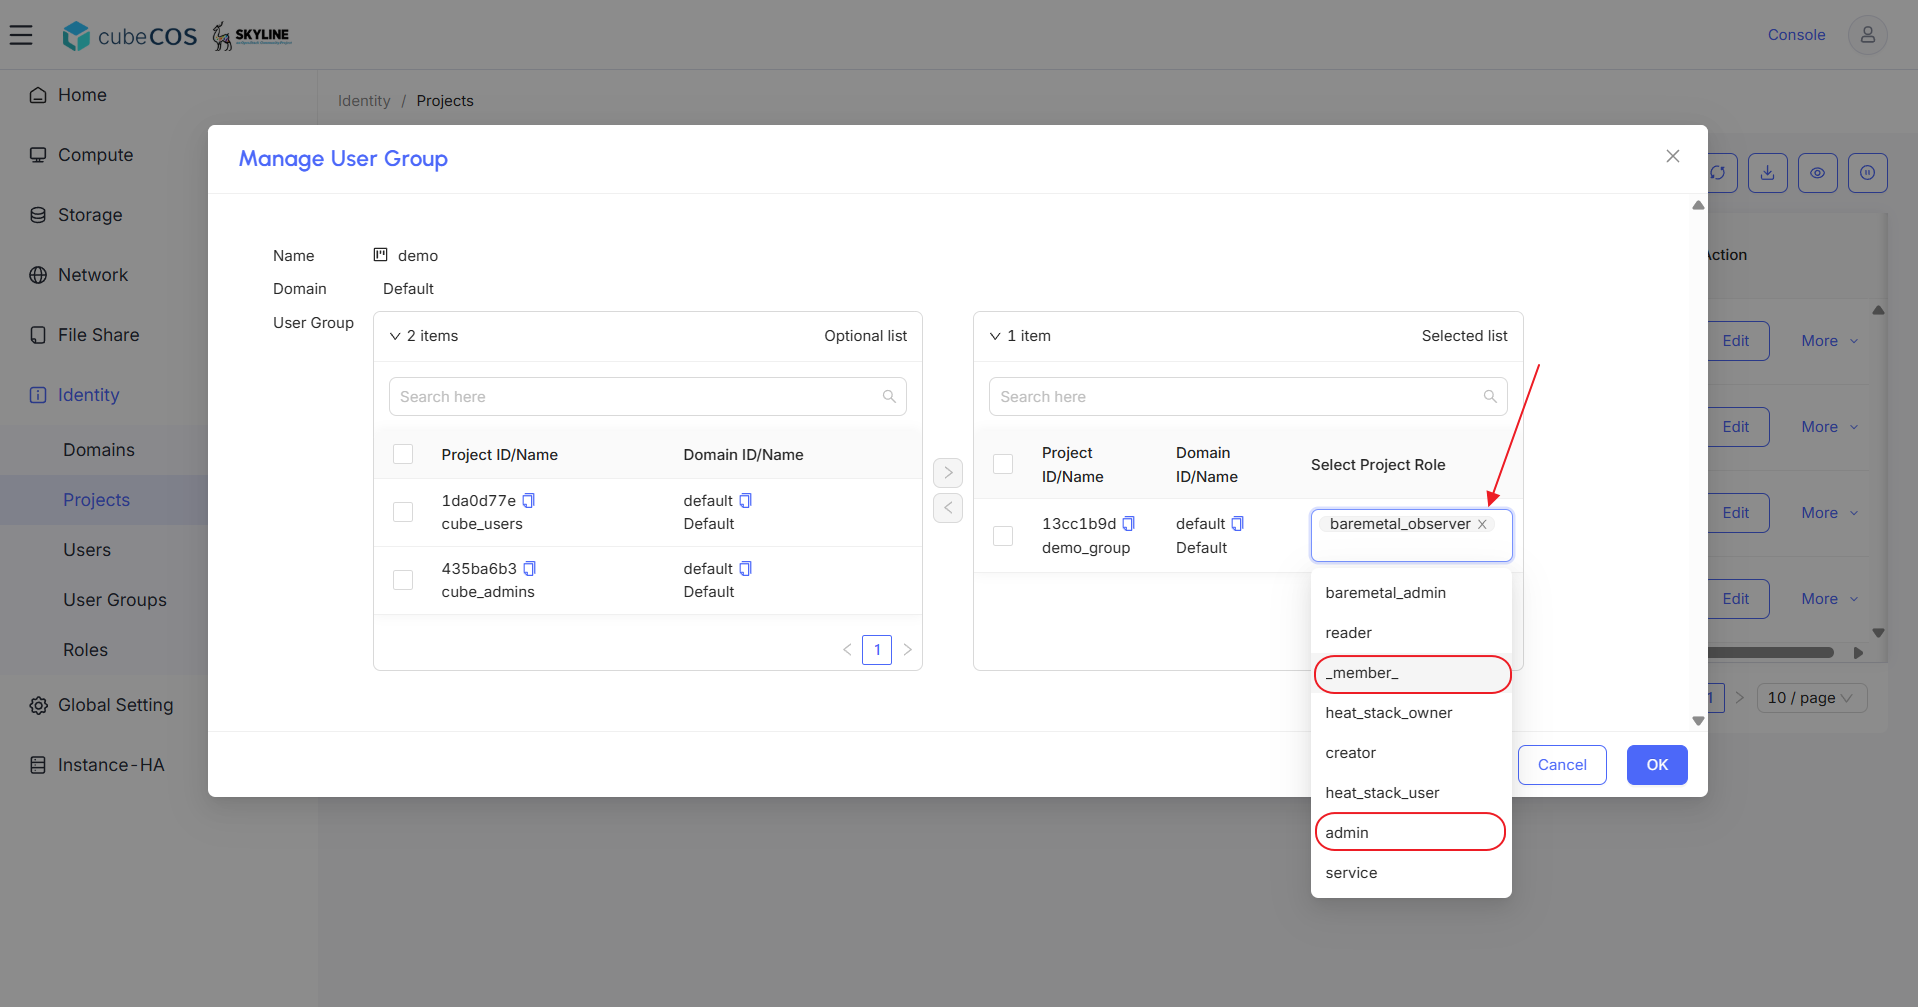
-
After modifying all Project Role privileges in the Selected list, click
OKto apply.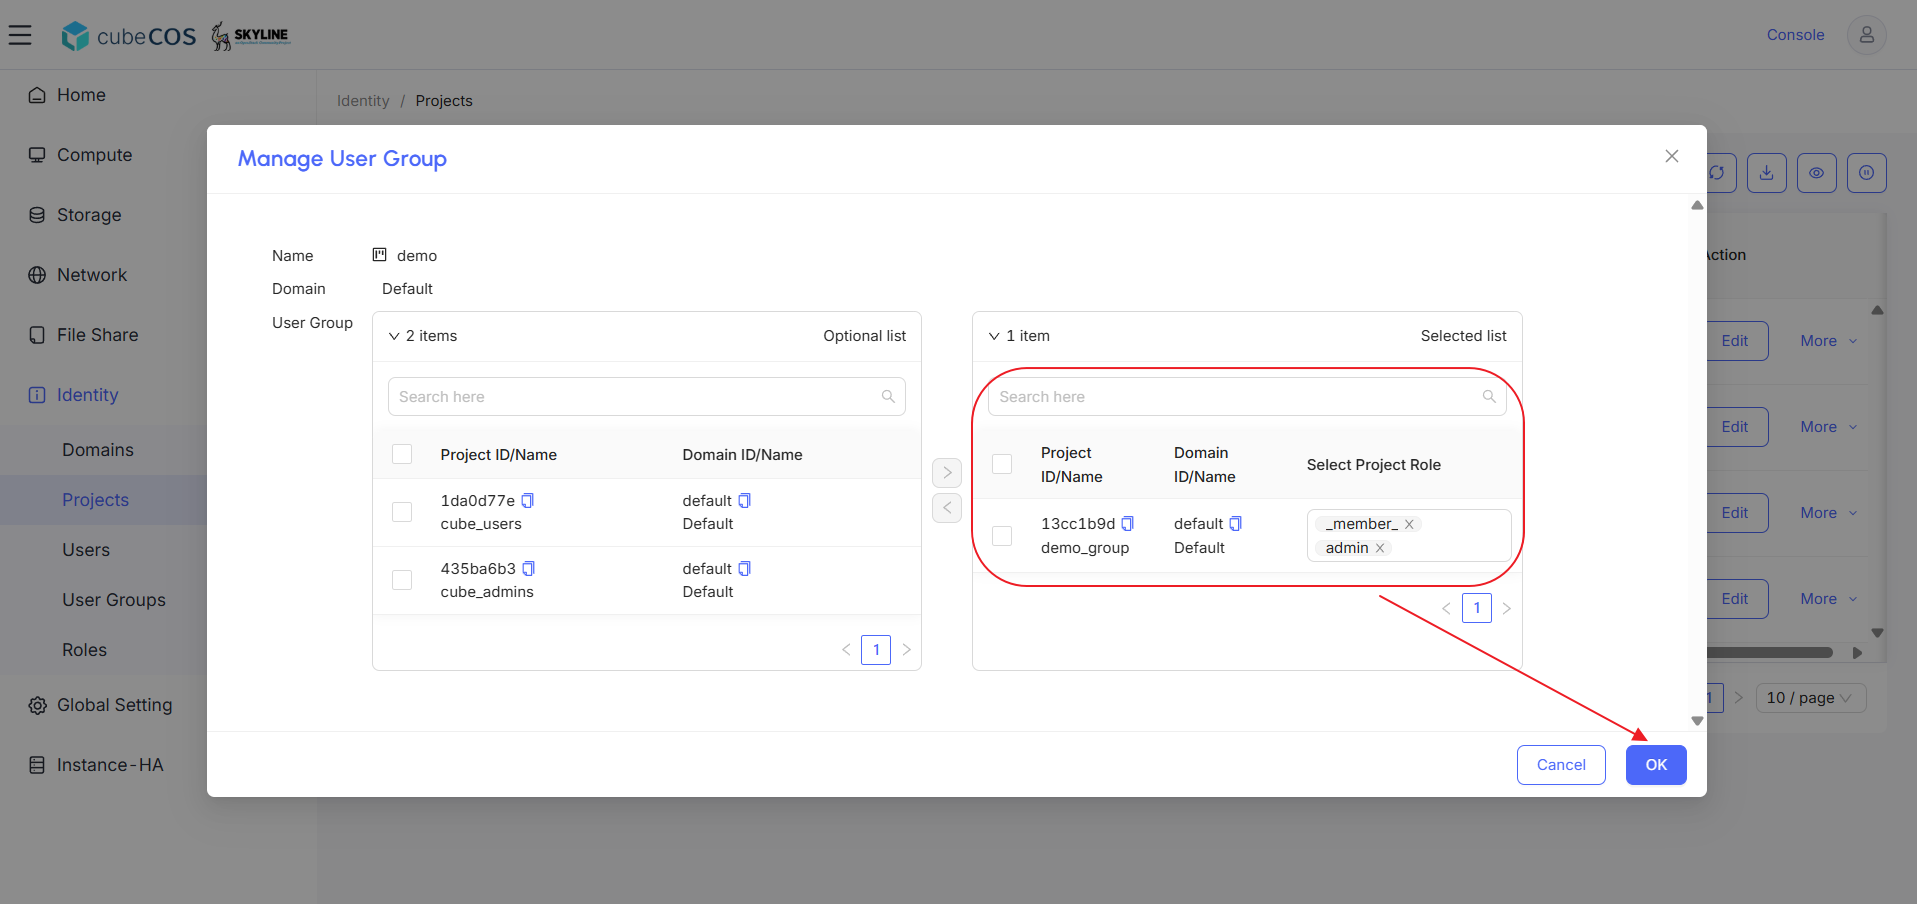
-
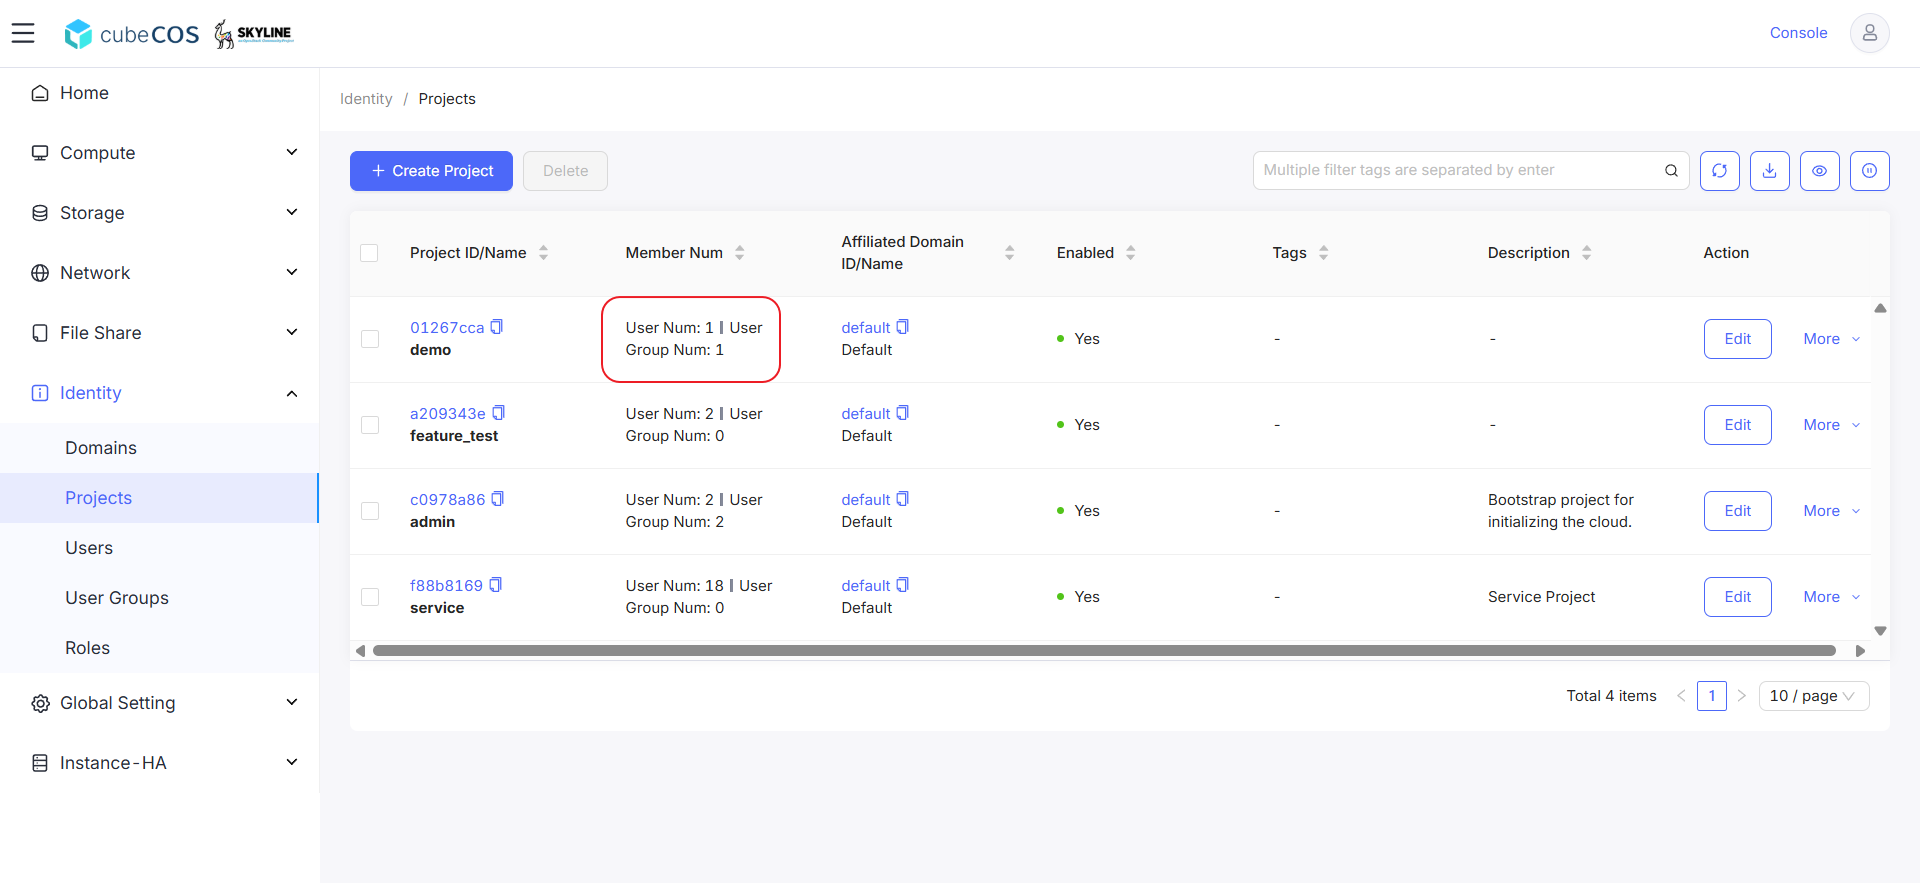
Check the Member Num column to verify the application.