How to create users (Local) CubeCOS
CubeCOS local users overview
This guide explains how to create users directly within the CubeCOS system using the local identity management interface. Local user creation allows administrators to manage user accounts, passwords, and basic profile information without relying on external authentication systems.
When to use Local User Creation:
- For environments without external identity providers
- When you want to manage user credentials locally
- For testing or development environments
Prerequisites
- Administrator access to the CubeCOS dashboard
- Knowledge of user requirements and domain structure
Create local users on CubeCOS
-
Follow 1-Access the administration panel to enter the administrator view.
-
Navigate to
Identity > Usersthen click on+ CREATE USER.
-
Enter the following fields:
- User Name: Specify the username.
- Password: User's password.
- Status: Set user enable/forbidden.
- Real Name: User's real name.
- Email: User's email.
- Phone: User's cellphone.
- Affiliated Domain: Specific domain can be selected through the drop-down menu.
After completing all the fields above, click Confirm to create the user.
info
Password must be 8 to 32 characters long and include at least one uppercase letter, one lowercase letter, one number, and one special character.
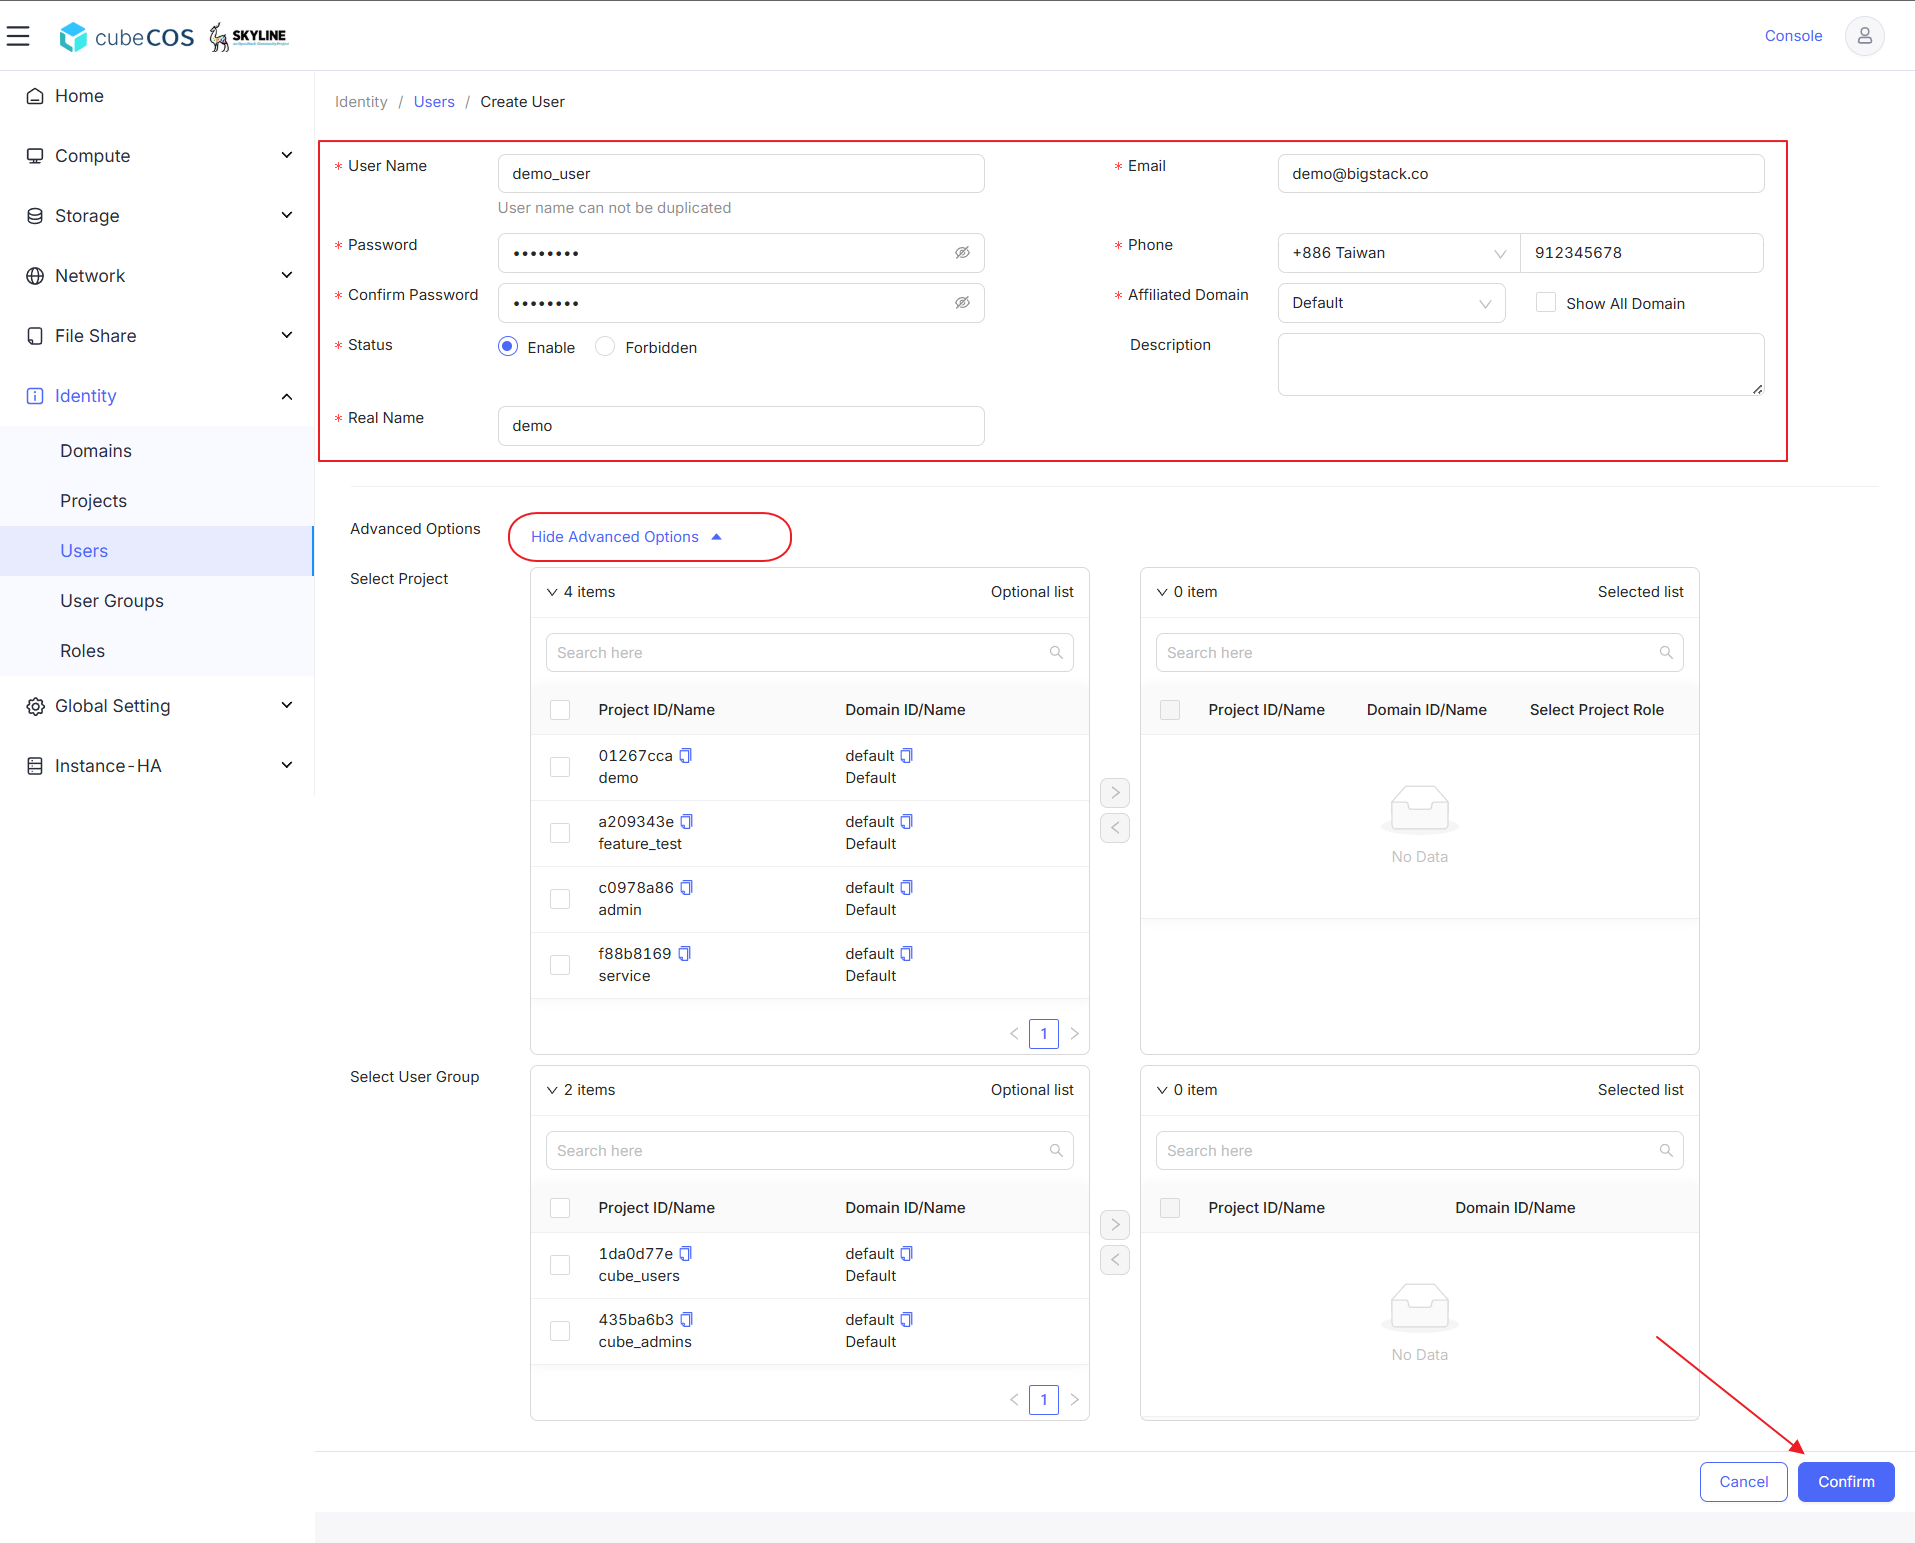
Advanced Optionscan be configured to assign user privilege of specific projects and user groups. This is recommended to be modified by user group feature for better privilege management. See Create User Group (Local)