Create and attach a volume
Use this procedure to provision a new block storage volume. Users can attach Volume to an existing compute instance to provide additional persistent storage.
Create Volume
-
Navigate to
Project > Storage > Volumes>+ CREATE VOLUME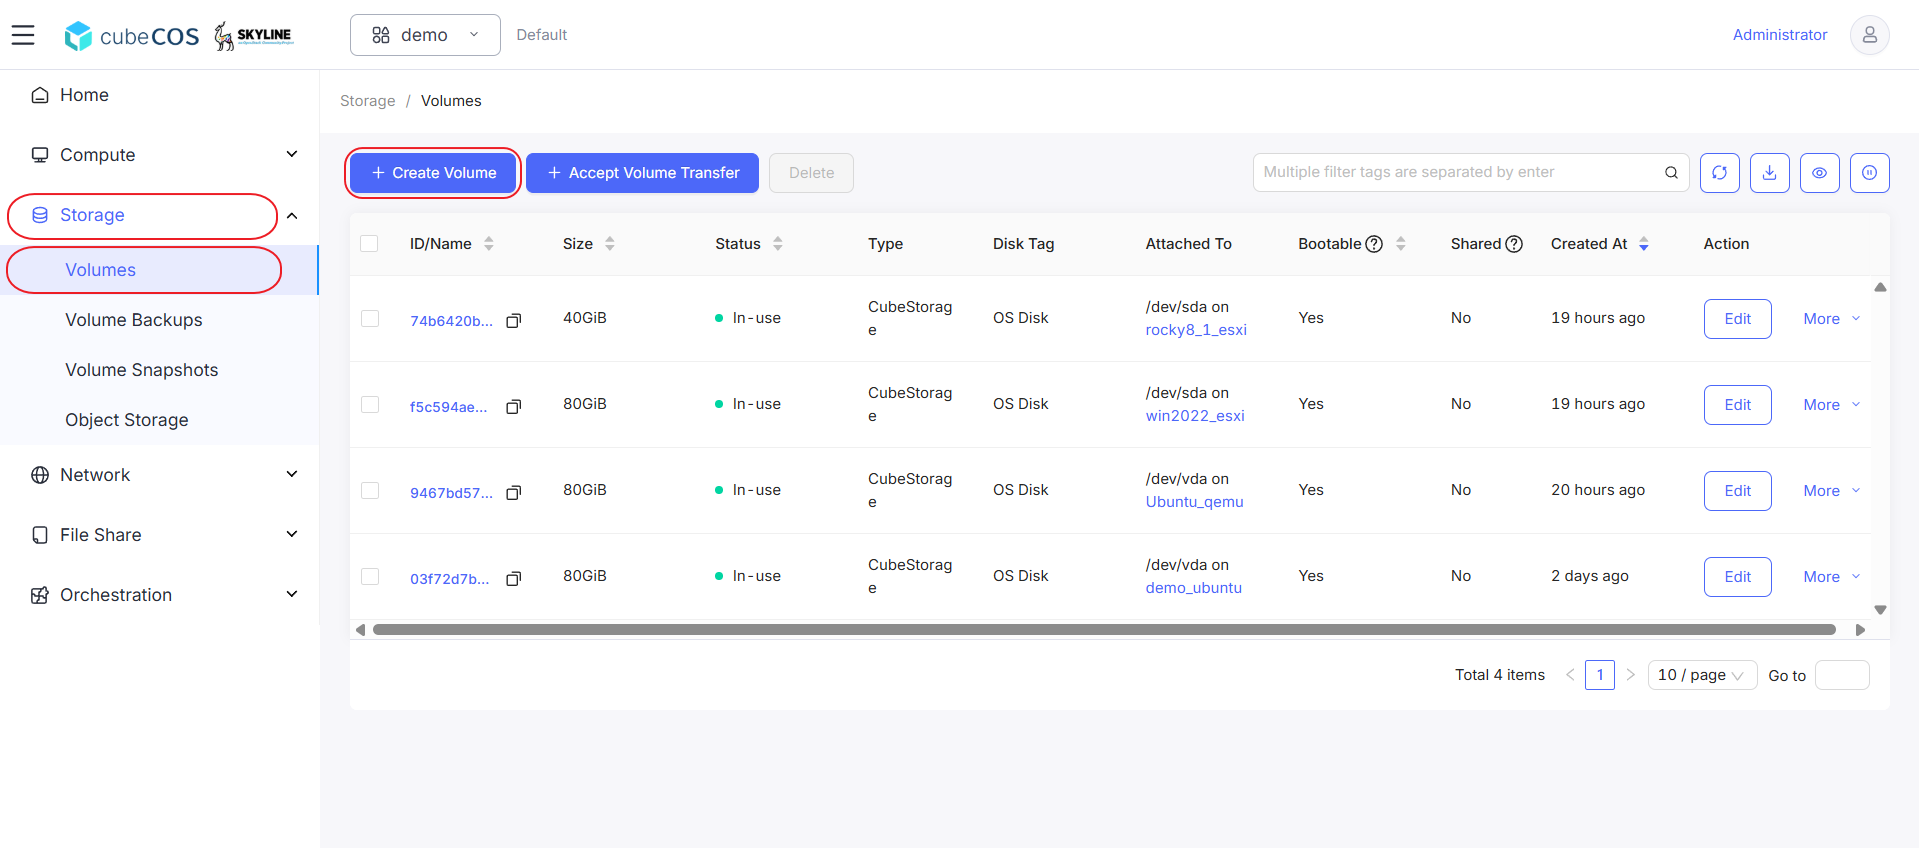
-
For this creation, fill in the following fields:
-
Available Zone: Specify Available Zone of Volume to create in. Choose Not Select unless clearly knowing which to assign.
-
*Data Source Type:
-
*Blank Volume : Create volume without exsist image or volume snapshot.
-
*Image : Create volume with exsist image.
Following attributes :
*Operating System : images categories by its os type and versions, notices that image imported by CLI will all be categorized in Others, can be reassigned its category from
Images. See Import image(CLI) for more.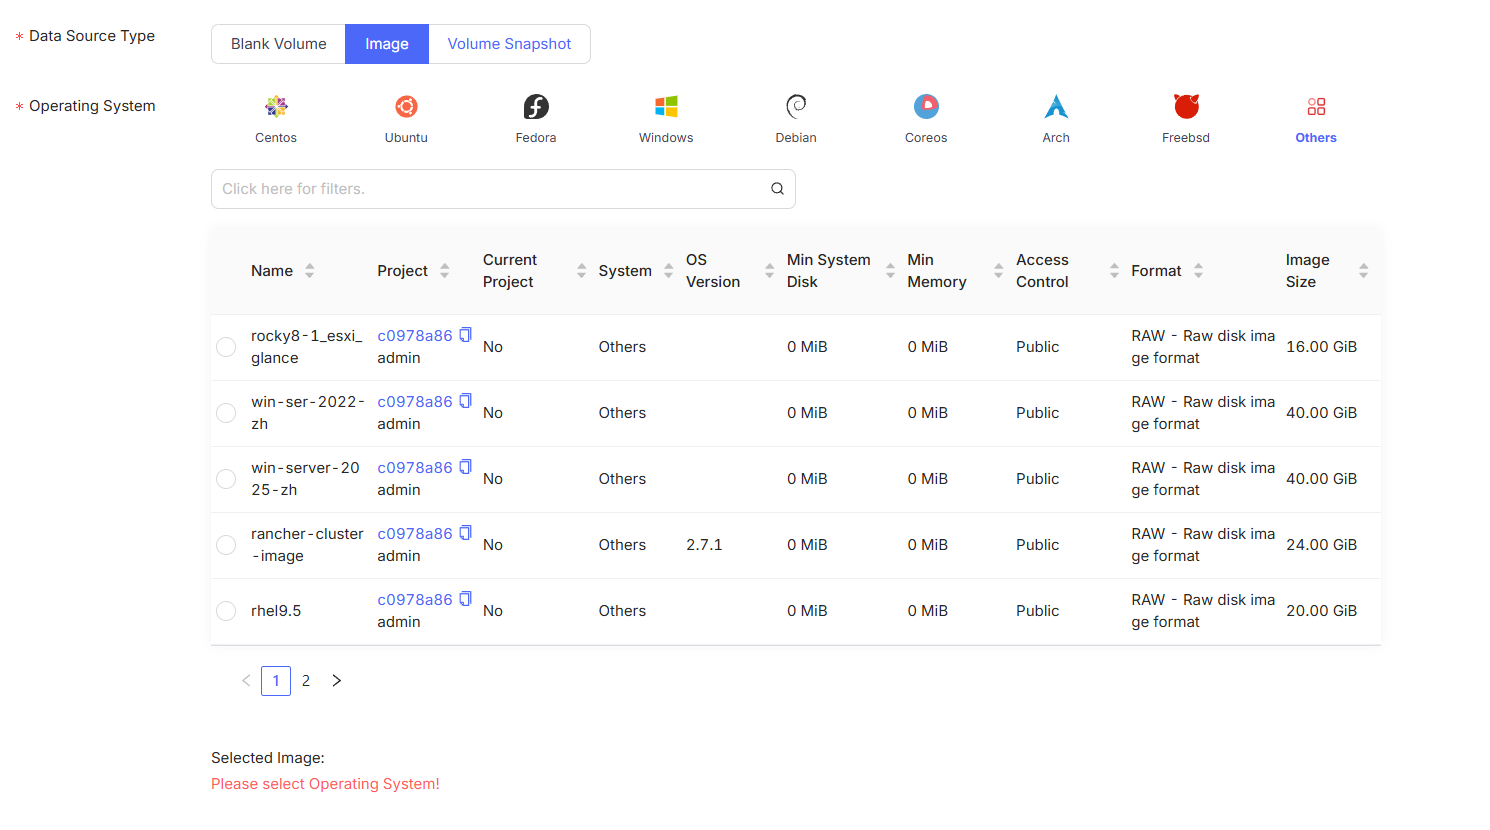
-
*Volume Snapshot : Create volume with exsist volume snapshot.
Following attributes :
*Volume Snapshot : images categories by its os type and versions, notices that image imported by CLI will all be categorized in Others, can be reassigned its category from
Images. See Volume Snapshots for more.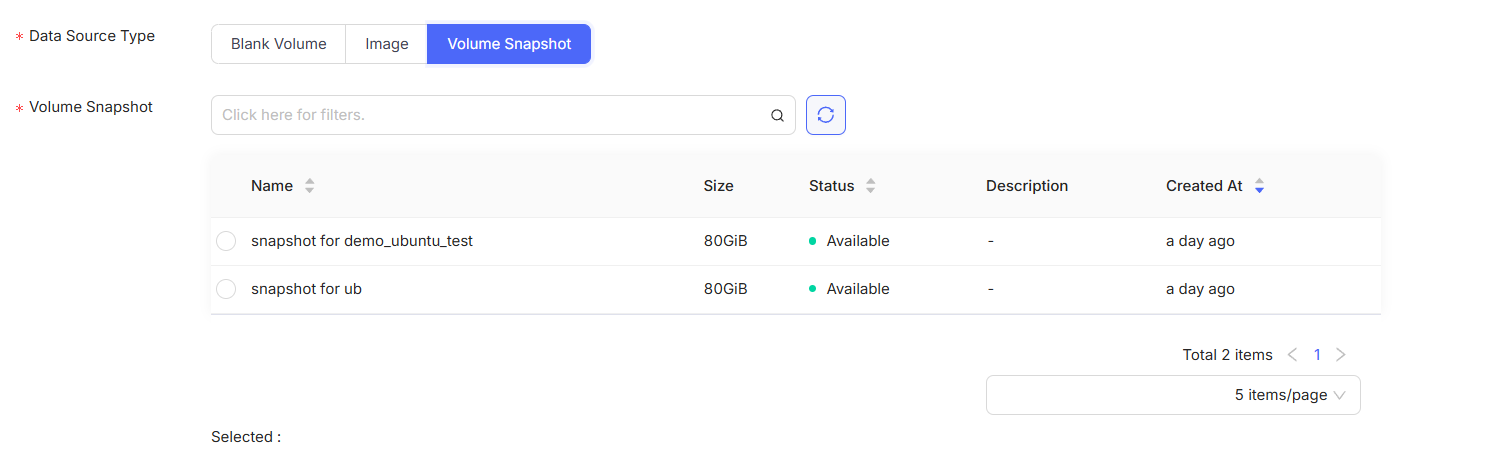
-
-
*Capacity (GiB): Set capacity of the volume (GiB, minimum 1).
-
*Name : Input desired name of the volume showing on dashboard.
After filling all fields above, click
Confirmto apply user creation.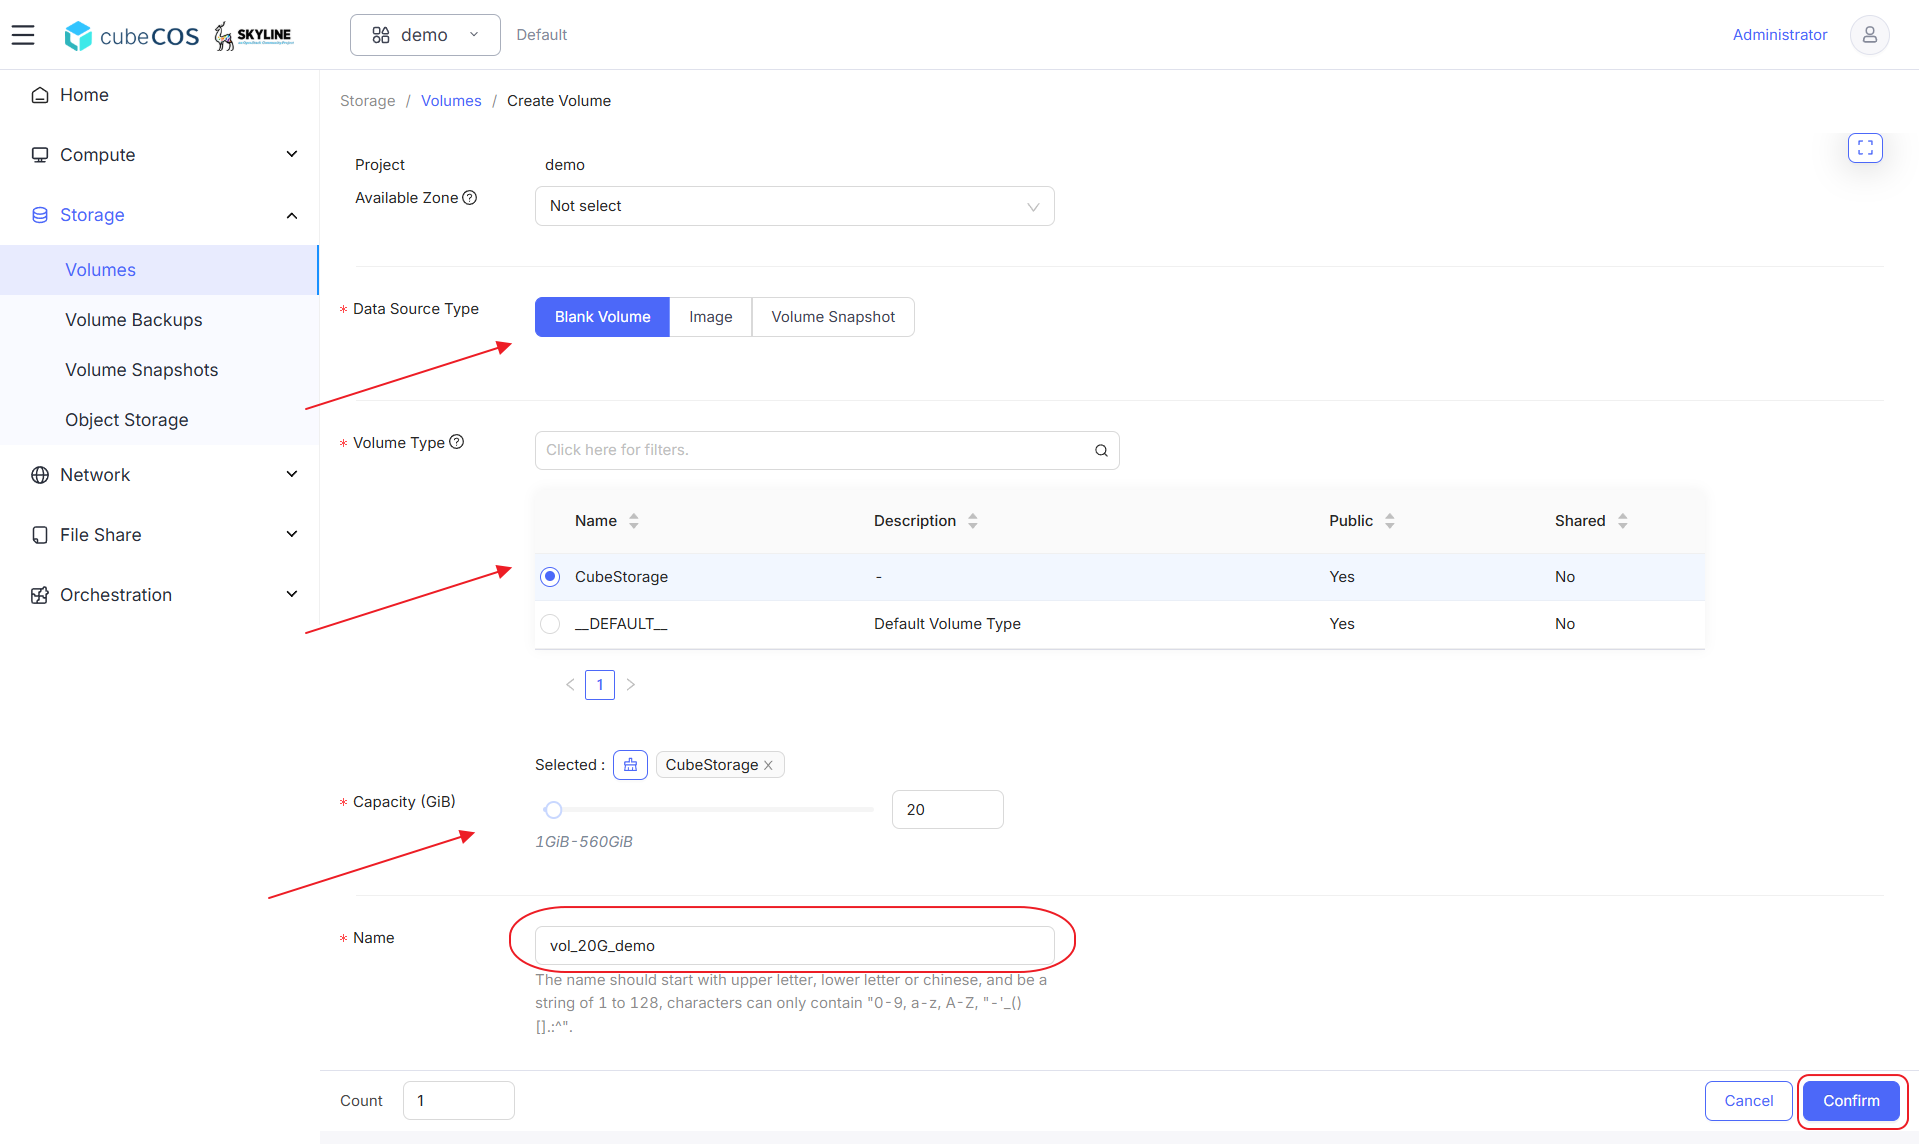
-
-
Use the dashboard to verify the Volume creation.
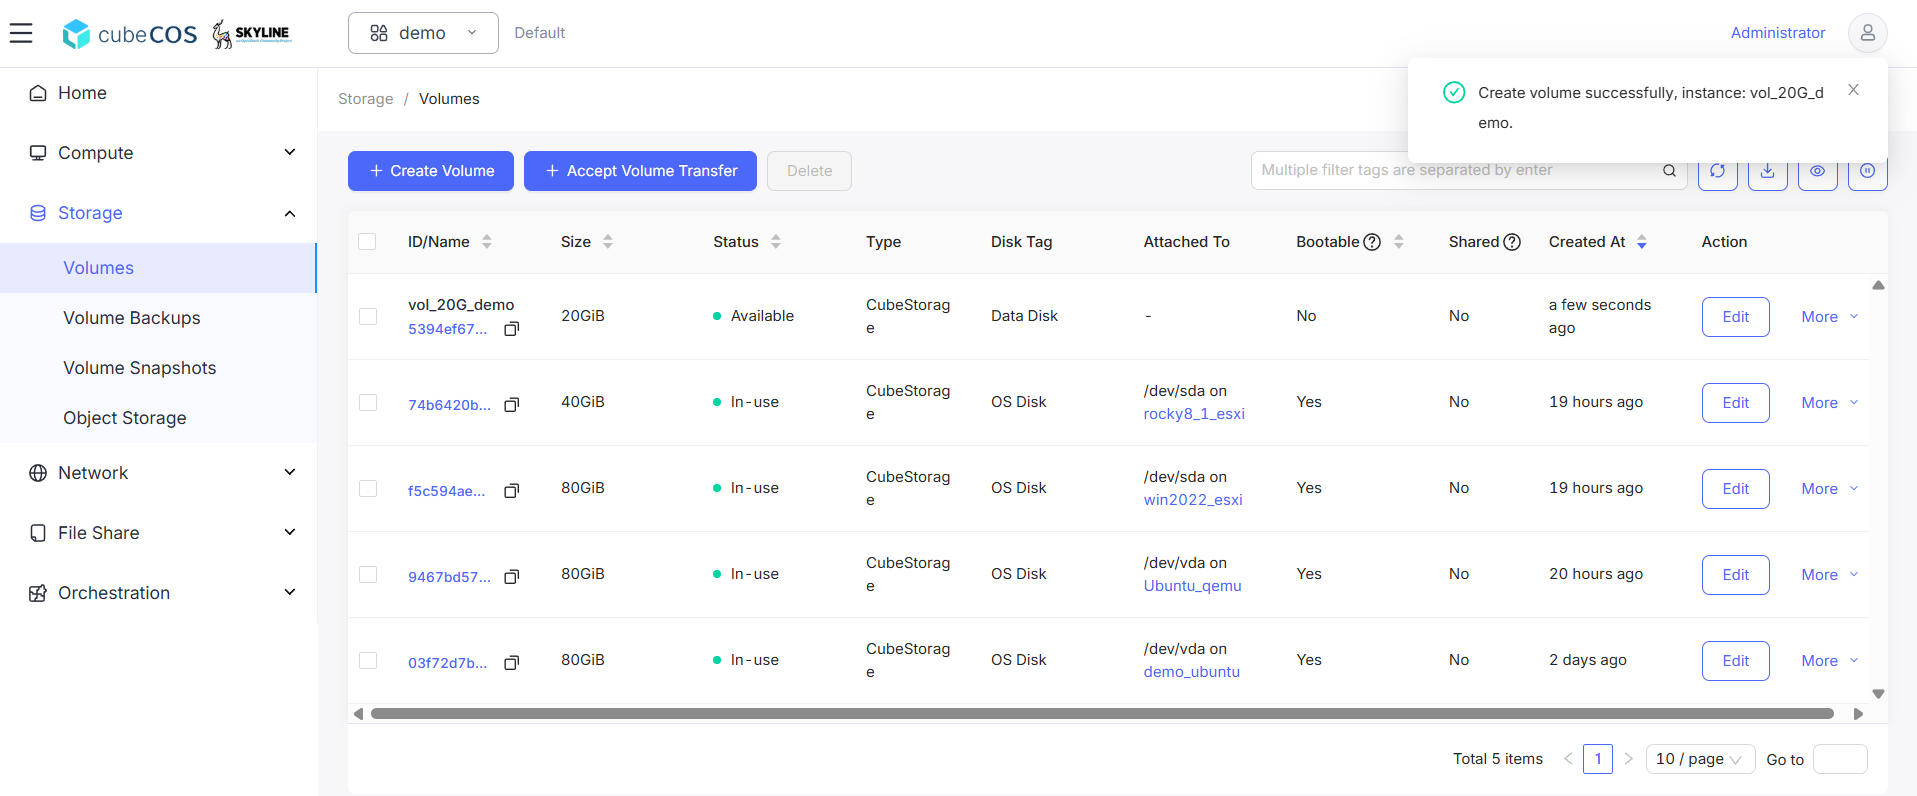
Attach Volume
-
Navigate to
Project > Compute > Instances, choose desired project, than hover toMore.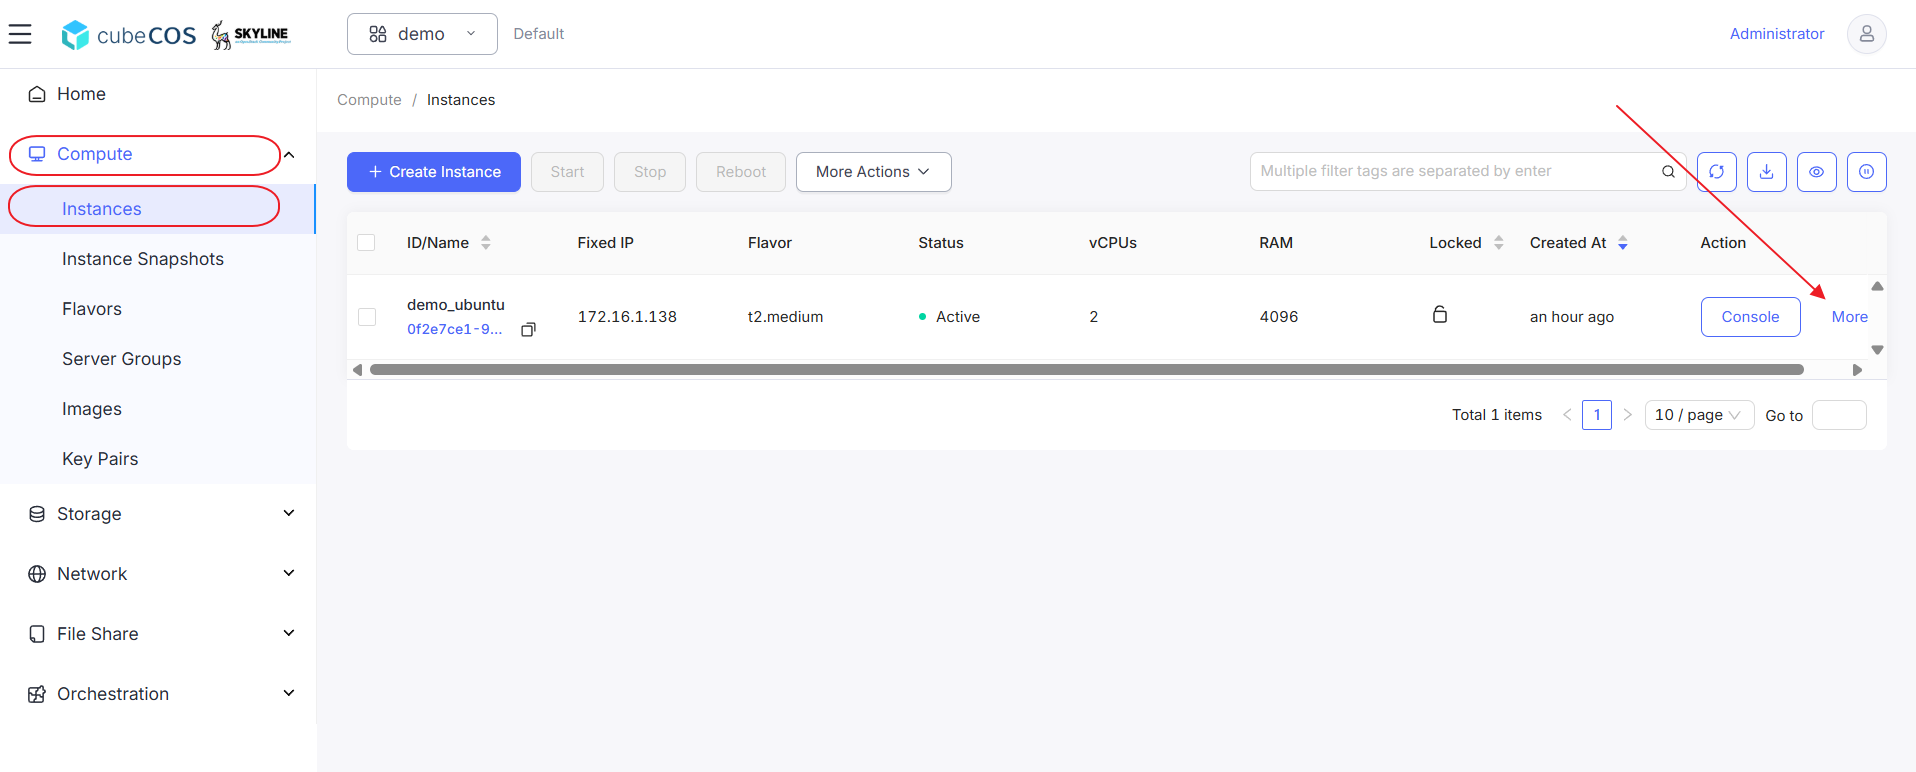
-
Hover to
Related Resourcesat the drop down menu, then clickAttach Volumefrom drop down expended.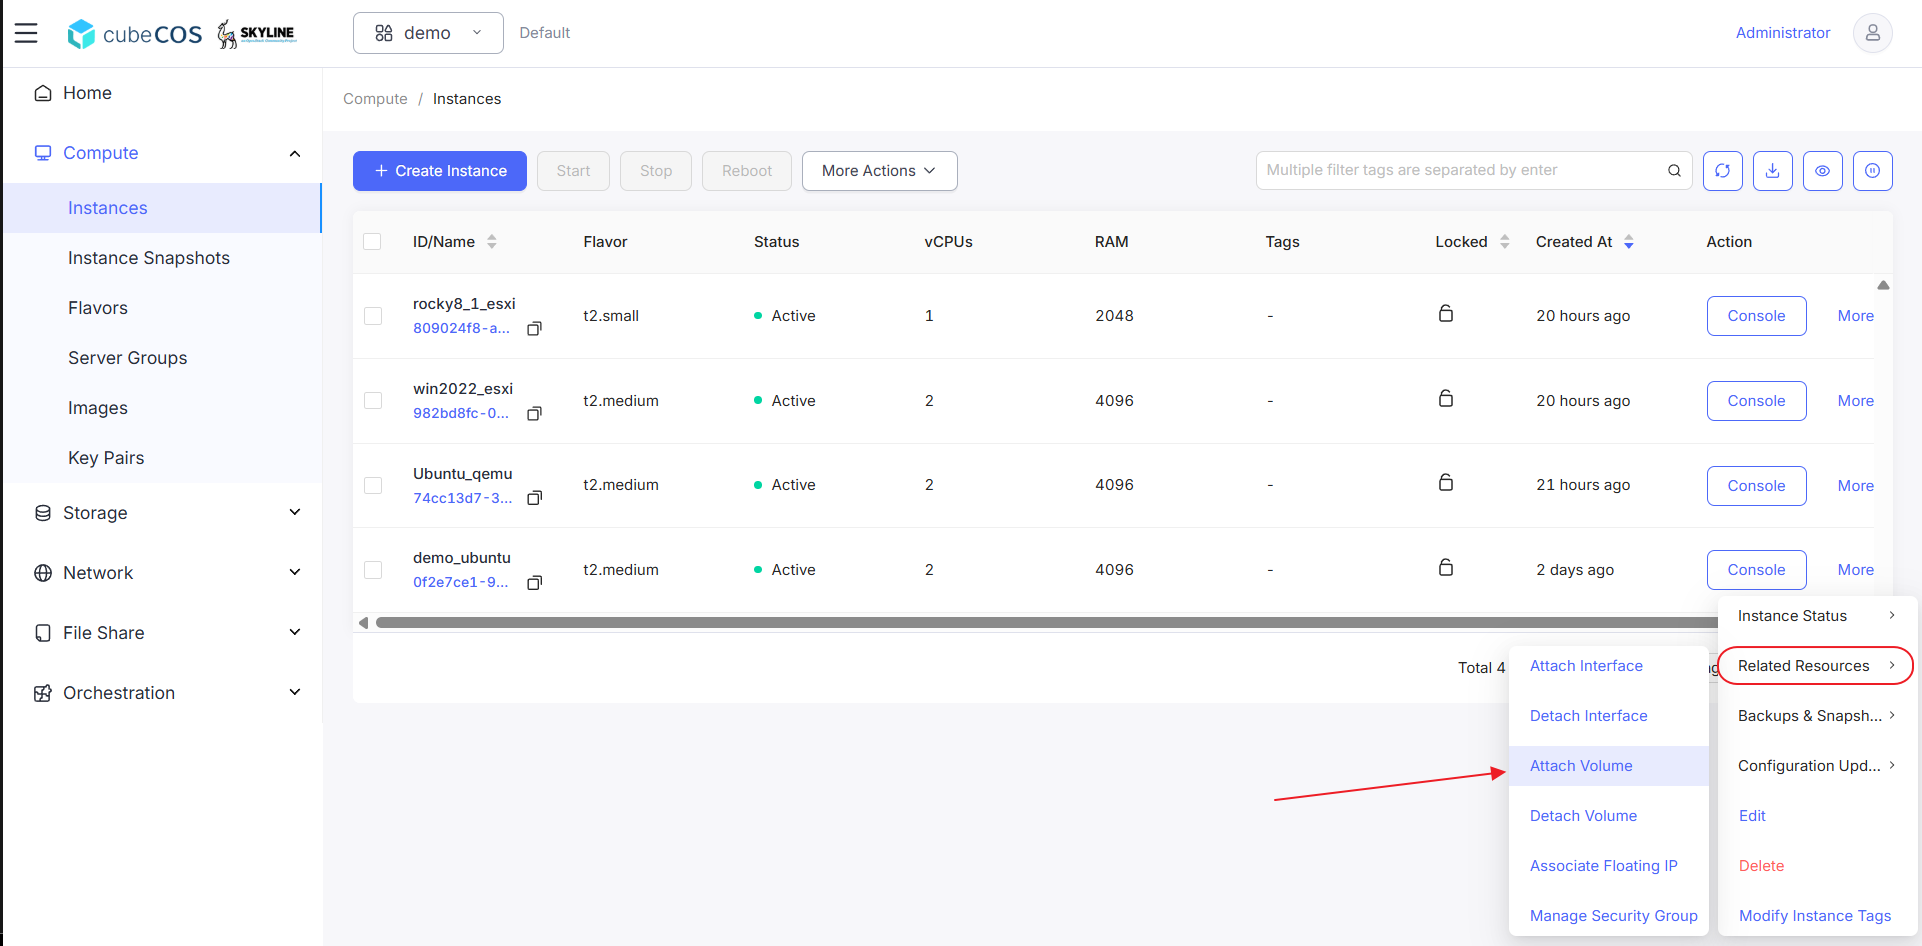
-
Select Volumes. Click
OKbutton to proceed.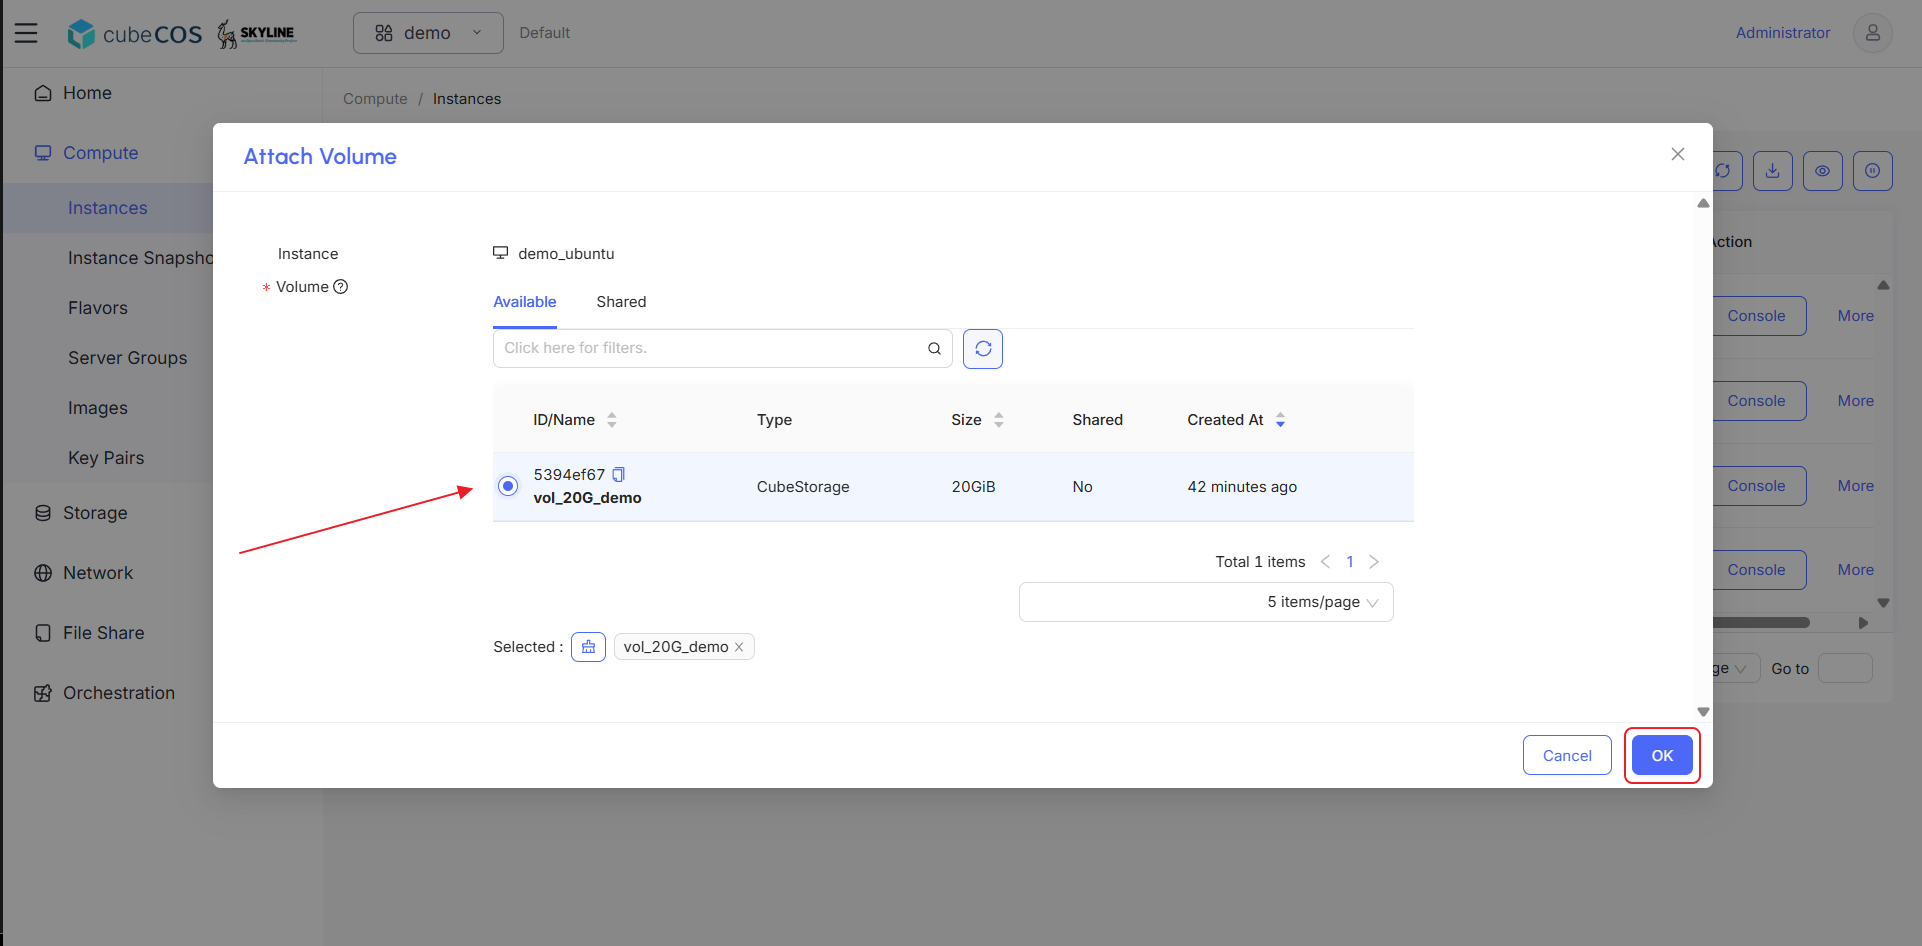
-
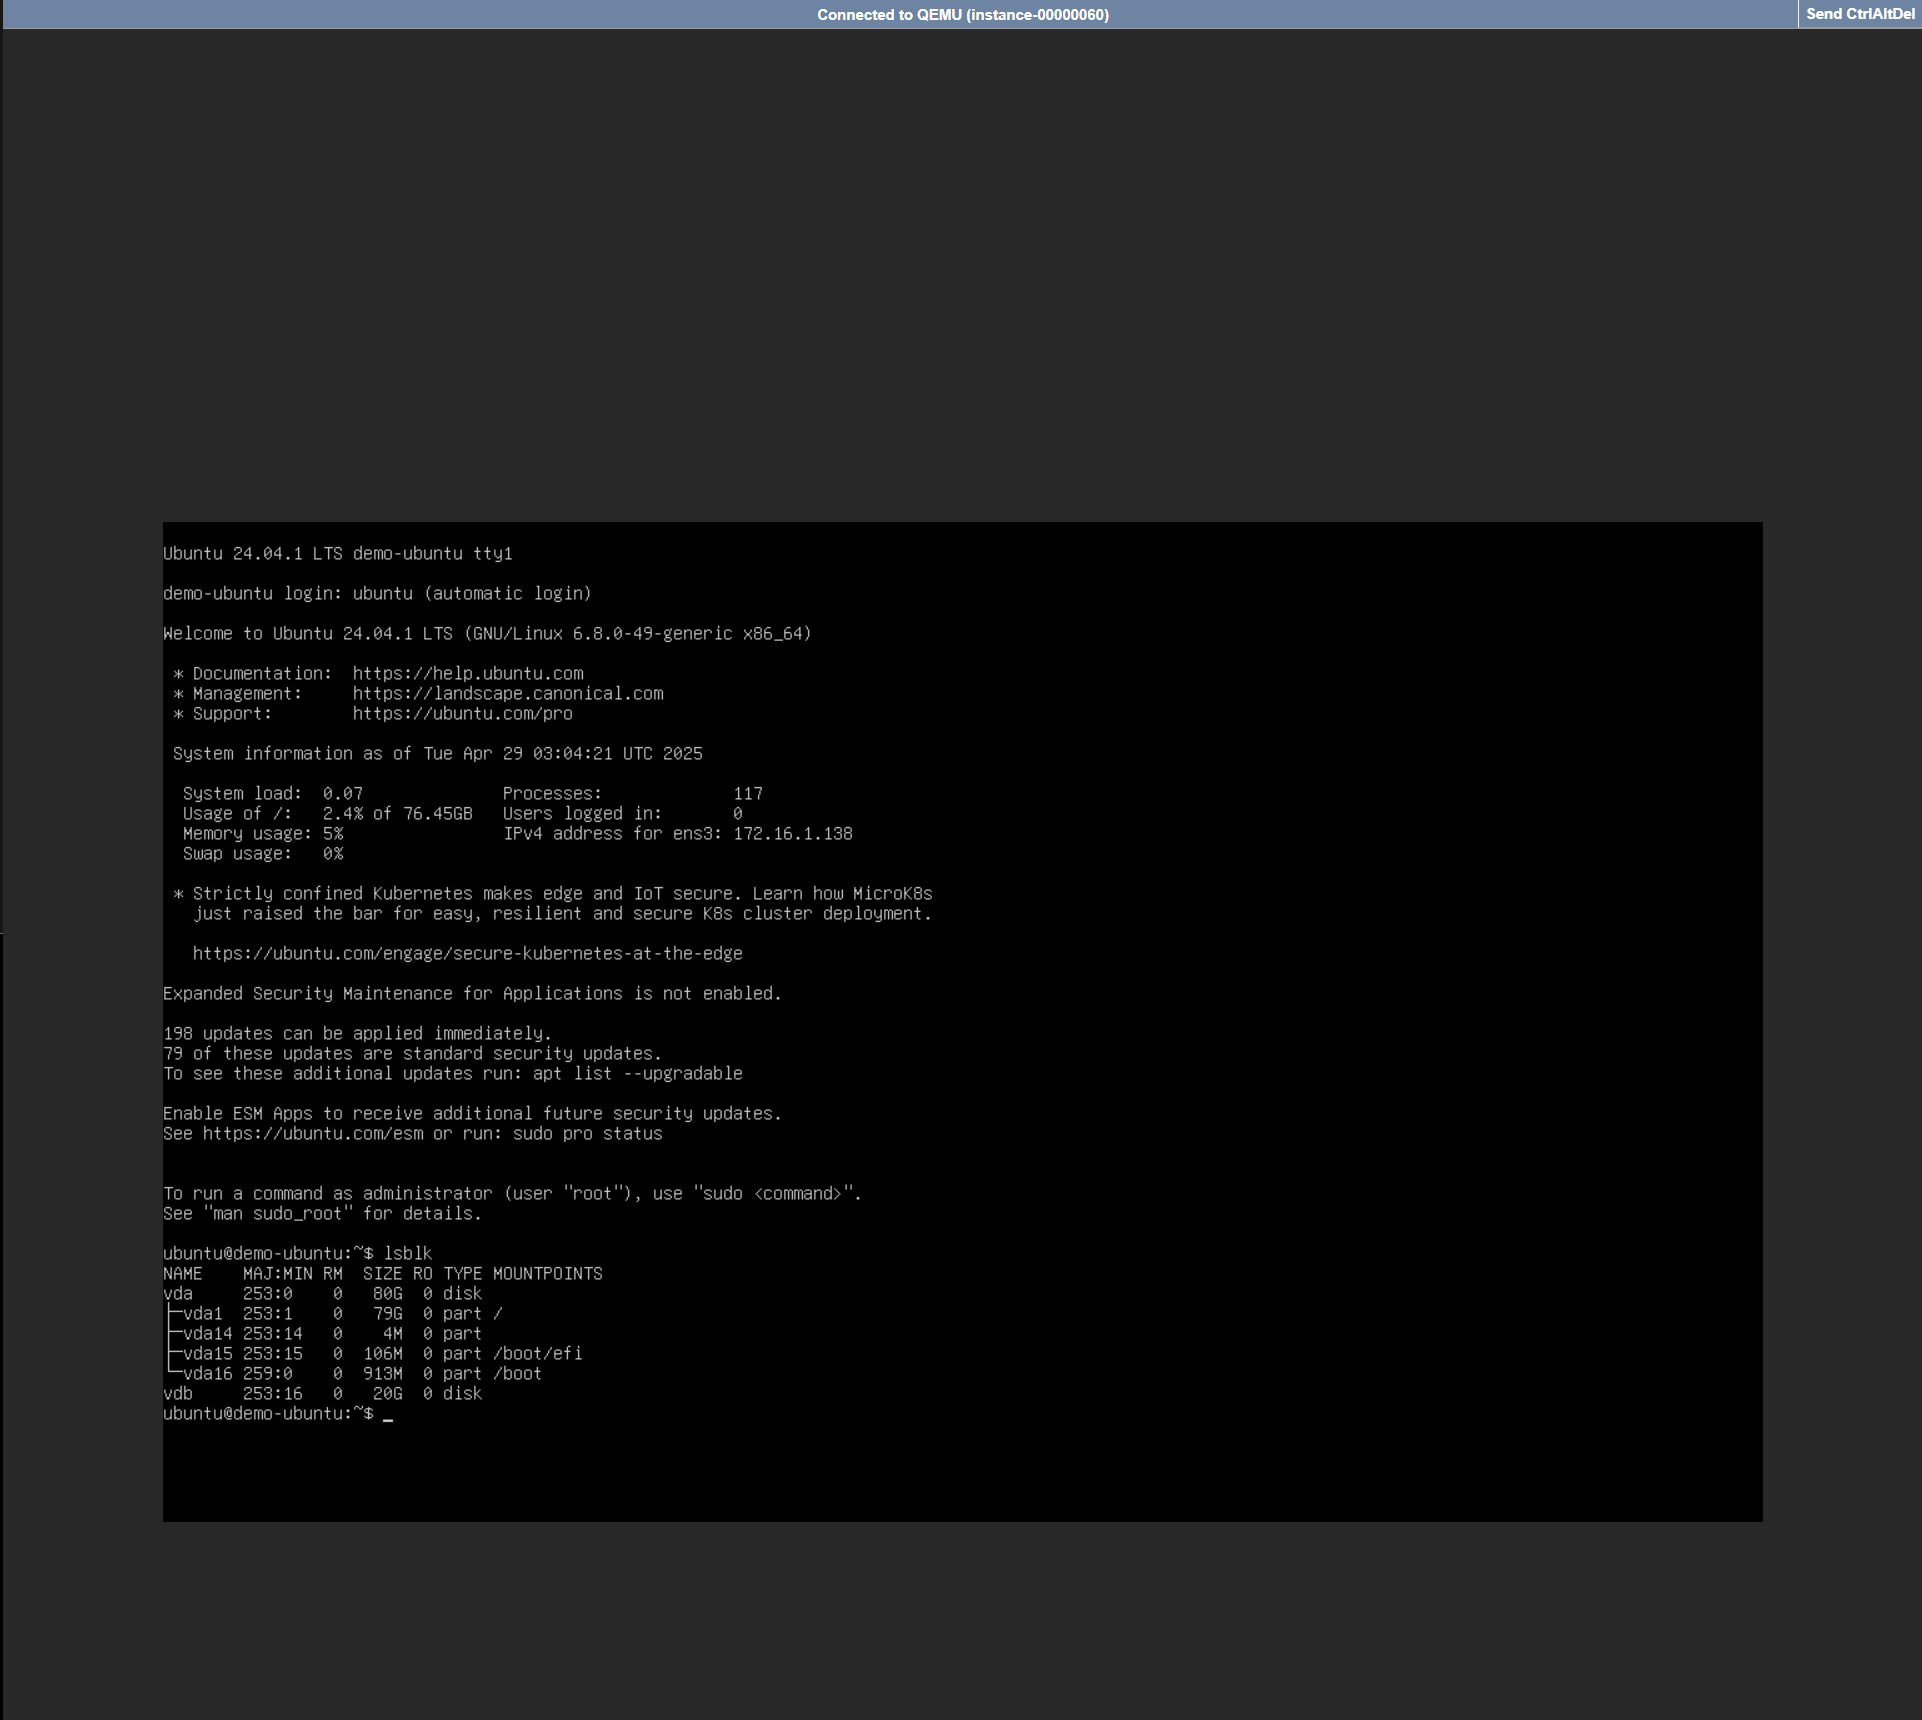
Verify the attachment through console. See Connect to Instance by noVNC for more info.