Automate private DNS record creation
Learn to how to automatically create a DNS record whenever a floating IP is assigned to a virtual machine.
Setting up the DNS Network
-
Navigate to
Network > Networks, click on theNetwork IDfrom the list of your Networks.
-
Select
Subnetsand clickEdit.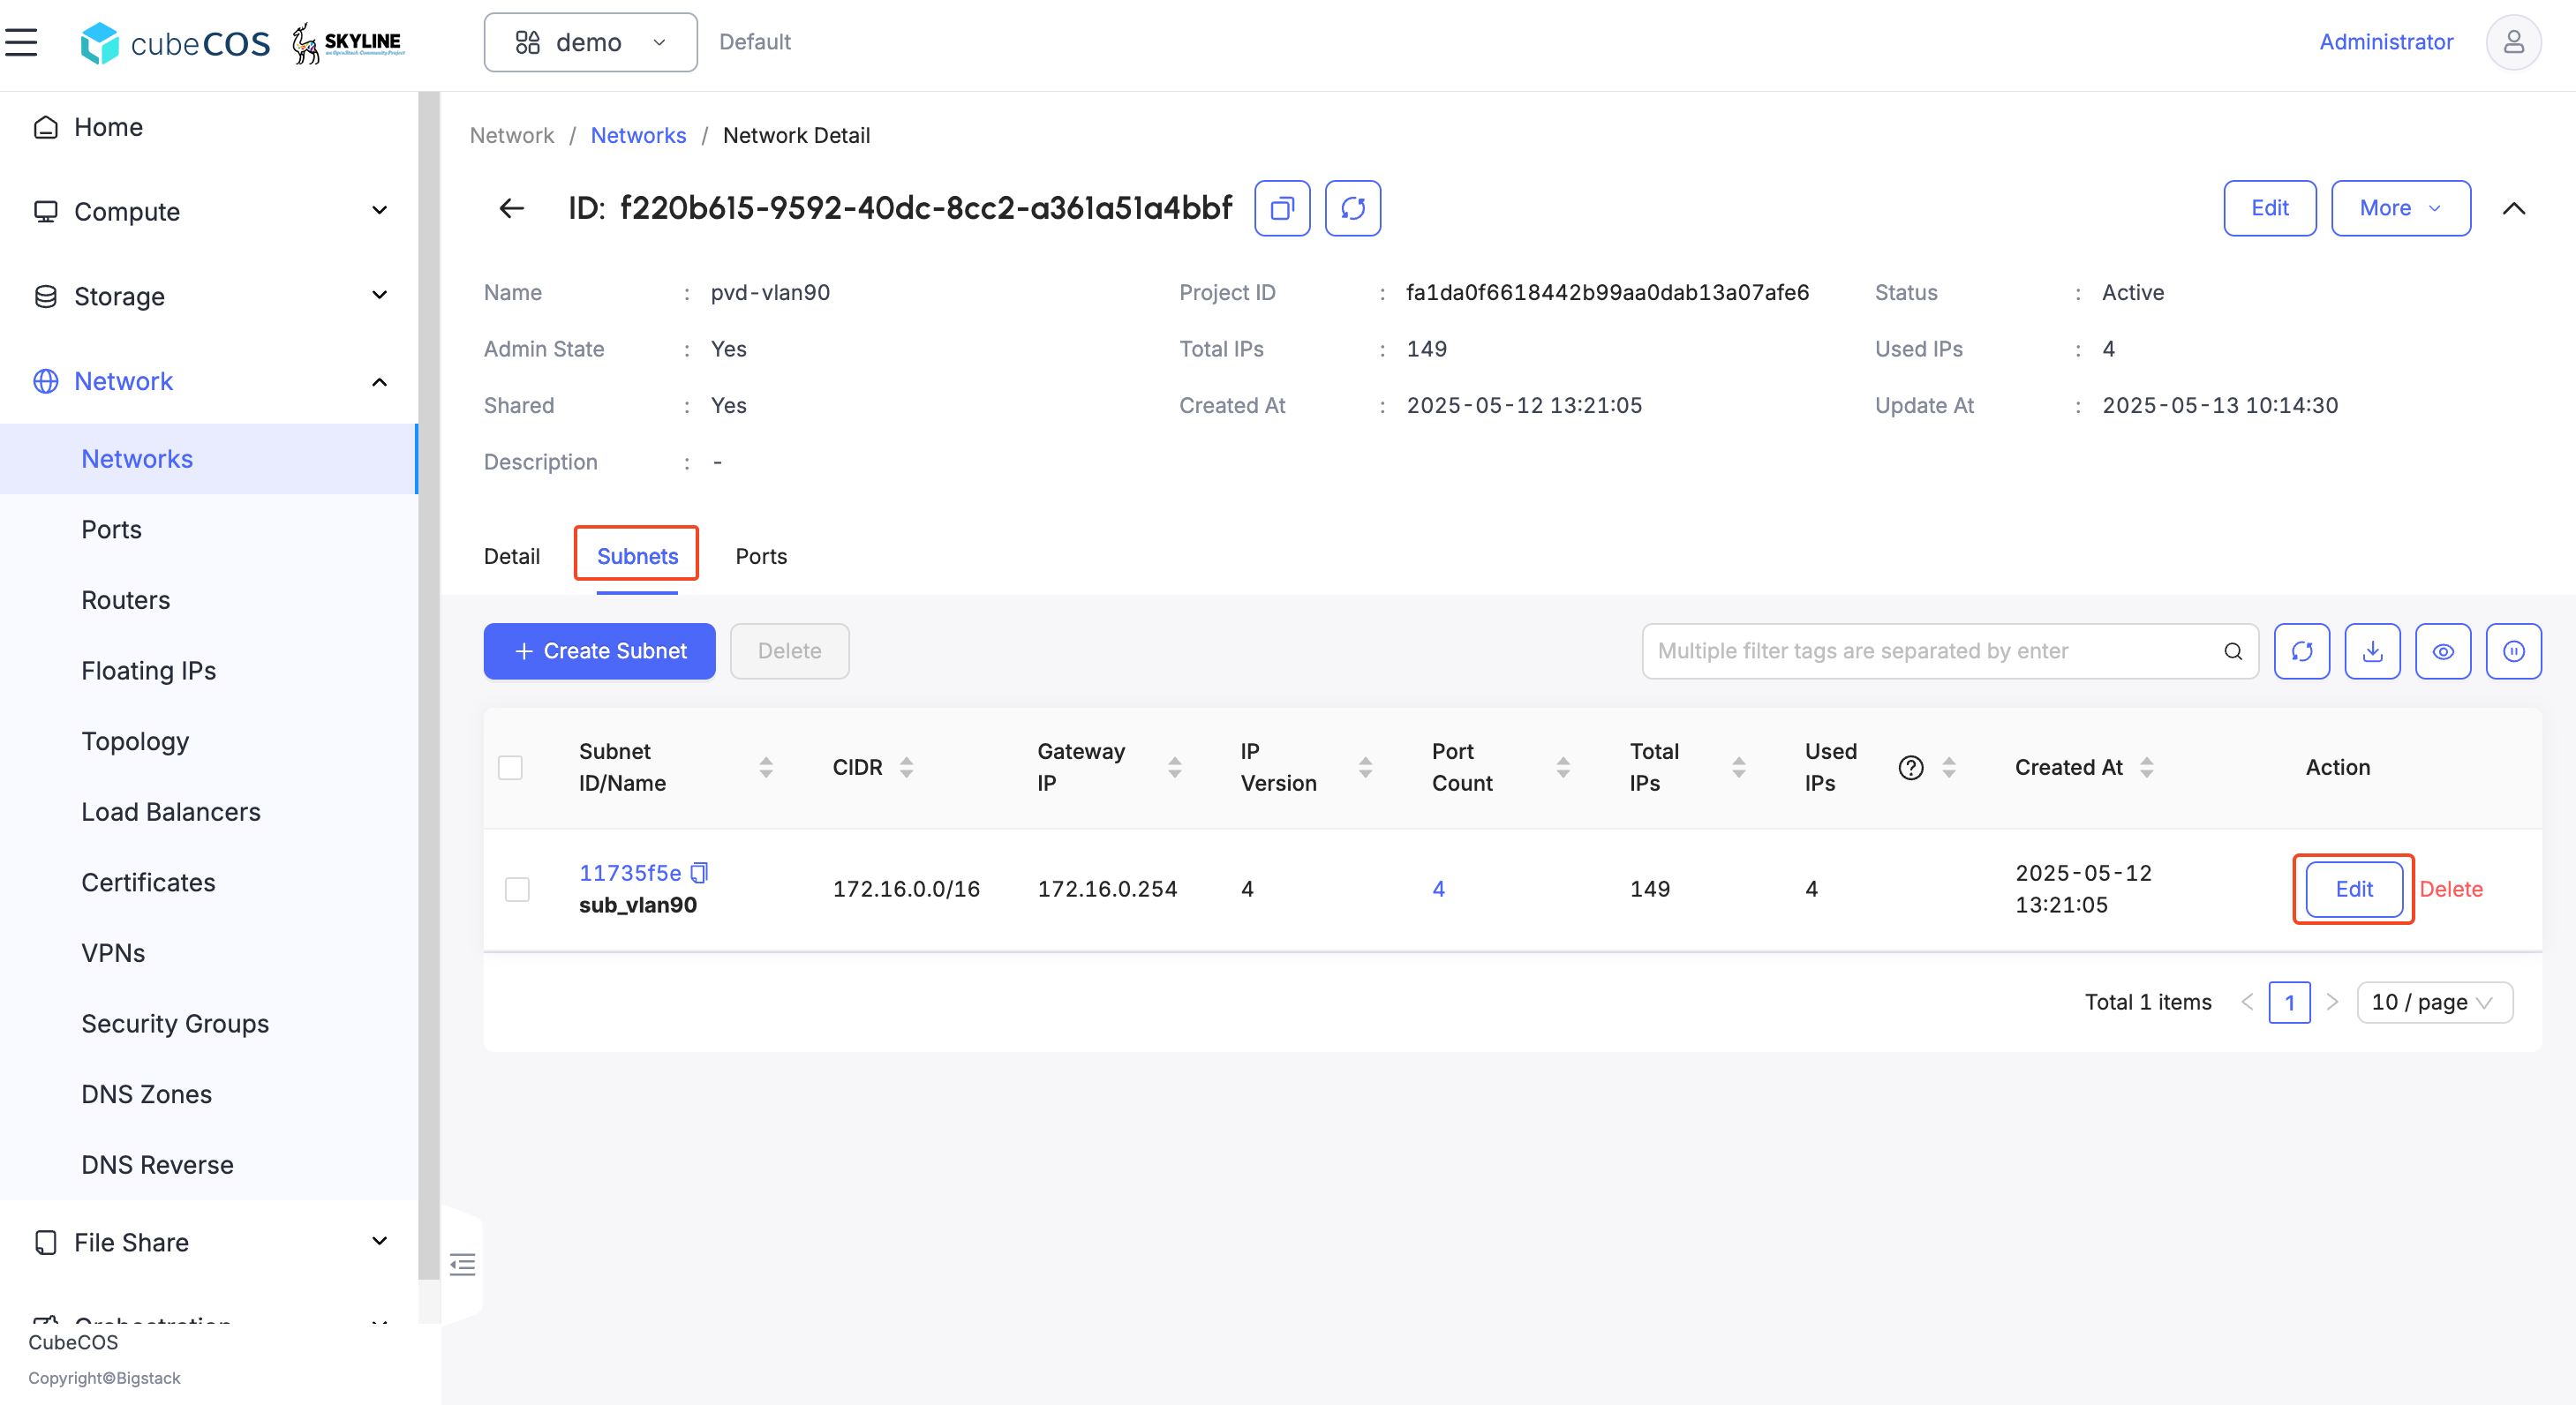
-
Type in DNS name servers with
Controller VIP.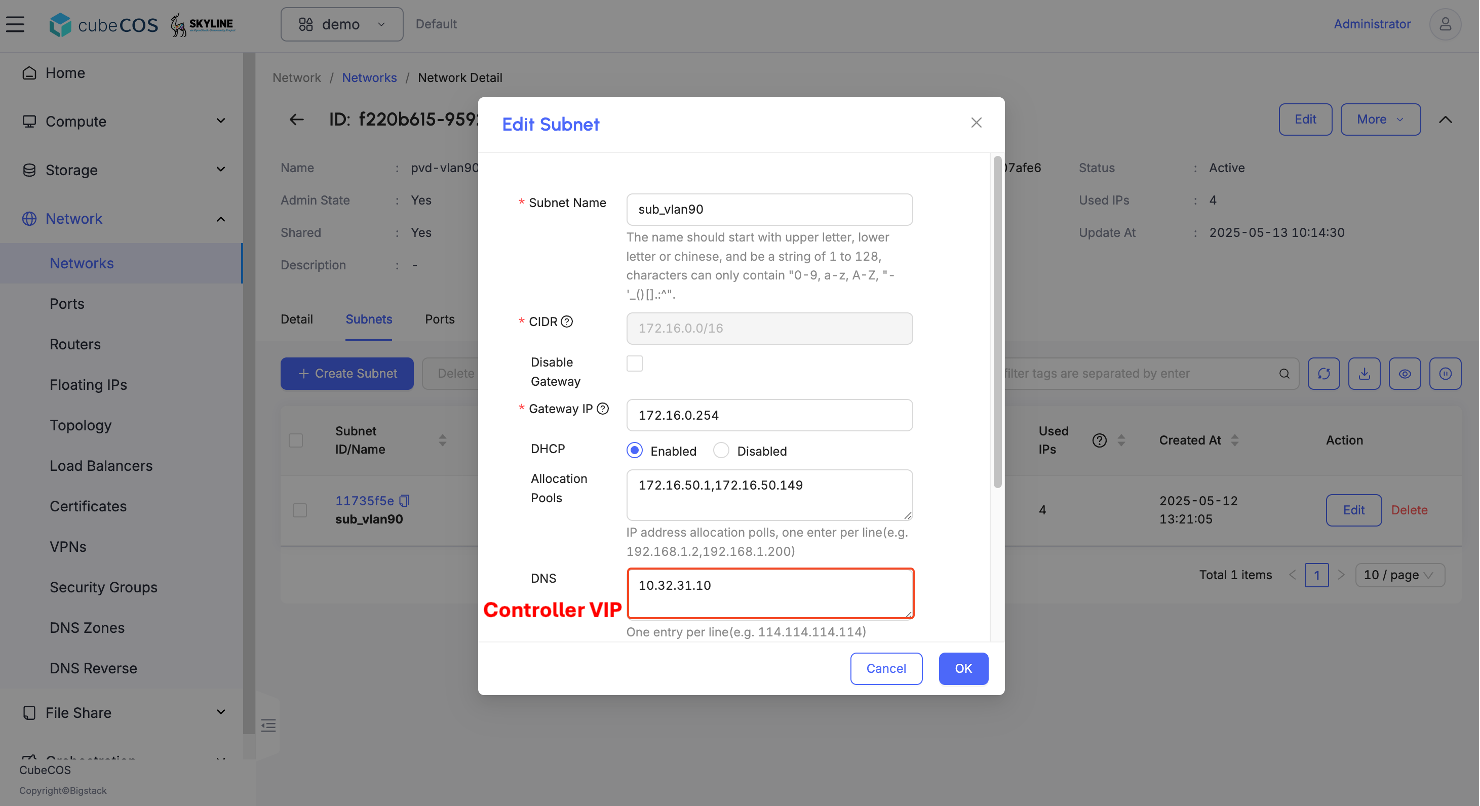
Create DNS Zone
-
Navigate
Project > Network > DNS Zones, click on theCREATE ZONE.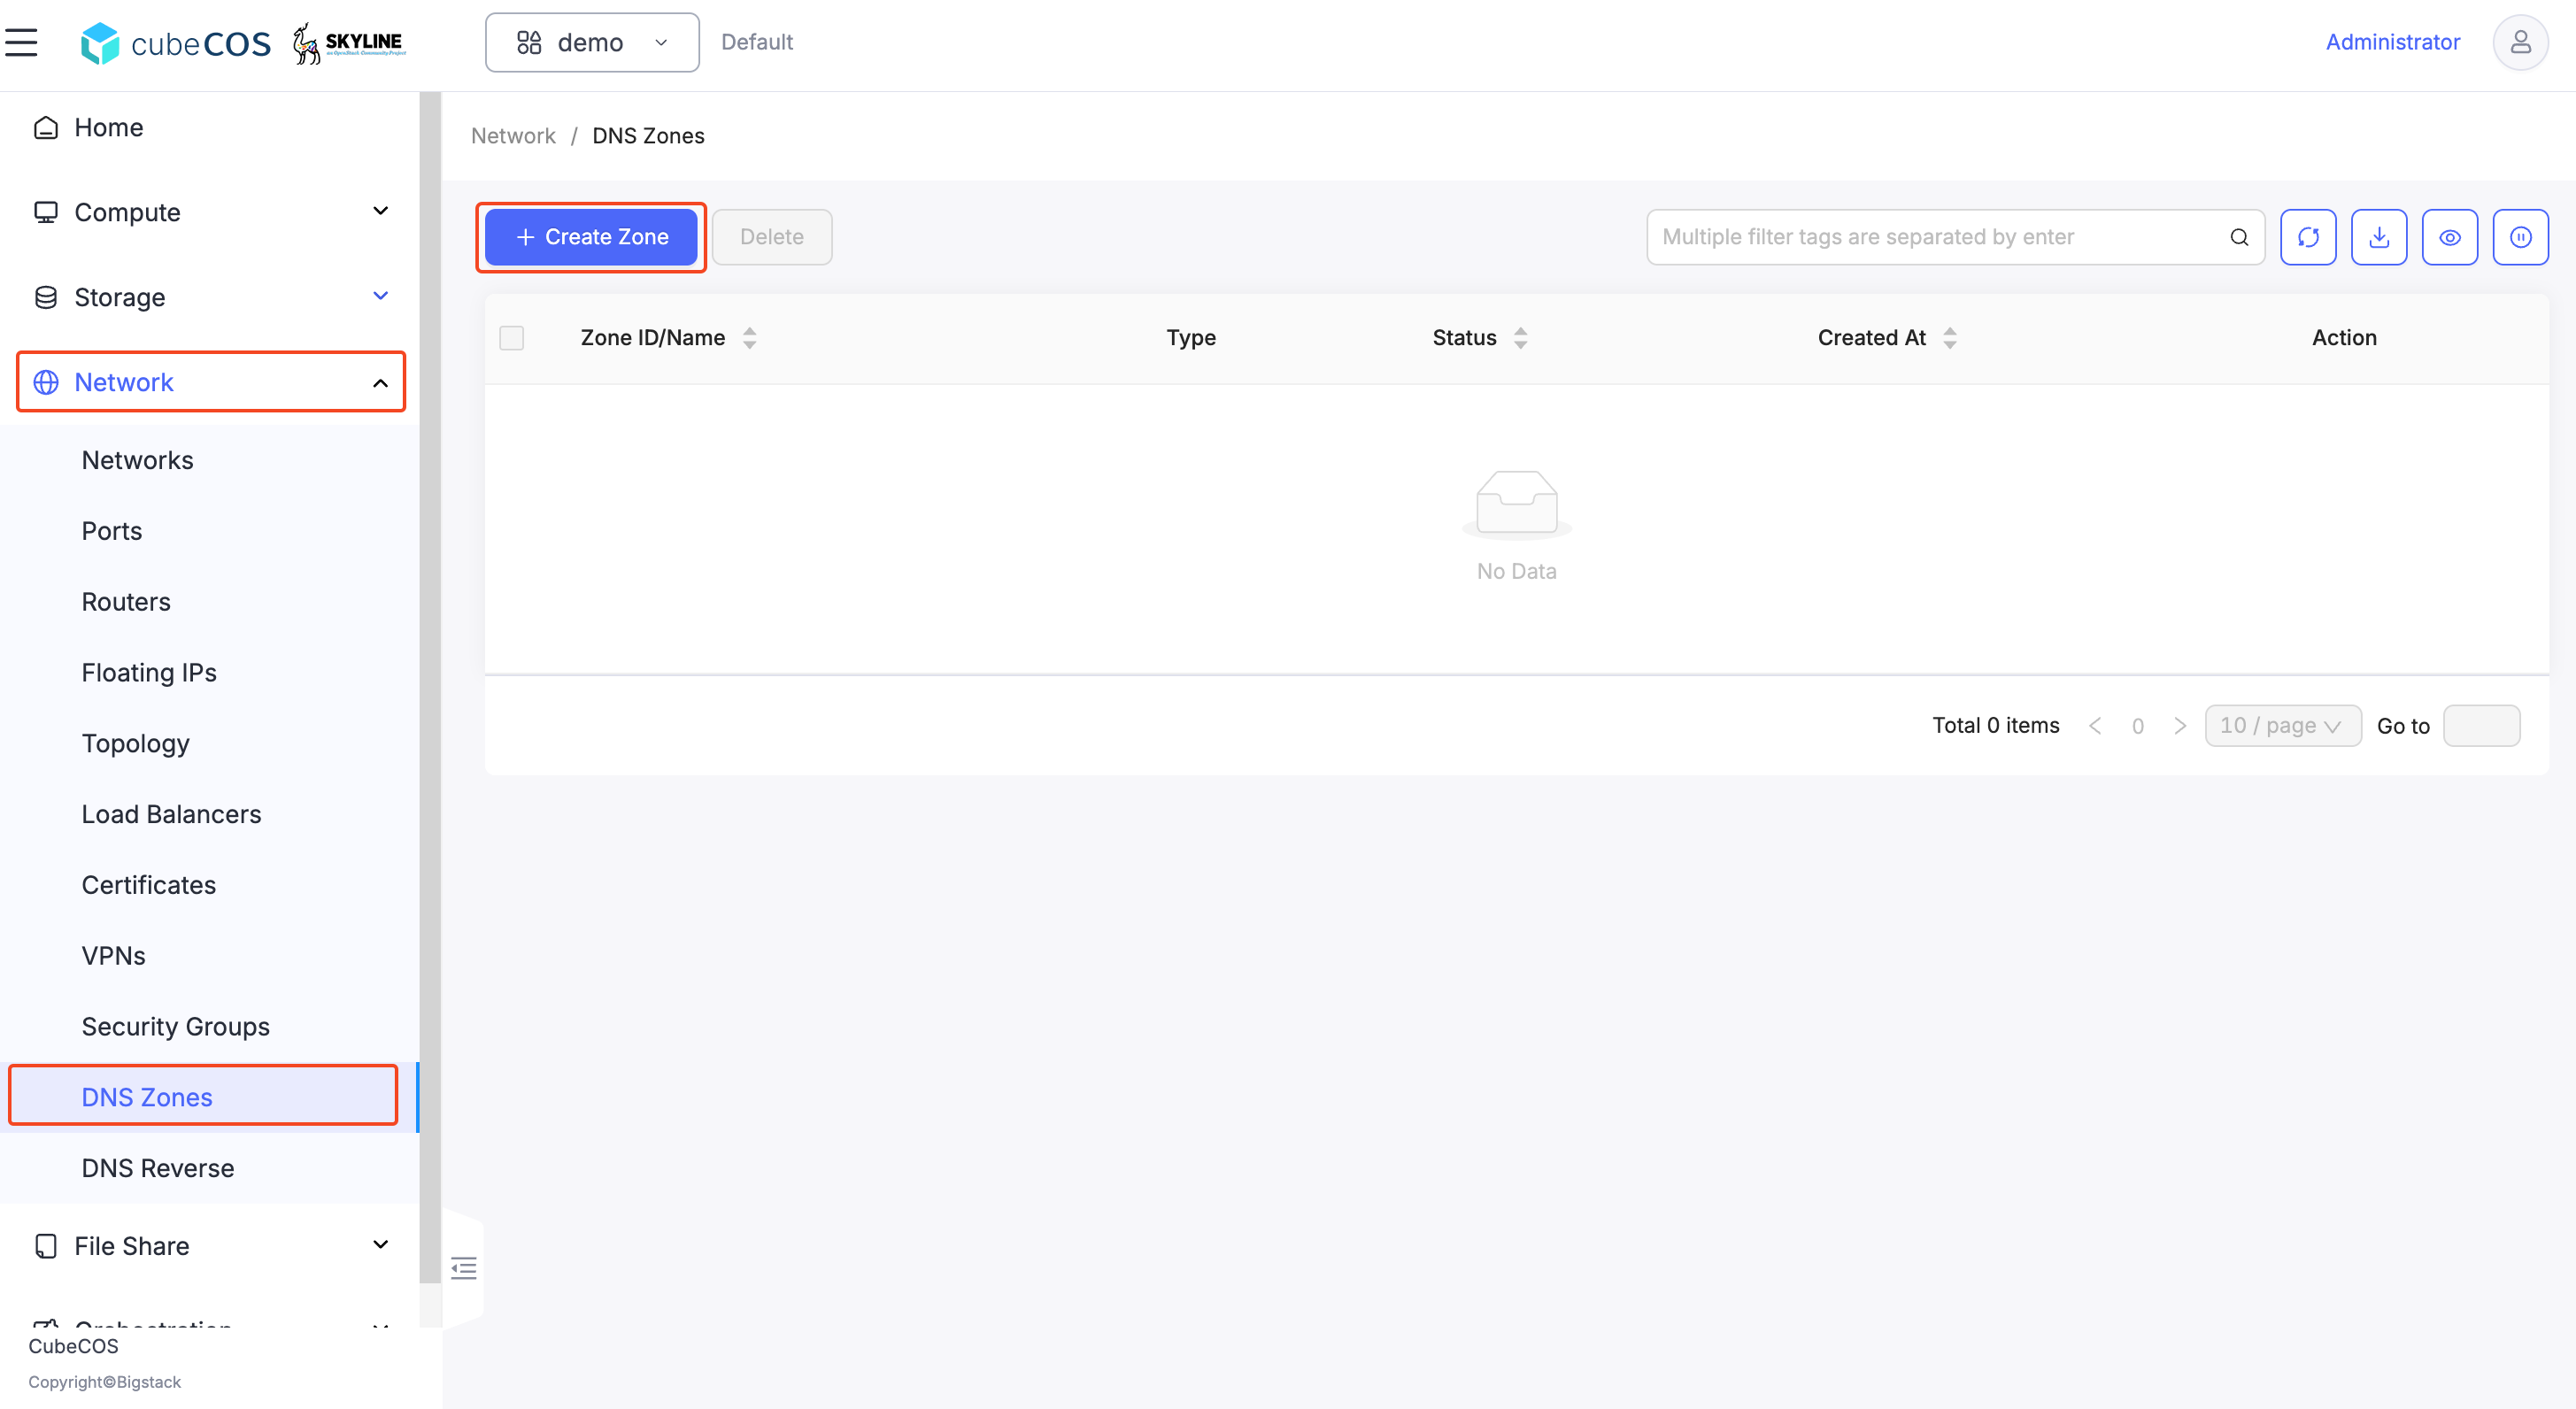
-
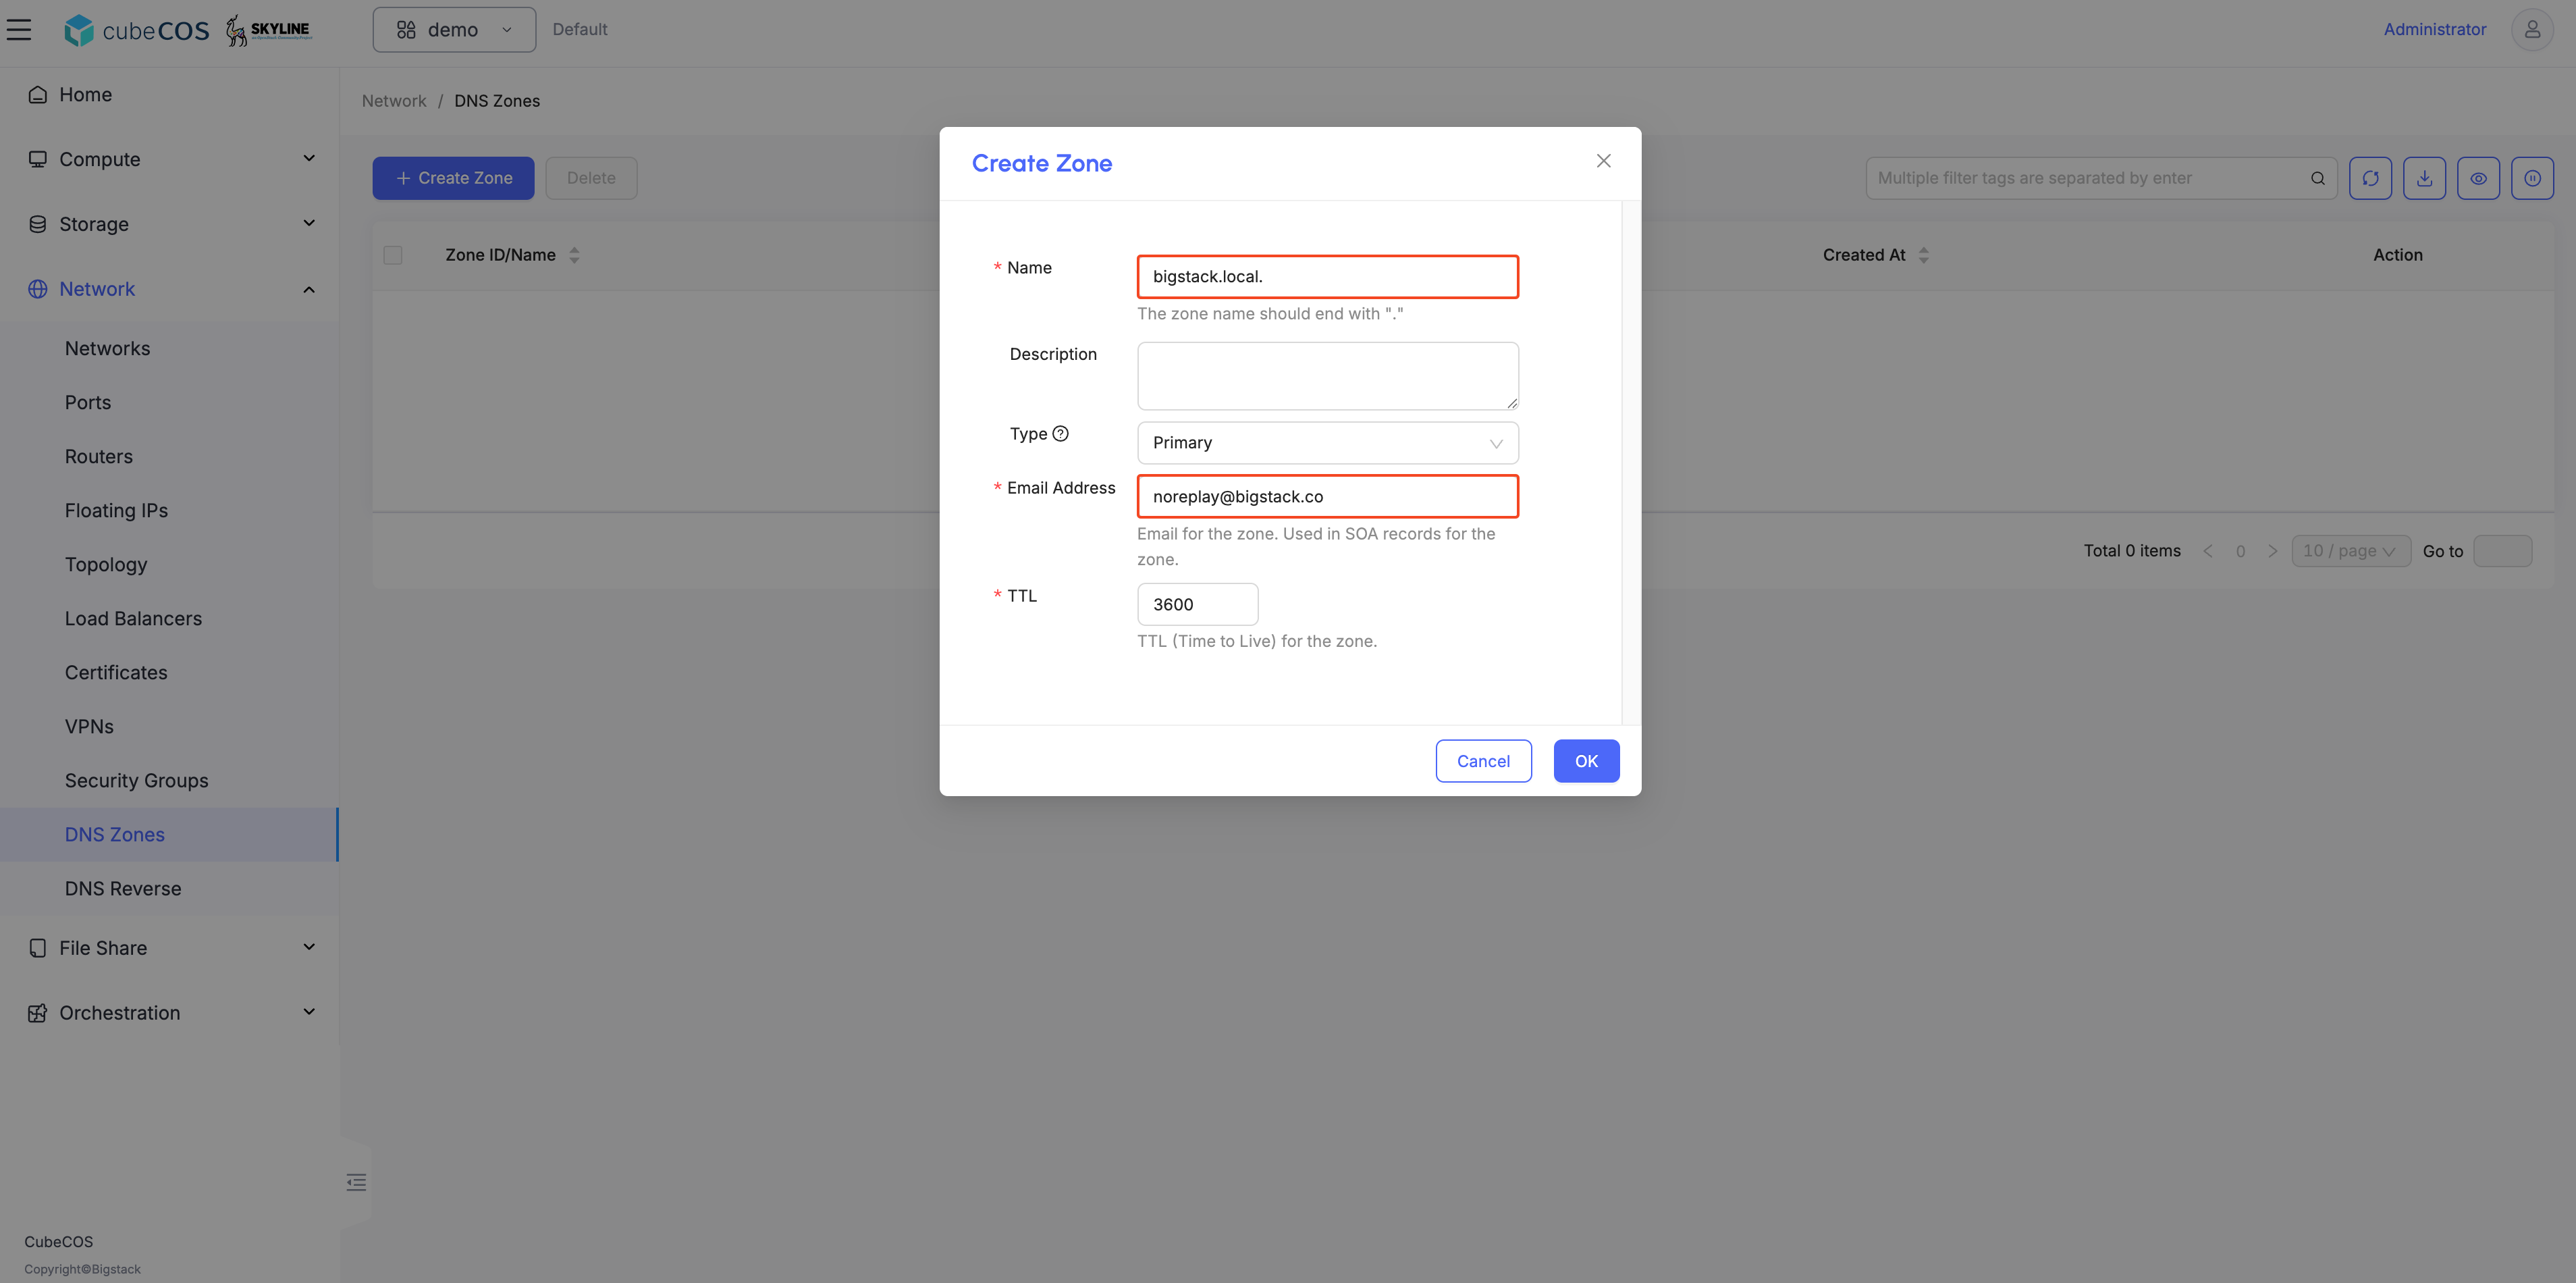
Create zone with a preferred/registered domain name.
Connect to console
Accessing CubeCOS cluster VIP via SSH
    $ ssh [email protected]
    Warning: Permanently added '172.16.1.20' (ED25519) to the list of known hosts.
    [email protected]'s password:
    Welcome to Cube Appliance
    License (type: trial) is valid for 46 days
    Enter "help" for a list of available commands
    cc1>
Setting a prefix dns_domain on a private network through CLI
    cc1> iaas network network_set
    Select domain:
    1: Default
    Enter index: 1
    Select tenant:
    1: admin
    Enter index: 1
    Select network:
    1: public
    2: pri_192
    Enter index: 2
    Select type:
    1: name
    2: description
    3: qos-policy
    4: no-qos-policy
    5: dns-domain
    6: no-dns-domain
    Enter index: 5
    Input value: bigstack.local.
    Updated network: a35cef55-02fa-49bf-9a1e-f844584544de
Check up the dns_domain prefix
    cc1> iaas network network_show
    Select domain:
    1: Default
    Enter index: 1
    Select tenant:
    1: admin
    Enter index: 1
    Select network:
    1: public
    2: pri_192
    Enter index: 2
    +---------------------------+--------------------------------------+
    | Field                     | Value                                |
    +---------------------------+--------------------------------------+
    | admin_state_up            | UP                                   |
    | availability_zone_hints   |                                      |
    | availability_zones        |                                      |
    | created_at                | 2025-05-15T06:39:24Z                 |
    | description               |                                      |
    | dns_domain                | bigstack.local.                      |
    | id                        | a35cef55-02fa-49bf-9a1e-f844584544de |
    | ipv4_address_scope        | None                                 |
    | ipv6_address_scope        | None                                 |
    | is_default                | None                                 |
    | is_vlan_transparent       | None                                 |
    | mtu                       | 1442                                 |
    | name                      | pri_192                              |
    | port_security_enabled     | True                                 |
    | project_id                | b8d8d3f84f82451f9b6b6bbd1b115ec3     |
    | provider:network_type     | geneve                               |
    | provider:physical_network | None                                 |
    | provider:segmentation_id  | 2142                                 |
    | qos_policy_id             | None                                 |
    | revision_number           | 3                                    |
    | router:external           | Internal                             |
    | segments                  | None                                 |
    | shared                    | False                                |
    | status                    | ACTIVE                               |
    | subnets                   | e5976294-4e89-4f0d-b97f-2eec230d3758 |
    | tags                      |                                      |
    | updated_at                | 2025-05-15T06:40:48Z                 |
    +---------------------------+--------------------------------------+
Associate Floating IP to your Instances
-
Navigate to
Project > Compute > Instance. -
Hover over
More, thenRelated Resources, and clickAssociate Floating IP.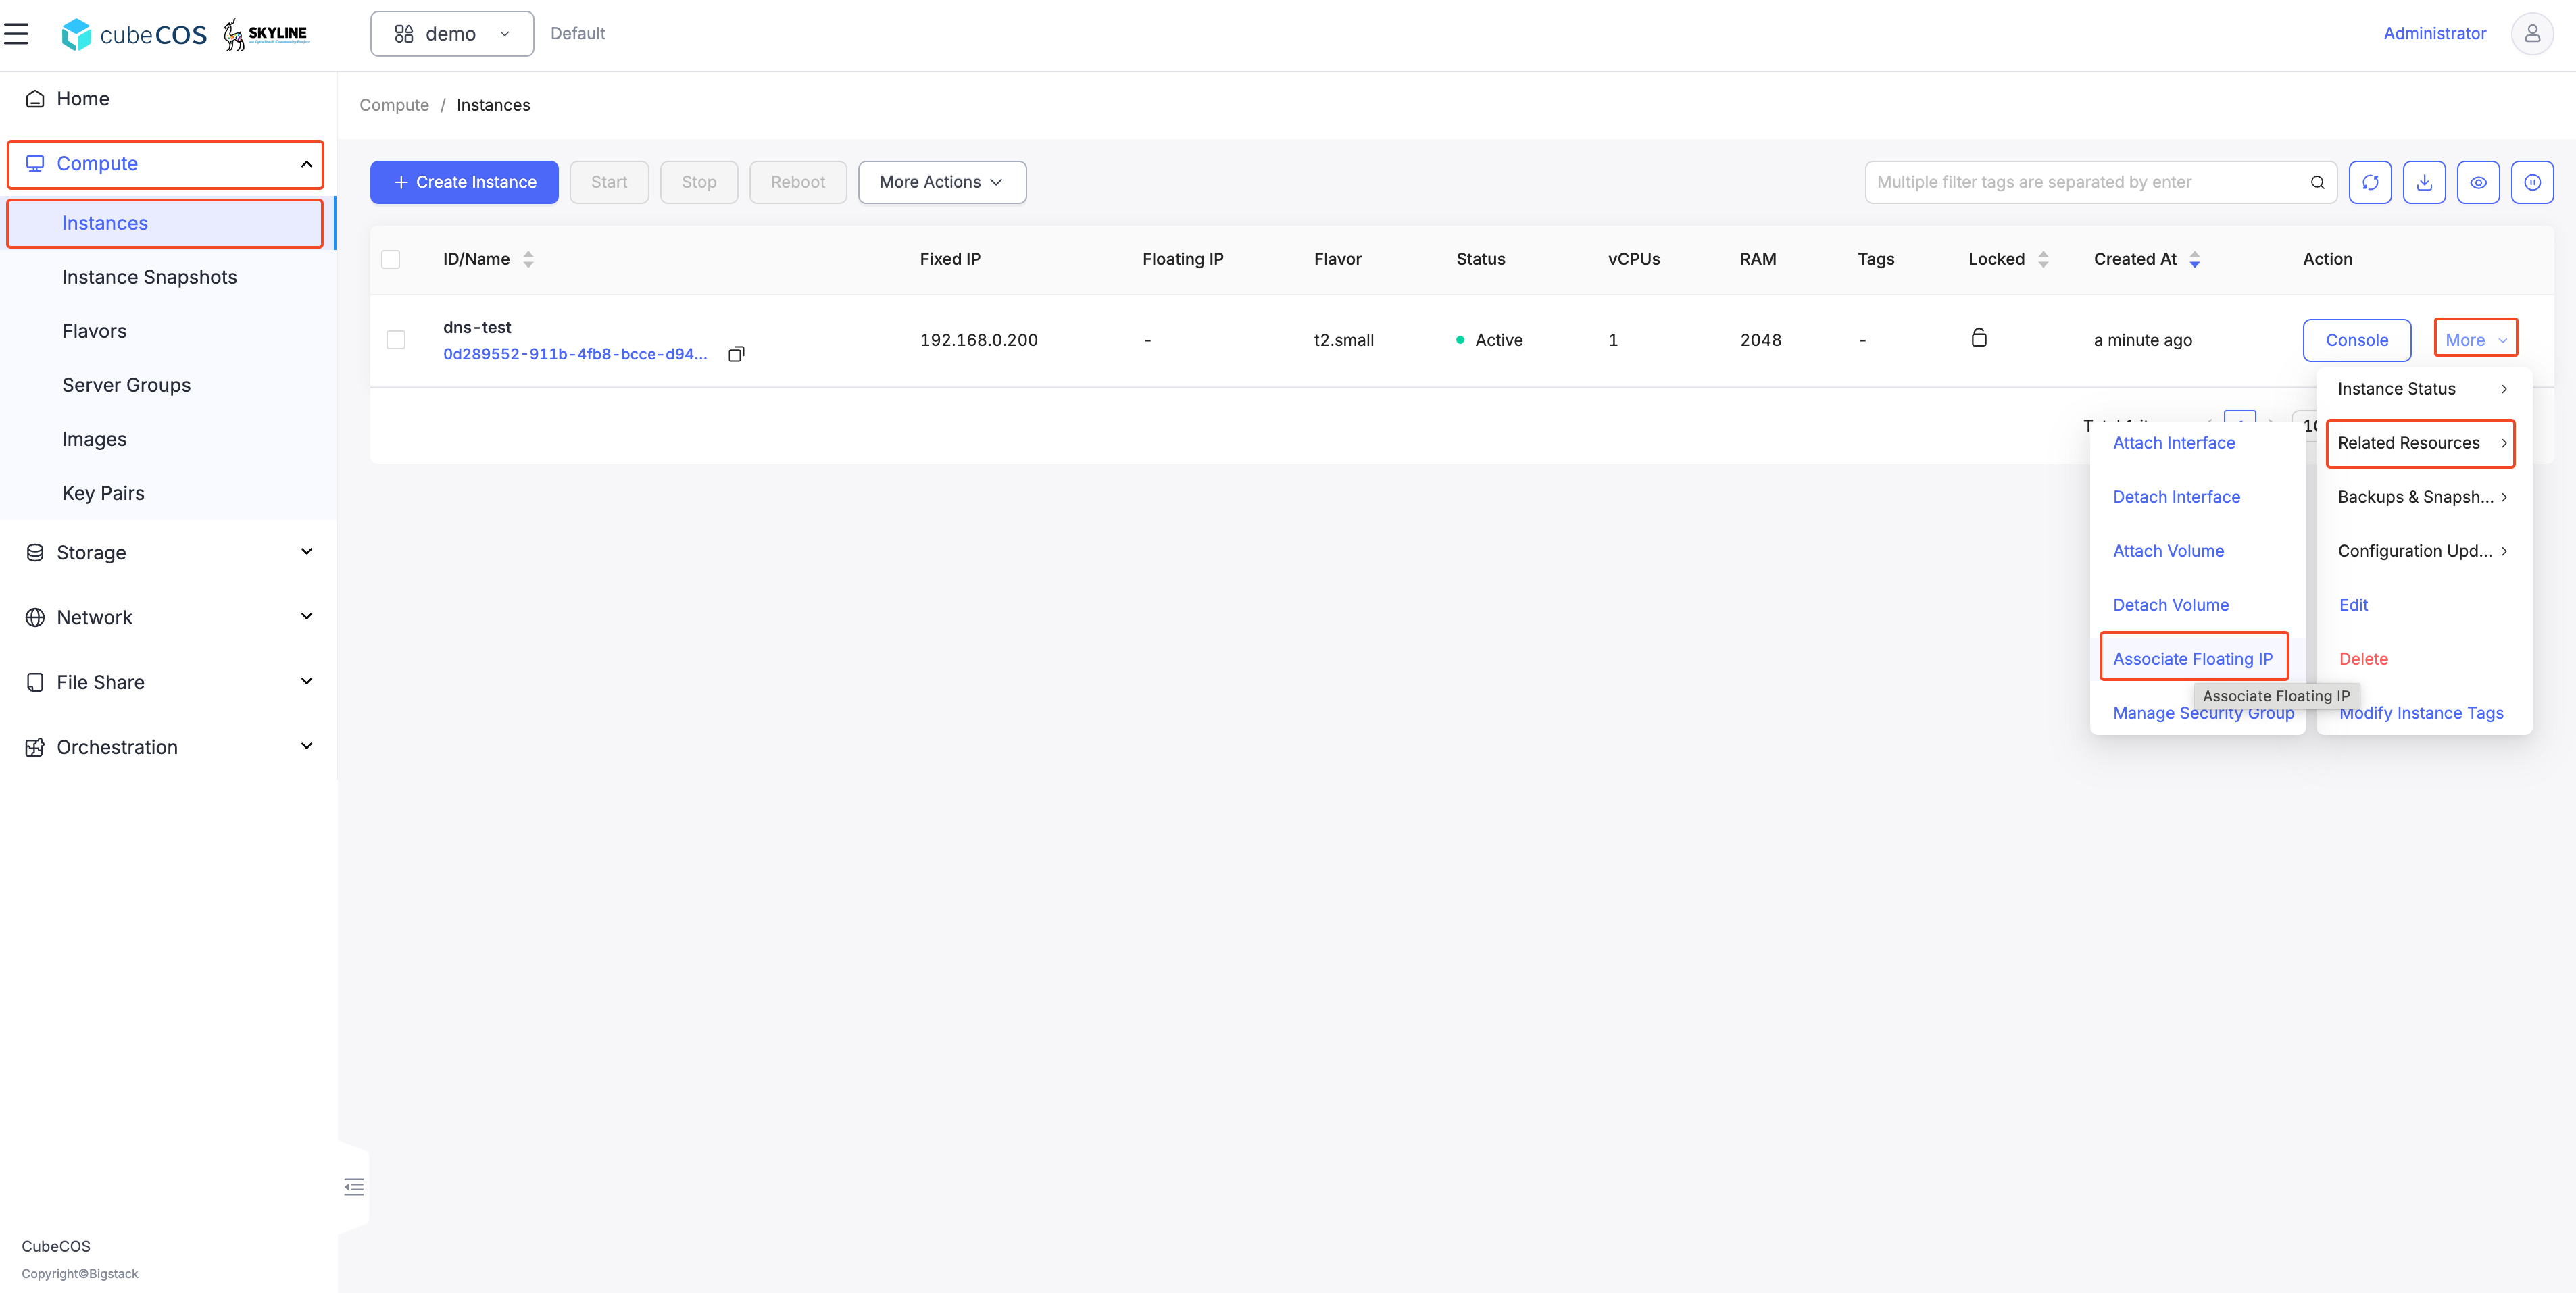
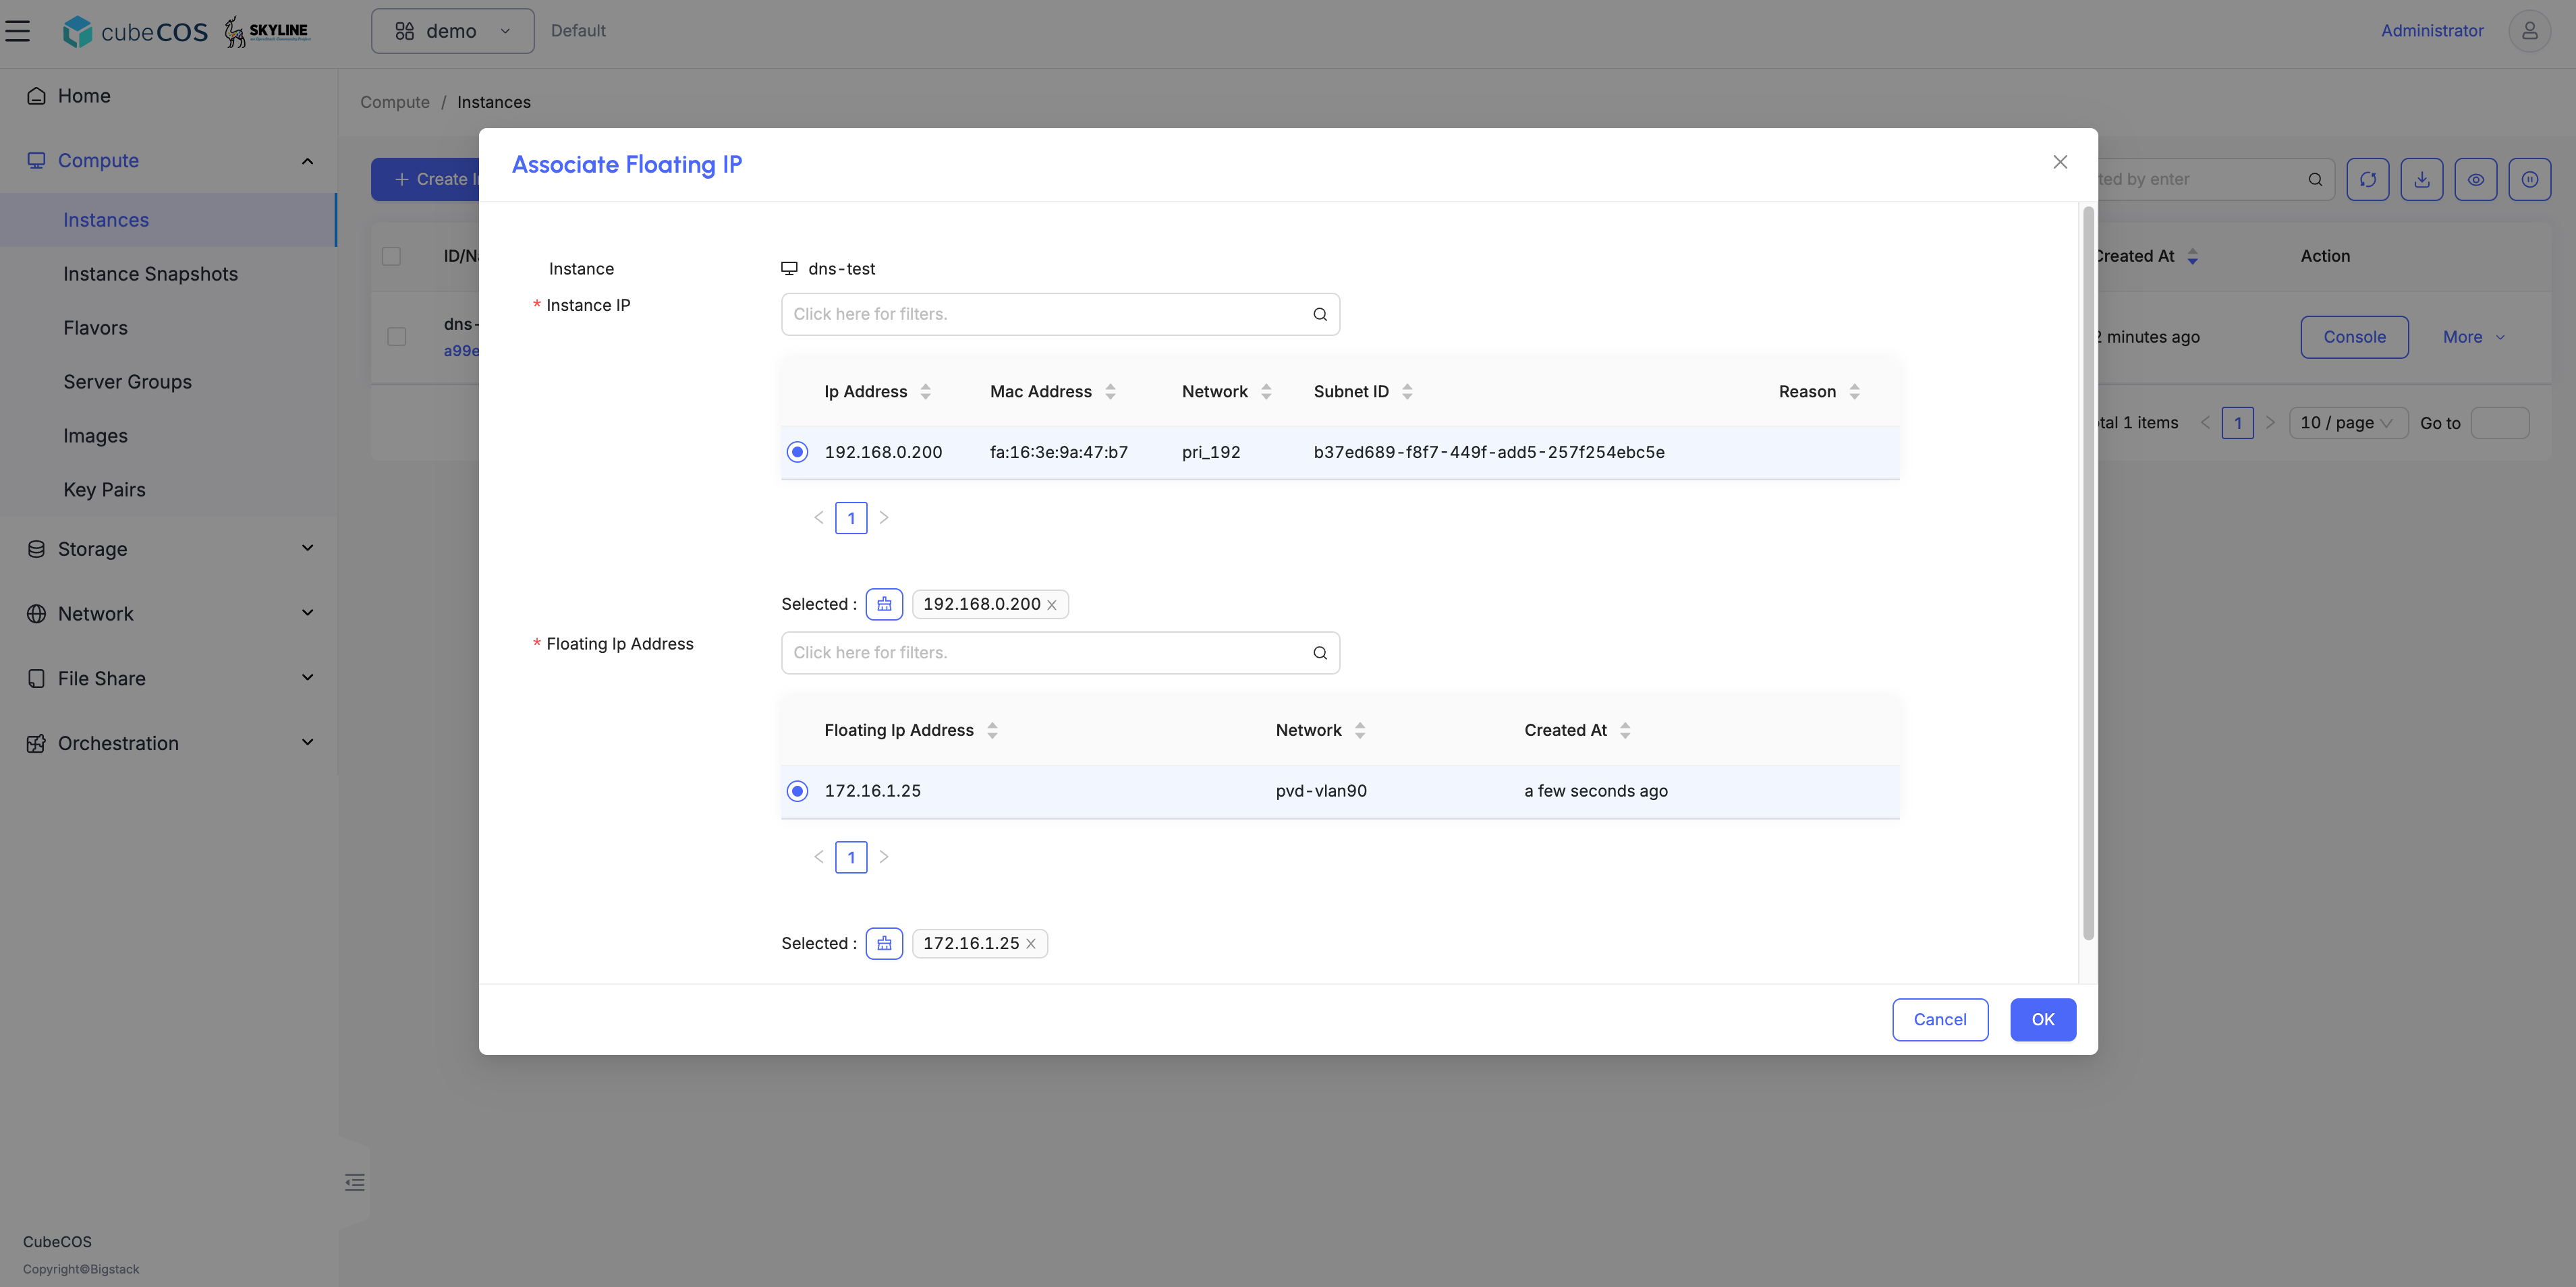
-
An IP
172.16.1.25has been associated to your instancedns-test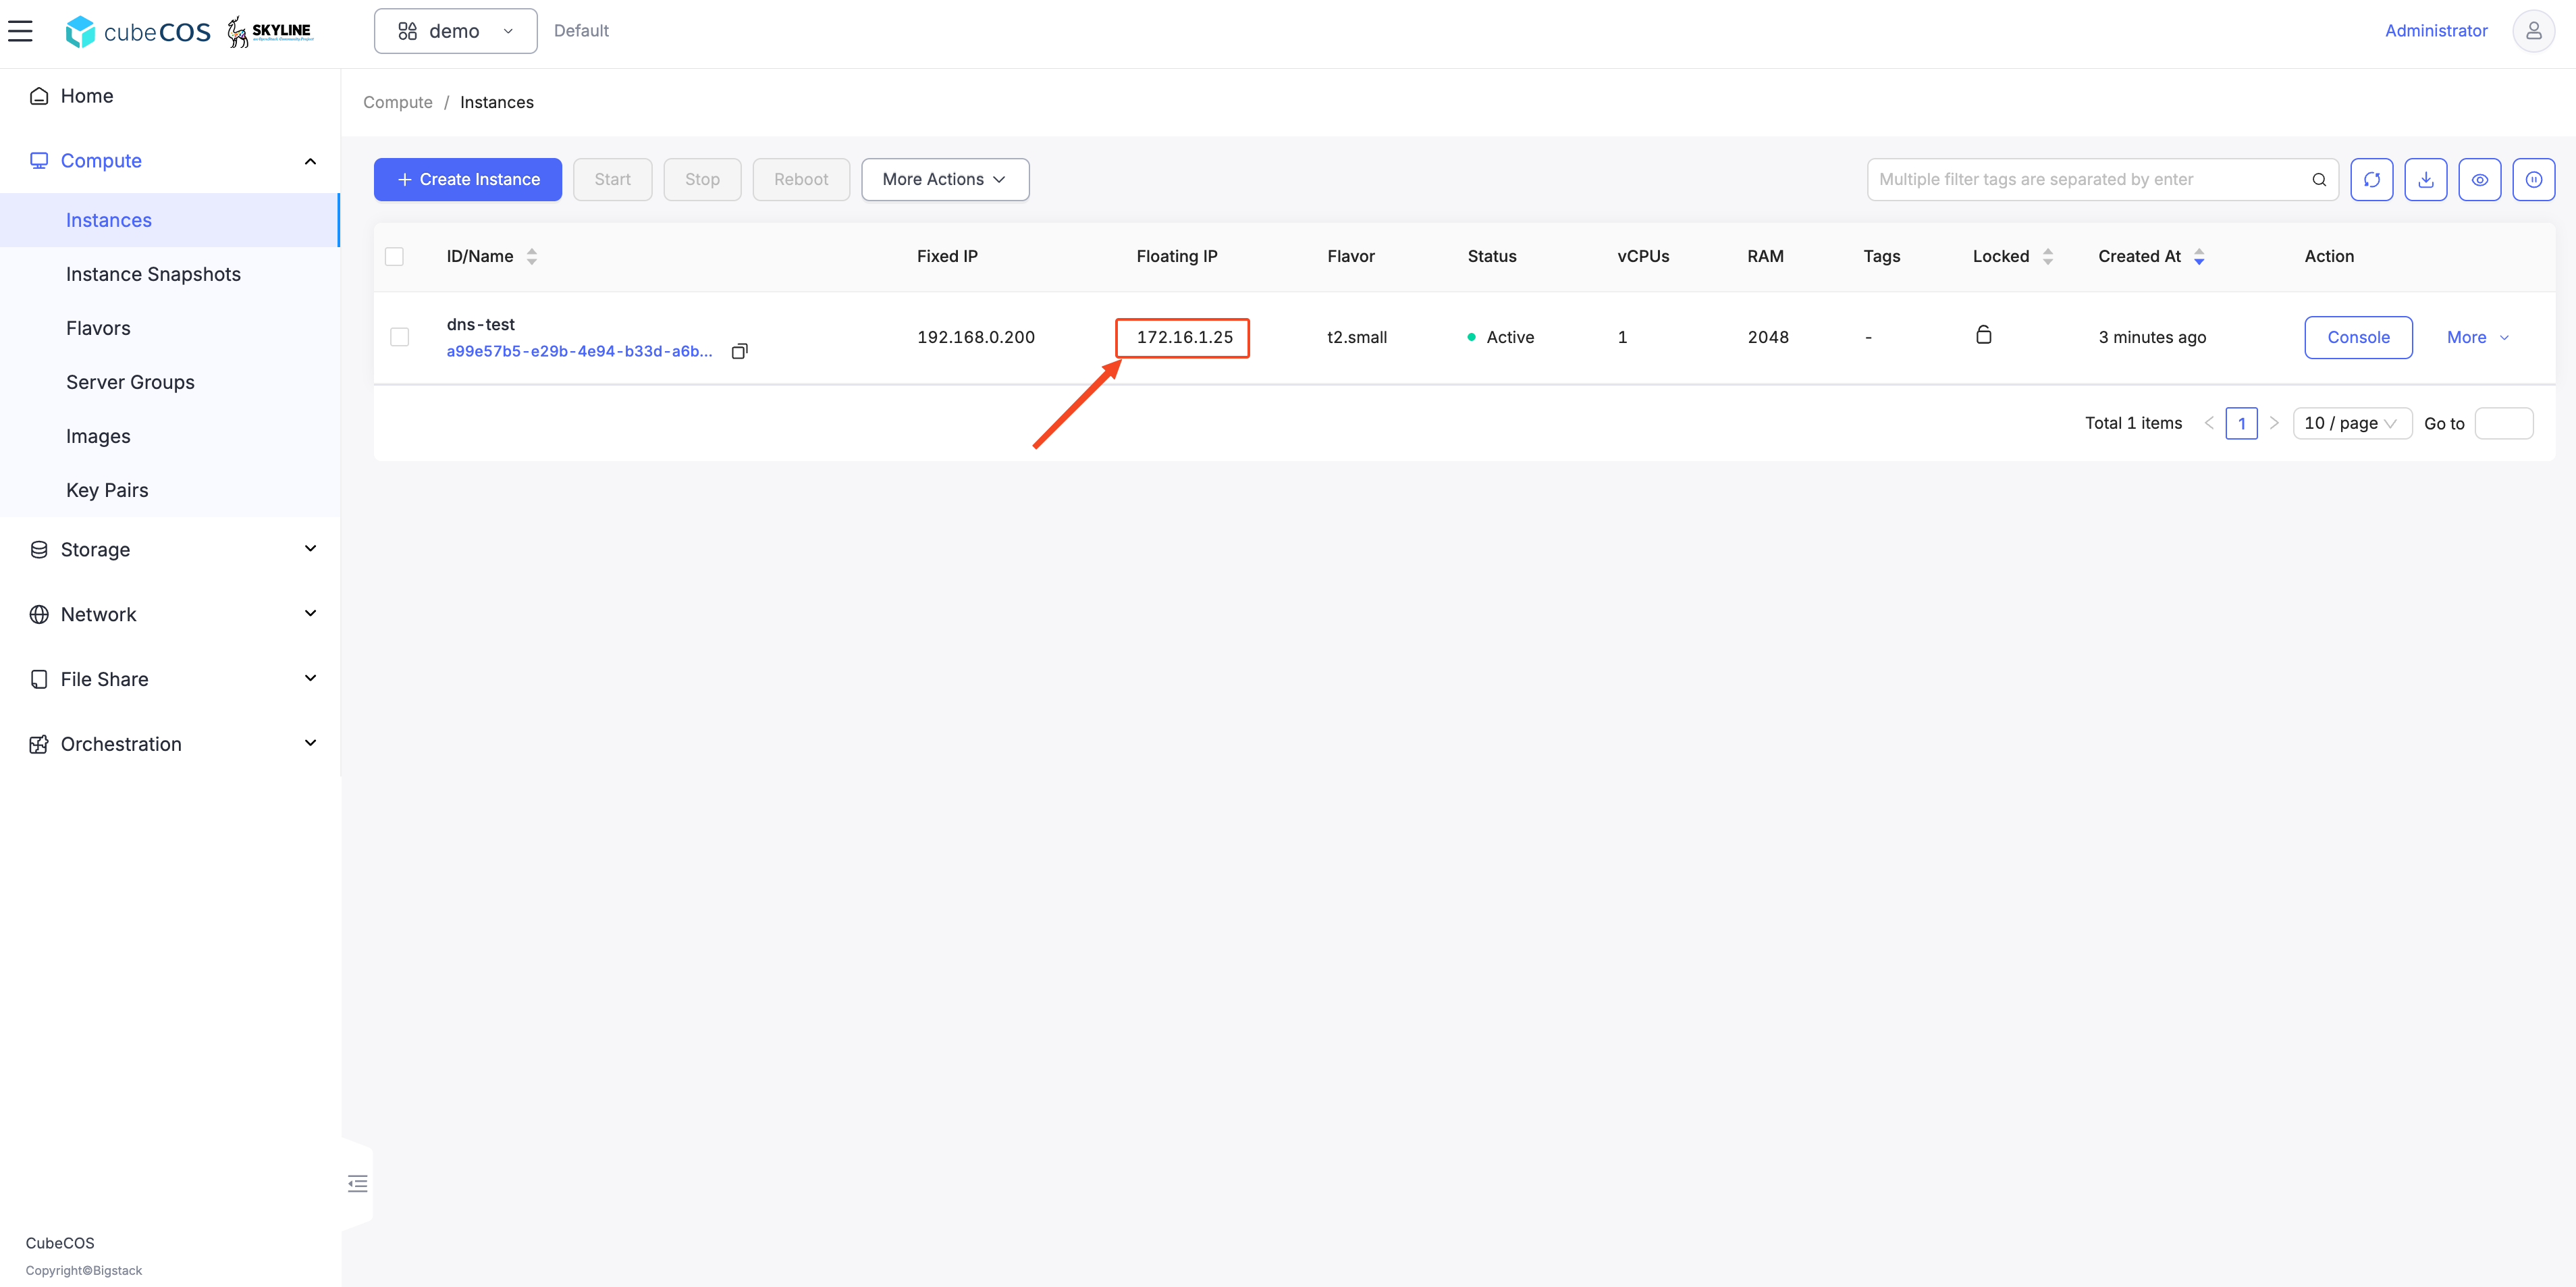
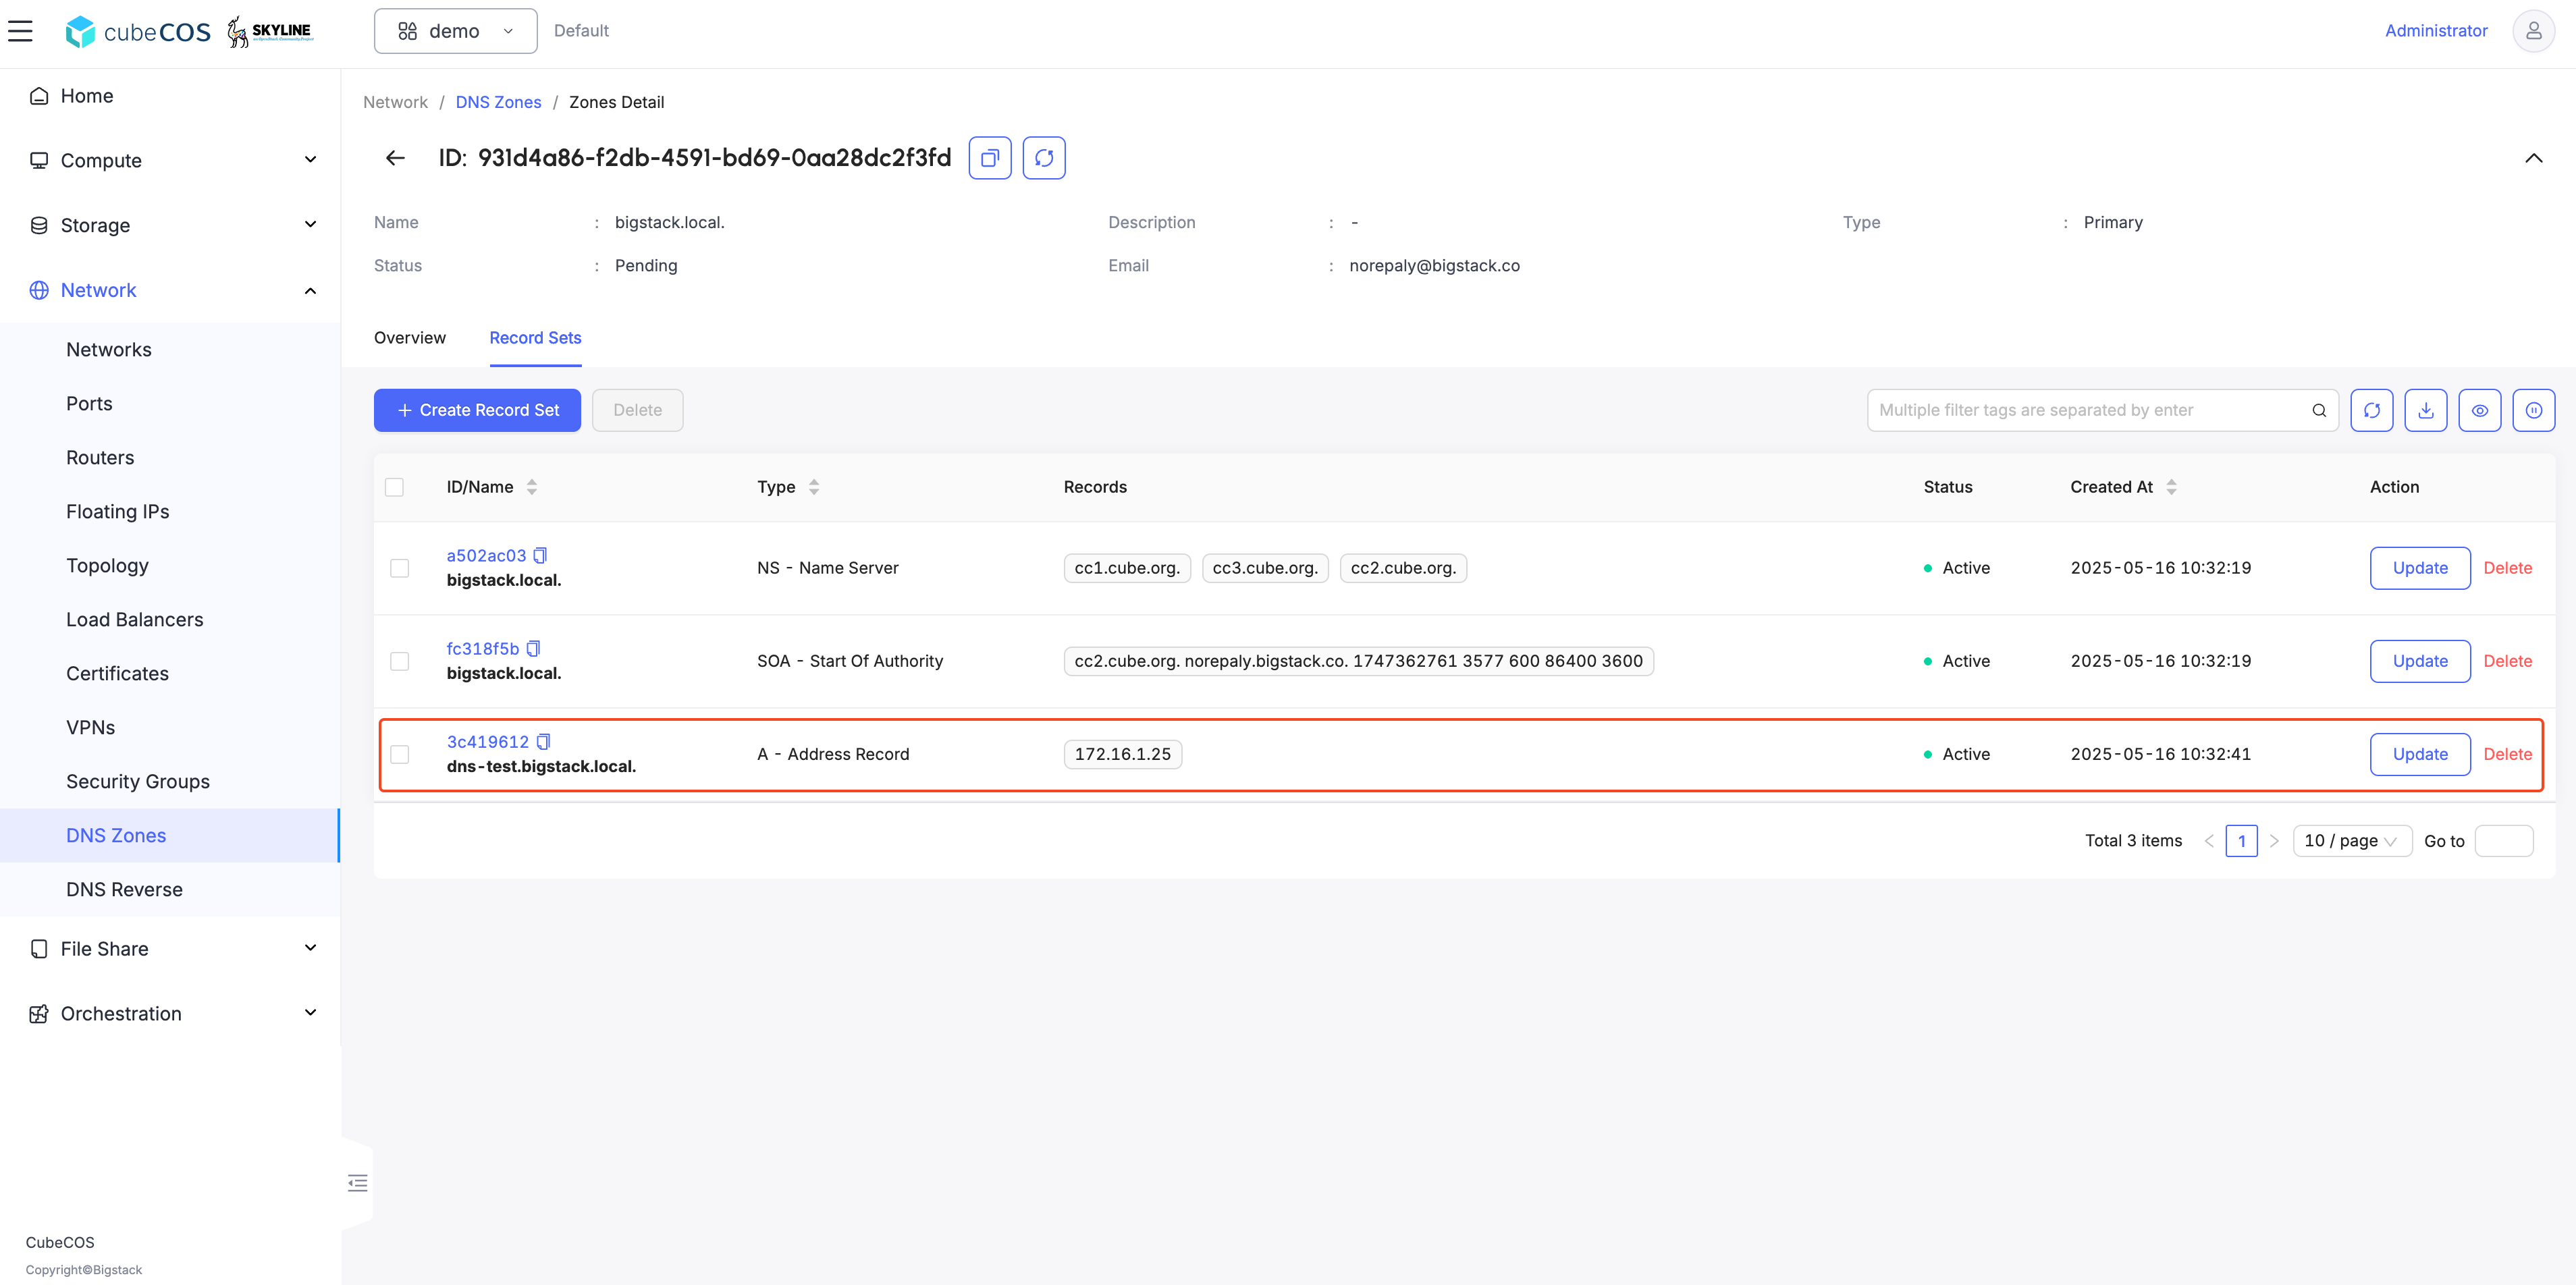
Check the zone record set of bigstack.local.
-
A Record has been created according to your instance's hostname
dns-test.bigstack.local.is mapping172.16.1.25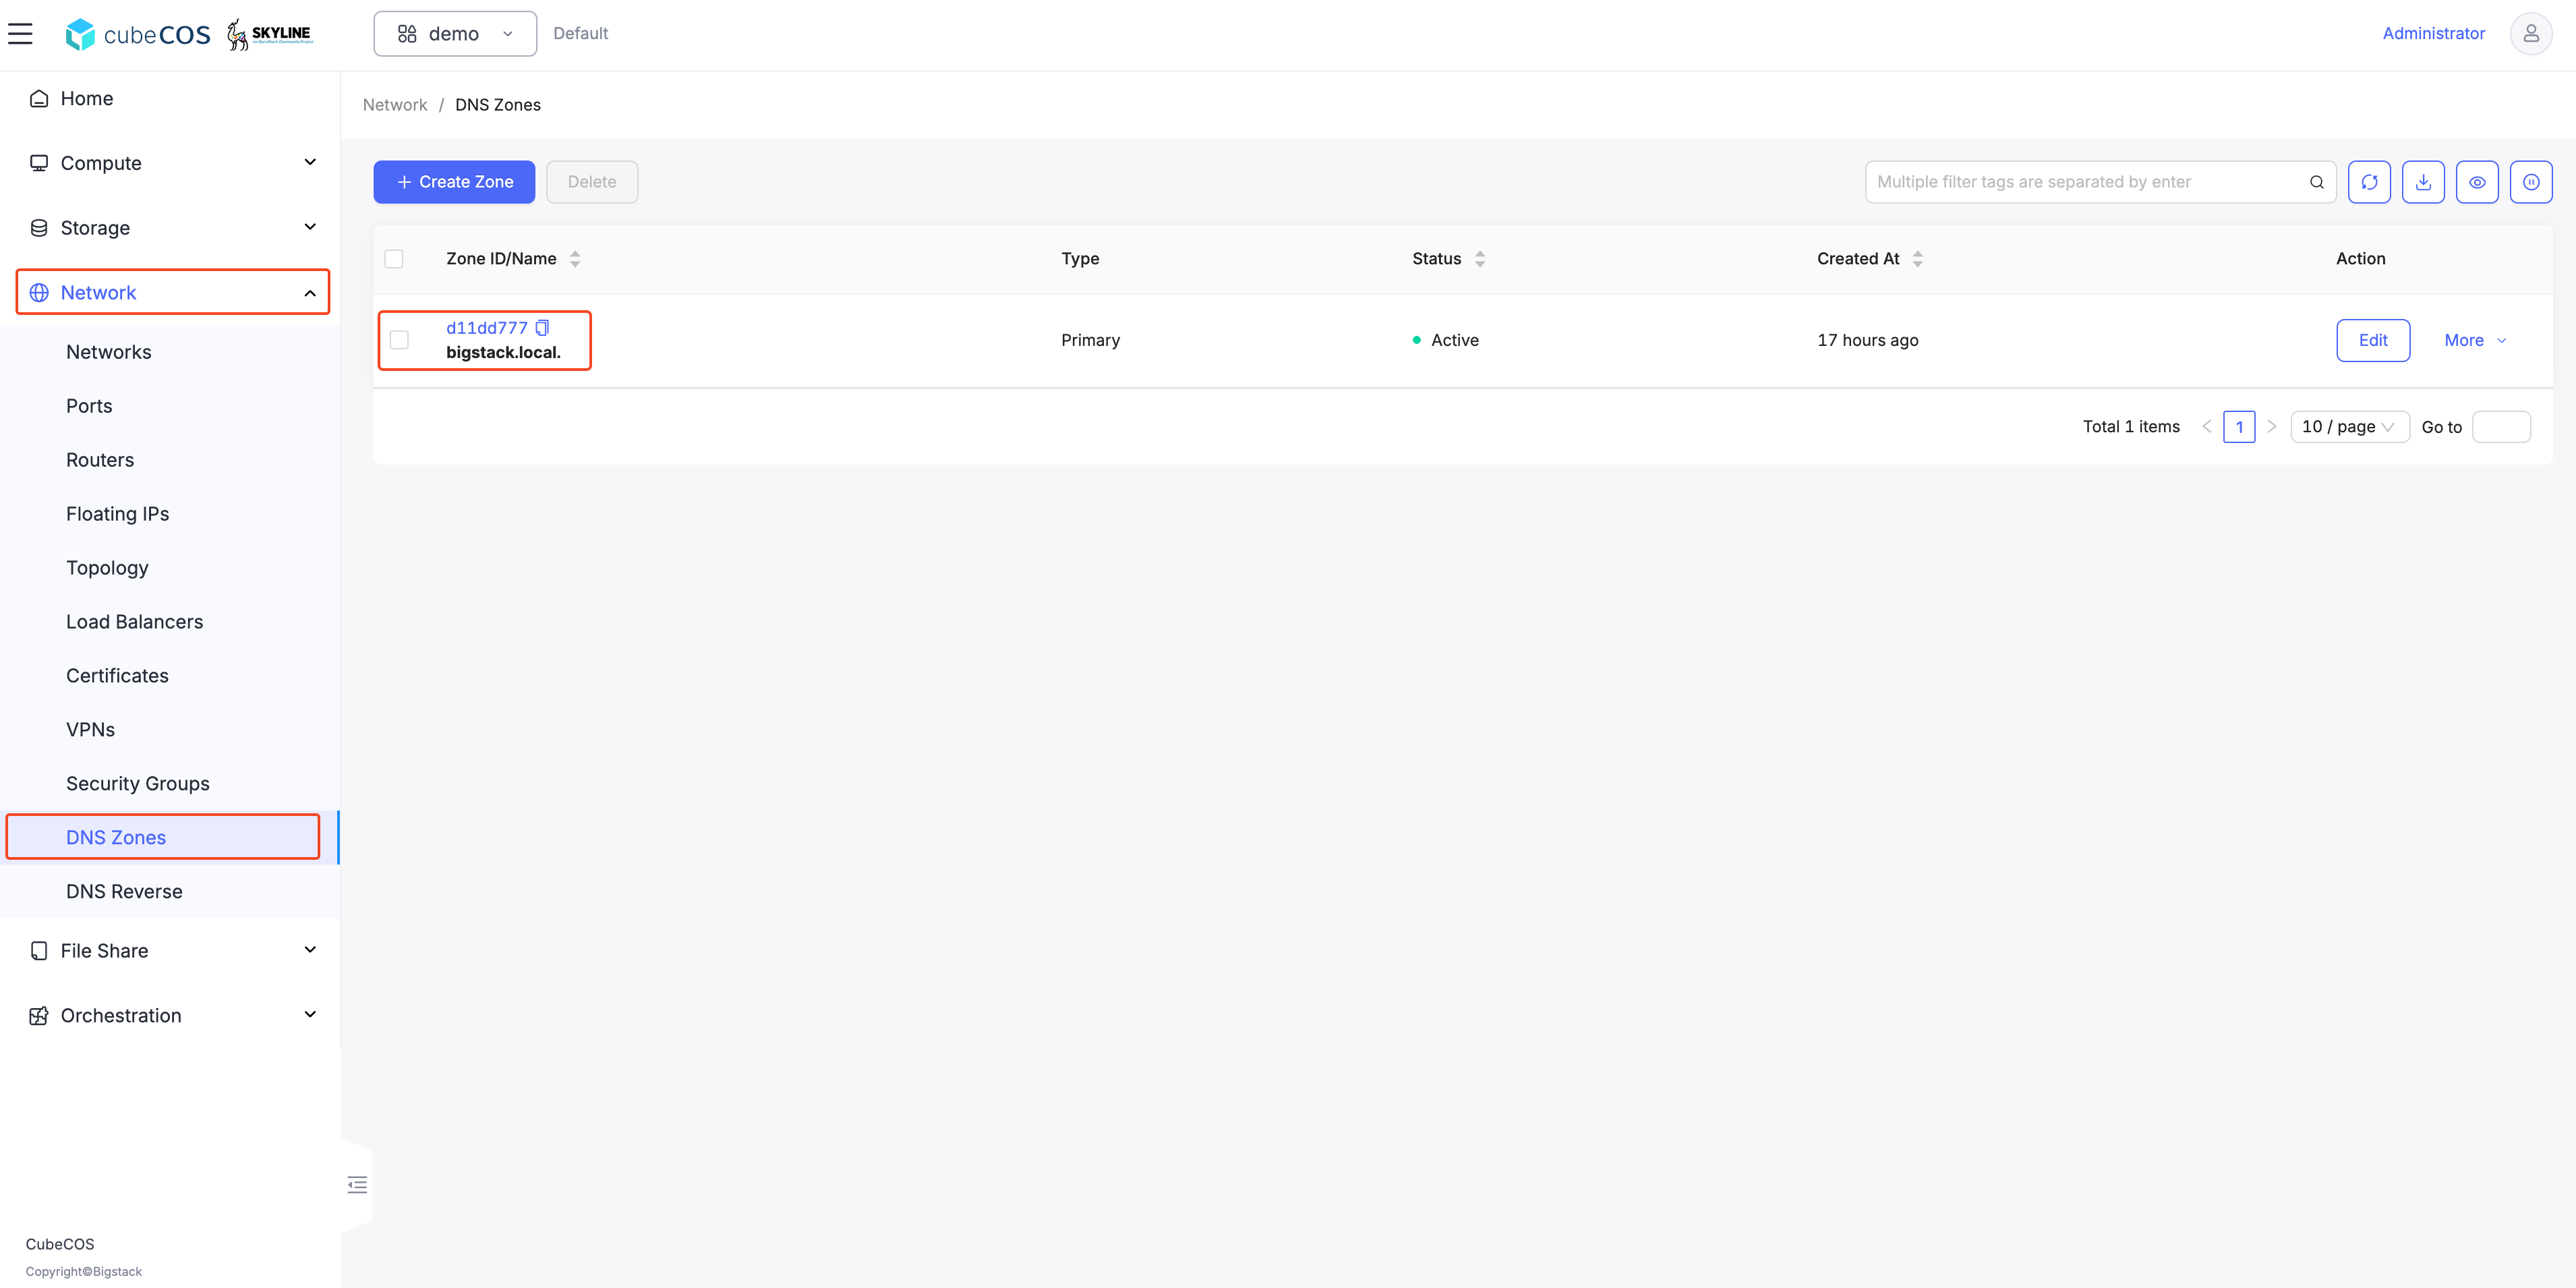
Check the DNS with nslookup
- open a terminal and run
nslookup dns-test.bigstack.local. 10.32.31.10
  ❯ nslookup dns-test.bigstack.local. 10.32.31.10
  Server:  10.32.31.10
  Address: 10.32.31.10#53

  Name: dns-test.bigstack.local
  Address: 172.16.1.25
Summary
In this use case, the address of a floating IP is published in the external DNS service in conjunction with the dns_name of its associated port and the dns_domain of the port’s network. The steps to execute in this use case are the following:
- Assign a valid domain name to the network’s
dns_domainattribute. This name must end with a period (.). - Boot an instance or alternatively, create a port specifying a valid value to its
dns_nameattribute. If the port is going to be used for an instance boot, the value assigned todns_namemust be equal to the host name that the Compute service will assign to the instance. Otherwise, the boot will fail. - Create a floating IP and associate it to the port.