User Group (Local)
-
Navigate to
Administrator > Identity > User Groups, create a new group and click+ CREATE USER GROUP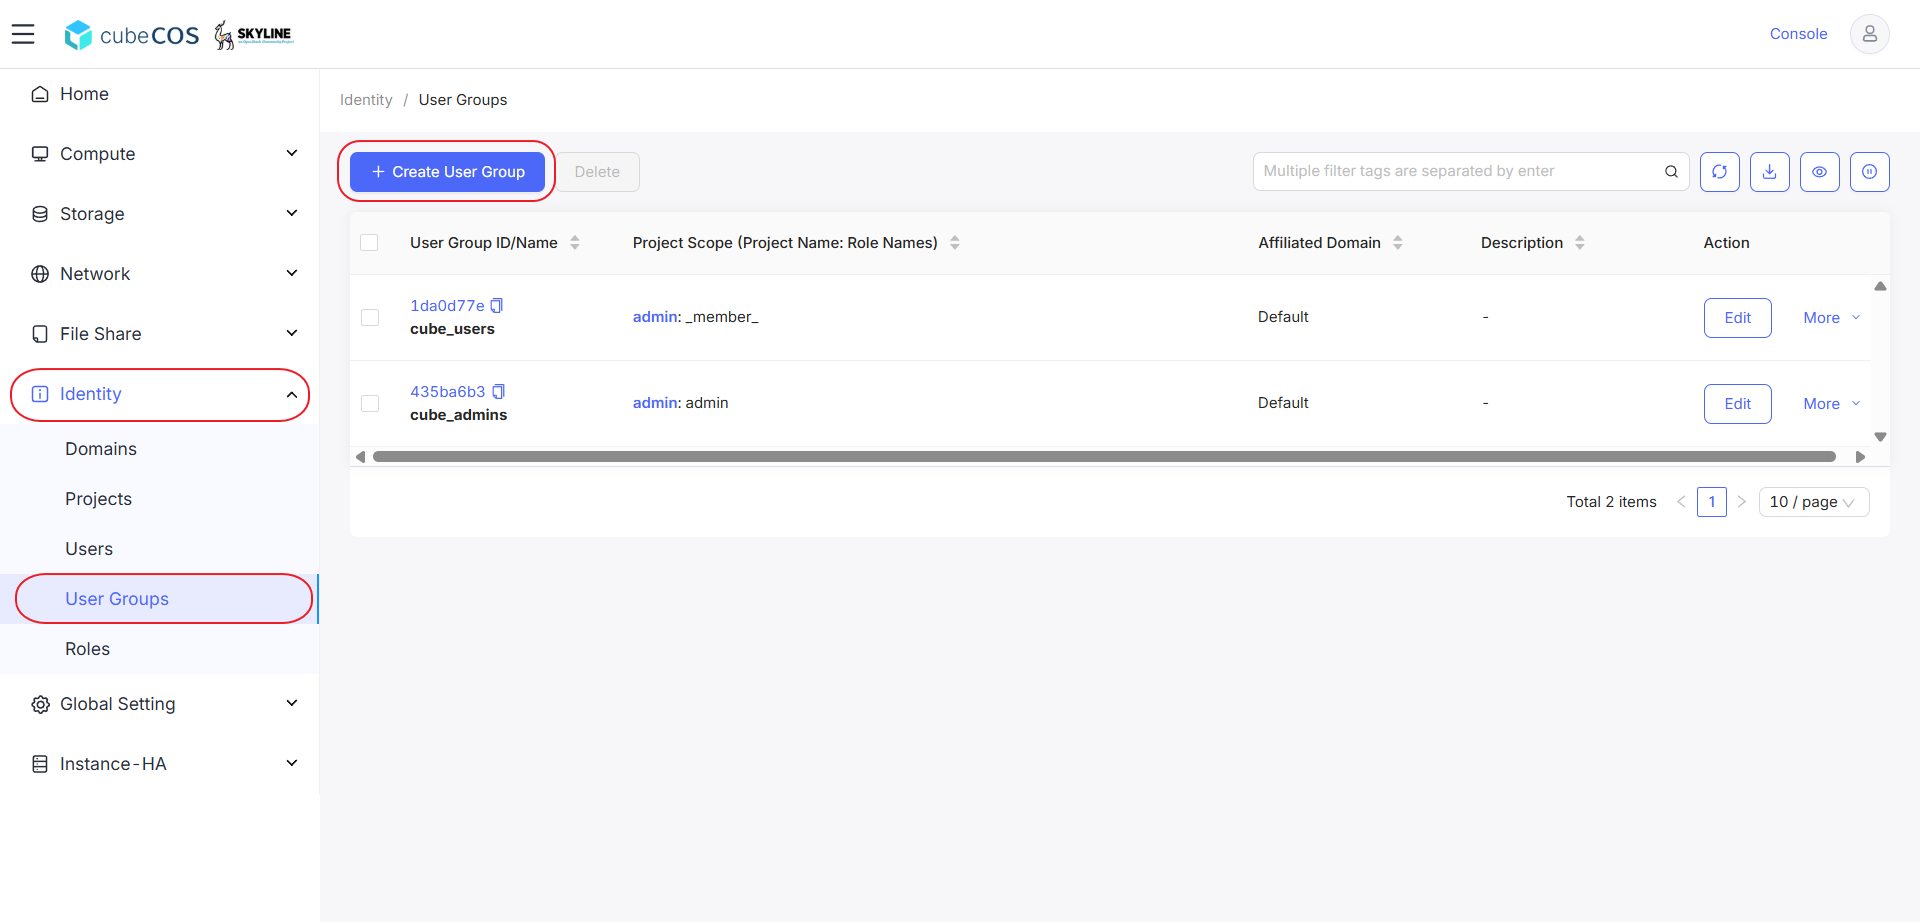
-
Insert User Group Name and select Affiliated Domain from its drop down menu, click
OK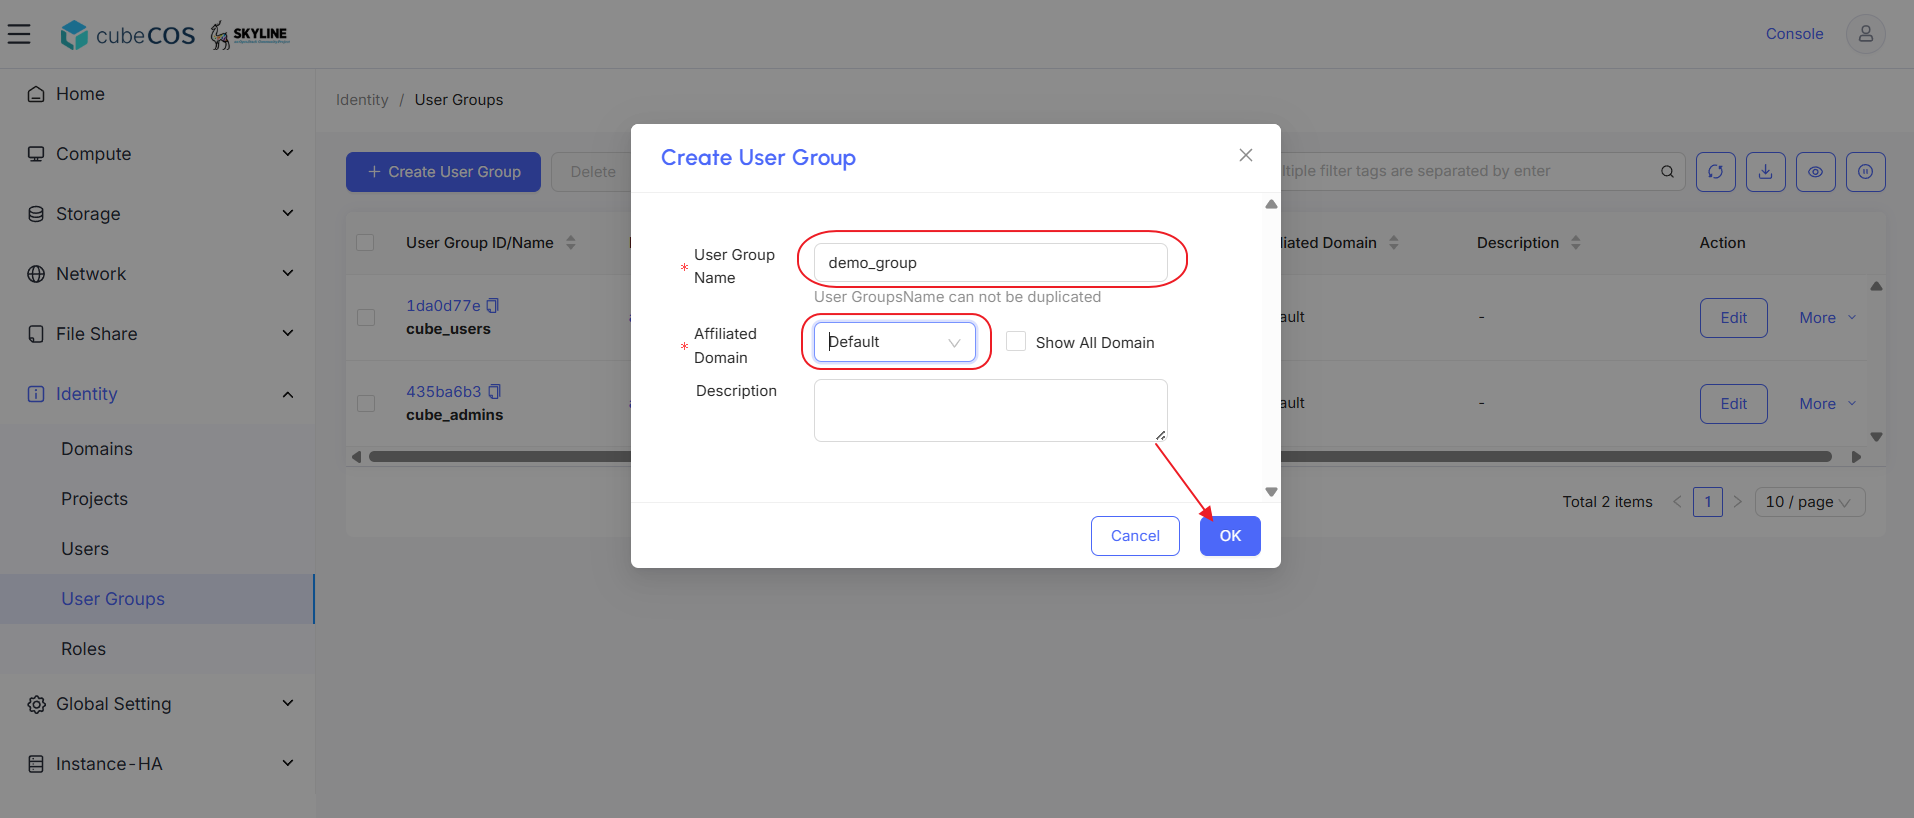
-
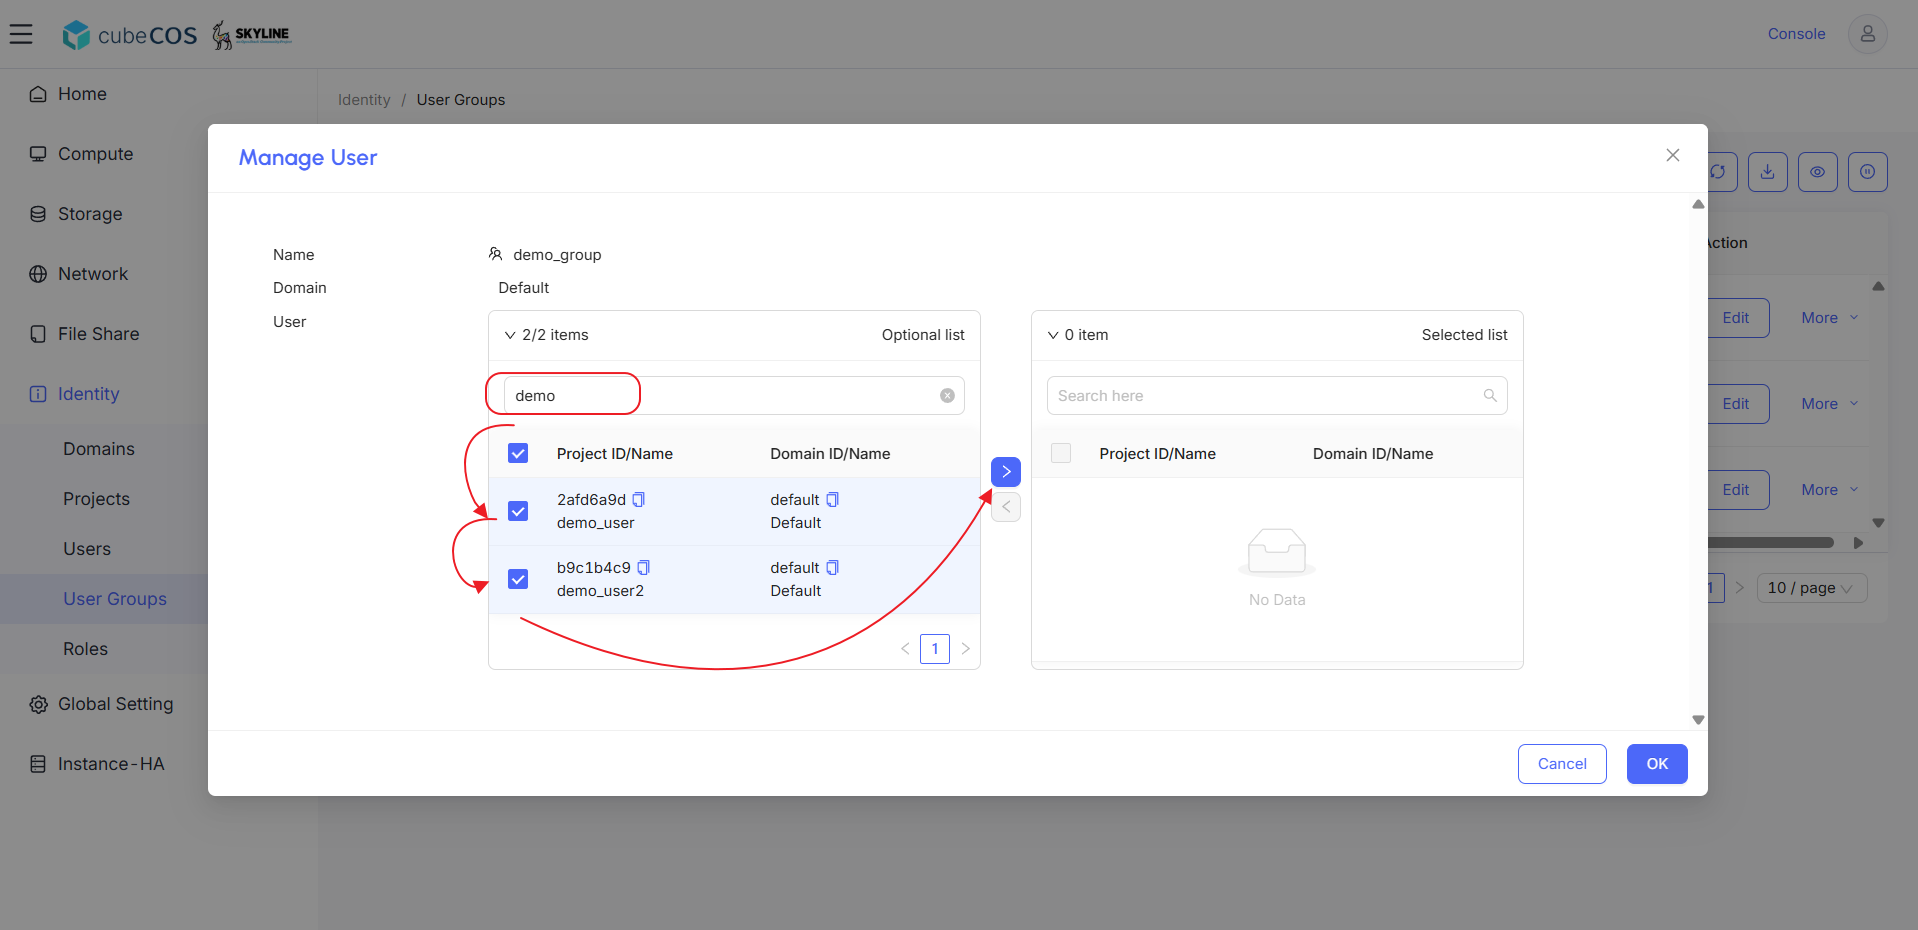
After creating, choose your User Group, then click
More. SelectManage Userat the drop-down menu.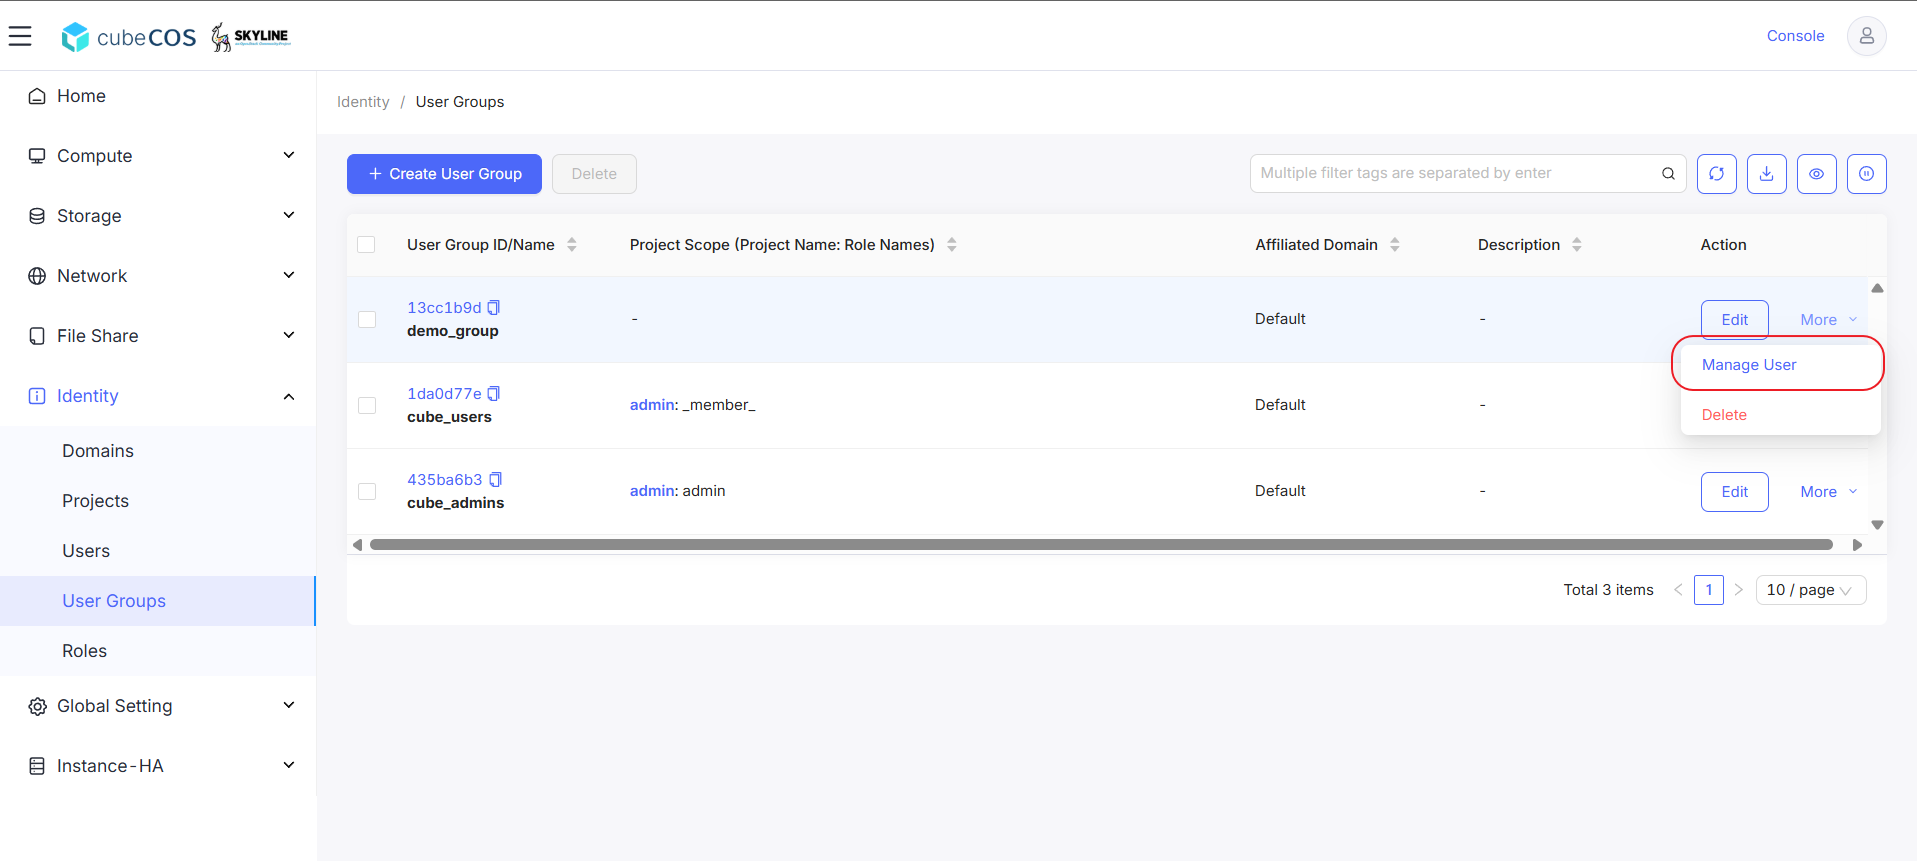
-
To add users, select them from the Optional list and click the > icon to move them to the Selected list.
-
Ensure users appear in the Selected list, click
OKto apply.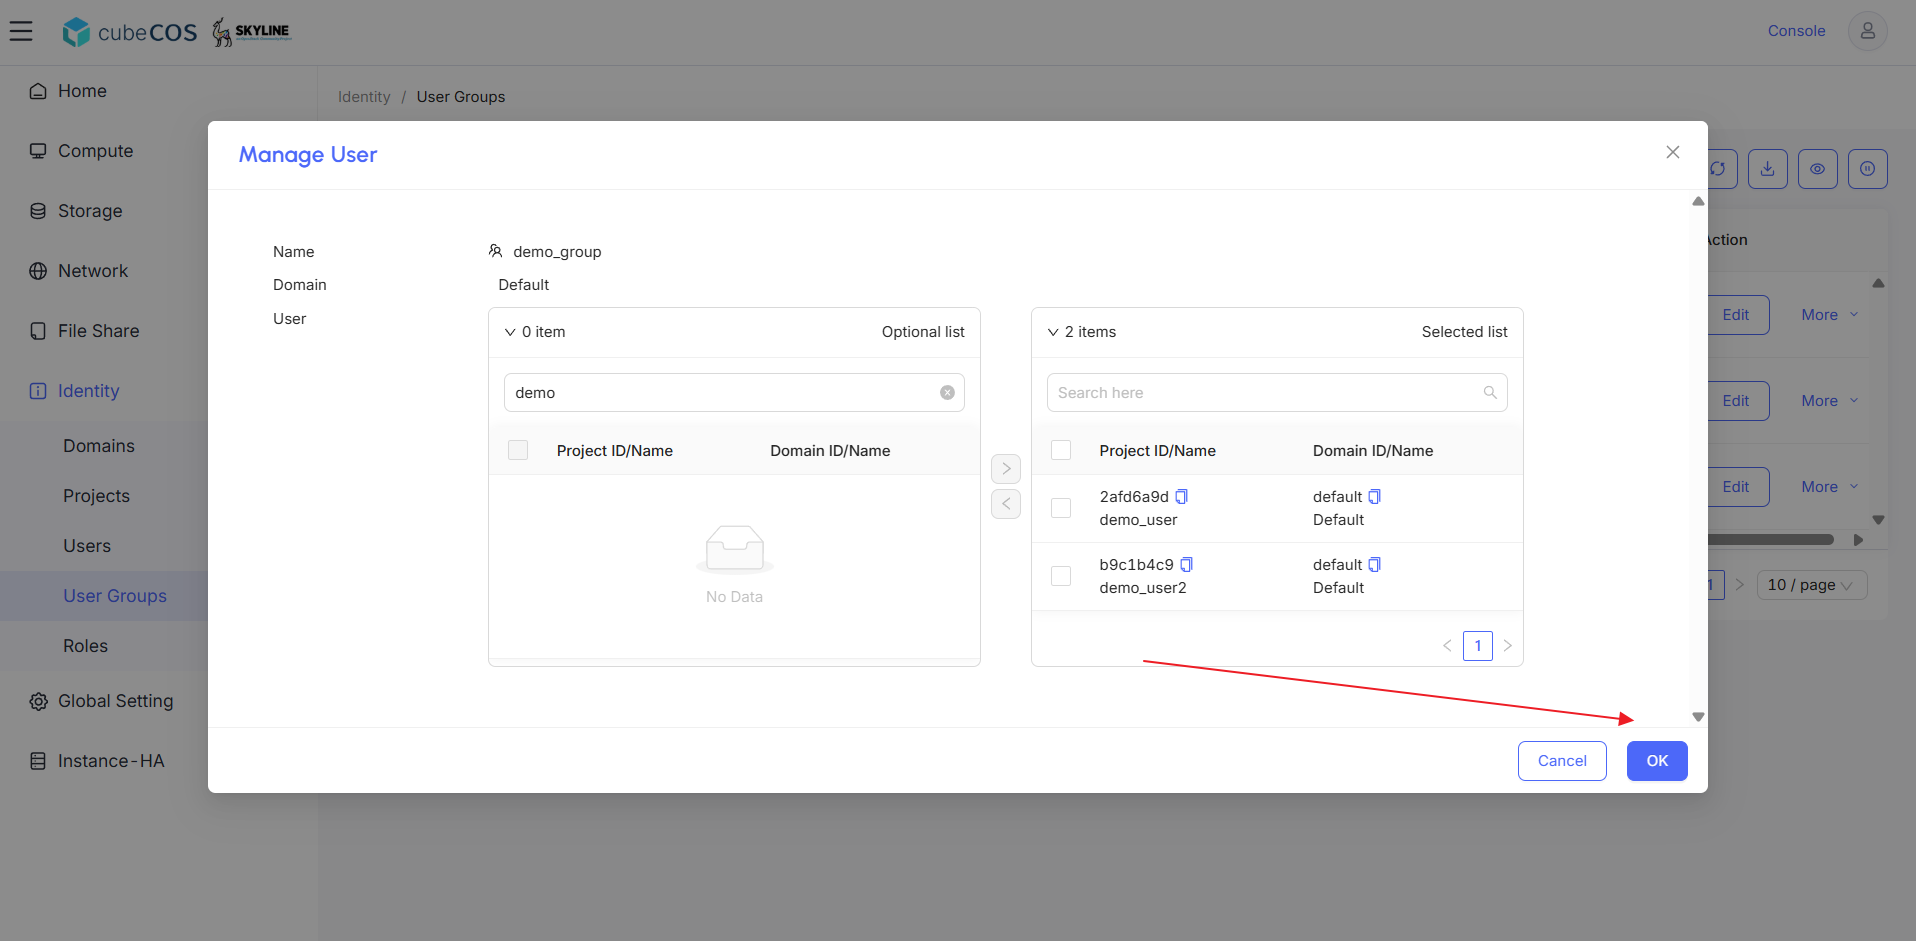
-
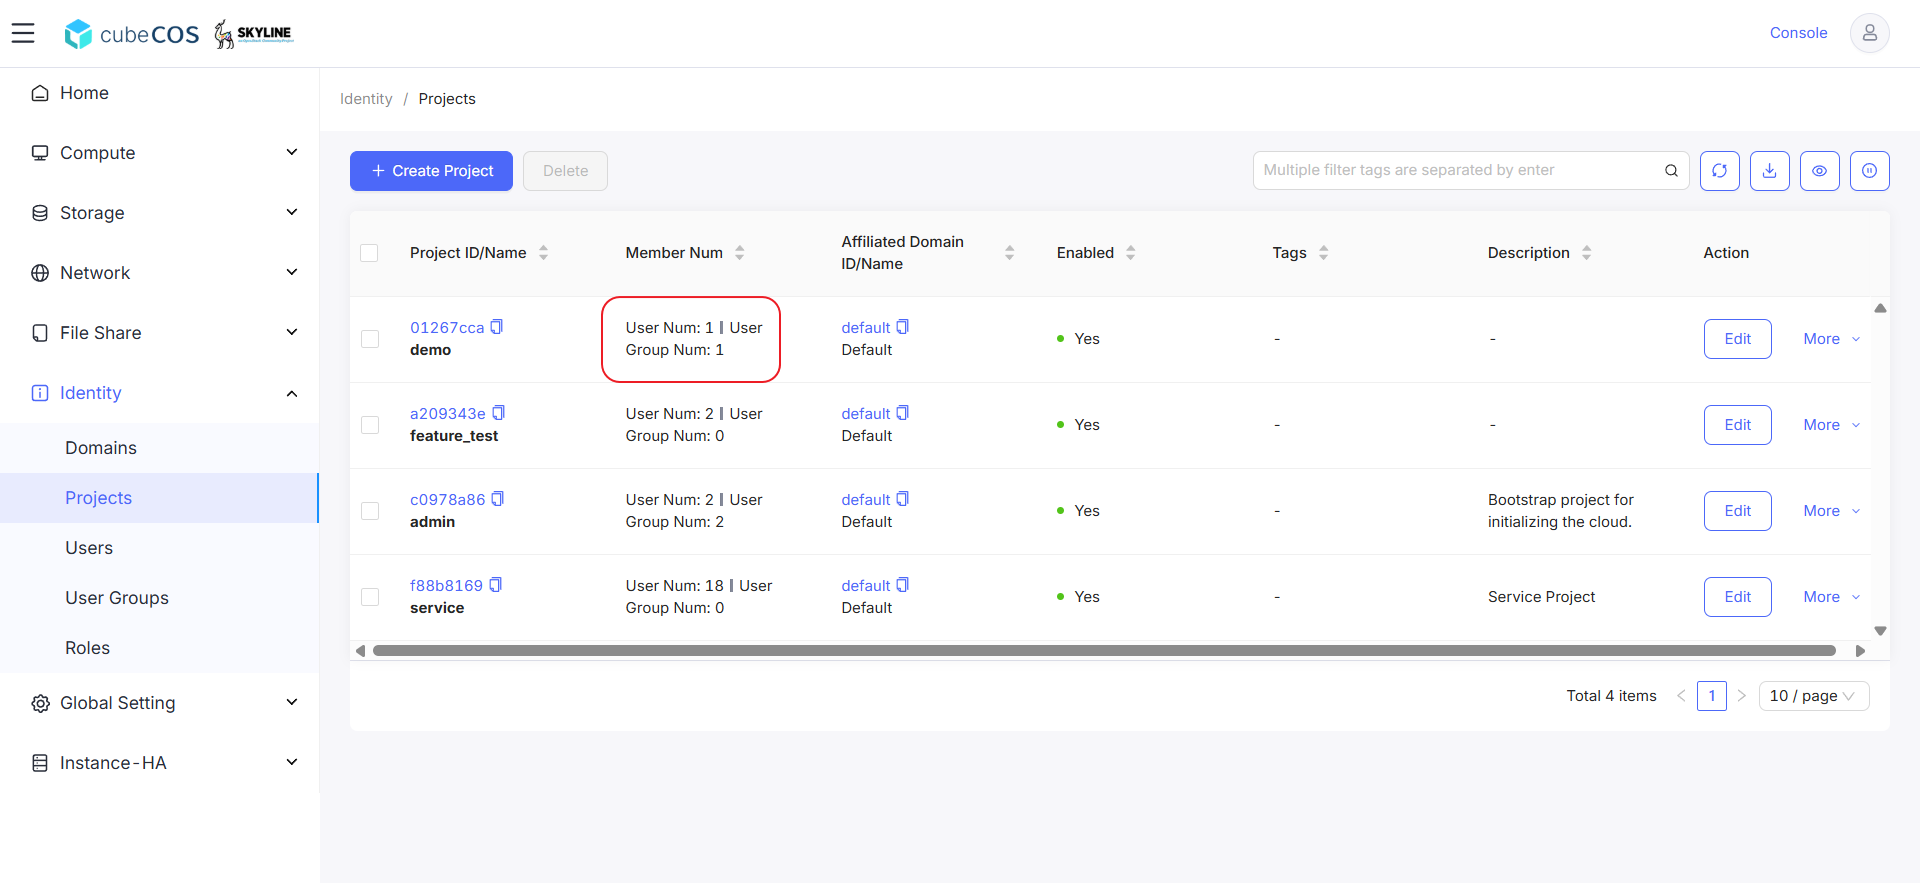
Navigate to
Administrator > Identity > Projects, choose the desired project, then clickMore. SelectManage User Groupfrom the drop-down menu.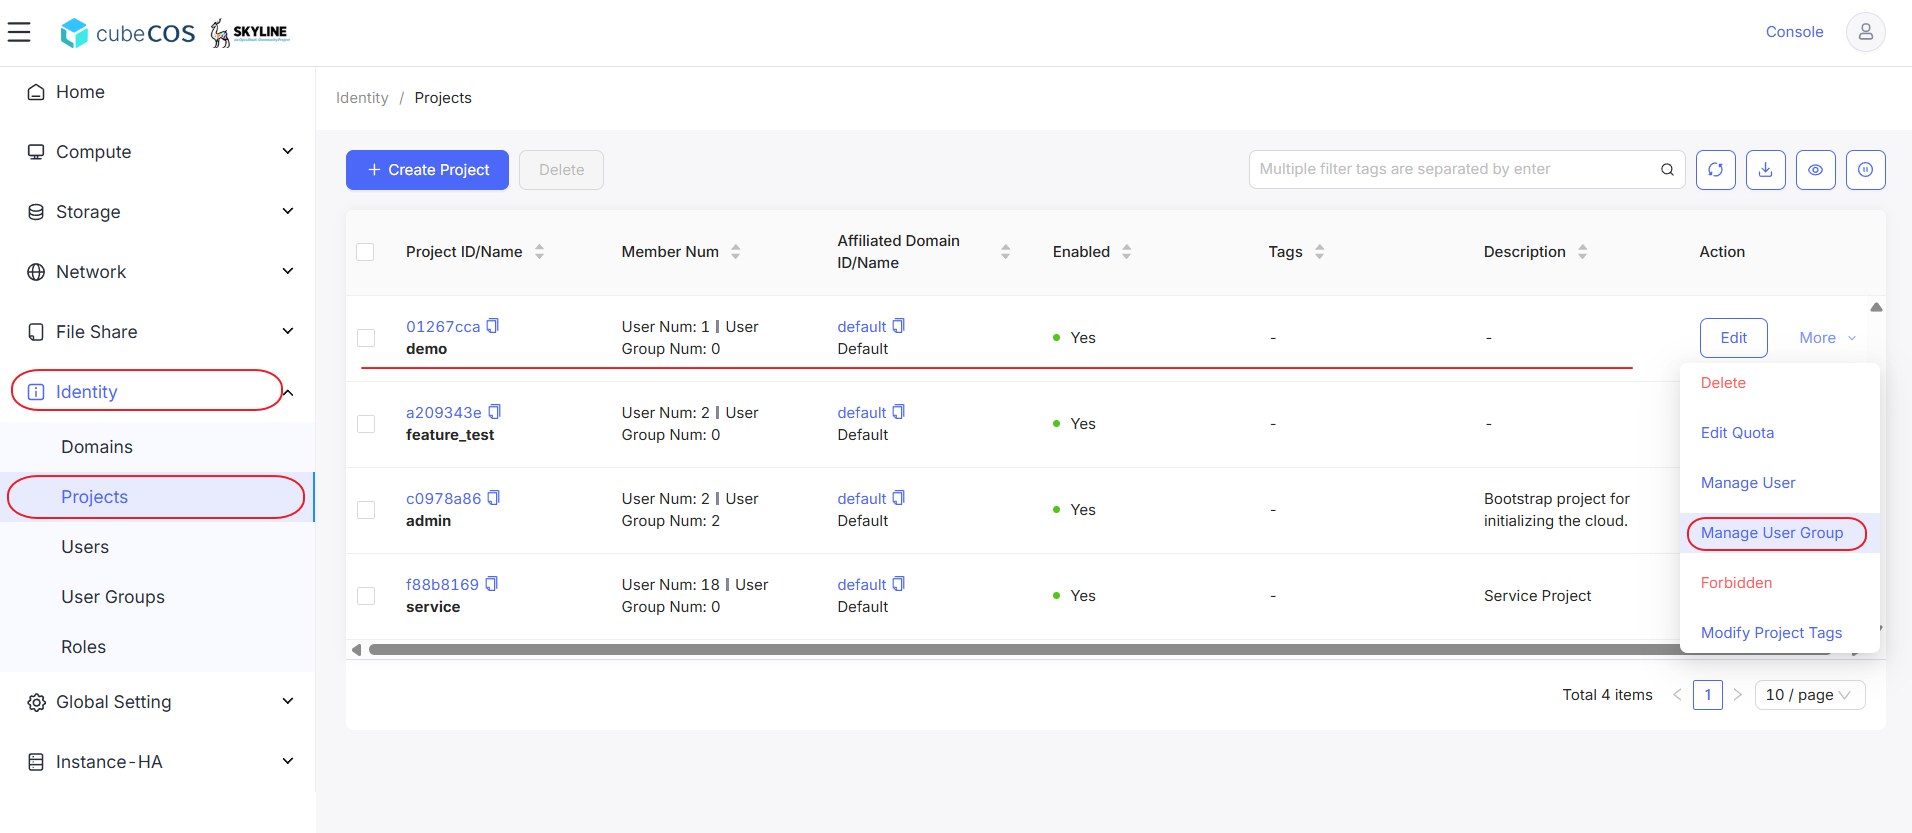
-
To add user groups, select them from the
Optional listand click the>icon to move them to theSelected list.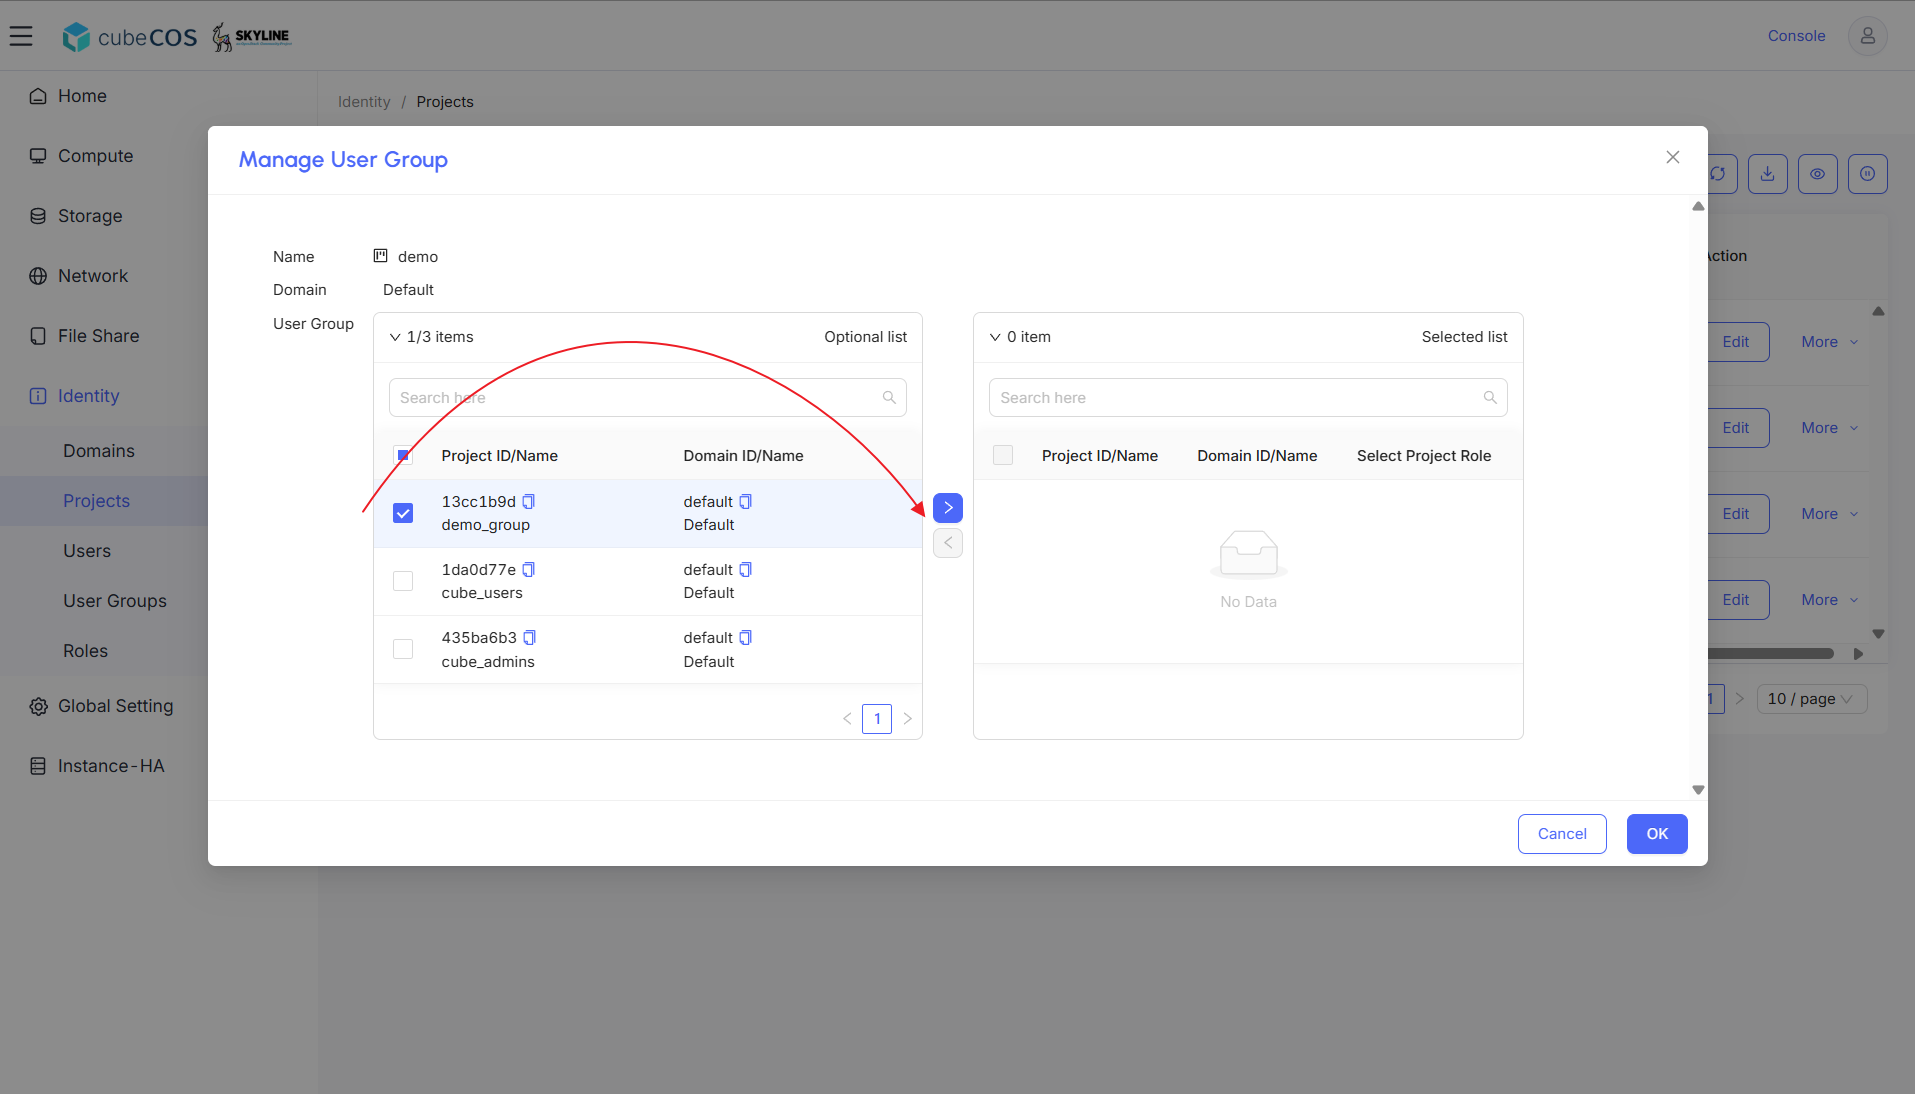
-
In the Selected list, assign
adminand_member_Project Role privileges.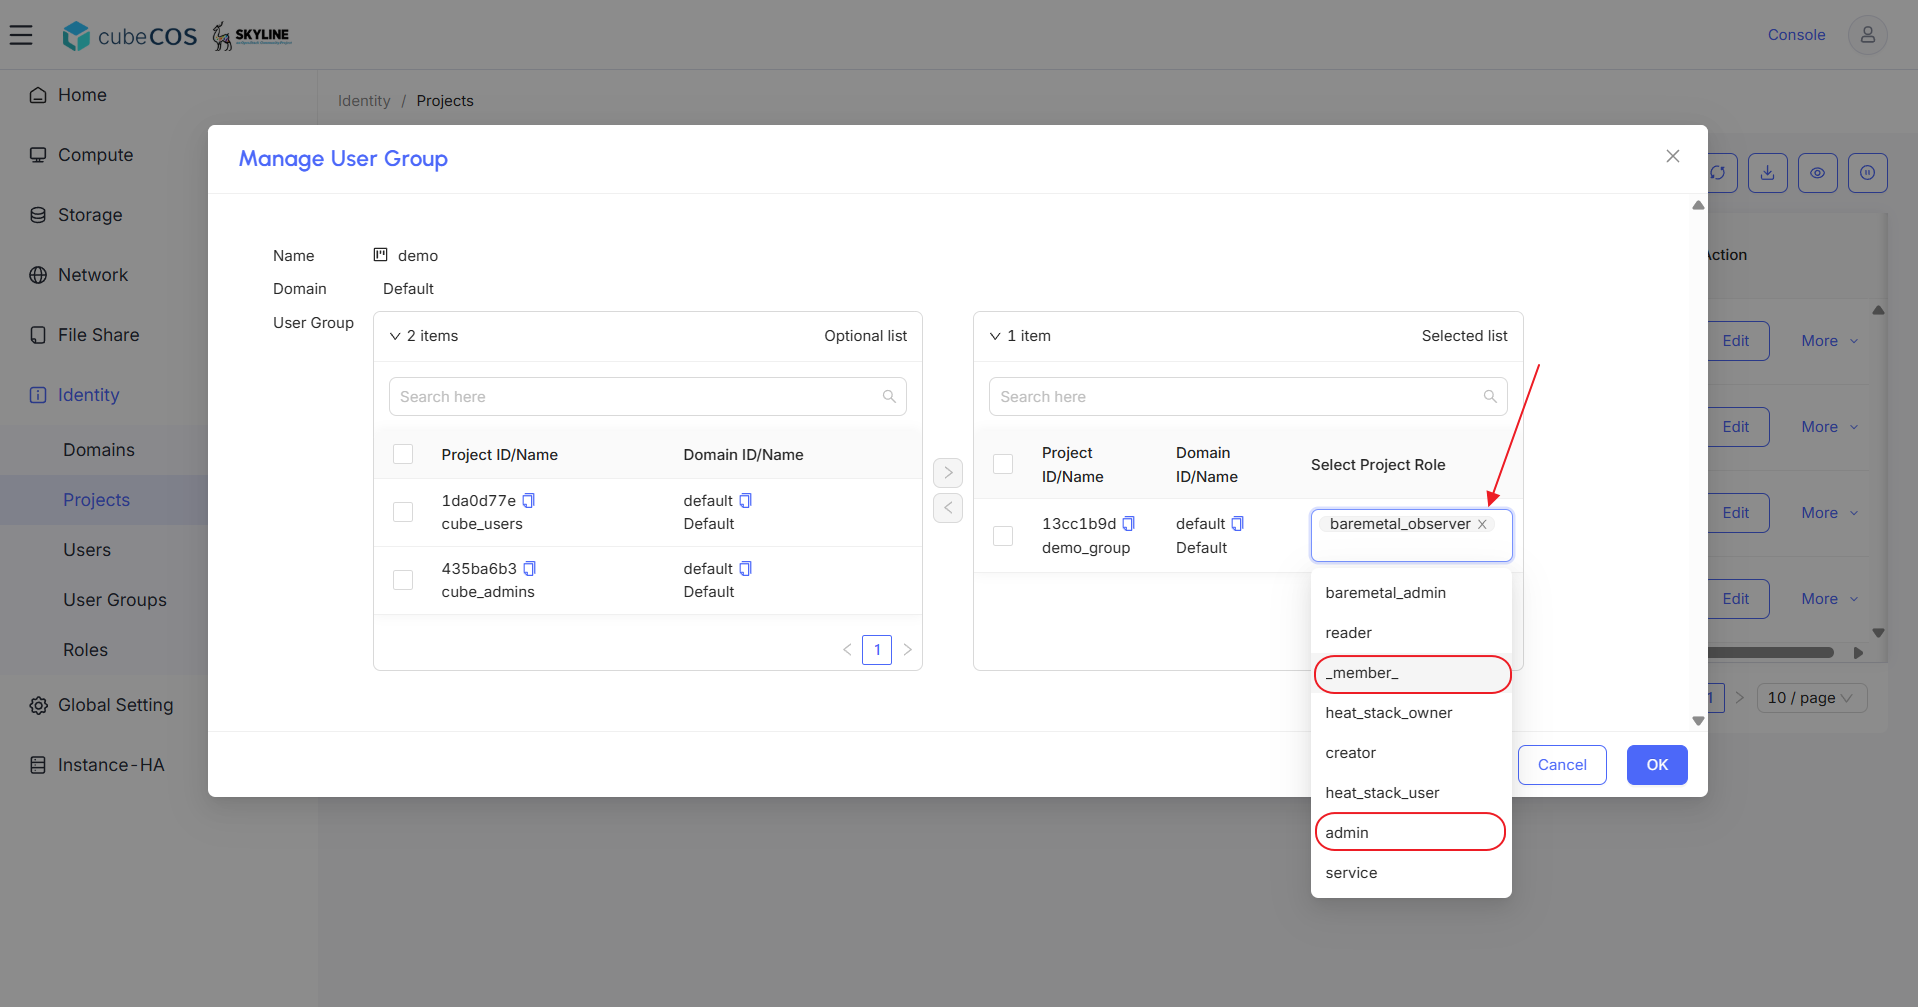
-
After modifying all Project Role privileges in the Selected list, click
OKto apply.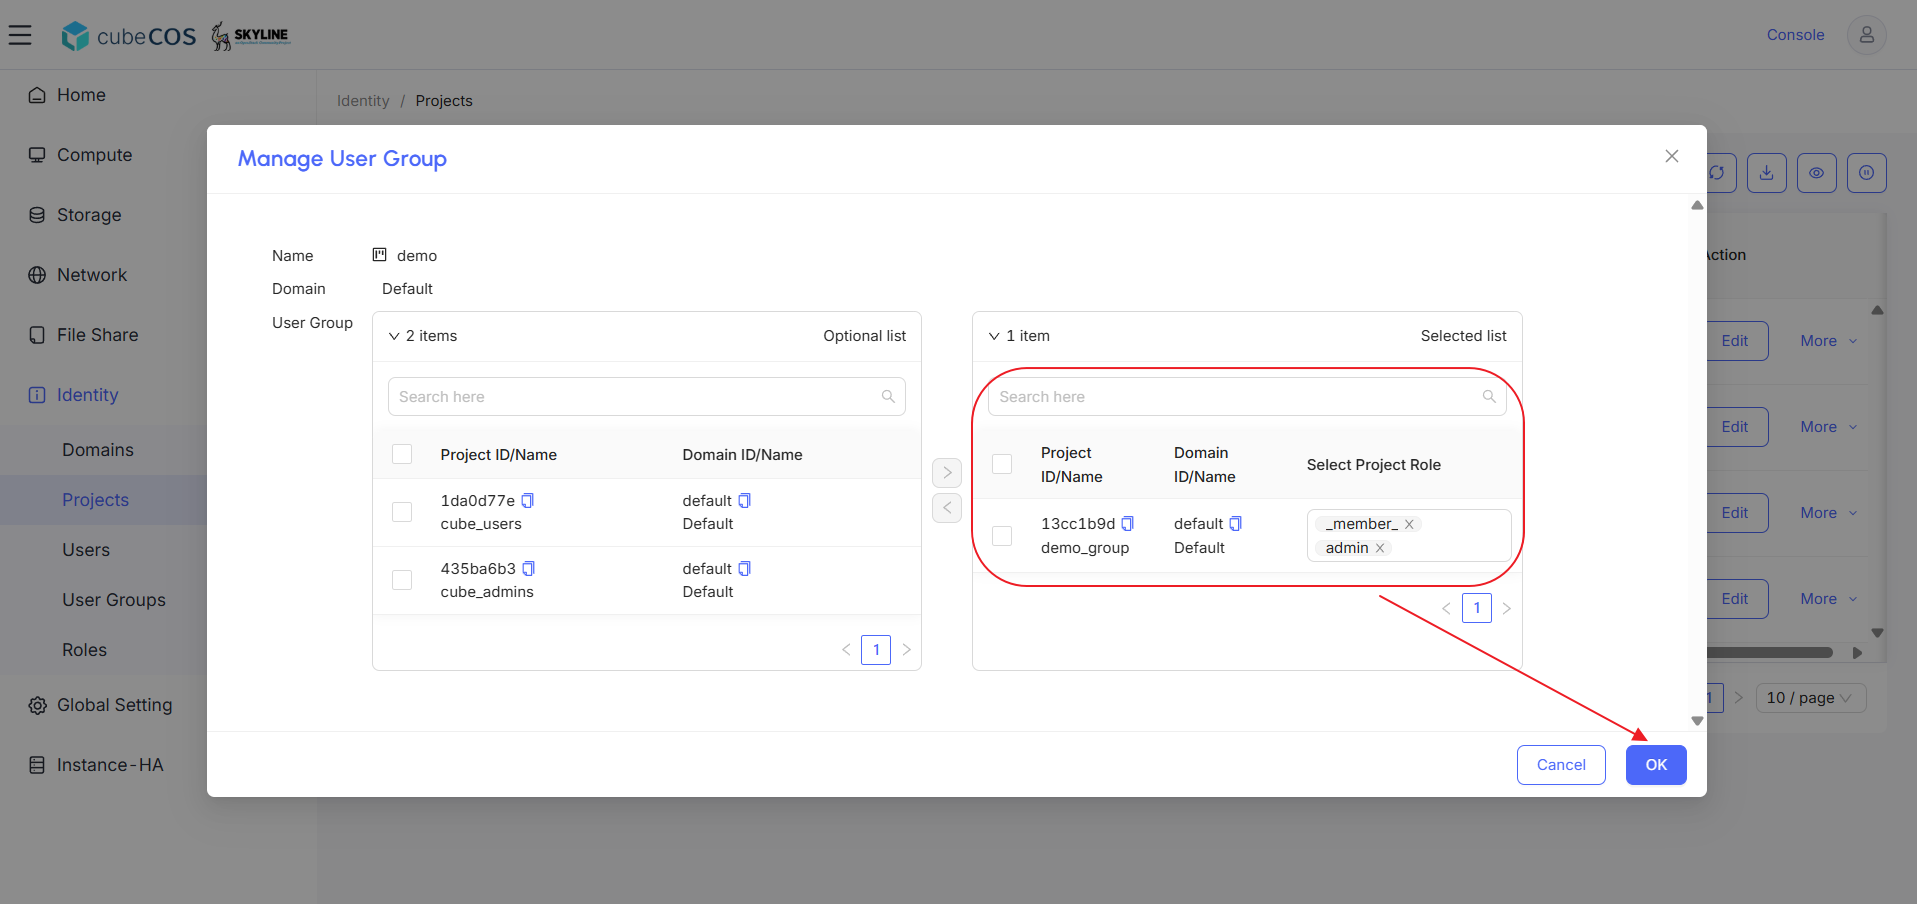
-
Check the Member Num column to verify the application.