Create a tenant sharing
USB storage devices are blocked by default. If accessing USB devices is needed, please set the tuning option cubesys.probeusb to true using CLI > tuning > configure after logging in as admin.
Create a share server and share its volumes with others VM on the same network
Pre-task
- Upload manila-service-image_yoga to
/mnt/cephfs/glance - import with cli
import_fs
  cc1> image import_fs
  1: usb
  2: local
  Enter index: 2
  1: manila-service-image-yoga.qcow2
  Enter index: 1
  Importing...
  [16:54:04] Converting image to RAW format ...
      (100.00/100%)
  [16:54:07] Creating image manila-service-image ...
  [=============================>] 100%
  669320d1-7b8e-4a7e-85a0-79e5ea54abe6
  [16:54:57] Finished creating image manila-service-image
  Importing  complete. It is safe to remove the local image file.
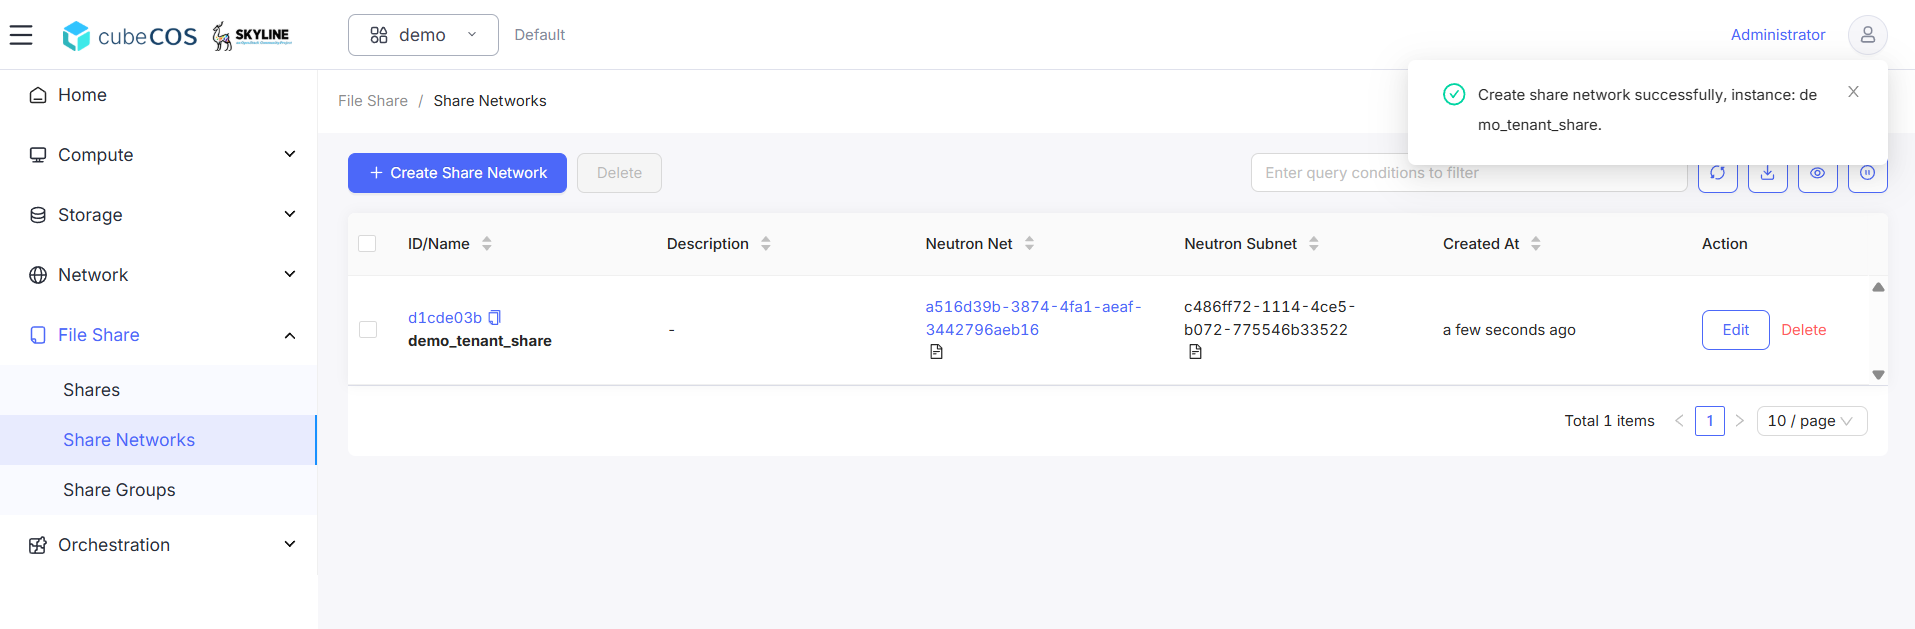
Create Share Networks
-
Navigate to
Project > File Share > Share Networks>+ Create Share Network.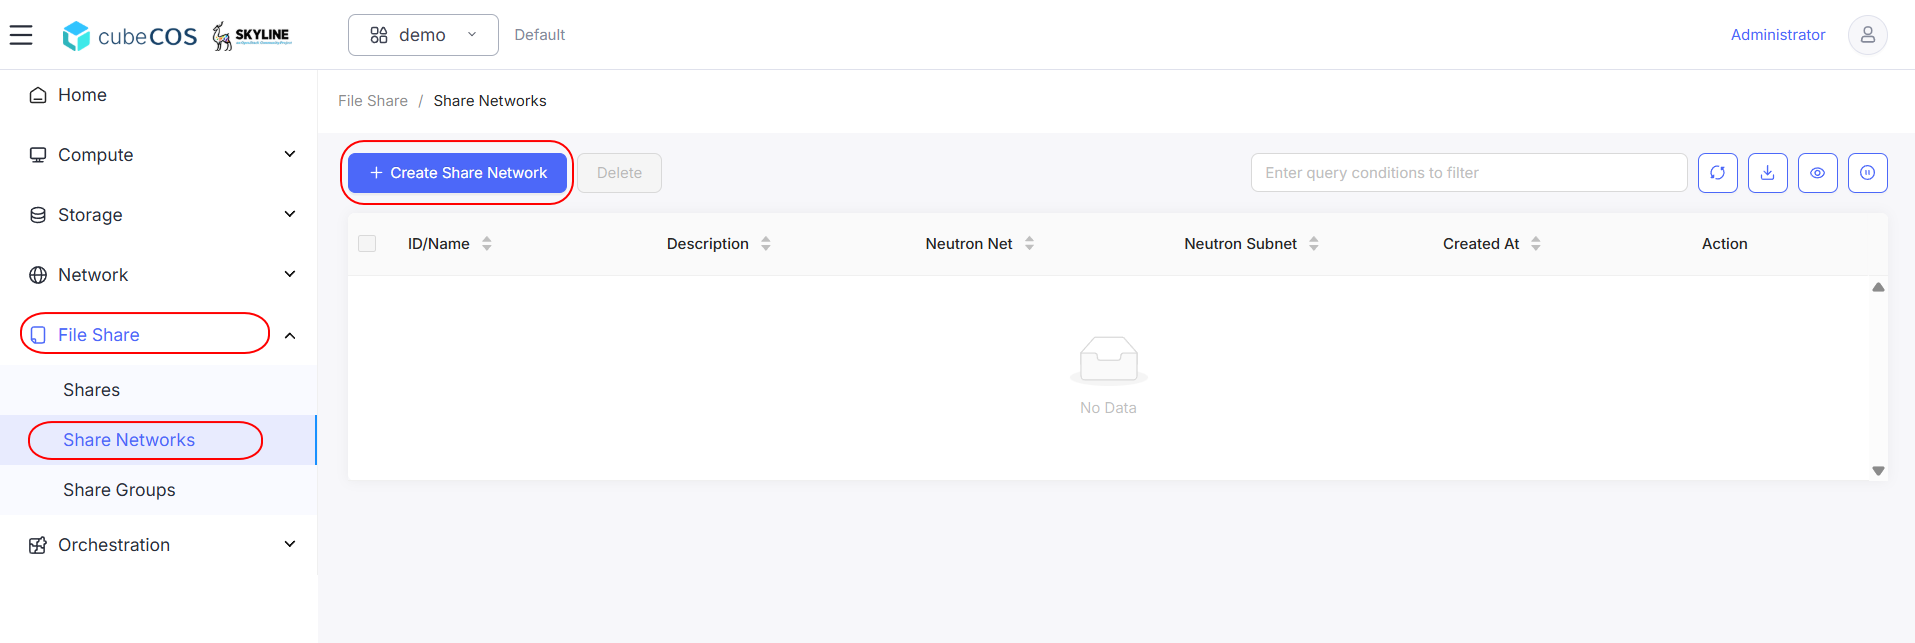
-
Name the SHARE NETWORK, select desired Network and Subnets for sharing. Click
OKto proceed.
-
Verify Share Network by checking dashboard.
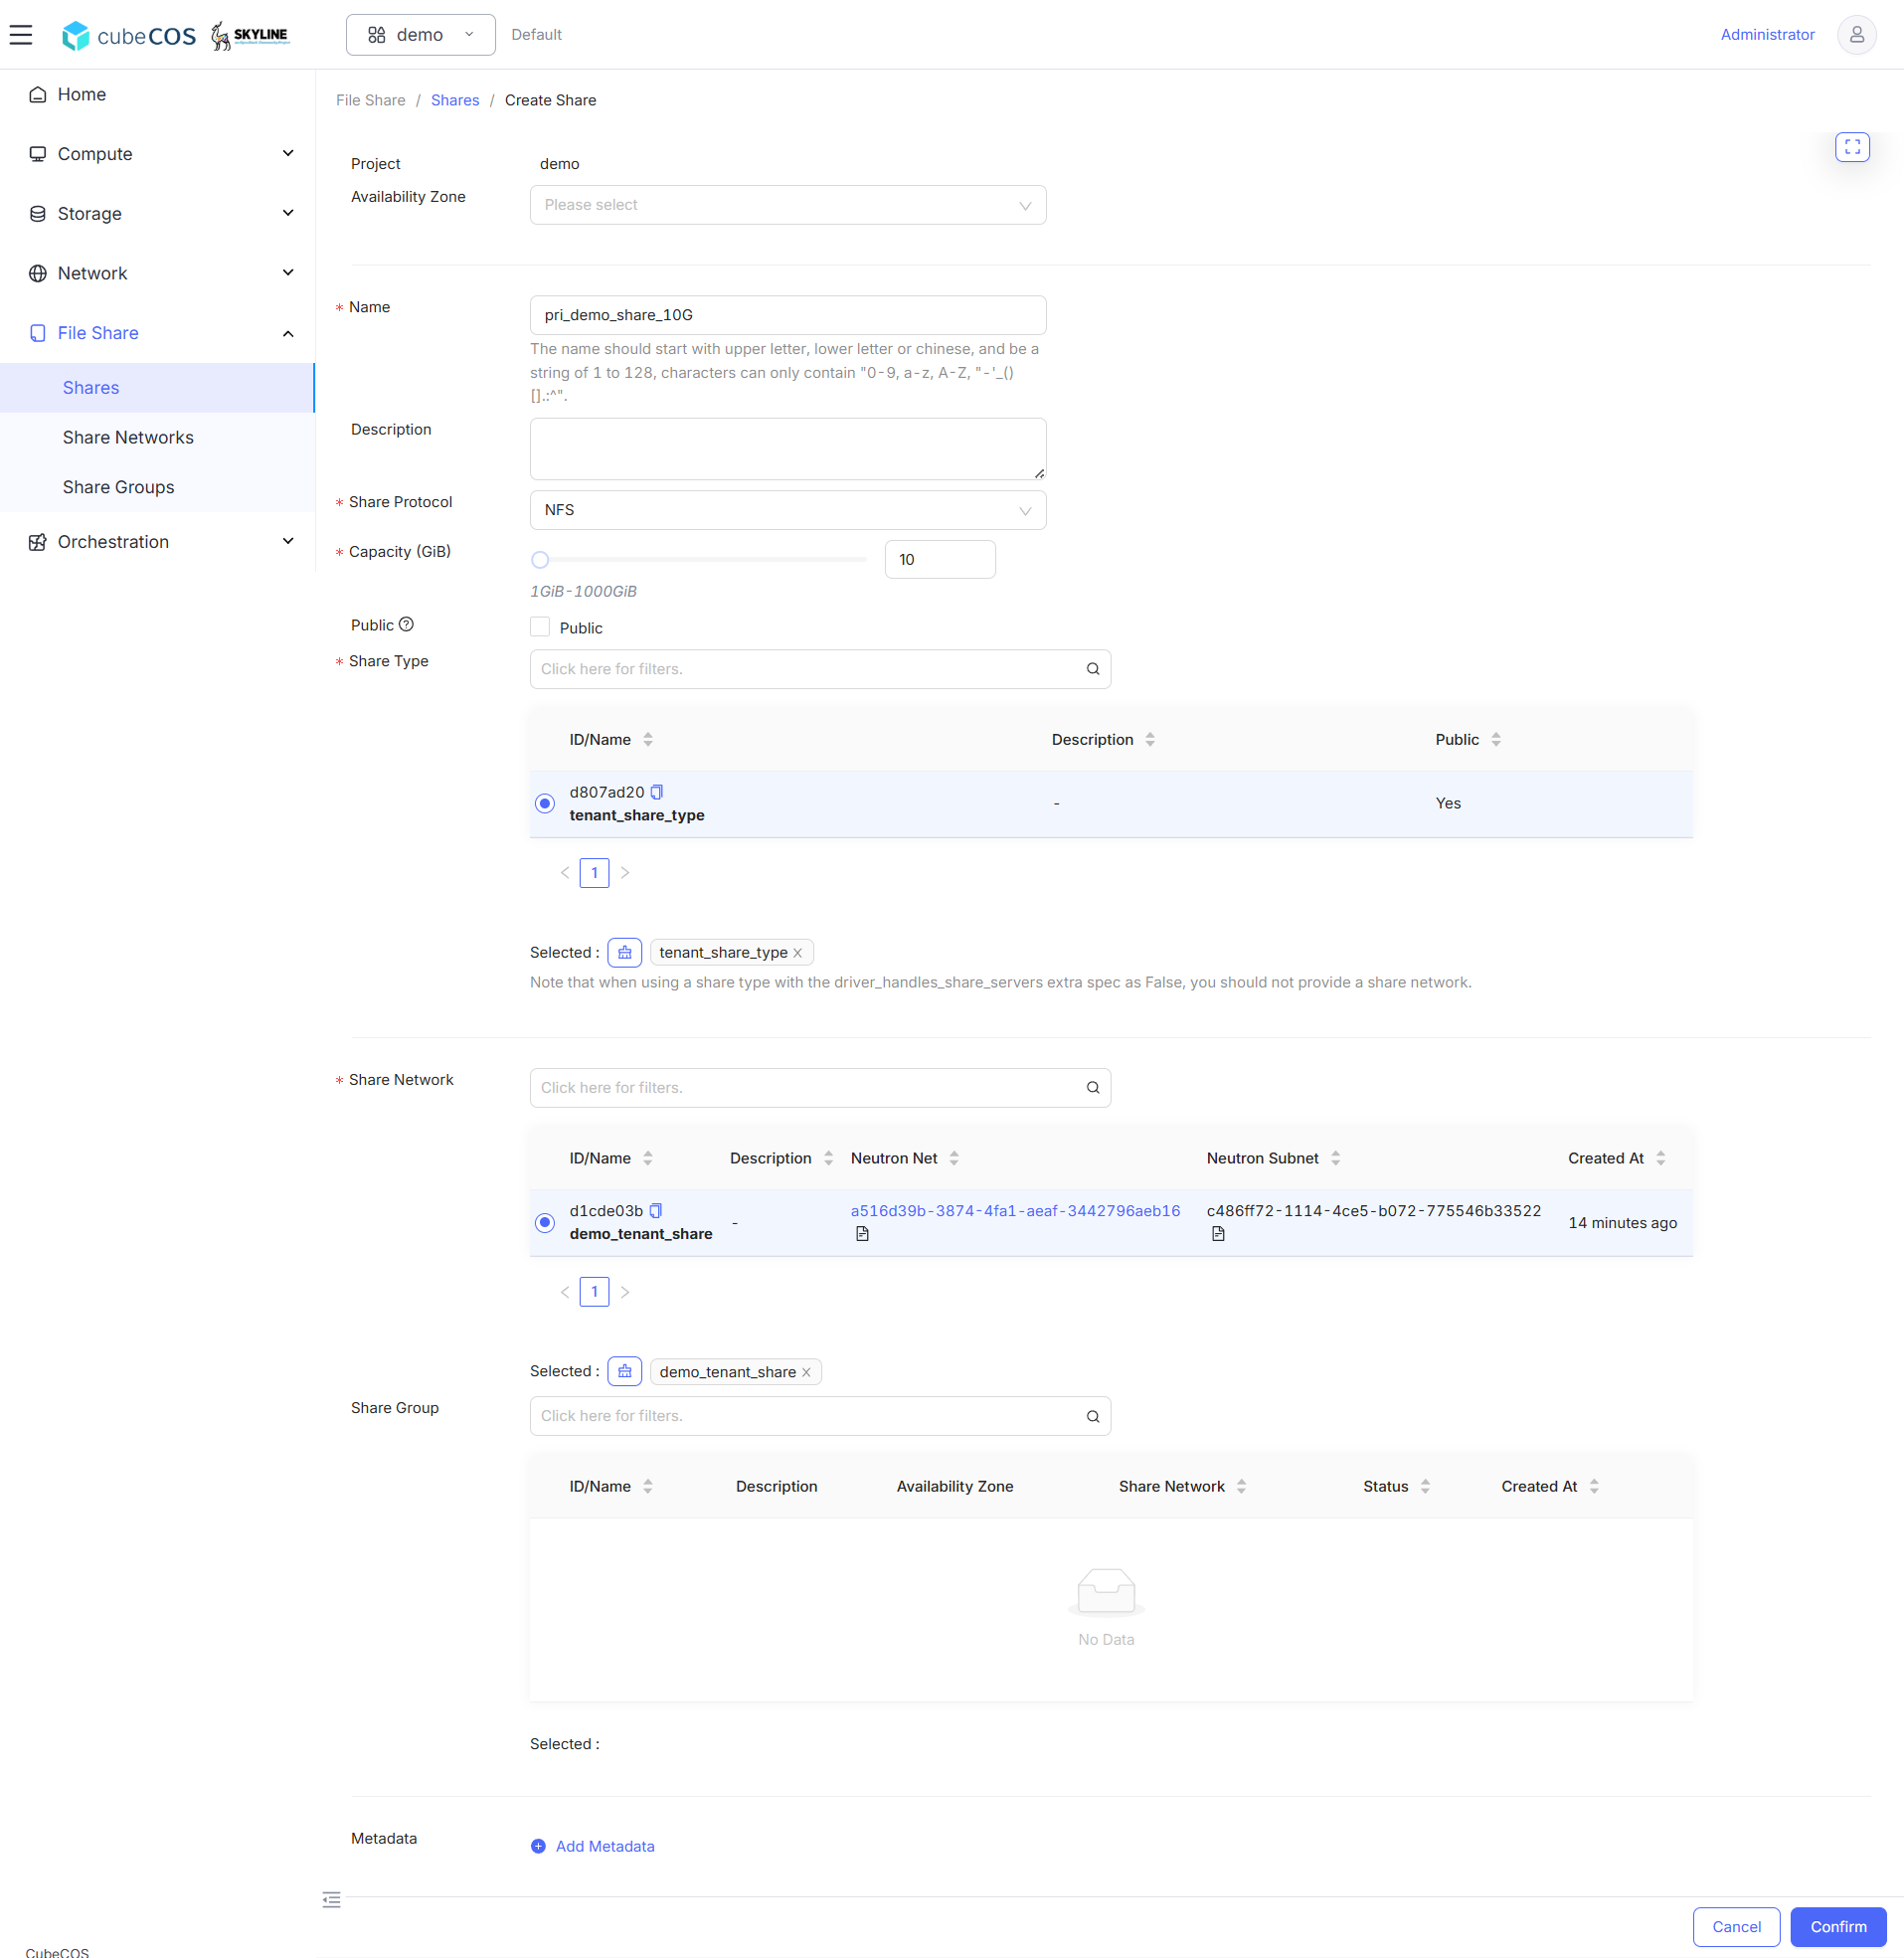
Create a Share - tenant share type
-
Navigate to
Project > File Share > Shares>+ Create Share.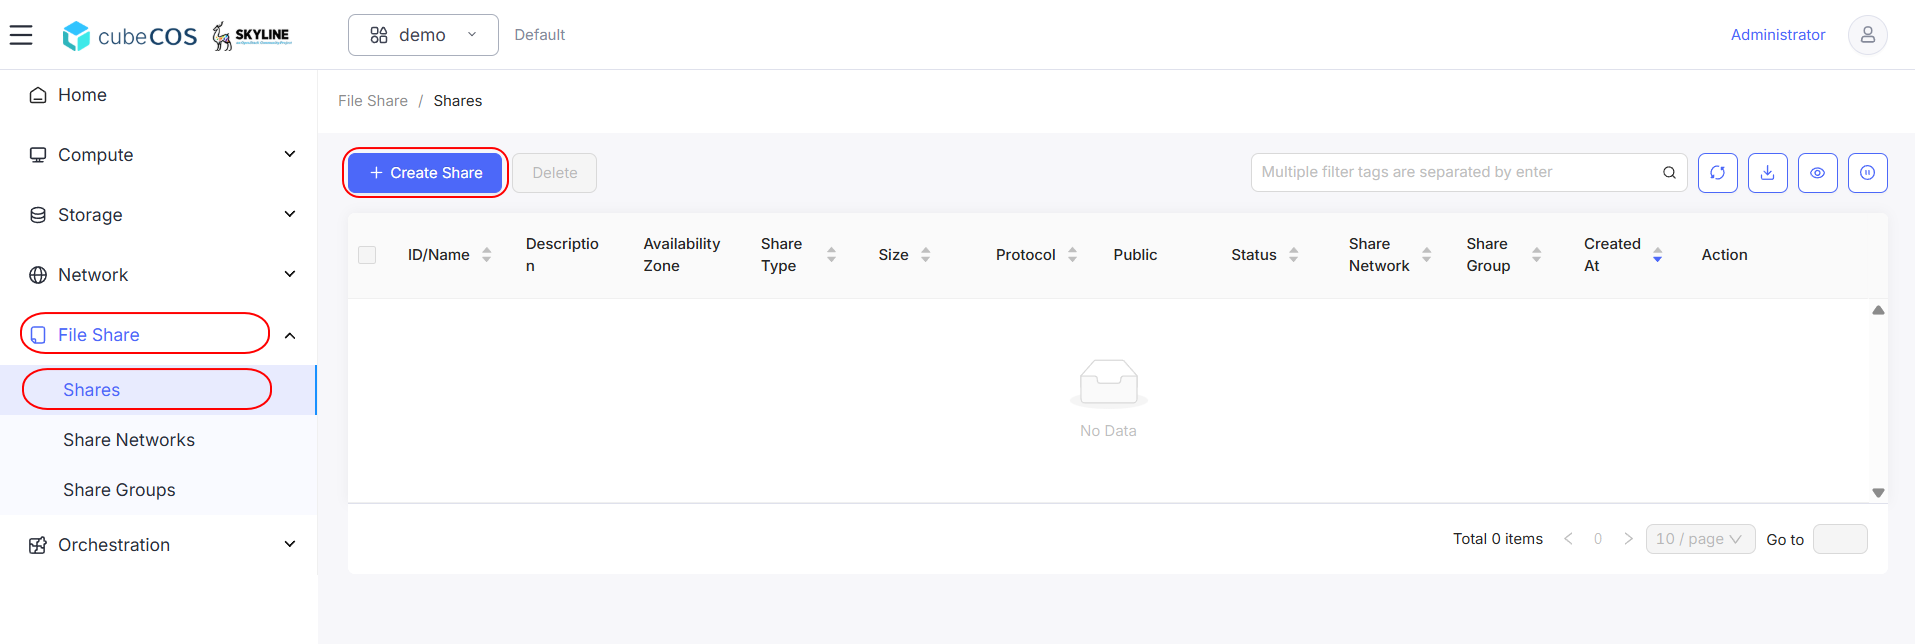
-
For this creation, fill in the following fields:
-
Available Zone: Specify Available Zone of Volume to create in. Choose Not Select unless clearly knowing which to assign. Available Zone is not required and set to none by default
-
*Name : Input desired name of the Share.
-
*Share Protocol: Supported Share Protocol types listed below
- NFS
- CIFS
-
*Capacity (GiB): Set capacity of the share volume (GiB, minimum 1).
-
*Share Type: Choose tenant_share_type.
-
*Share Network: Choose the Share Network created above.
After filling all fields above, click
Confirmto apply Share creation.Demonstration below will use NFS as Share Protocol
-
-
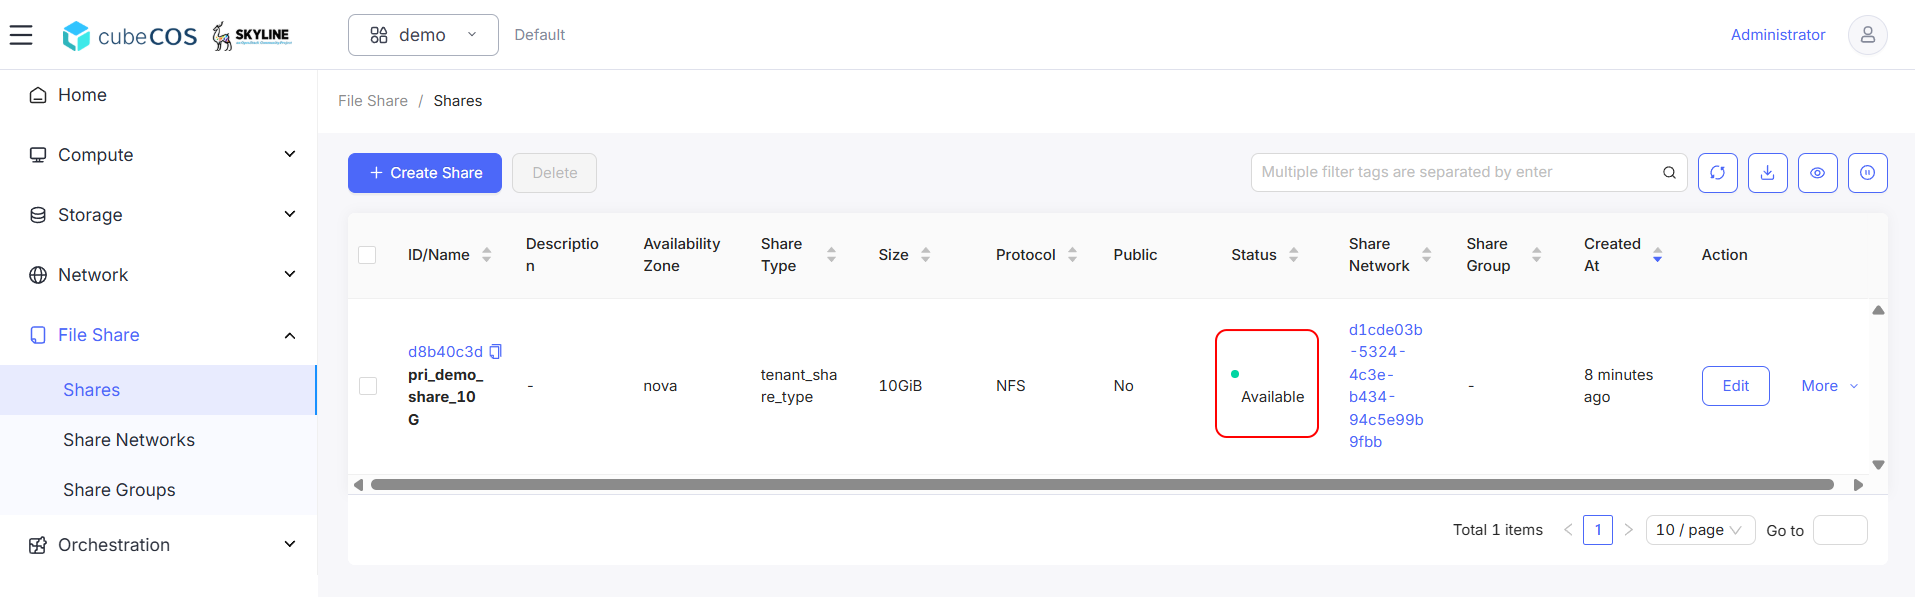
During share creation, share status will display
Creating. The share status will change toAvailbleonce creation is completed.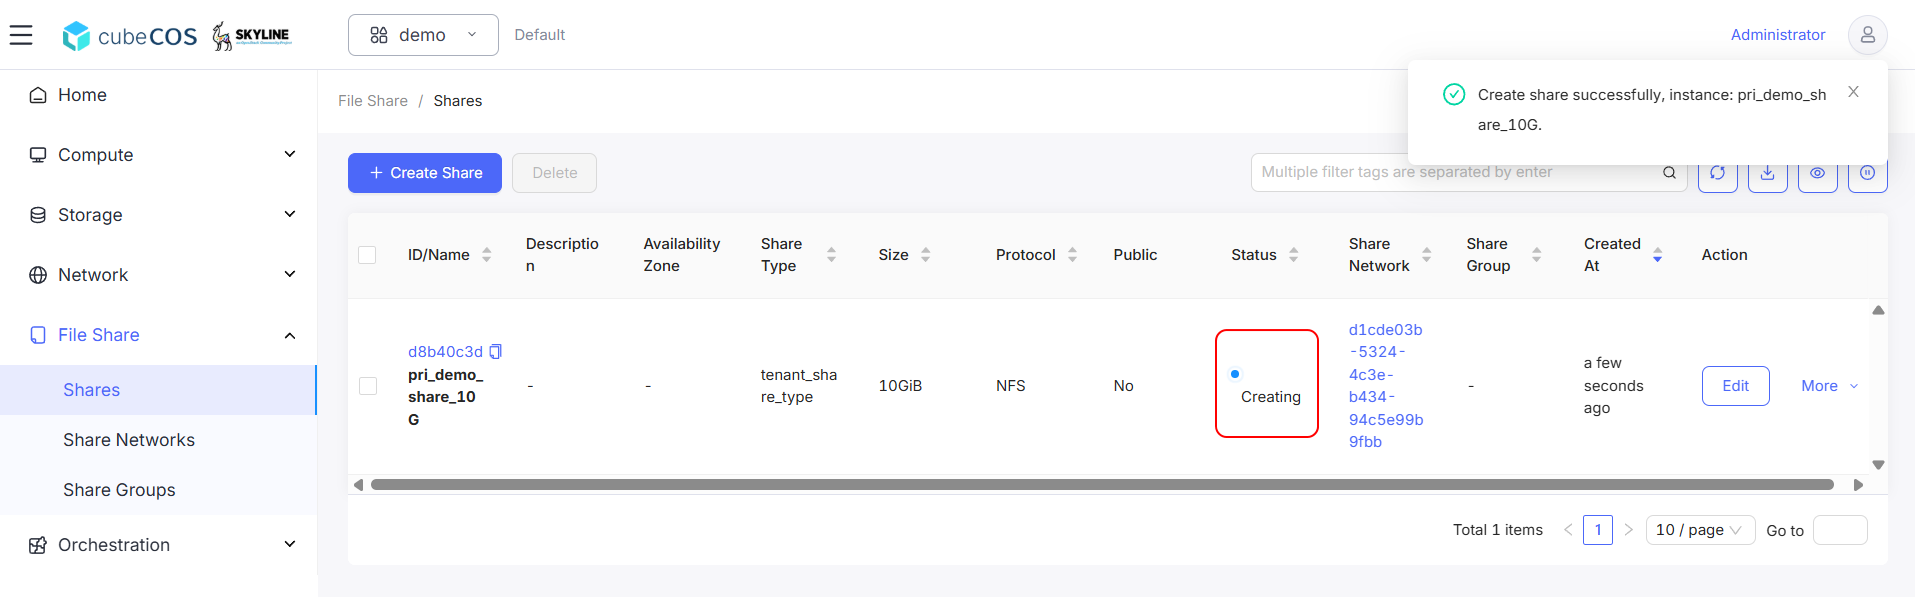
Create Rules
-
Choose the share created above, than hover to
More, than clickManage Access Rulefrom the drop down menu.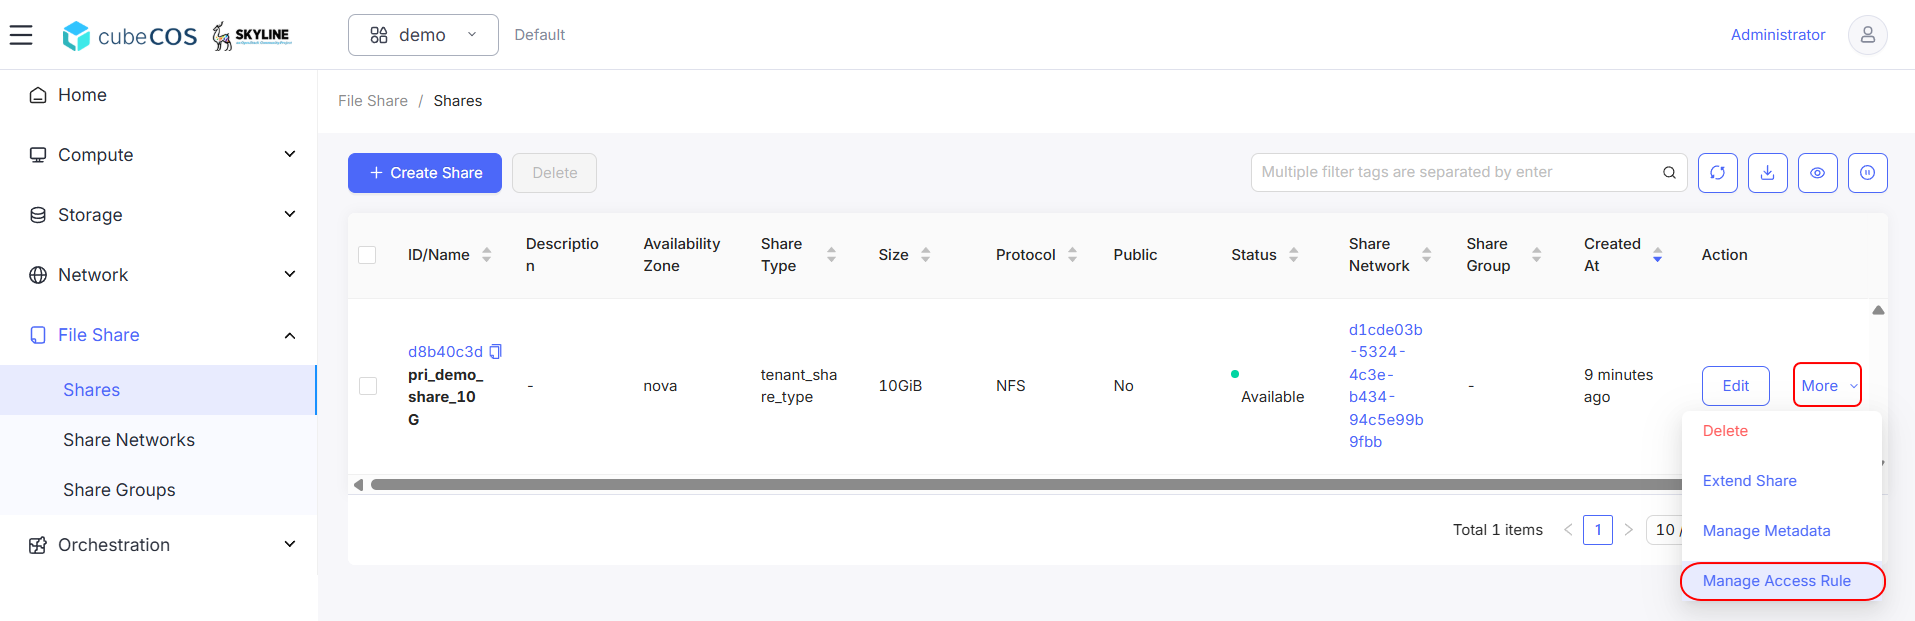
-
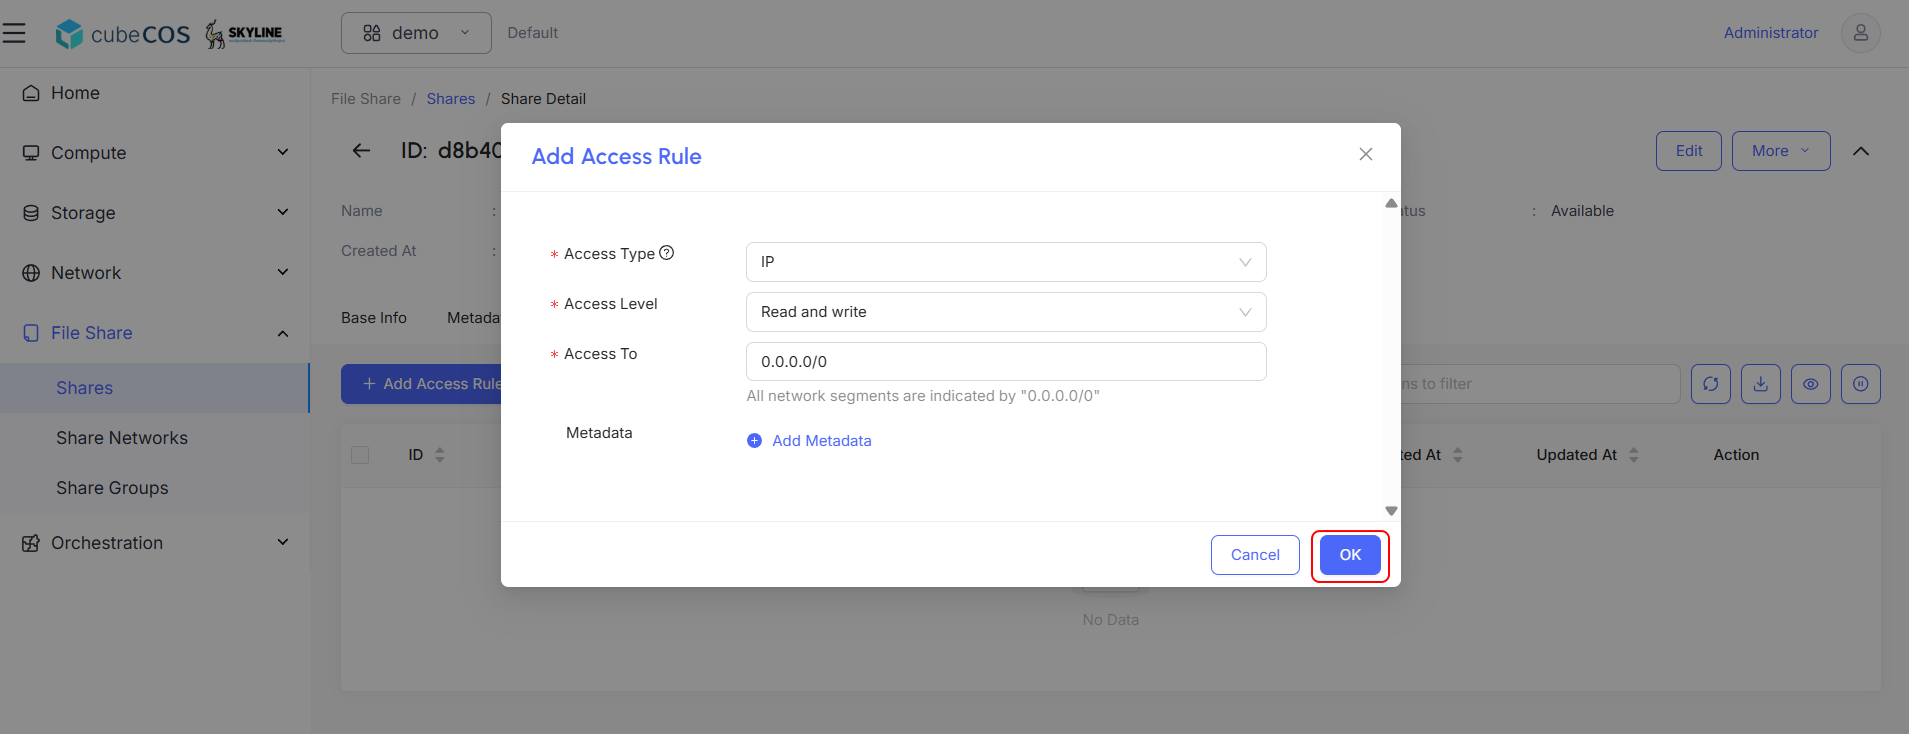
Click
Add Access Rule.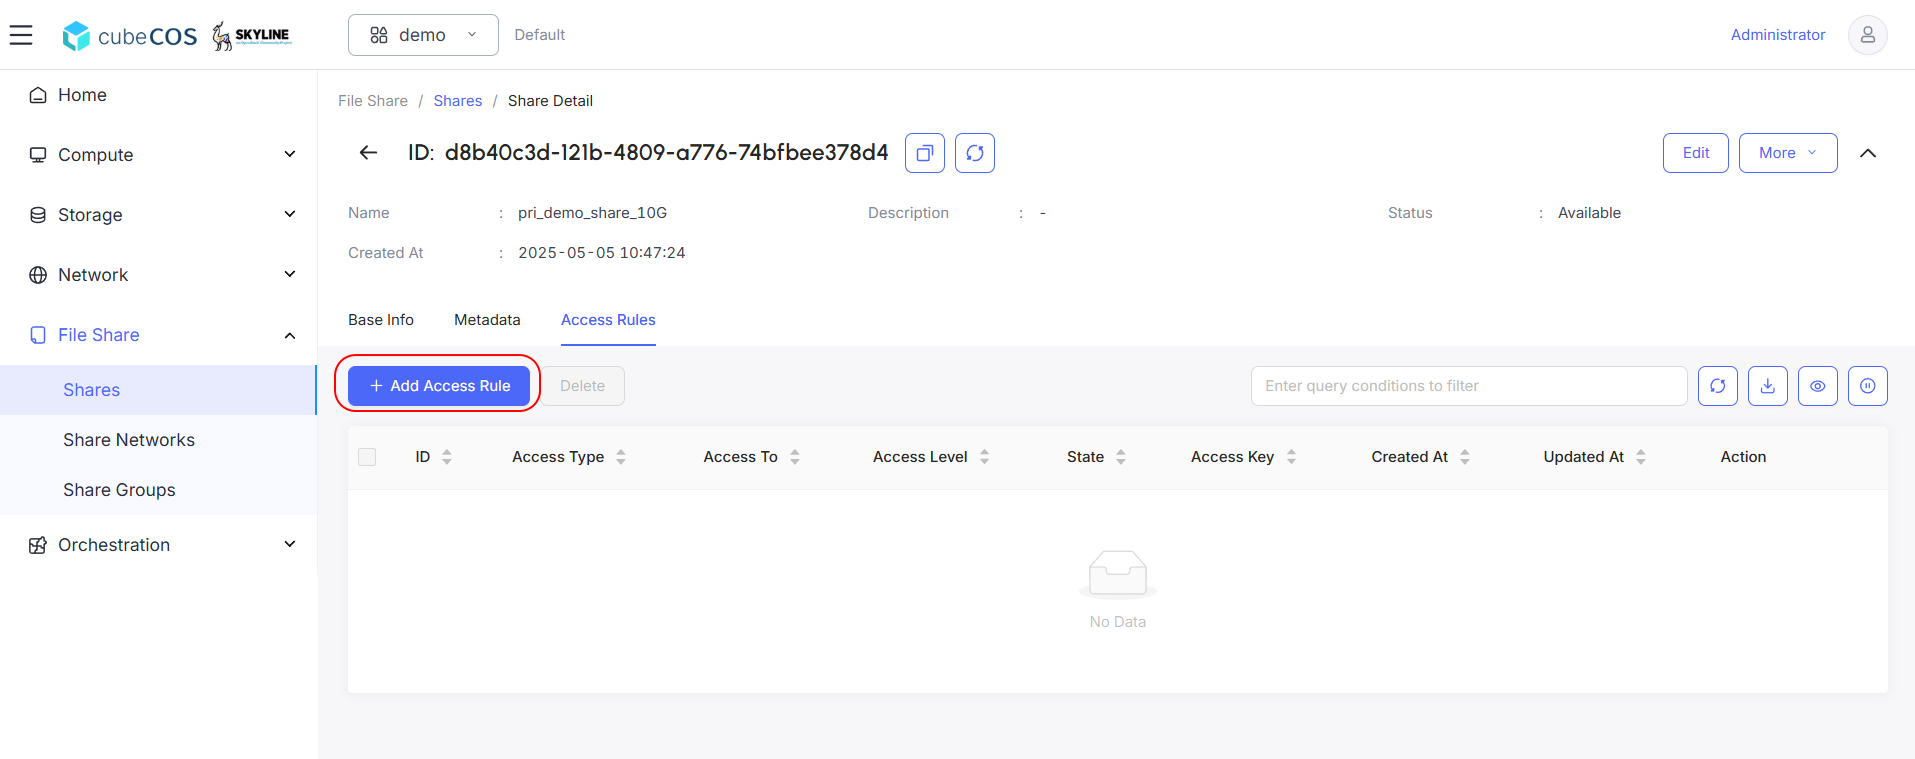
-
For this creation, fill in the following fields:
-
*Access Type : Supported Share Protocol types listed below
- IP : Authenticates through IP adress.
- Cert : Authenticates instances through TLS certificate.
- User : Authenticates by a specified user or group name.
- Cephx : Authenticates through Ceph system.
-
*Access Level : Select either
Read and writeorRead only. -
*Access To: Attribute must fill in according to Access Type chose above:
- IP : A valid format is XX.XX.XX.XX or XX.XX.XX.XX/XX. For example 0.0.0.0/0.
- Cert : A valid value is any string up to 64 characters long in the common name (CN) of the certificate.
- User : An alphanumeric string that can contain some special characters and is from 4 to 32 characters long.
- Cephx : Specify the Ceph auth ID that needs to be authenticated and authorized for share access by the Ceph back end. A valid value must be non-empty, consist of ASCII printable characters, and not contain periods.
After filling all fields above, click
Confirmto apply user creation.Demonstration below will use IP as Access Type
-
-
During rule apply, share status will display
Applying. The share status will change toActiveonce apply is completed.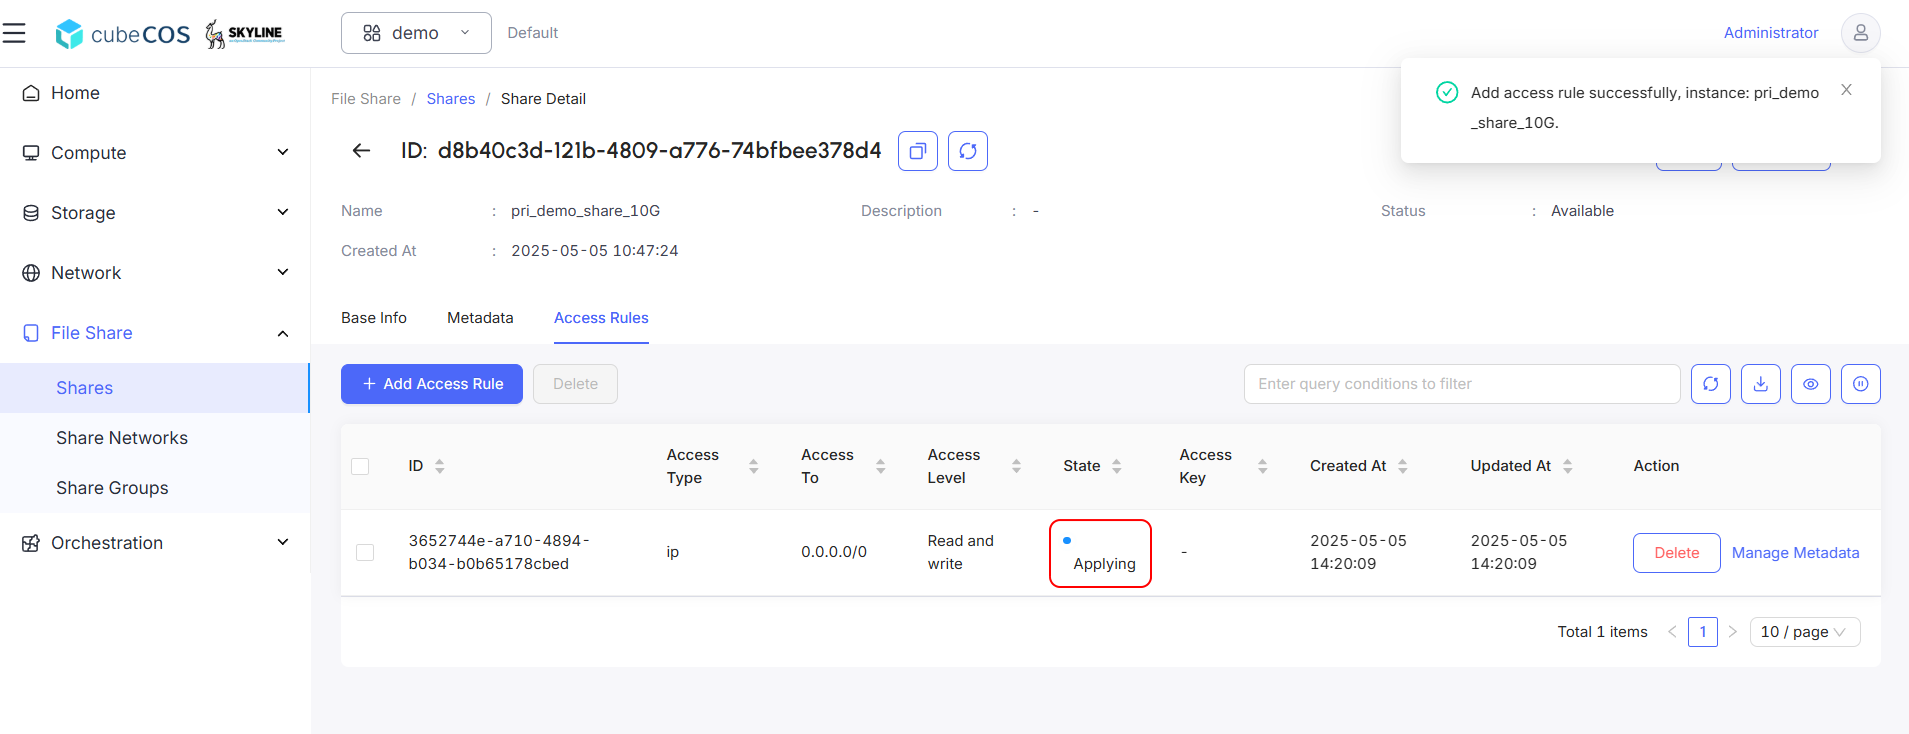

Get the shared link
-
Click
Base Infoafter rules areActive.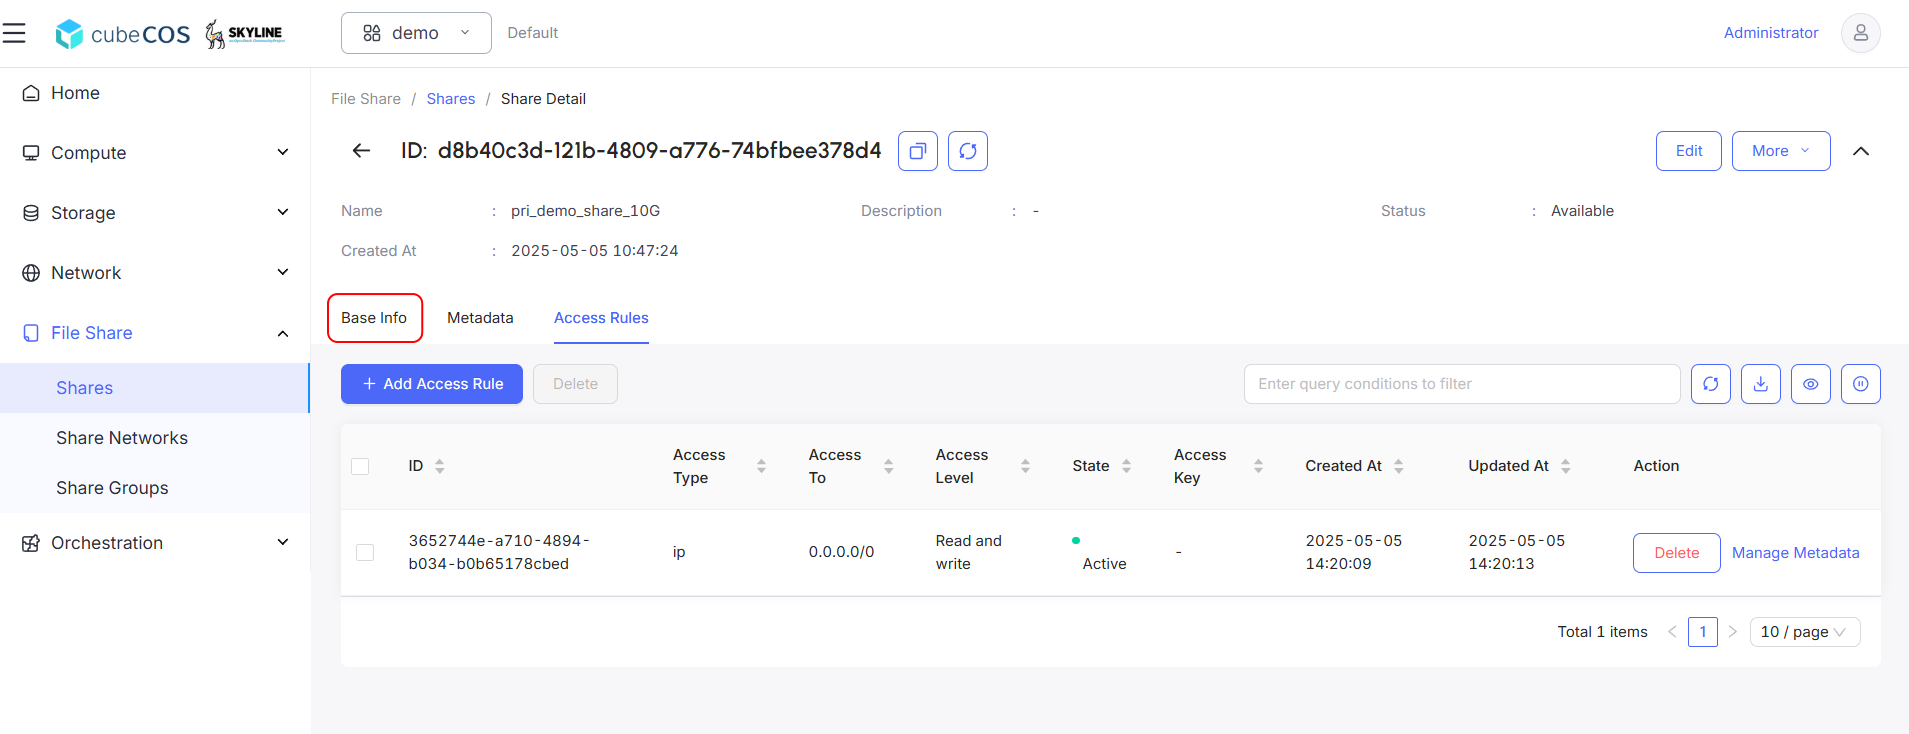
-
Copy
PathfromExport Locationsattribute. This is the shared link recognized by instances.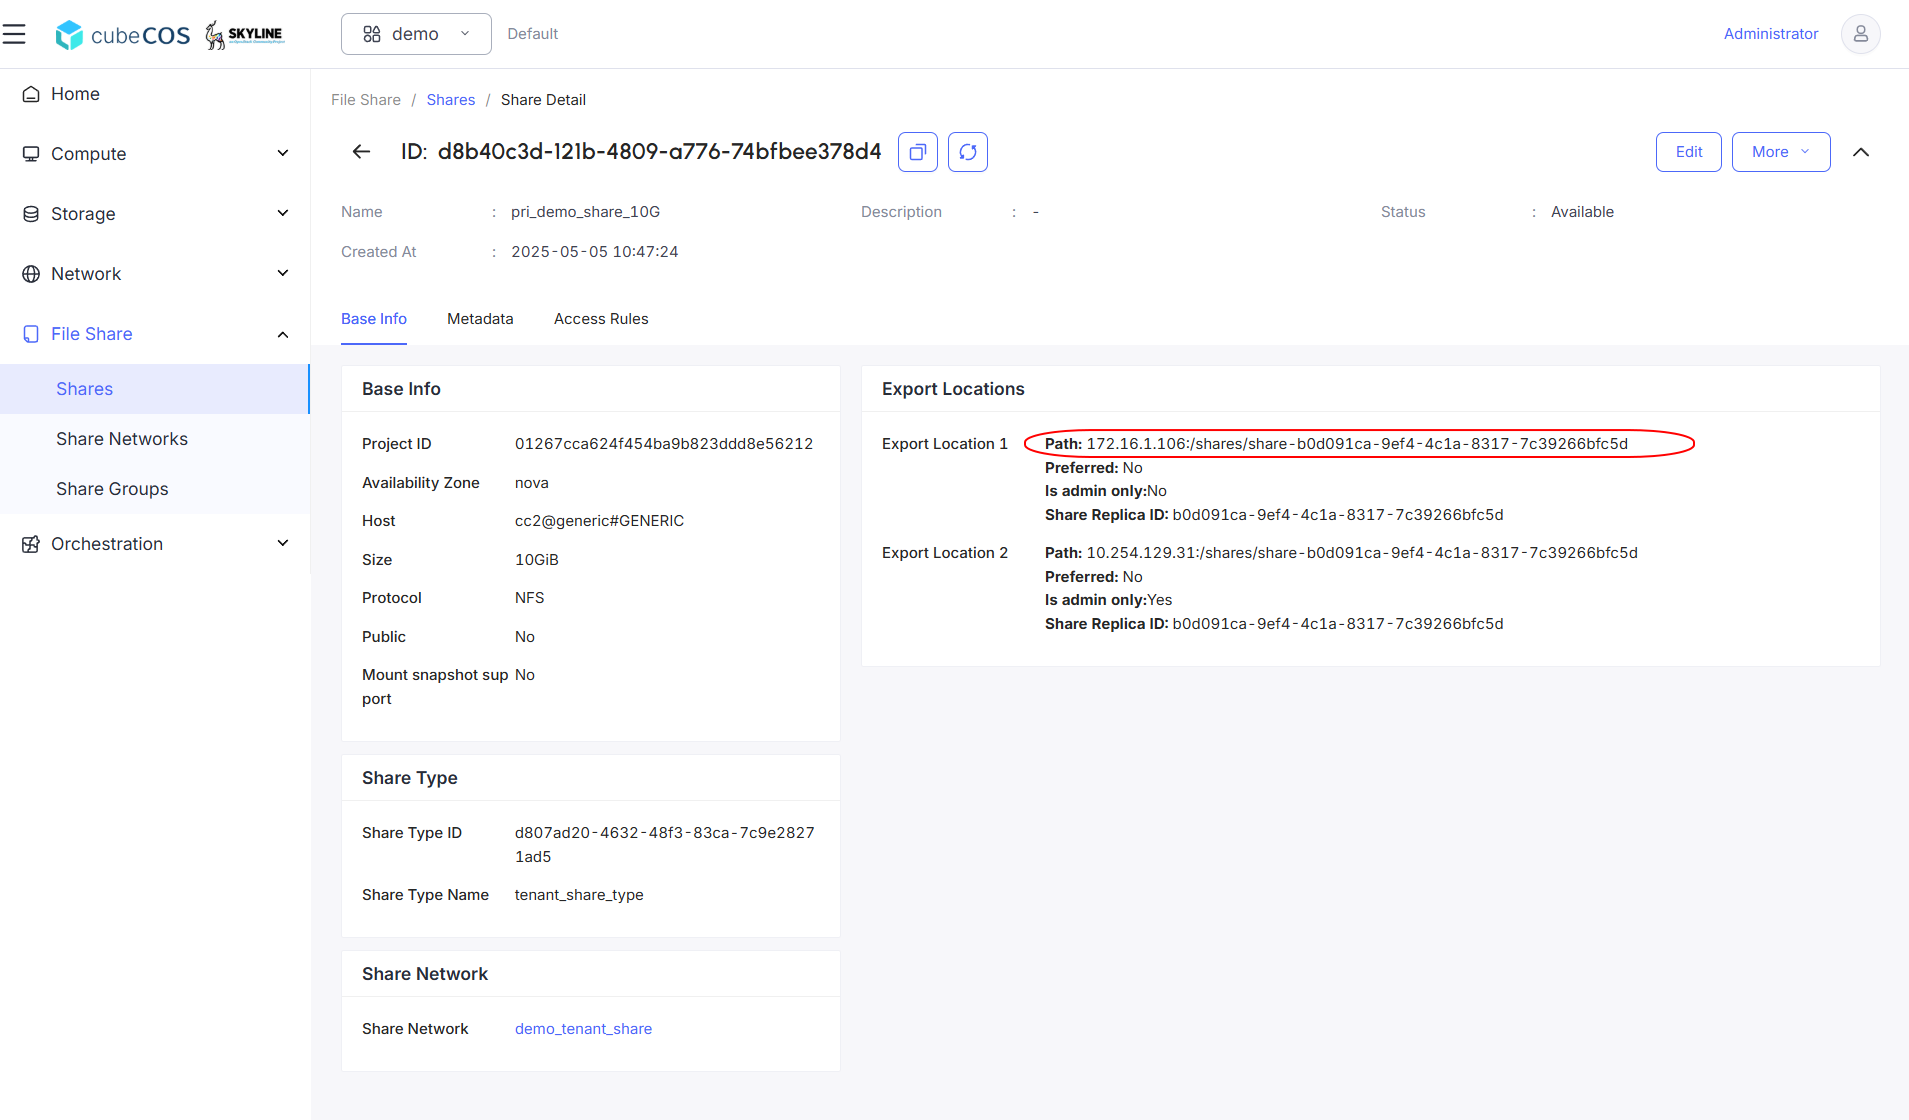
Mounting Share Space to VM
- Connect to the instances that need access to the file share and create a folder for mounting.
ubuntu@demo-ubuntu:~$ mkdir nfs-share
ubuntu@demo-ubuntu:~$ ls
nfs-share
- Mount share server to the folder created.
ubuntu@demo-ubuntu:~$ sudo mount -t nfs 172.16.1.106:/shares/share-b0d091ca-9ef4-4c1a-8317-7c39266bfc5d nfs-share/
- Verify mounting by
df -h
ubuntu@demo-ubuntu:~$ df -h
Filesystem                                                       Size  Used Avail Use% Mounted on
tmpfs                                                            392M  1.1M  391M   1% /run
/dev/vda1                                                         96G  1.9G   94G   2% /
tmpfs                                                            2.0G     0  2.0G   0% /dev/shm
tmpfs                                                            5.0M     0  5.0M   0% /run/lock
/dev/vda16                                                       881M   61M  758M   8% /boot
/dev/vda15                                                       105M  6.1M   99M   6% /boot/efi
/dev/vdb                                                          20G   24K   19G   1% /mnt/disk20g
tmpfs                                                            392M   12K  392M   1% /run/user/1000
172.16.1.106:/shares/share-b0d091ca-9ef4-4c1a-8317-7c39266bfc5d  9.8G  128K  9.3G   1% /home/ubuntu/nfs-share
- Verify accessibility by creating a file.
ubuntu@demo-ubuntu:~$ ls nfs-share/
lost+found
ubuntu@demo-ubuntu:~$ touch nfs-share/bigstack.co.txt
ubuntu@demo-ubuntu:~$ ls nfs-share/
bigstack.co.txt  lost+found