# Create a block storage volume for instances

> Learn how to block-based data volume for instance usages.

This page explains how to add a block-based data volume for exiting virtual machines. CubeCMP offers different disk sizes with different performance characteristics to match varying workload demands.

## Create a block-based data volume for virtual machines {#create-a-block-based-data-volume-for-virtual-machines}

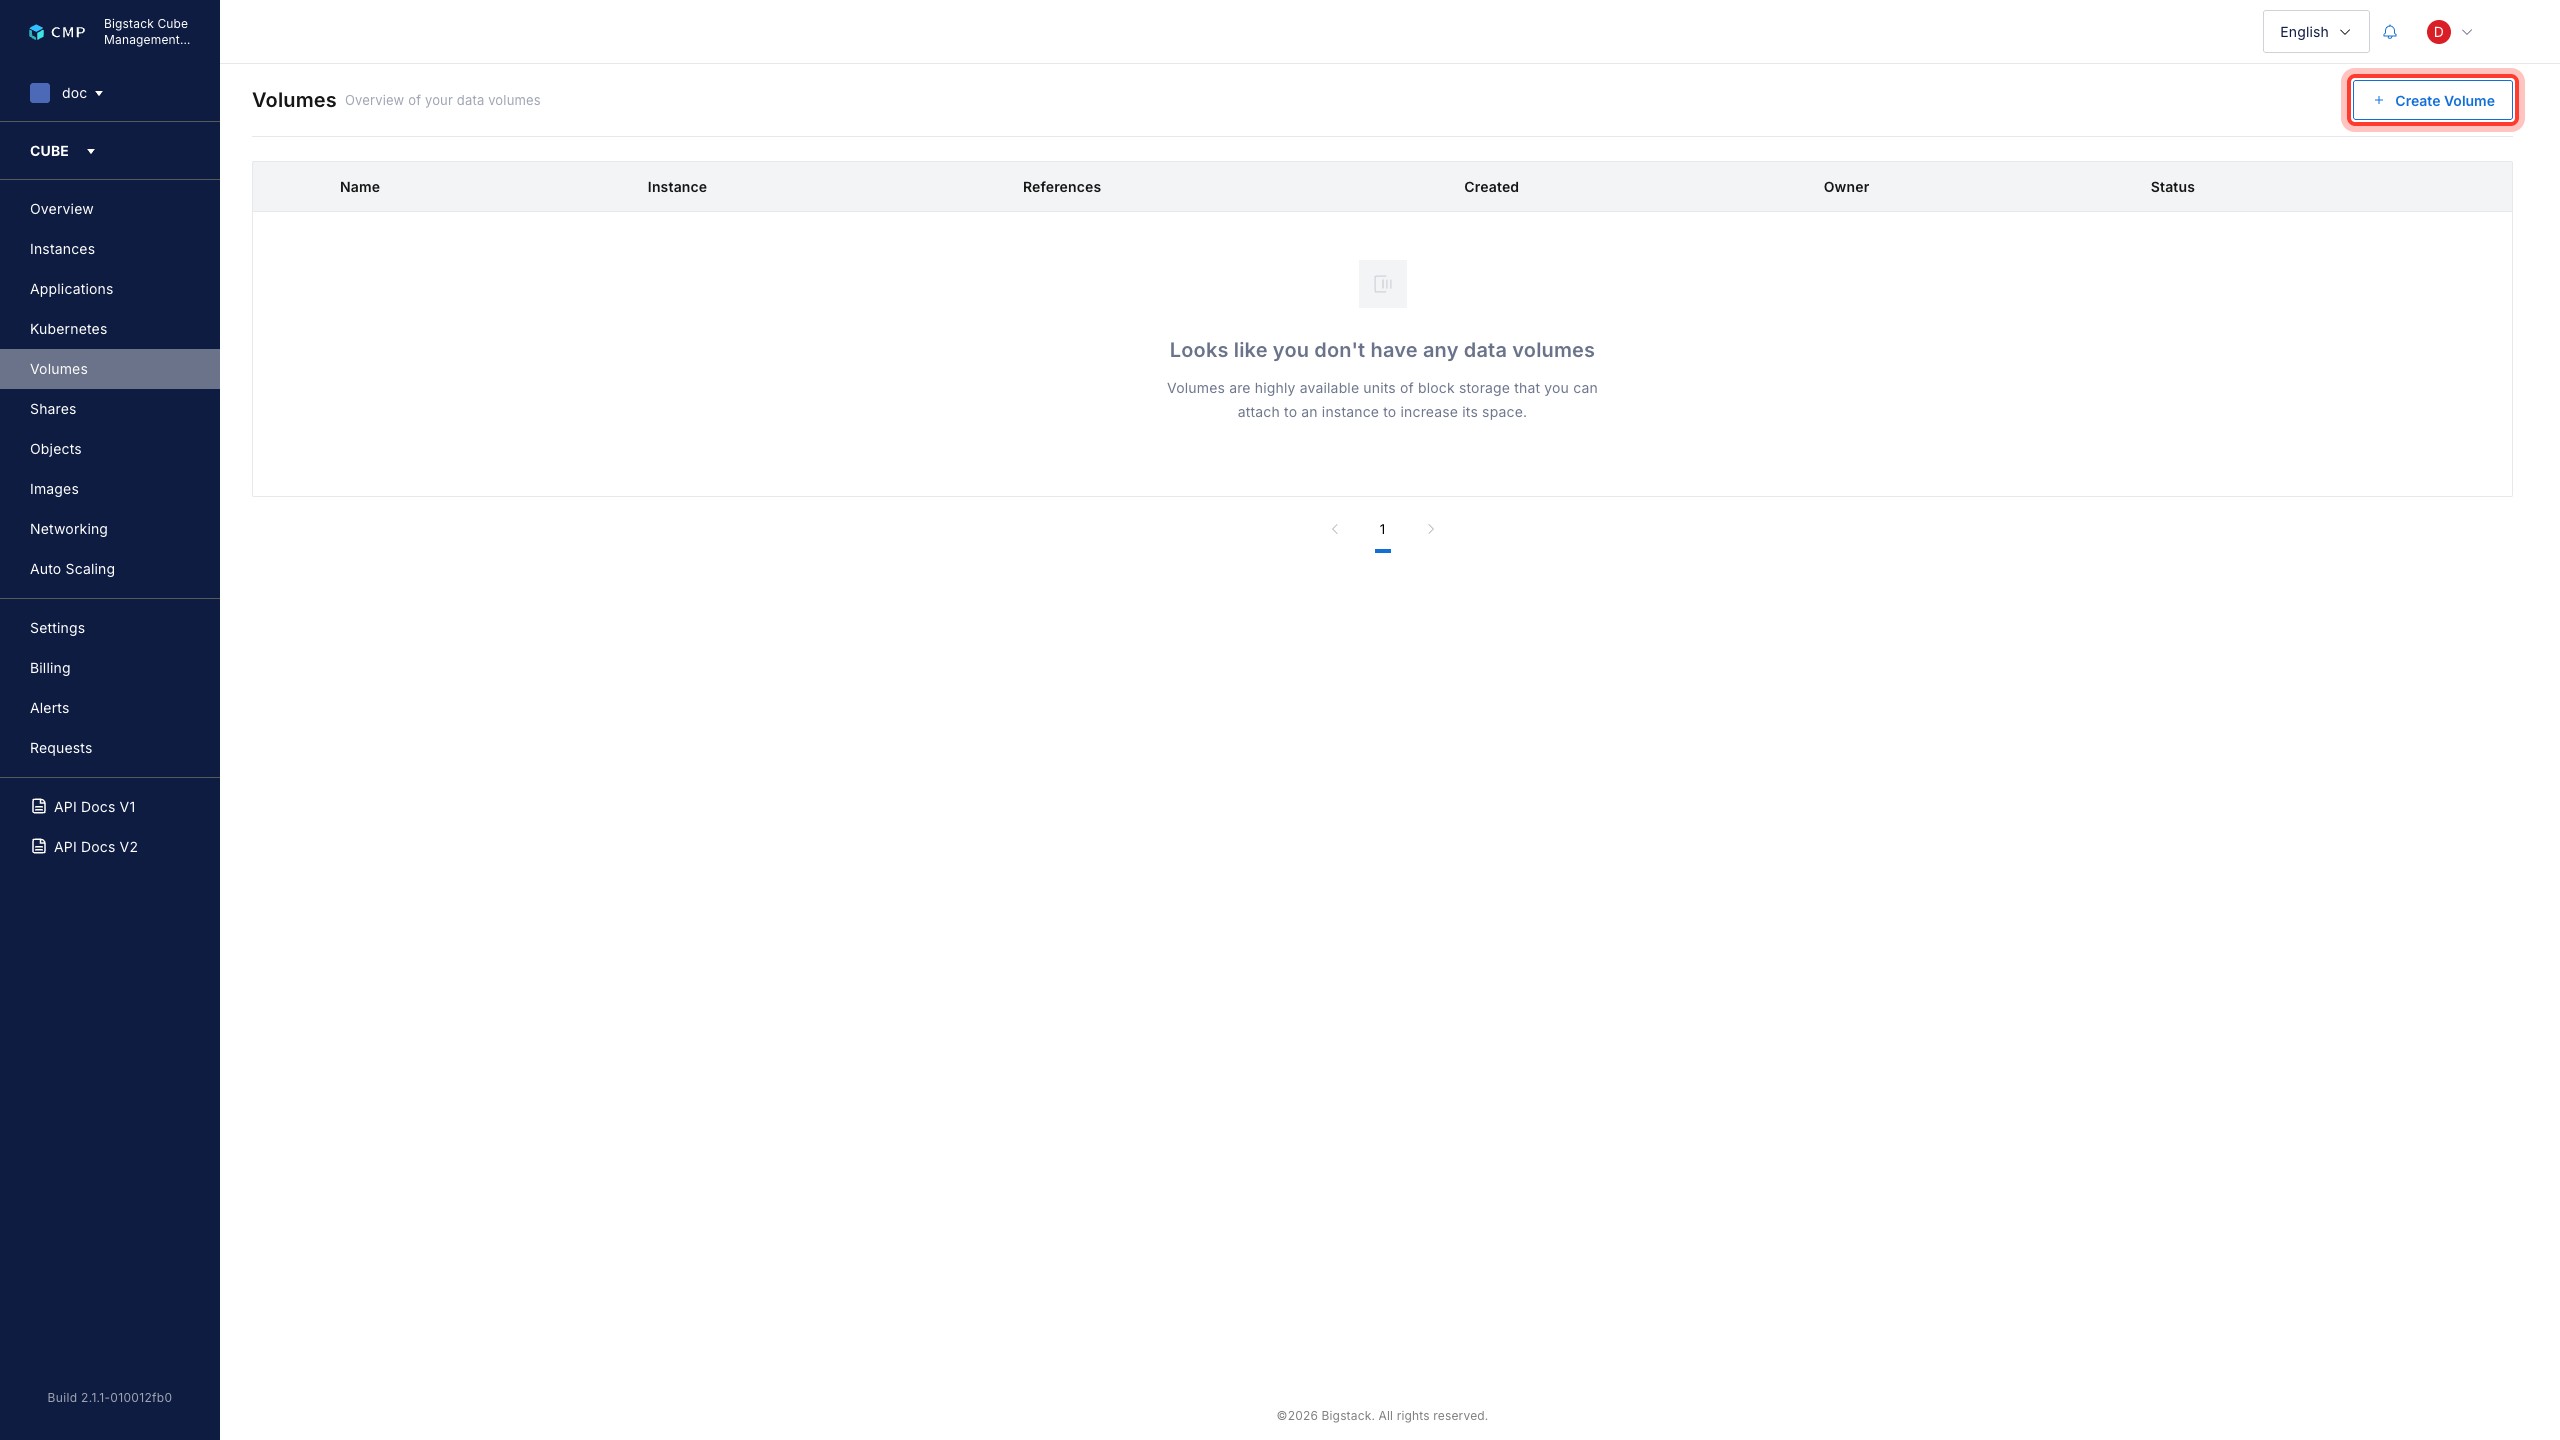
1. In the CubeCMP management console, go to the `Volumes` page.

   ![Volumes page](/assets/storage/create-block-volume-1-volumes-page.jpg)

2. To start the data volume creation flow, click `+ Create Volume`.
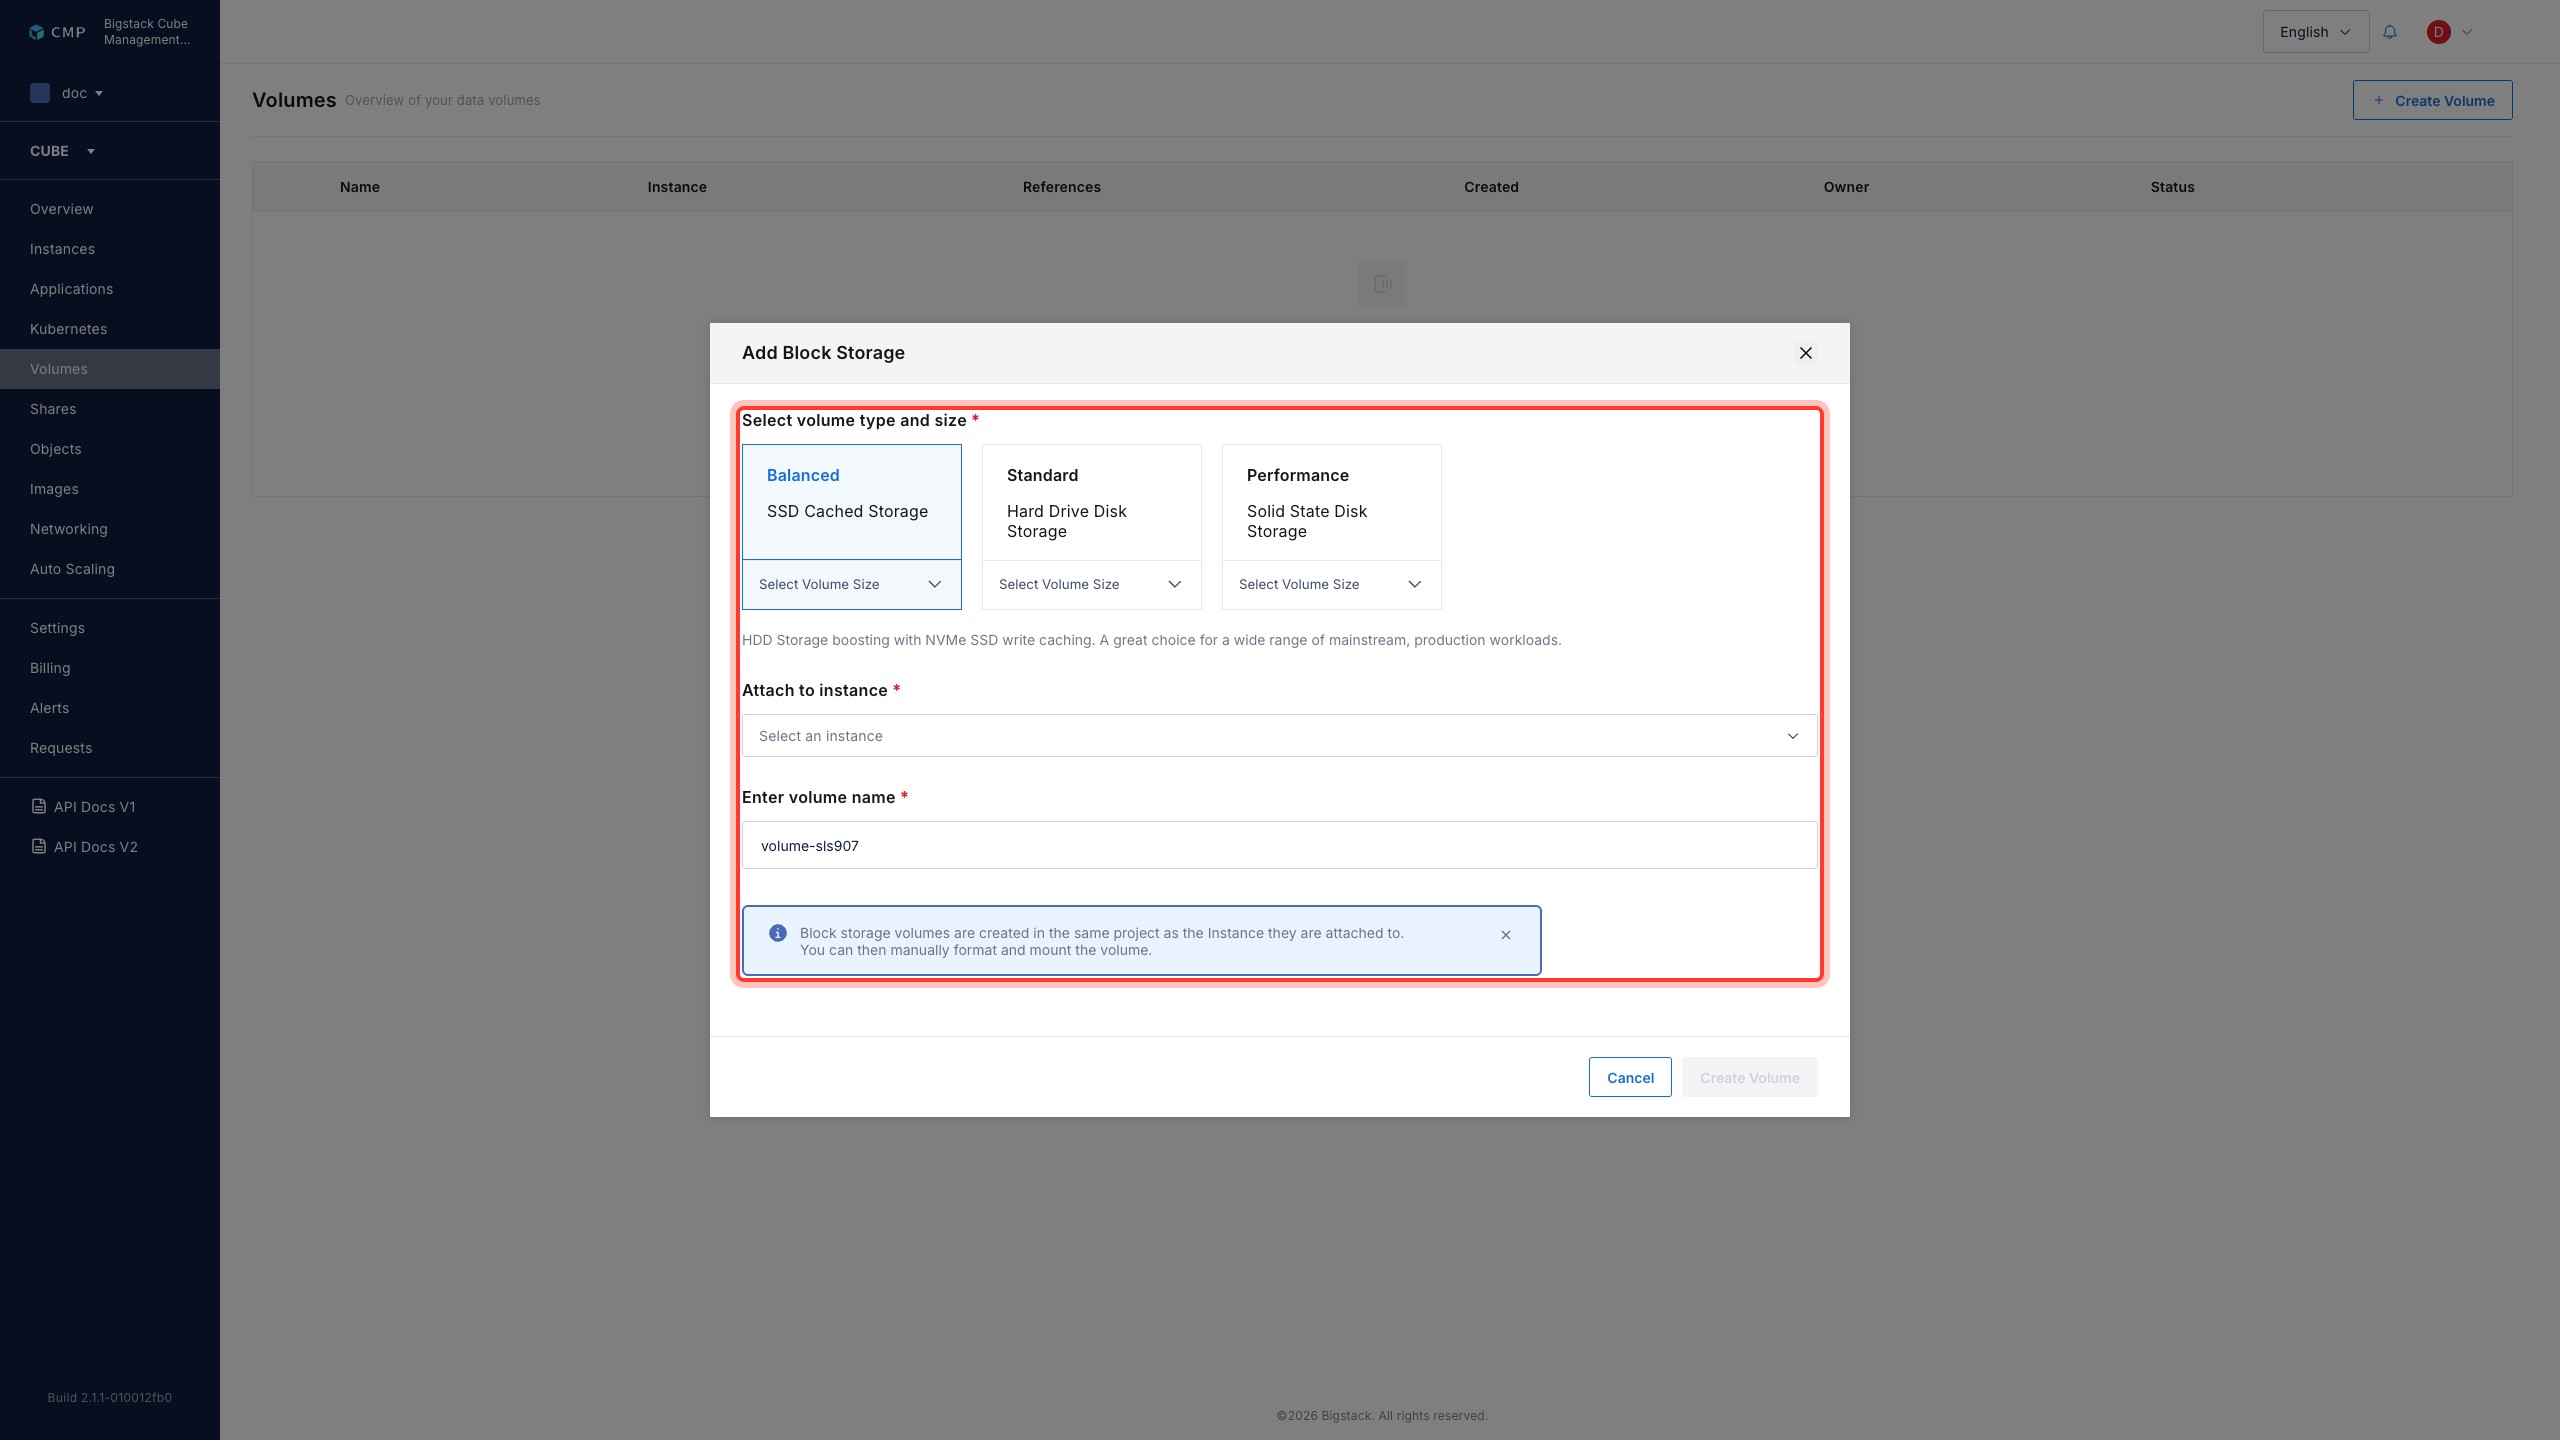
3. Configure the data volume parameters:
   1. To choose a disk type that matches performance requirements, **Select volume type and size**.
   2. To select which instance to attach the data volume to, set the **Attach to instance** field.
   3. Set the **Enter volume name** field.

   ![Add Block Storage dialog](/assets/storage/create-block-volume-2-create-volume-dialog.jpg)

4. To create the data volume, click **Create Volume**.

After creation, the data volume will appear on the **Volumes** page with its current status. Once the data volume's status displays as **Active**, you can proceed to mount and format the disk for use in the virtual machine.