Get Started
Network - Create an External/Internet network
-
Please navigate to Admin > Network > Networks >
+ CREATE NETWORK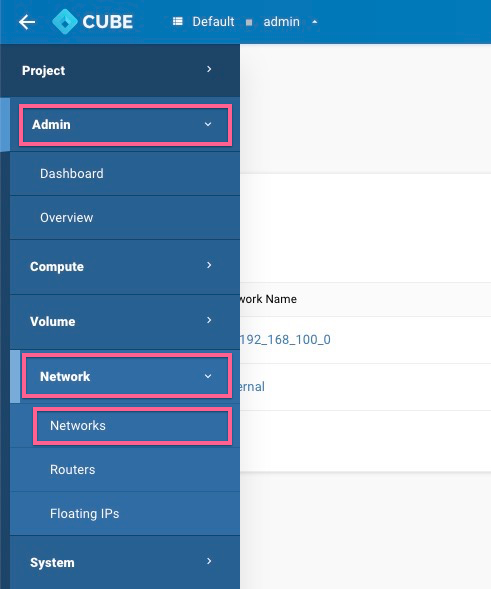
-
Please follow the configuration below, uncheck
shared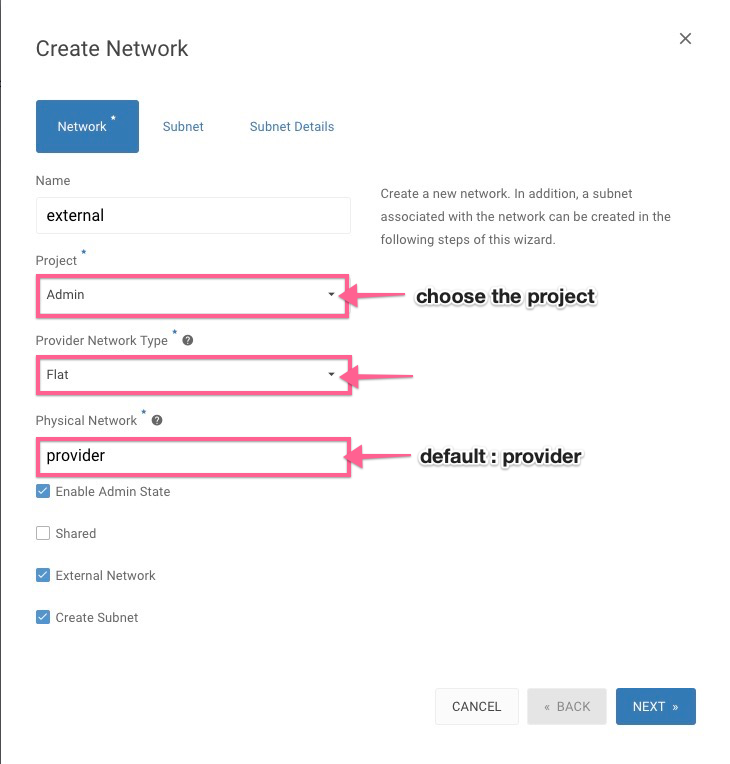
-
Config the Subnet
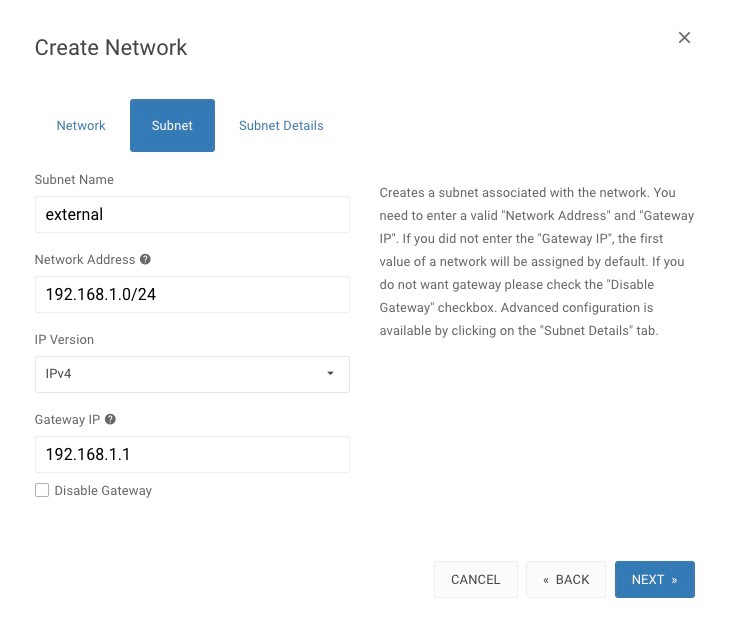
-
DHCP - Enable the DHCP setting, define the Allocation Pools & DNS
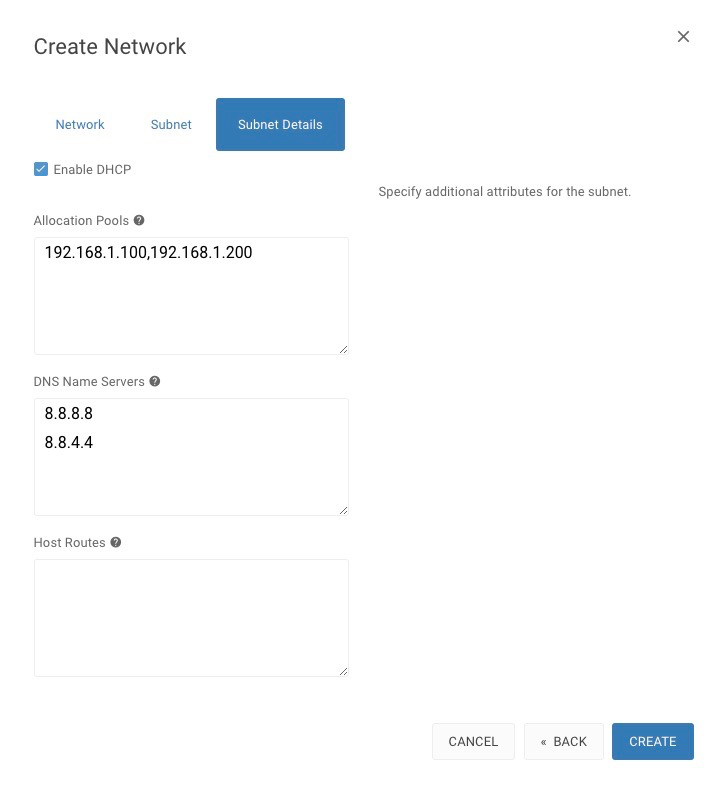
Network - Create Private Network (VLAN/VXLAN)
-
Please follow the configuration below, uncheck
shared&external, VXLAN is recommended.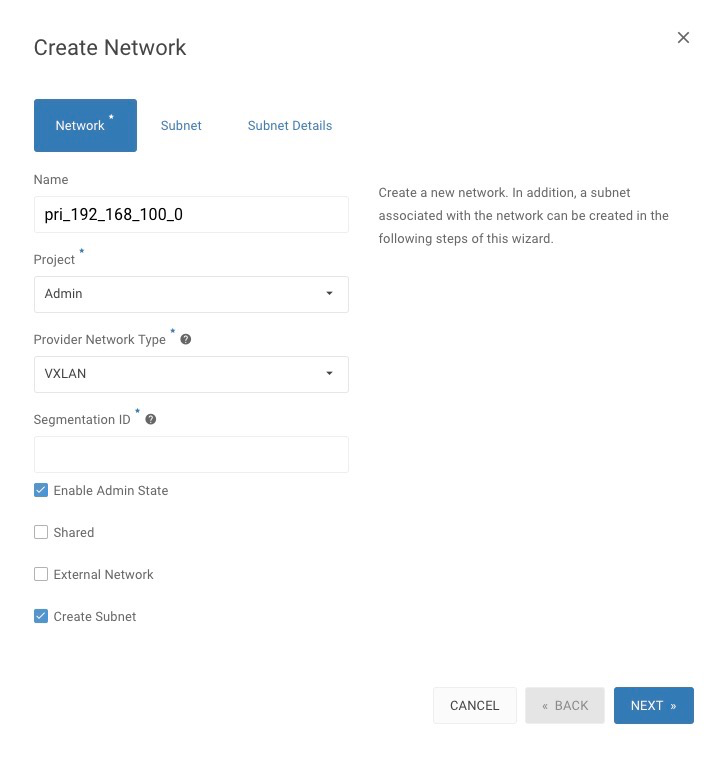
-
Configure the Subnet
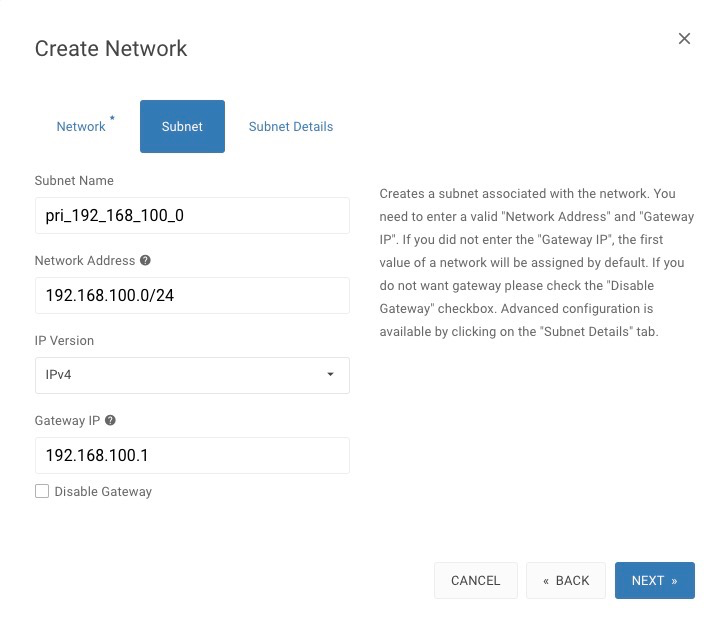
-
DHCP - Enable the DHCP setting, define the Allocation Pools & DNS
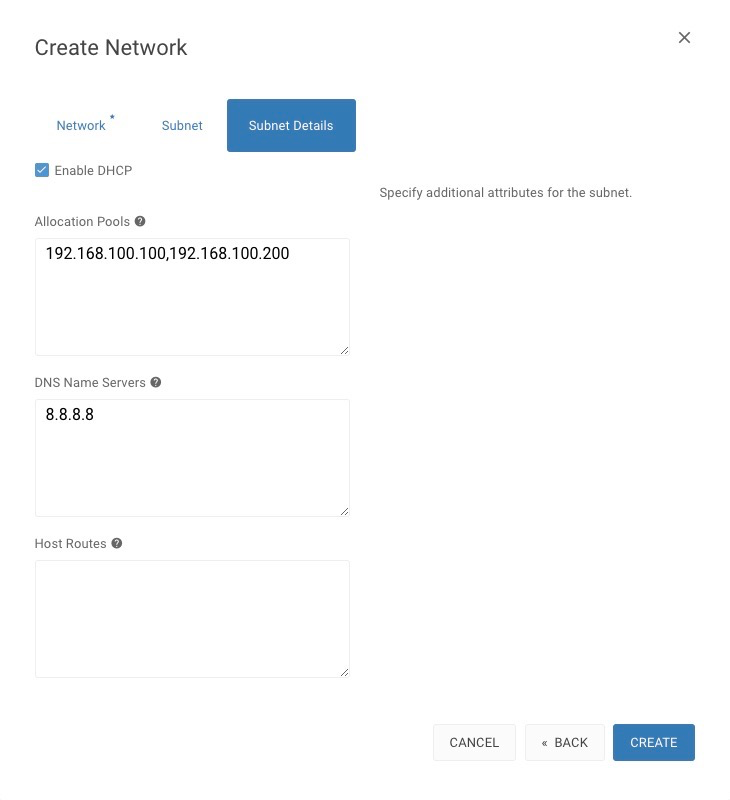
Network - Setting the route
Setting up a router bridging private network and external network, allows the instances can be accessed through floating ip and the internet
-
Please navigate to Project > Network > Routers >
+ CREATE ROUTER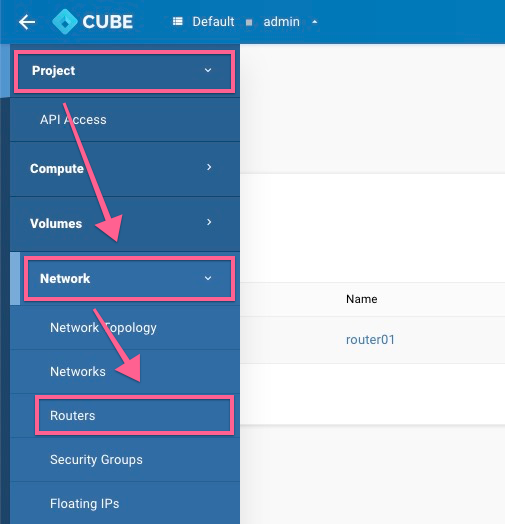
-
Create a Route
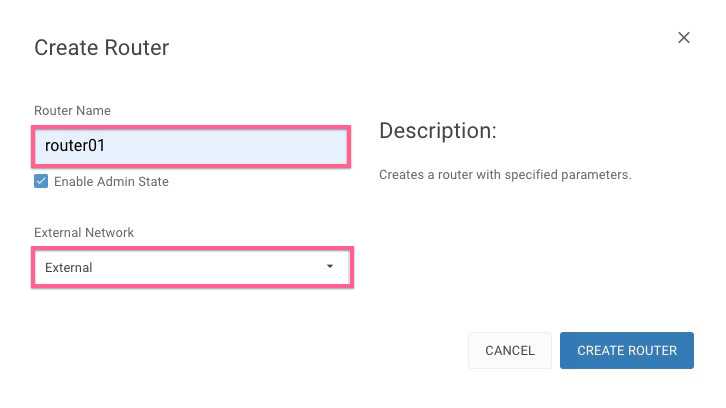
-
Click on newly created
router01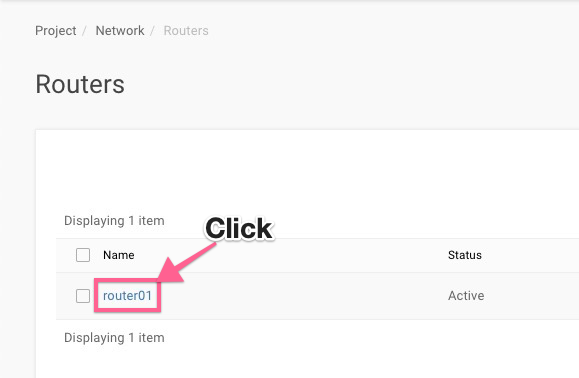
-
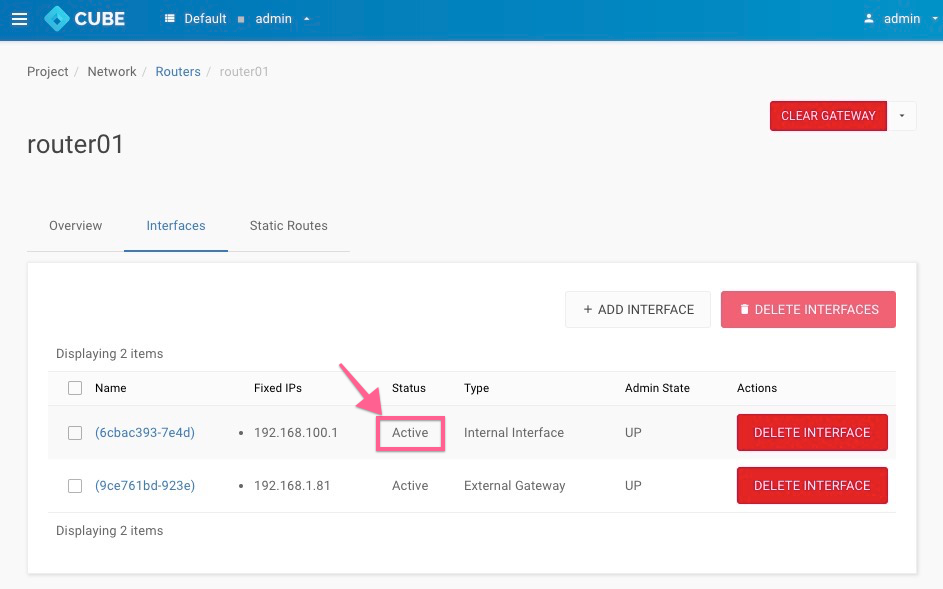
+ ADD INTERFACEto the router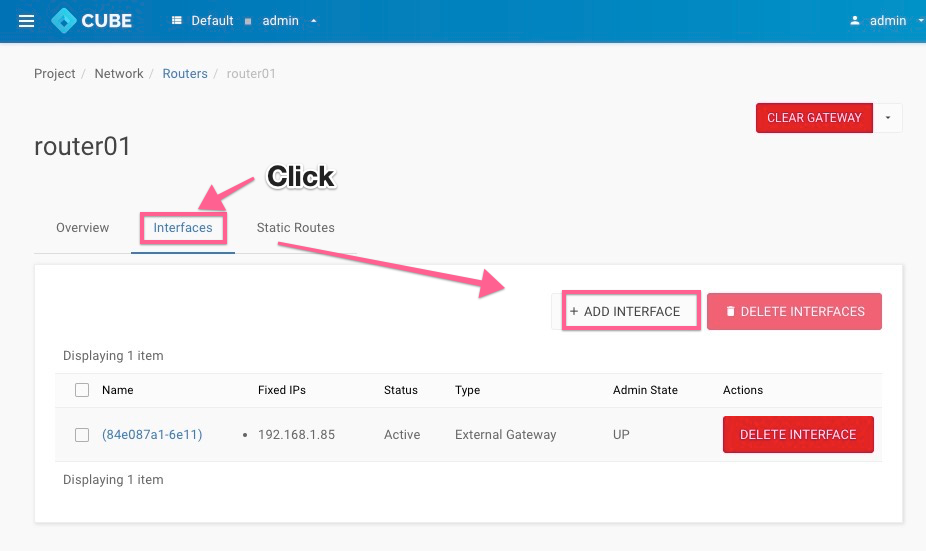
-
Select the private network(VLAN/VXLAN) , in a few seconds the added interface will show on the list and the status will automatically changed to
Active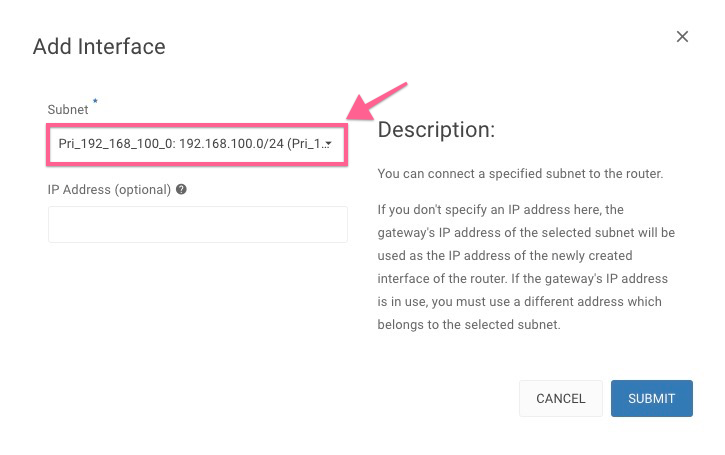
-
Let's preview our network setting at : Project > Network >
Network Topology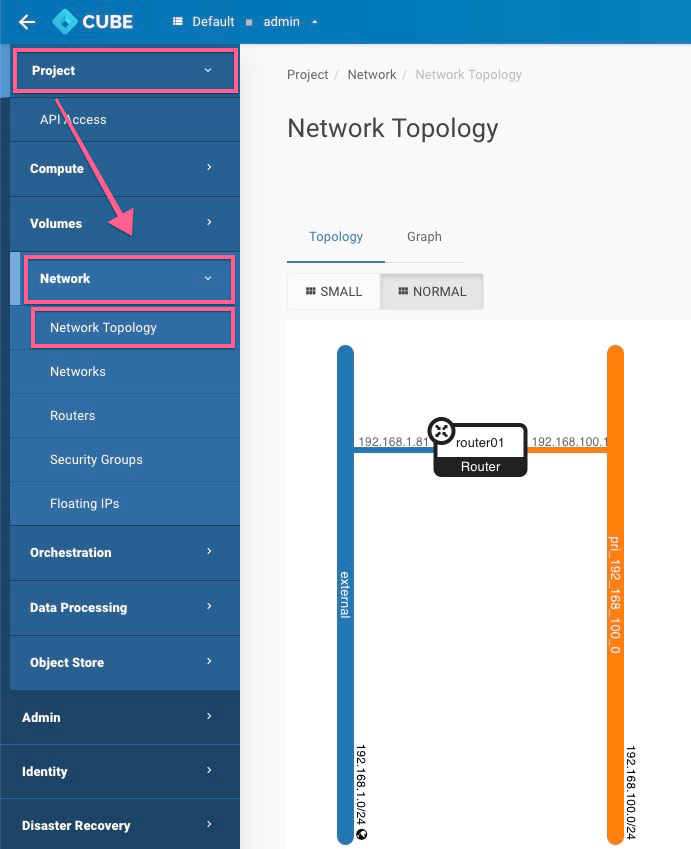
Network - Security Group
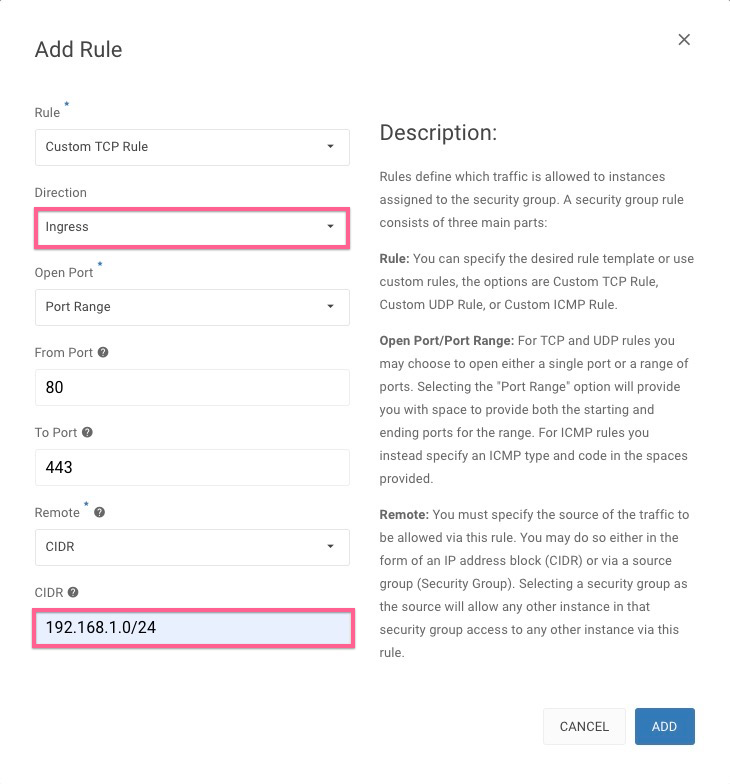
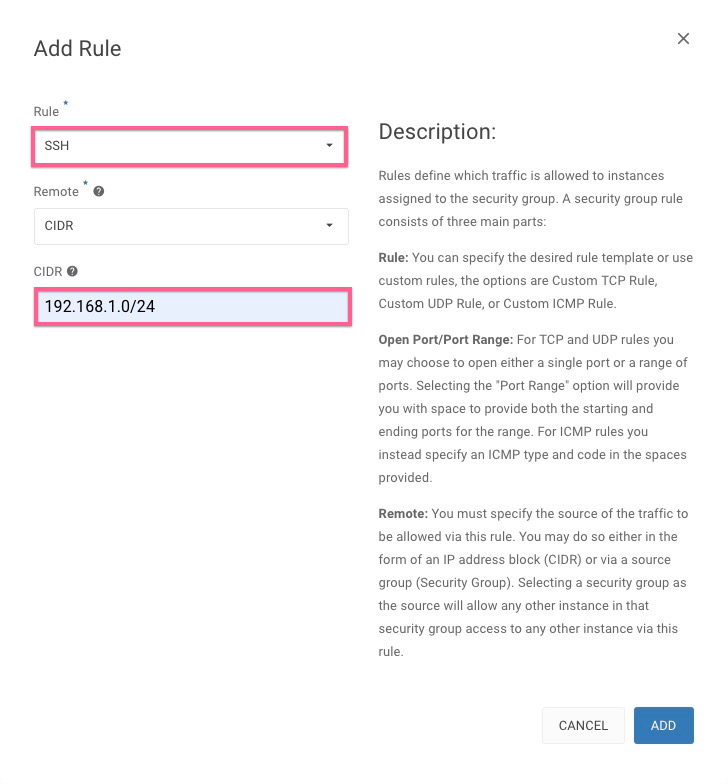
Allow SSH/HTTP/HTTPS/MYSQL services(ports) by changing the default security groups
-
Please navigate to Project > Network > Security Groups >
MANAGE RULES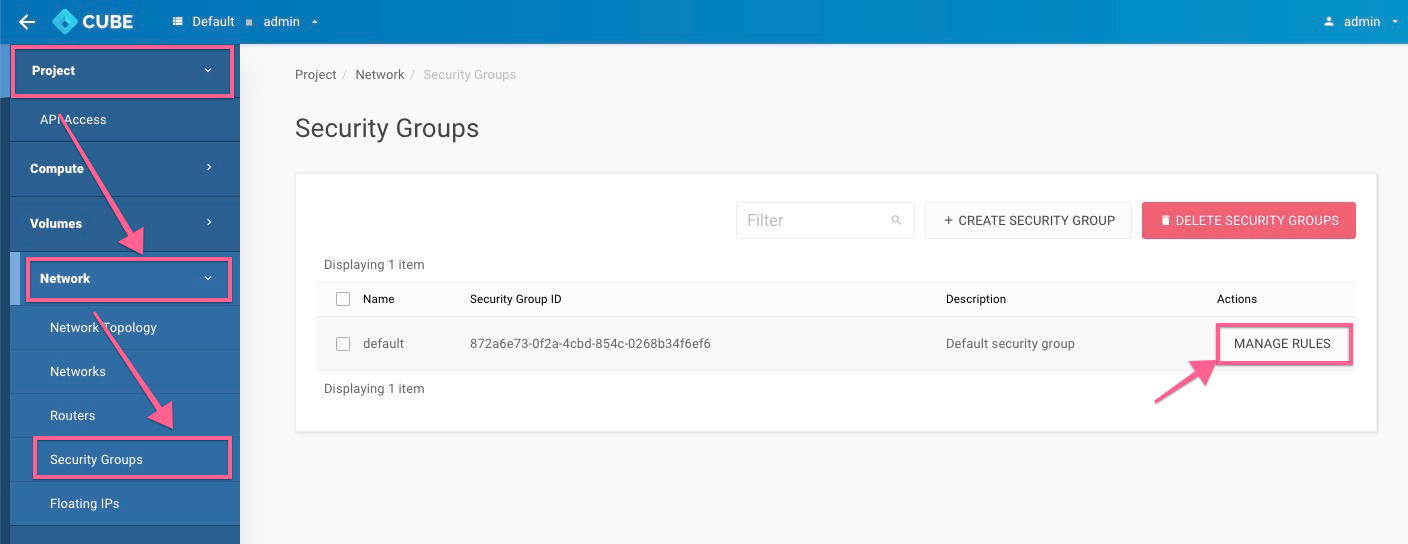
-
Create a new rule by click on
+ ADD RULE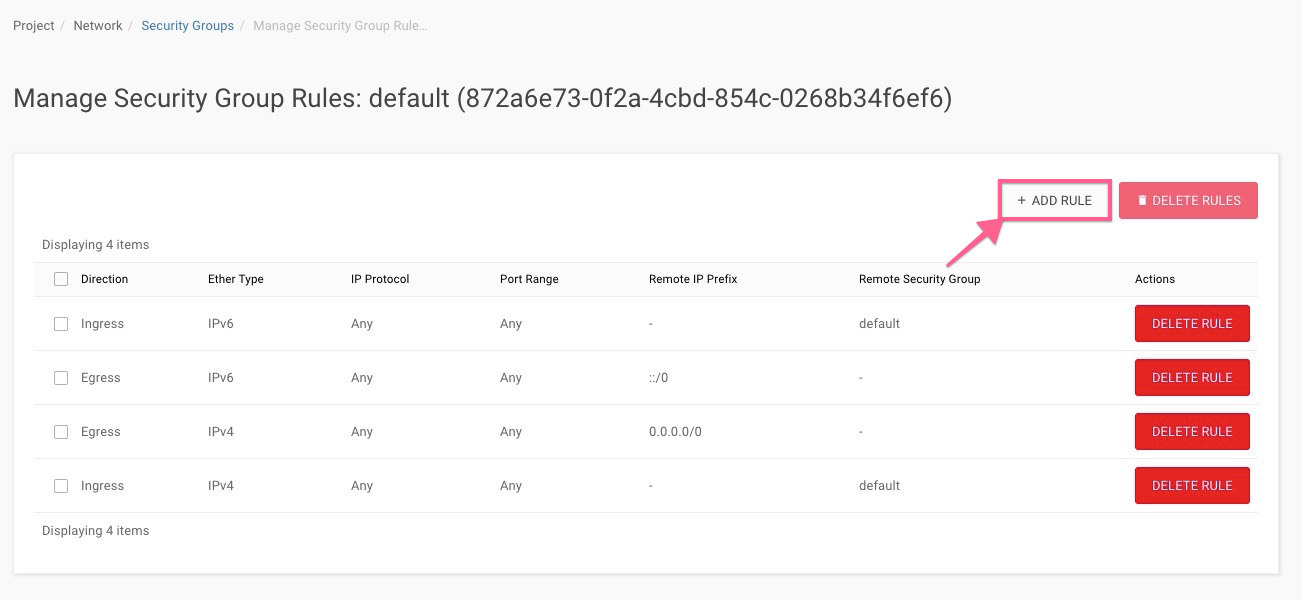
-
A. Create Rule by port range
B. Create rule by sevices
-
Finally the new rules will be added to the
defaultsecurity group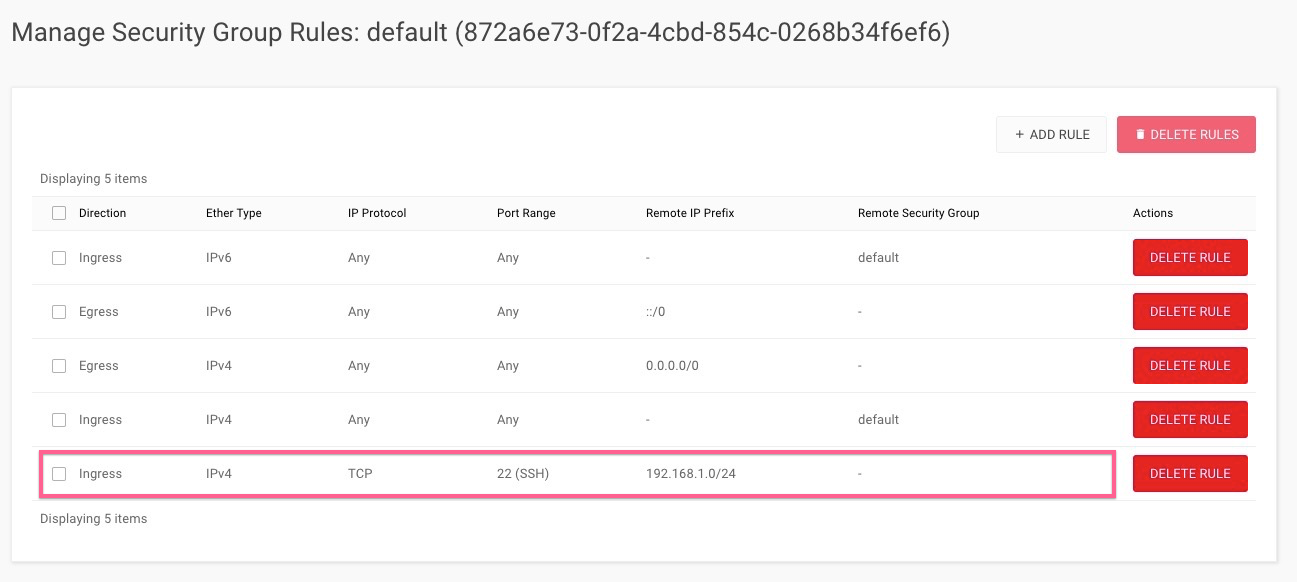
Compute - Create Flavors
-
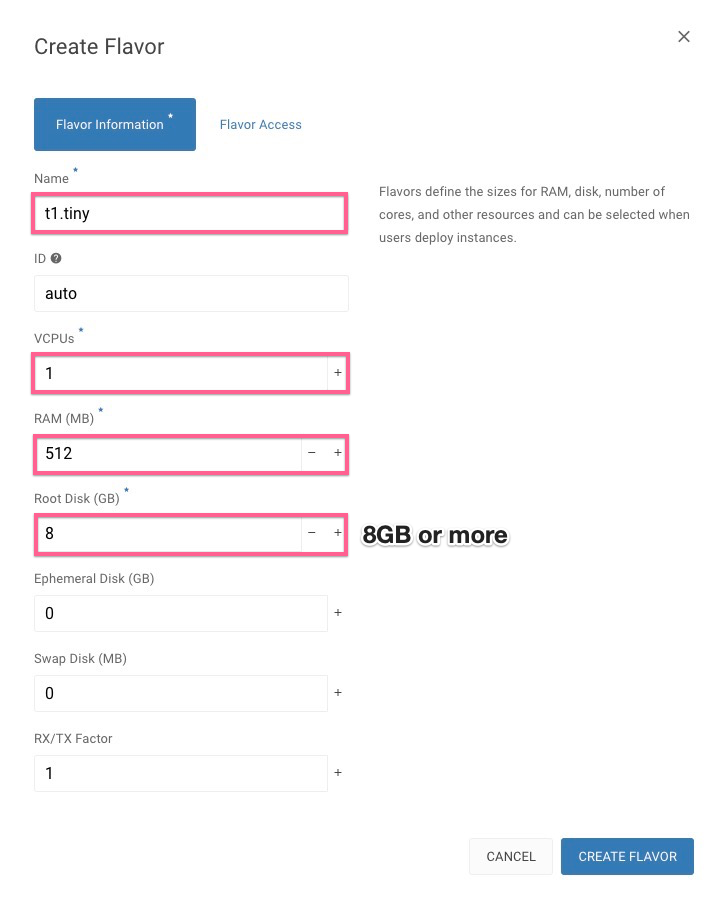
Let's goto Admin > Compute > Flavors >
+ CREATE FLAVOR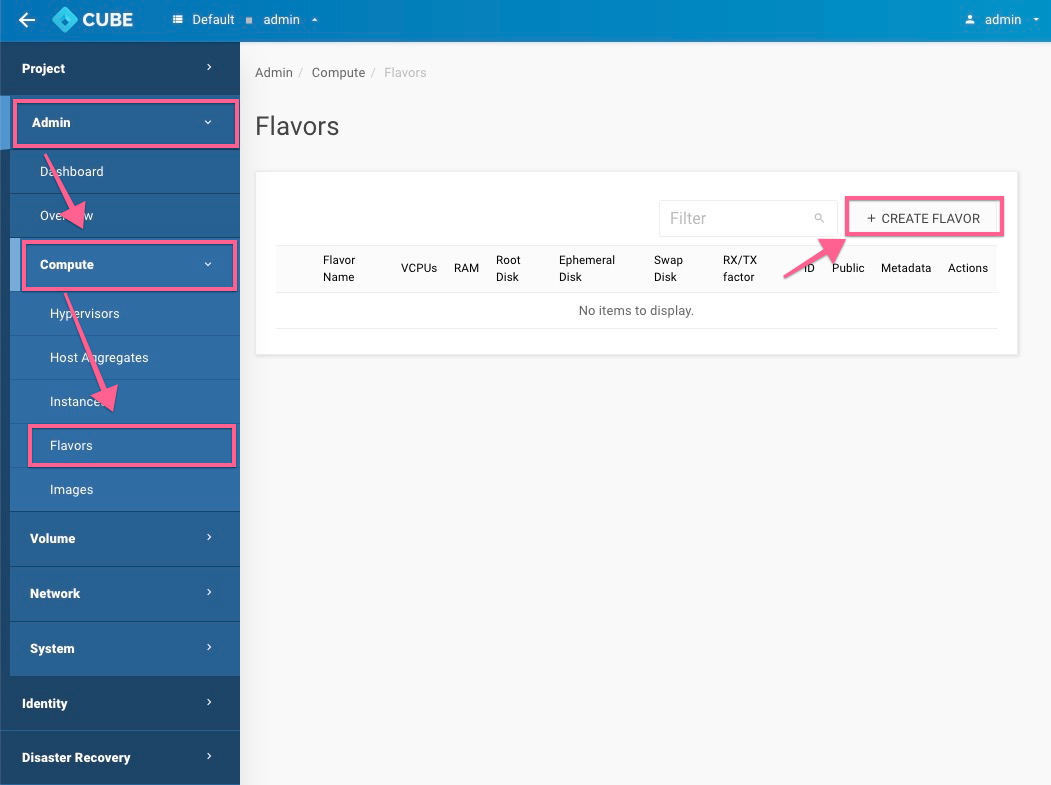
-
Please define a Names, No. of VCPU, RAM & Root Disk, ex:
Compute - Create Images with web
download from the web:
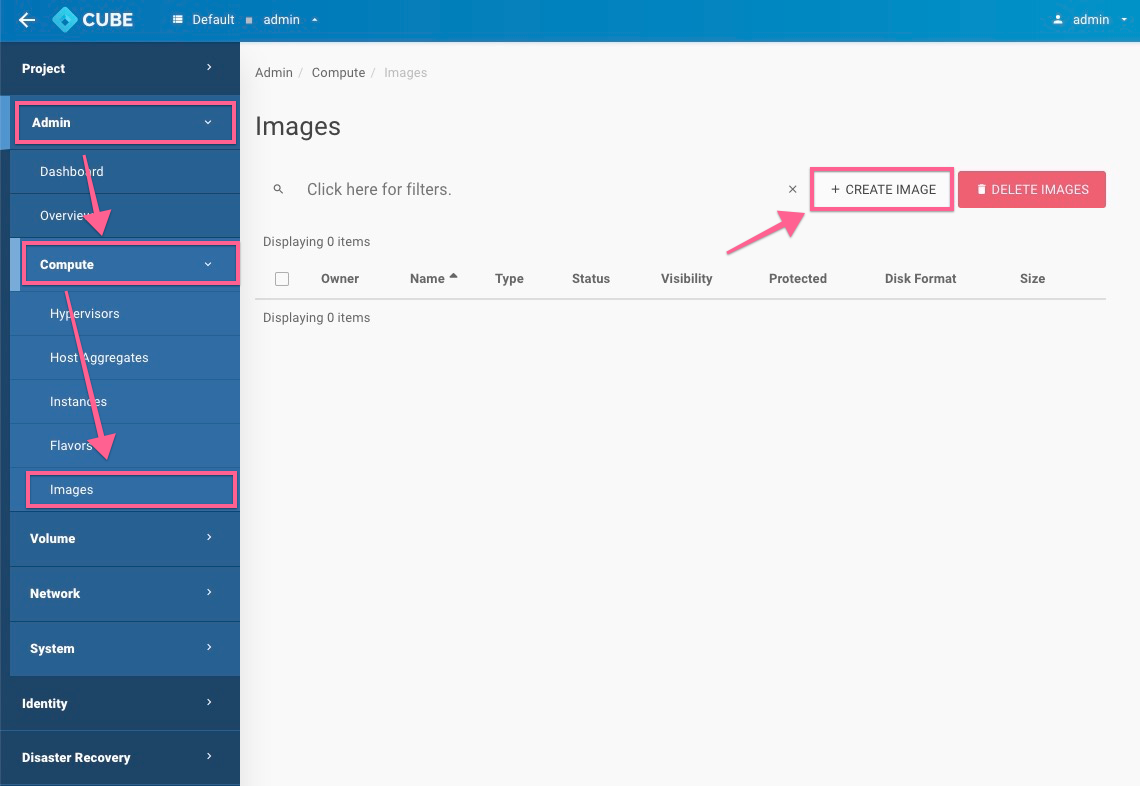
- Let's goto Admin > Compute > Images >
+ CREATE IMAGE
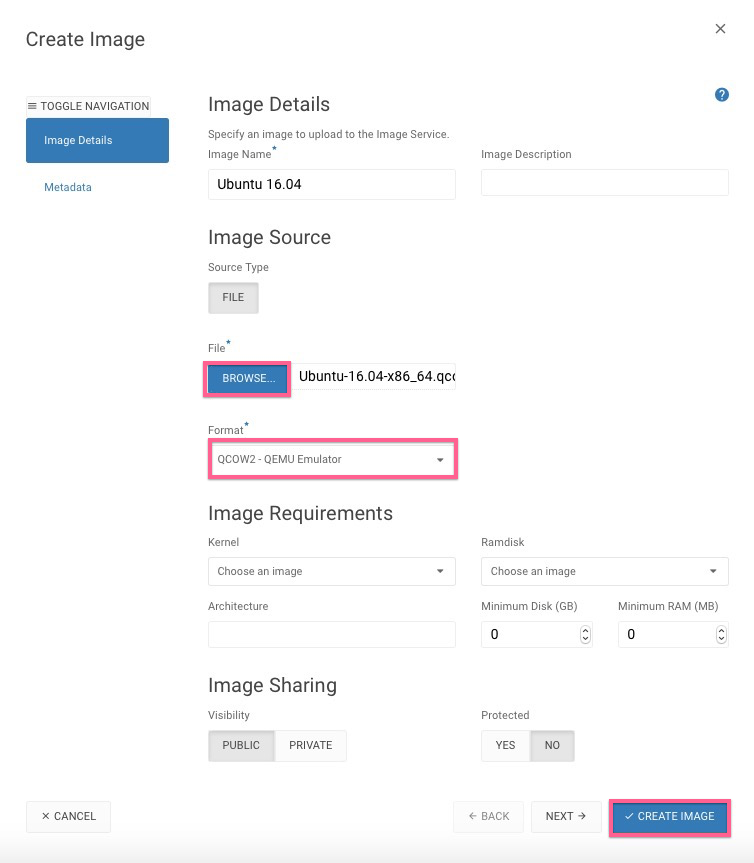
- Create an image with file upload, ex:
Compute - Create Images with CLI
Description: import your VM image from usb drive or local disk /var/support
your local machine
scp Cirros-0.4.0-x86_64.qcow2 root@IPADDRESS:/var/support/.
control node
ssh admin@IPADDRESS
Welcome to the Cube Appliance
Enter "help" for a list of available commands
host-1> image
host-1:image> import
1: usb
2: local
Enter index: 2
1: Cirros-0.4.0-x86_64.qcow2
Enter index: 1
Specify image name: Cirros
Importing...
+------------------+-----------------------------------------------------------------------------------------------------------------------------------------------------------------------------------------------------------------------+
| Field            | Value                                                                                                                                                                                                                 |
+------------------+-----------------------------------------------------------------------------------------------------------------------------------------------------------------------------------------------------------------------+
| checksum         | ba3cd24377dde5dfdd58728894004abb                                                                                                                                                                                      |
| container_format | bare                                                                                                                                                                                                                  |
| created_at       | 2019-10-09T06:19:44Z                                                                                                                                                                                                  |
| disk_format      | raw                                                                                                                                                                                                                   |
| file             | /v2/images/6660fd5a-1cec-4e4e-ada4-08366fc450d0/file                                                                                                                                                                  |
| id               | 6660fd5a-1cec-4e4e-ada4-08366fc450d0                                                                                                                                                                                  |
| min_disk         | 0                                                                                                                                                                                                                     |
| min_ram          | 0                                                                                                                                                                                                                     |
| name             | Cirros                                                                                                                                                                                                                |
| owner            | 35f9664428534c81b85611fa3c6f23c3                                                                                                                                                                                      |
| properties       | direct_url='rbd://c6e64c49-09cf-463b-9d1c-b6645b4b3b85/glance-images/6660fd5a-1cec-4e4e-ada4-08366fc450d0/snap', hw_disk_bus='scsi', hw_qemu_guest_agent='yes', hw_scsi_model='virtio-scsi', os_require_quiesce='yes' |
| protected        | False                                                                                                                                                                                                                 |
| schema           | /v2/schemas/image                                                                                                                                                                                                     |
| size             | 46137344                                                                                                                                                                                                              |
| status           | active                                                                                                                                                                                                                |
| tags             |                                                                                                                                                                                                                       |
| updated_at       | 2019-10-09T06:19:49Z                                                                                                                                                                                                  |
| virtual_size     | None                                                                                                                                                                                                                  |
| visibility       | public                                                                                                                                                                                                                |
+------------------+-----------------------------------------------------------------------------------------------------------------------------------------------------------------------------------------------------------------------+
Importing Cirros complete. It is safe to remove the USB drive.
Create Instance
-
Let's goto Project > Compute > Instances >
+ LAUNCH INSTANCE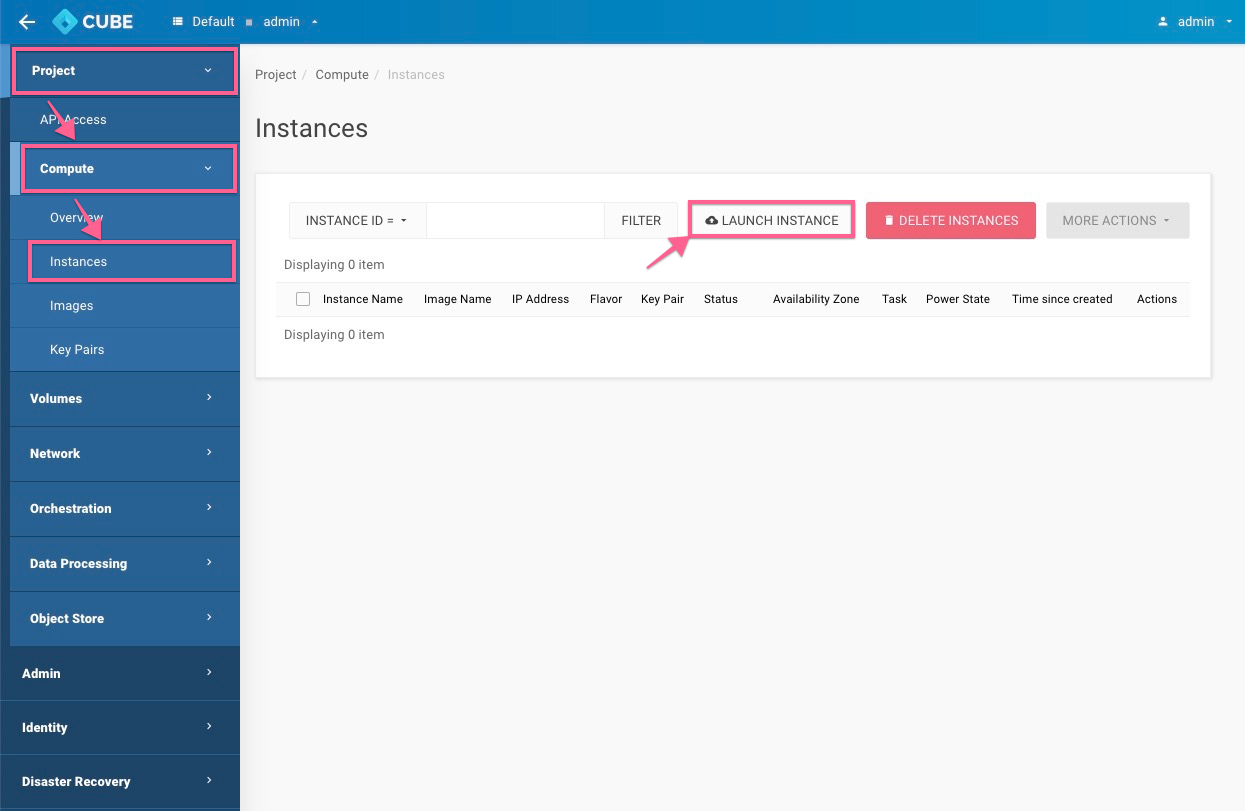
-
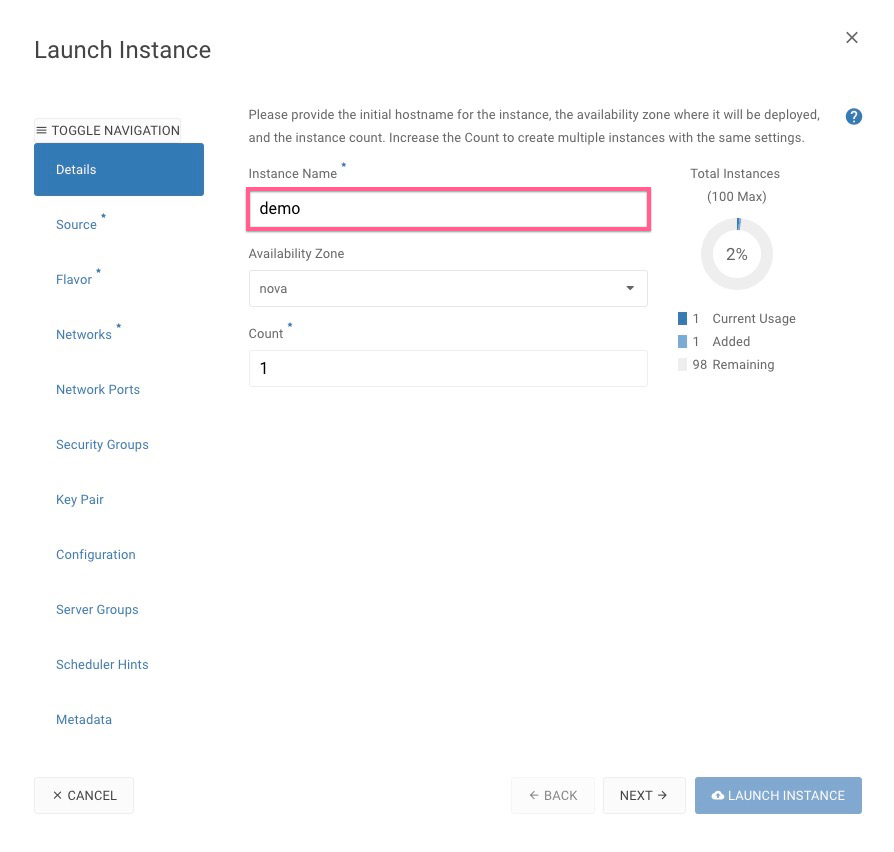
Detail : Naming the Instance Name
-
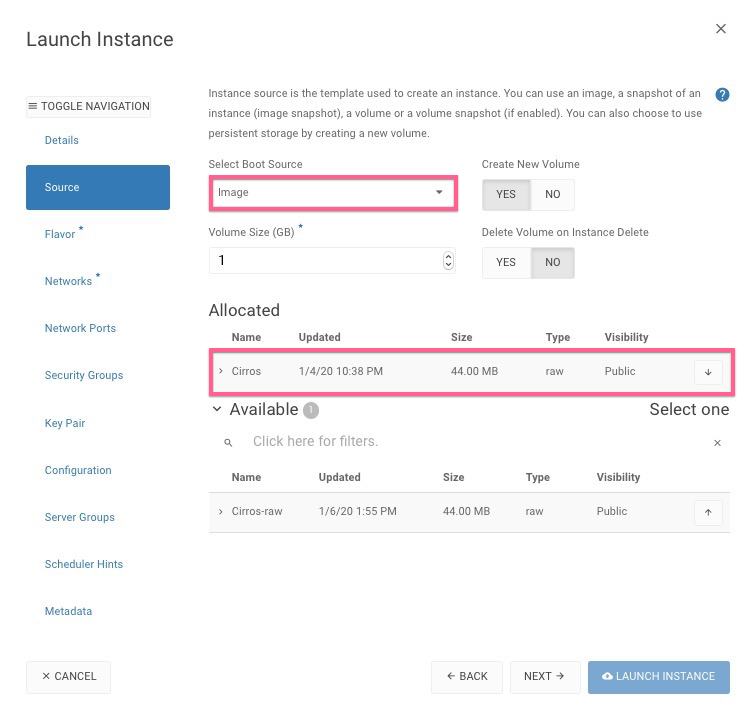
Source :
-
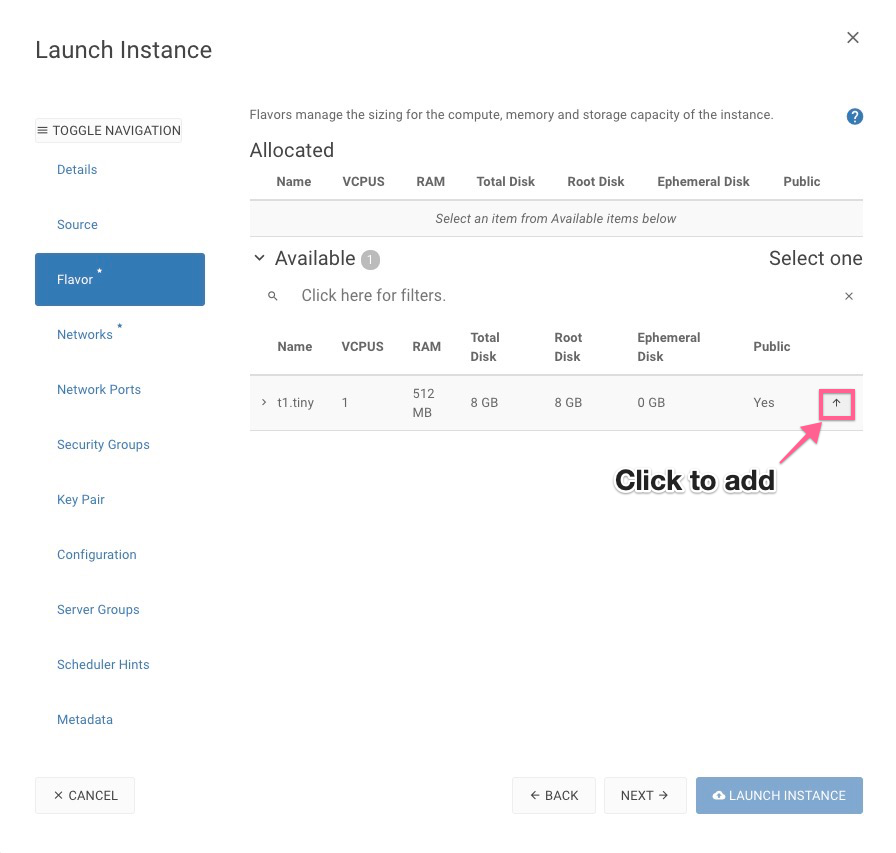
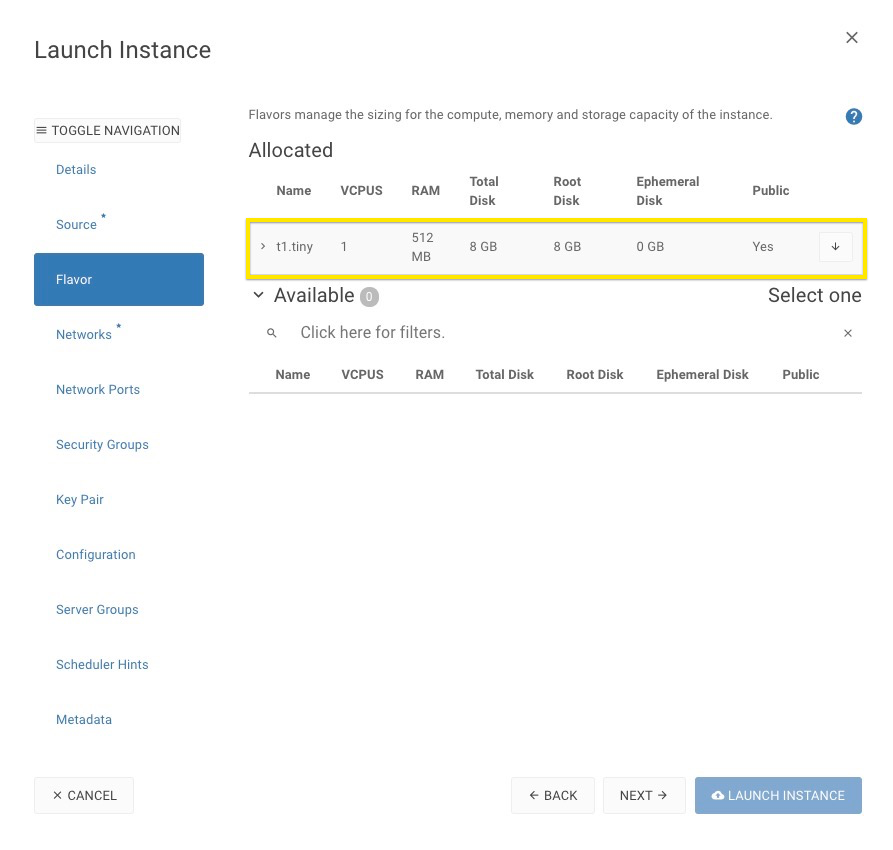
Flavor :
-
Keypair :
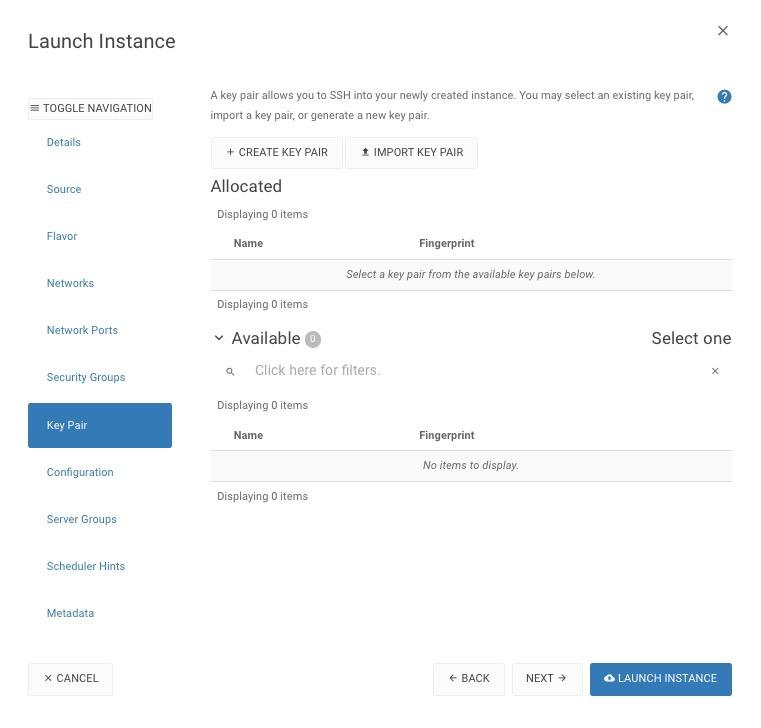
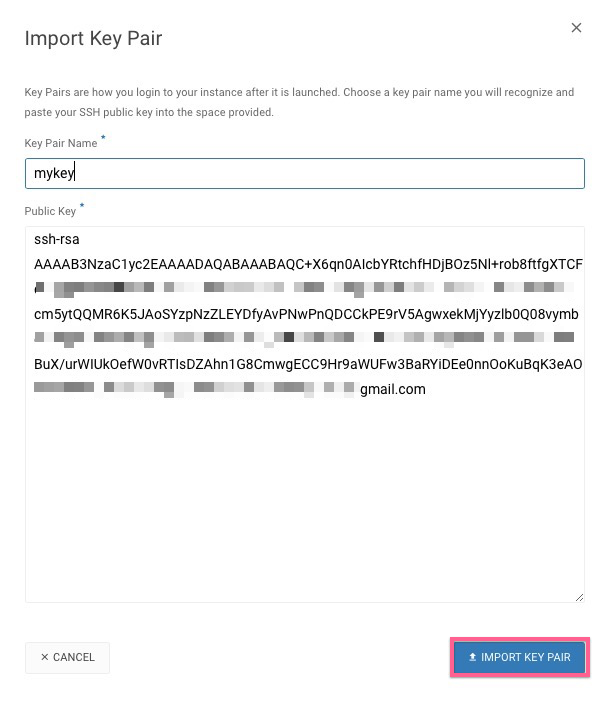
-
Launch the instance
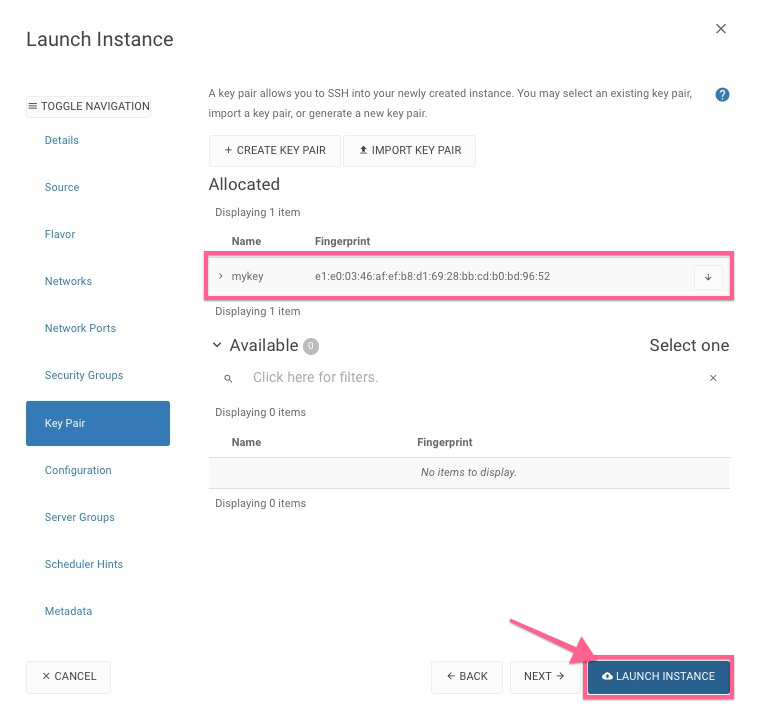
Associate Floating IP for VLAN/VXLAN
-
Select
ASSOCIATE FLOATING IPfrom the drop down from the actions column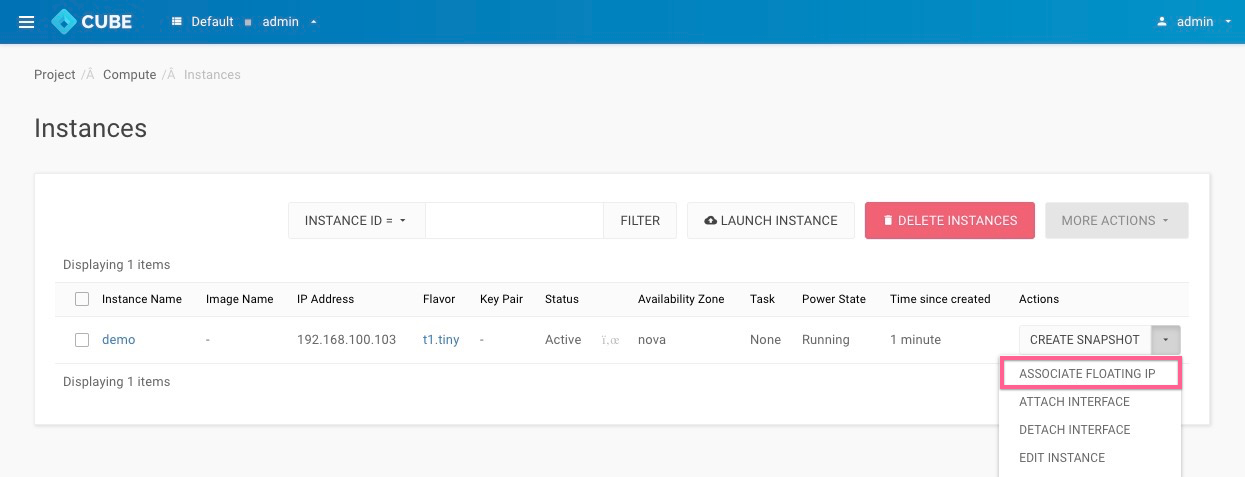
-
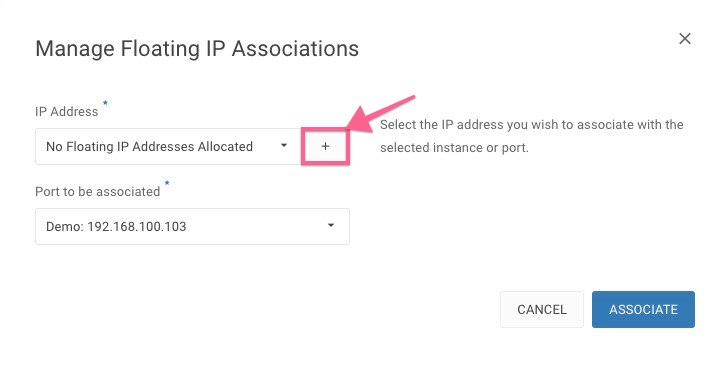
Allocate a floating IP
-
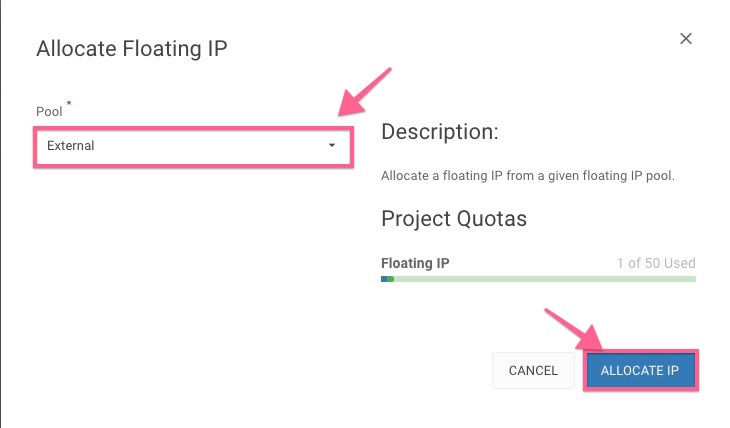
Select Pool and Allocate IP
-
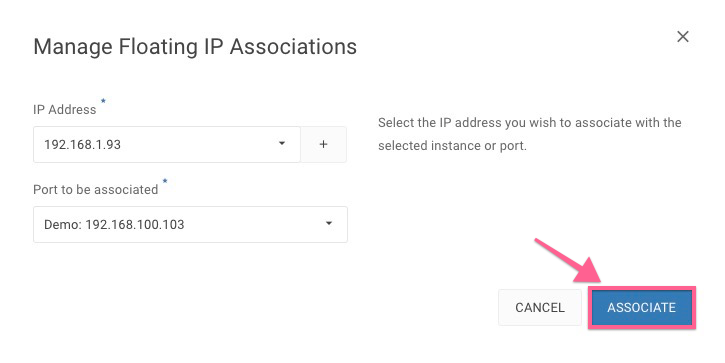
Associate to the instances
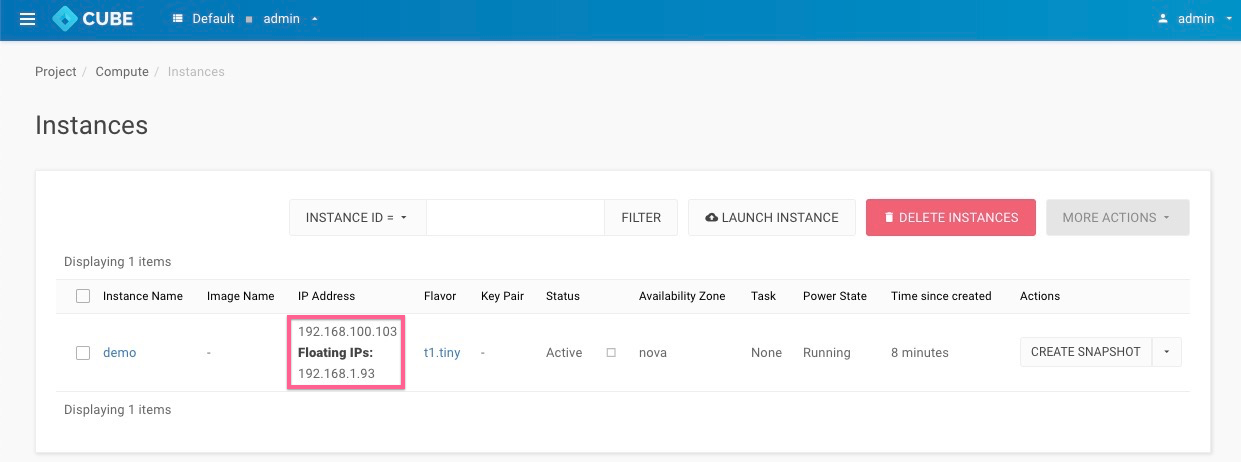
Connect to your instance
Now you can access your instance with SSH or SFTP
Warning: Permanently added '192.168.1.93' (ECDSA) to the list of known hosts.