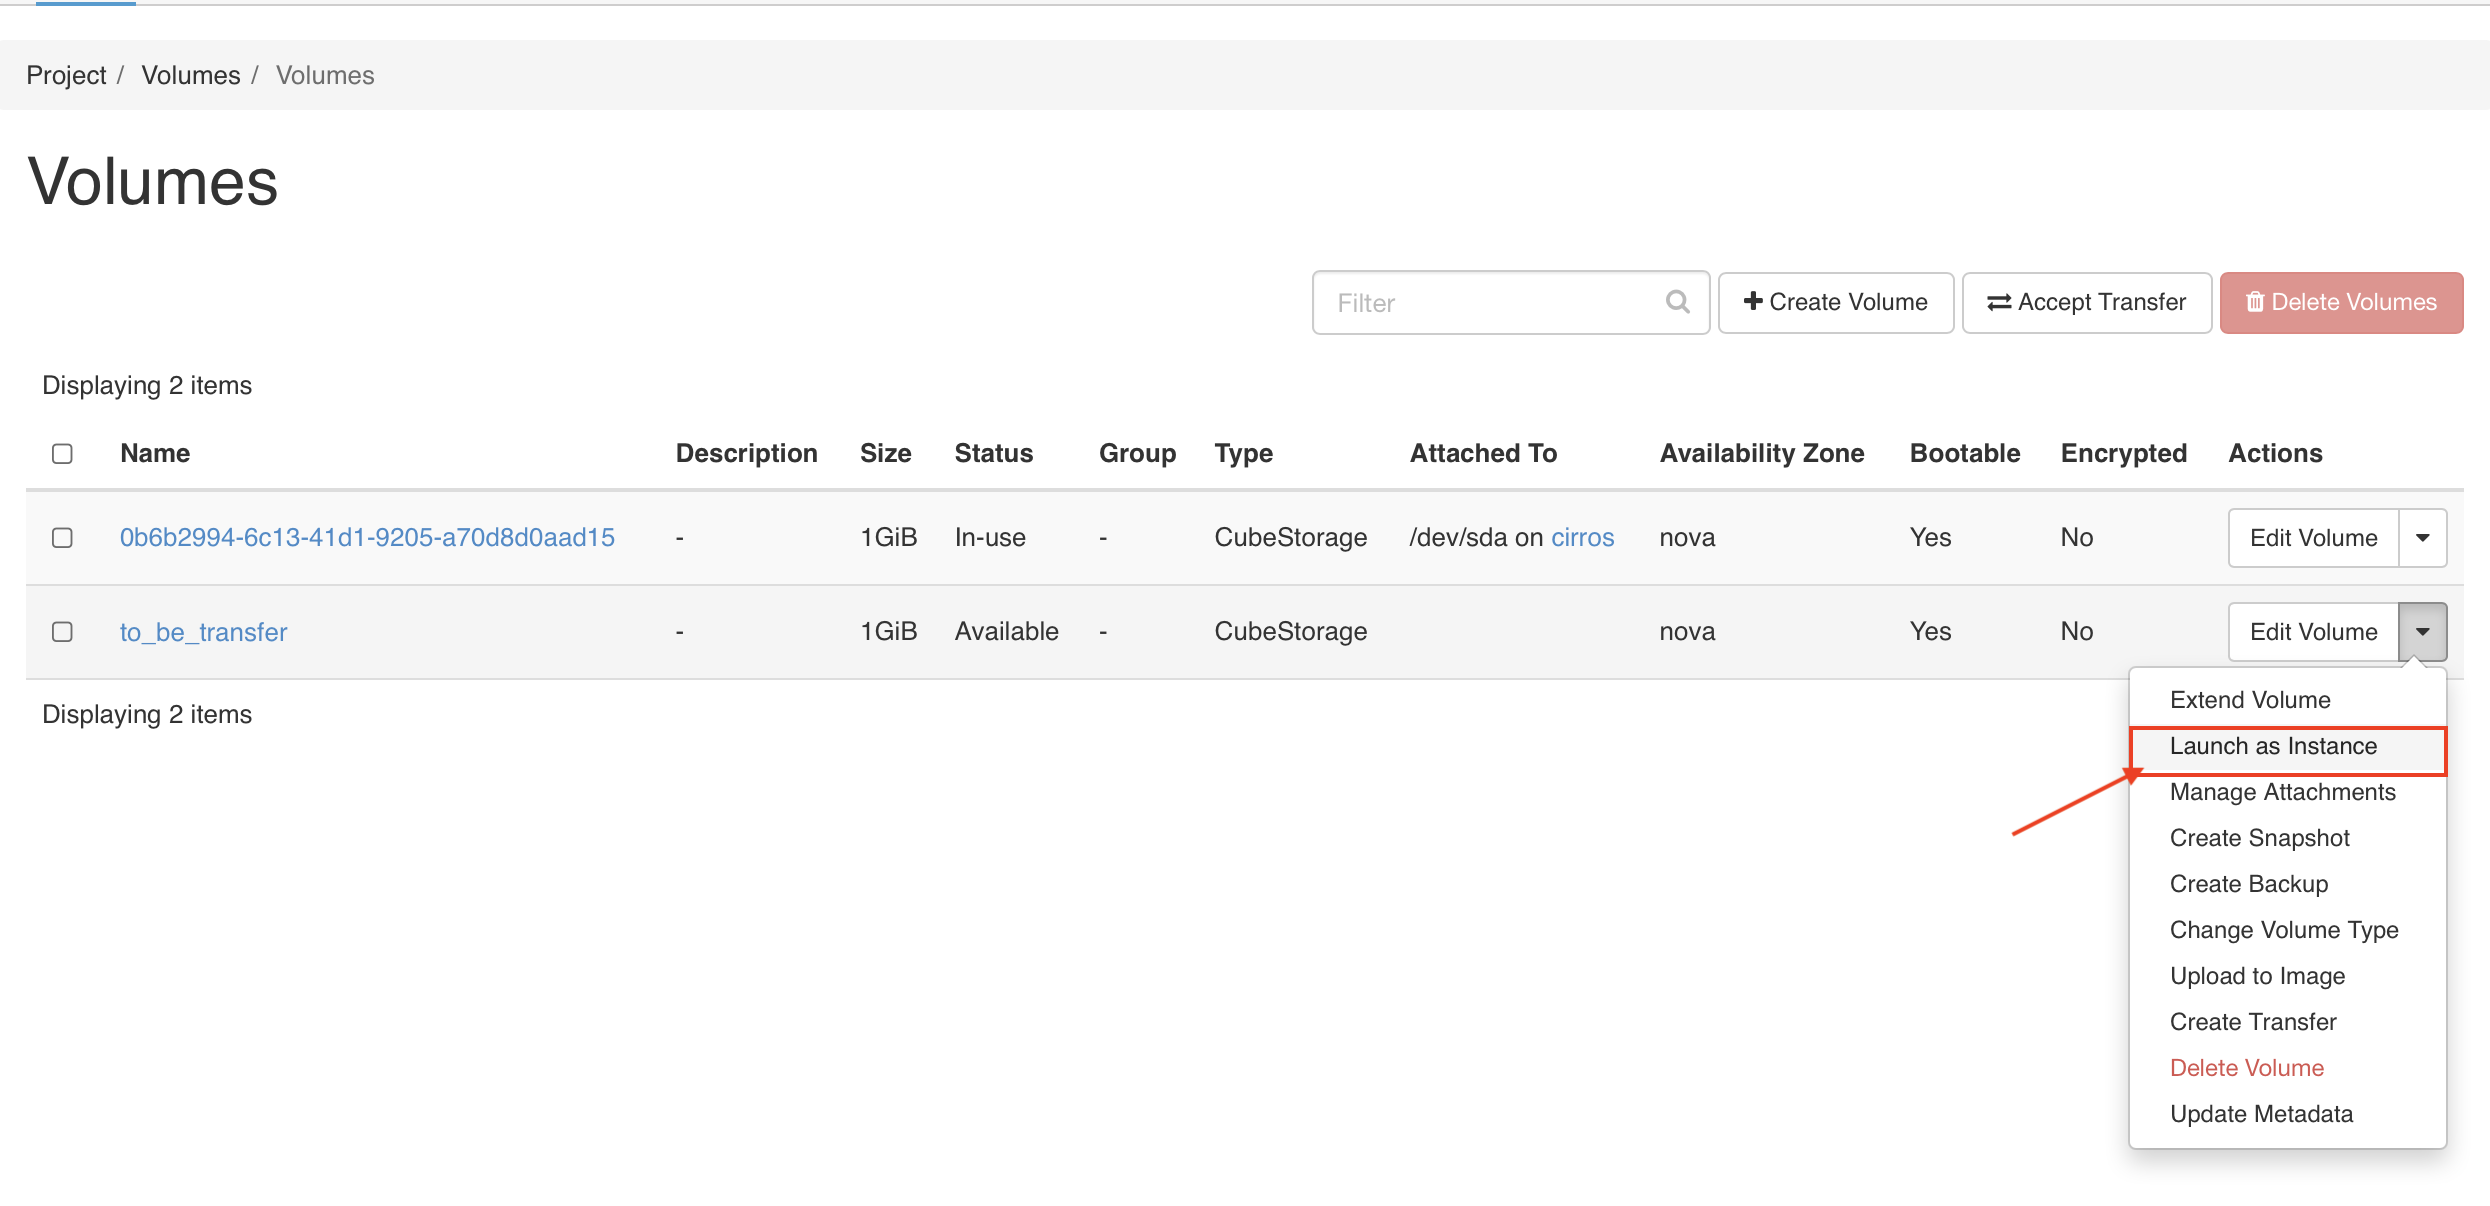
Create a Volume Transfer to another Project
-
Goto Current Project > Volumes > Volumes, choose the volume from the list you wish to transfer and select the
EDIT VOLUMEfrom the Actions column and rename it.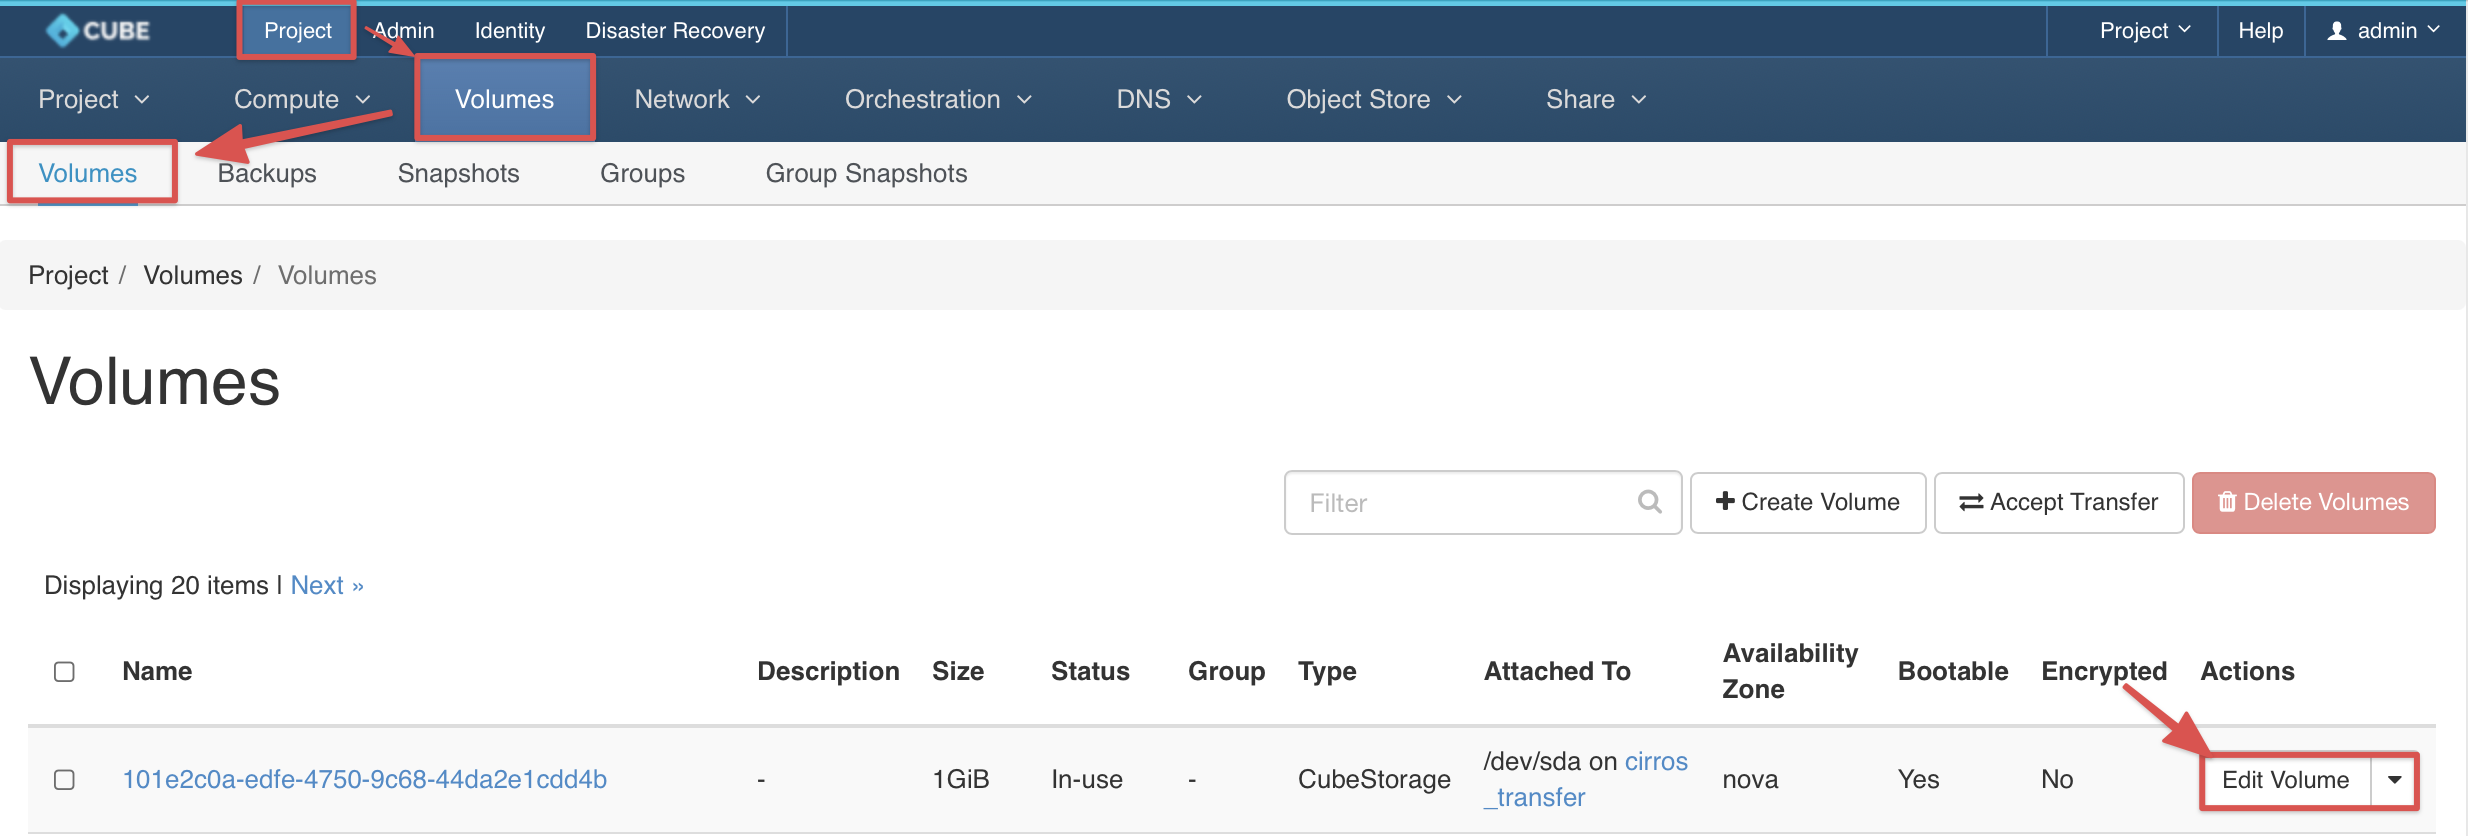
-
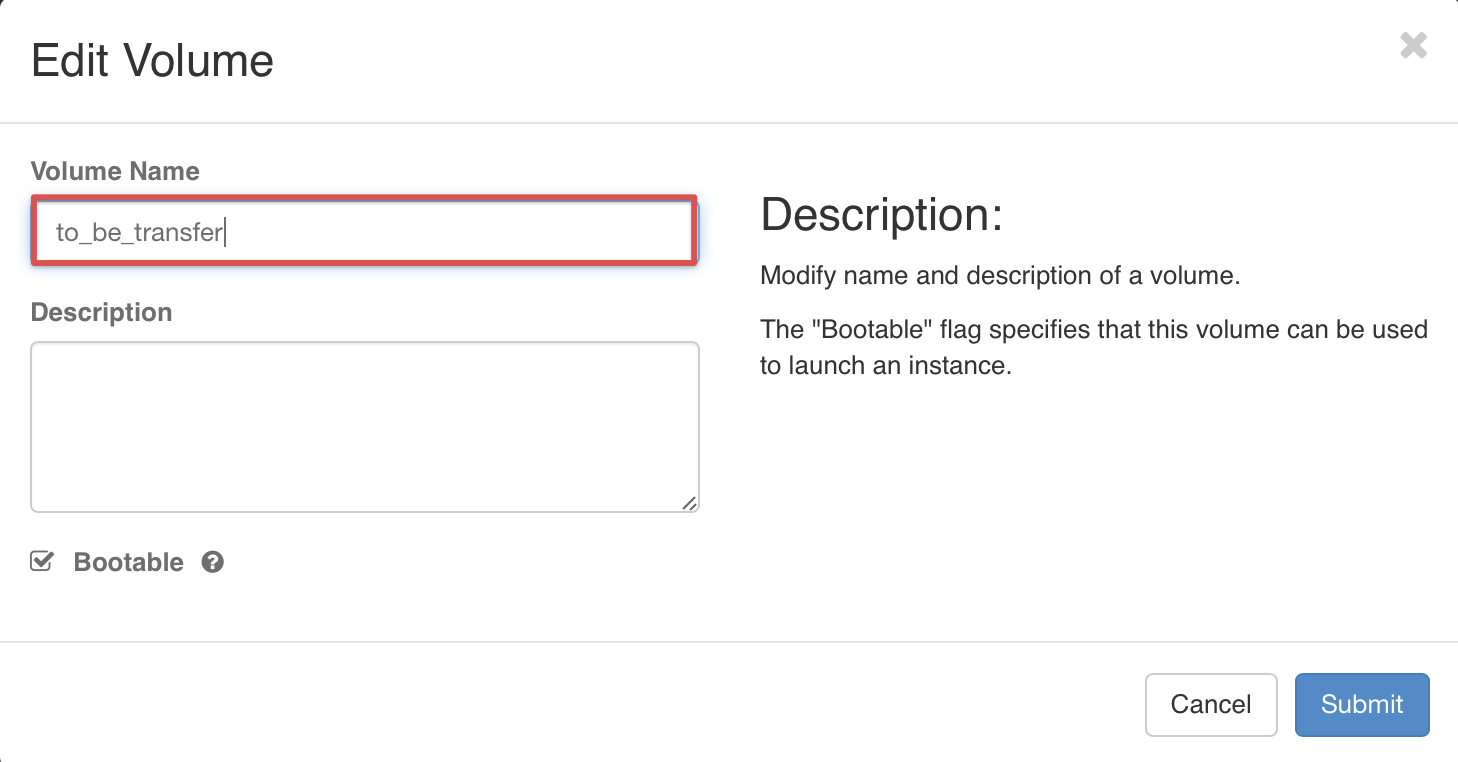
Enter a Volume Name & Submit.
-
Goto Project > Compute > Instances, Make sure the Instance is
Shutoff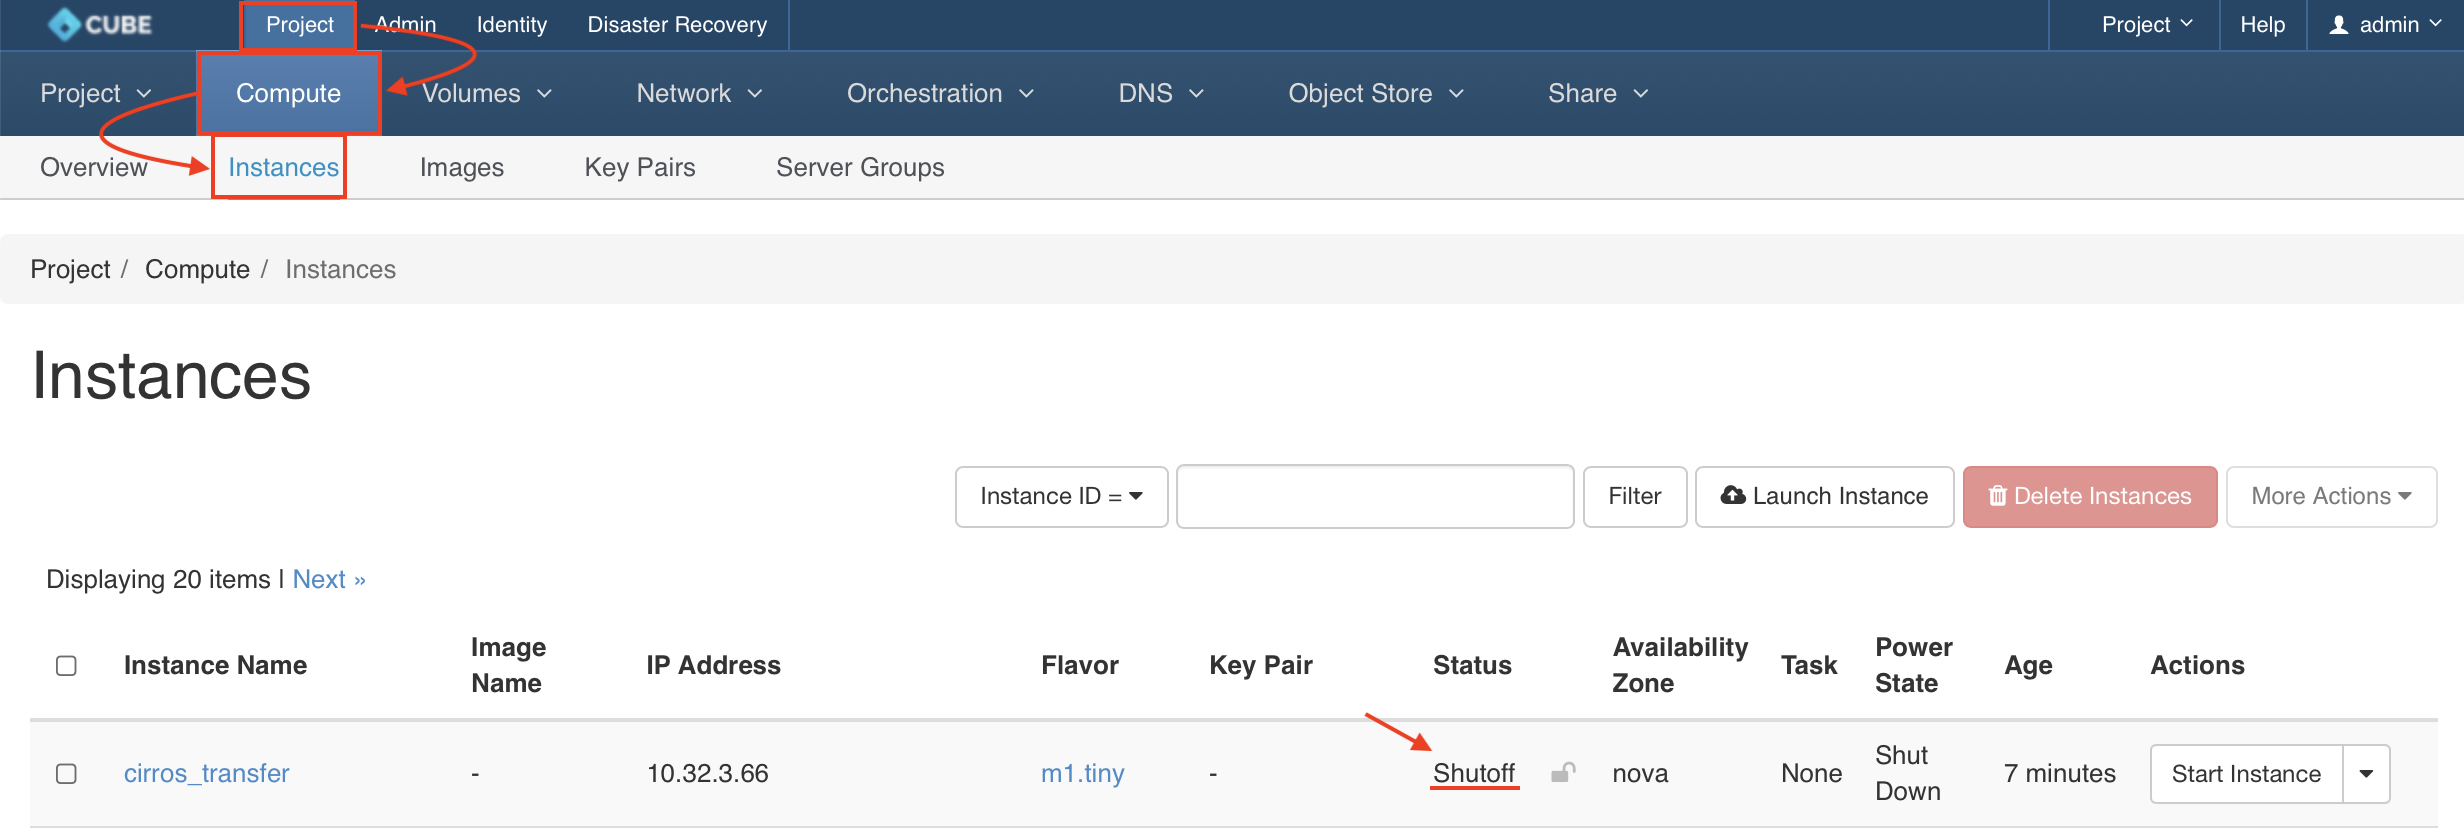
-
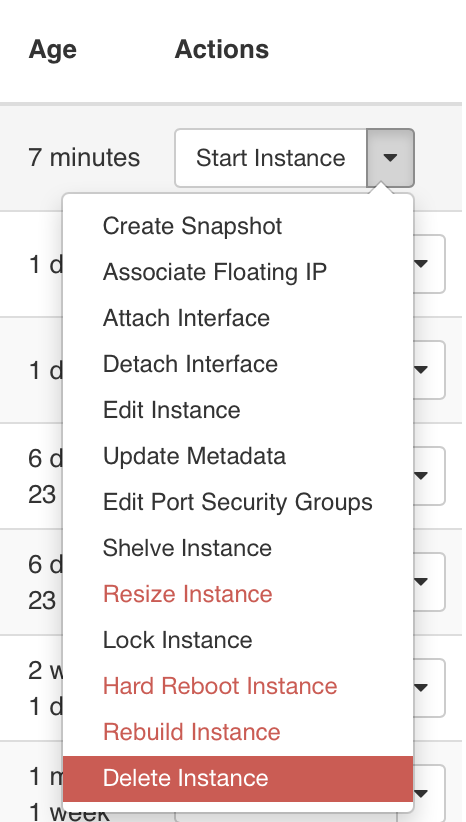
Delete the instance
-
Go back to Project > Volumes > Volumes, choose the volume and select
Create Transferfrom the Actions column.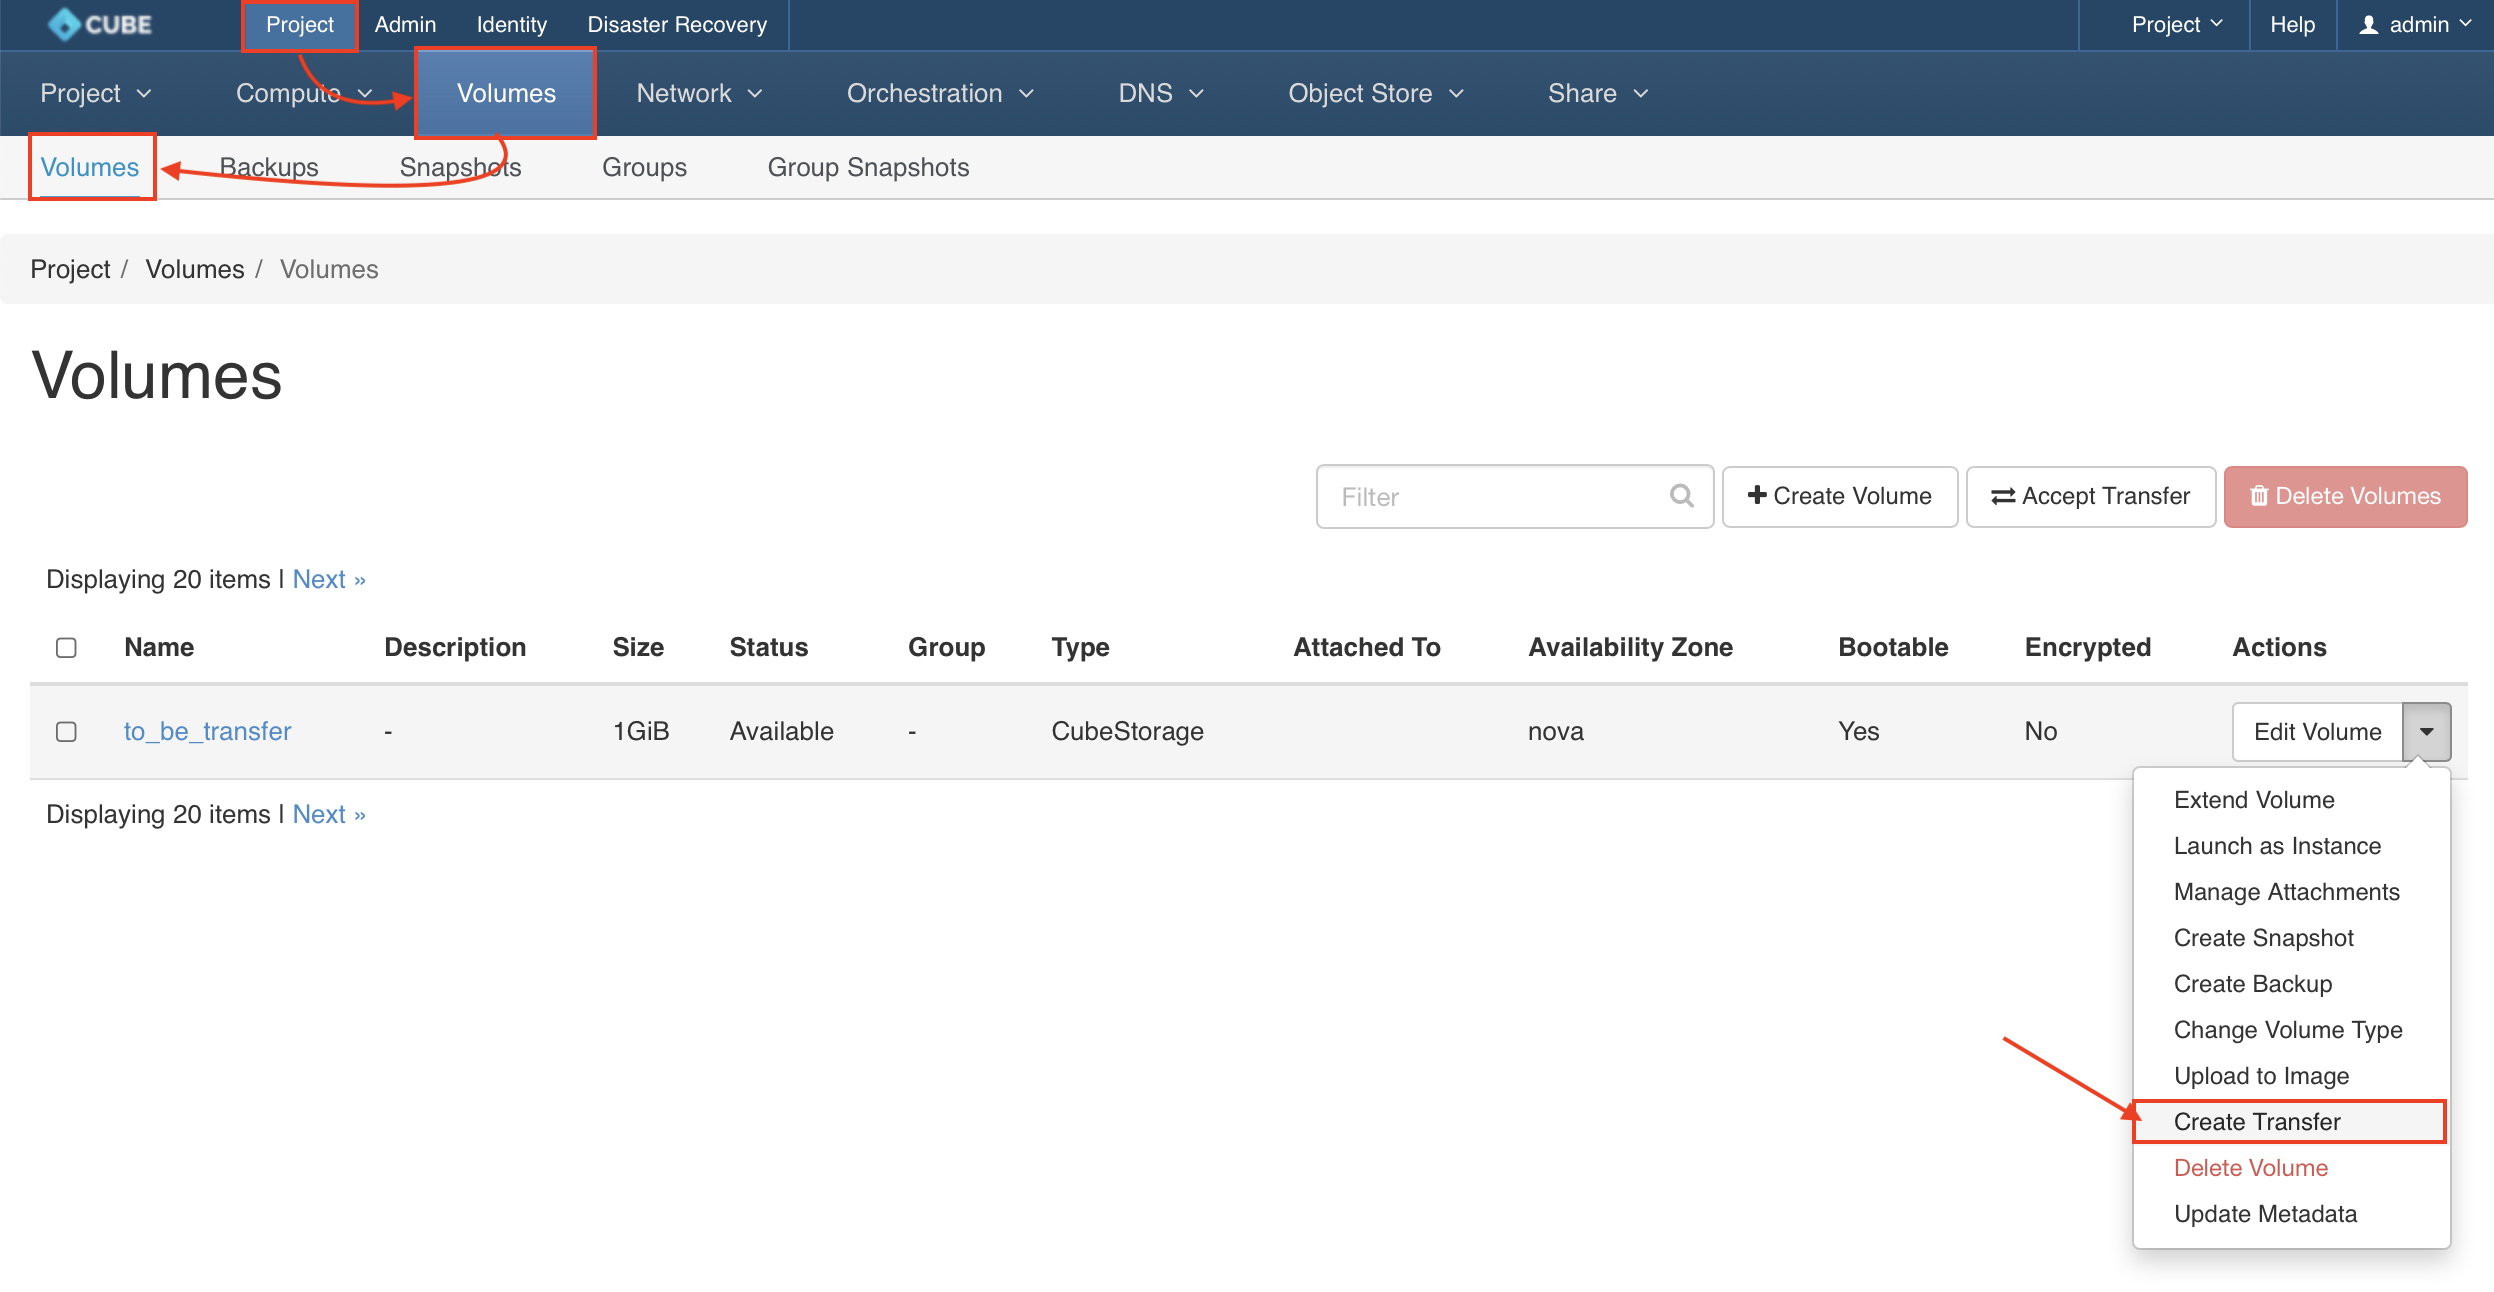
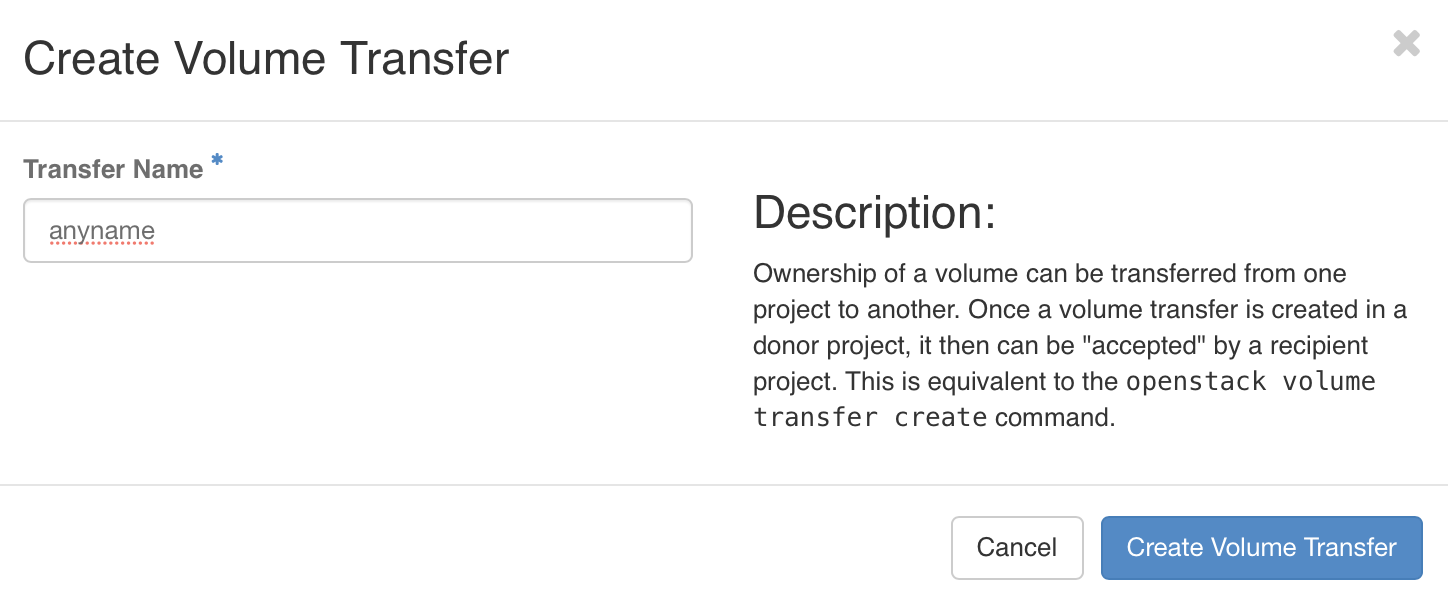
-
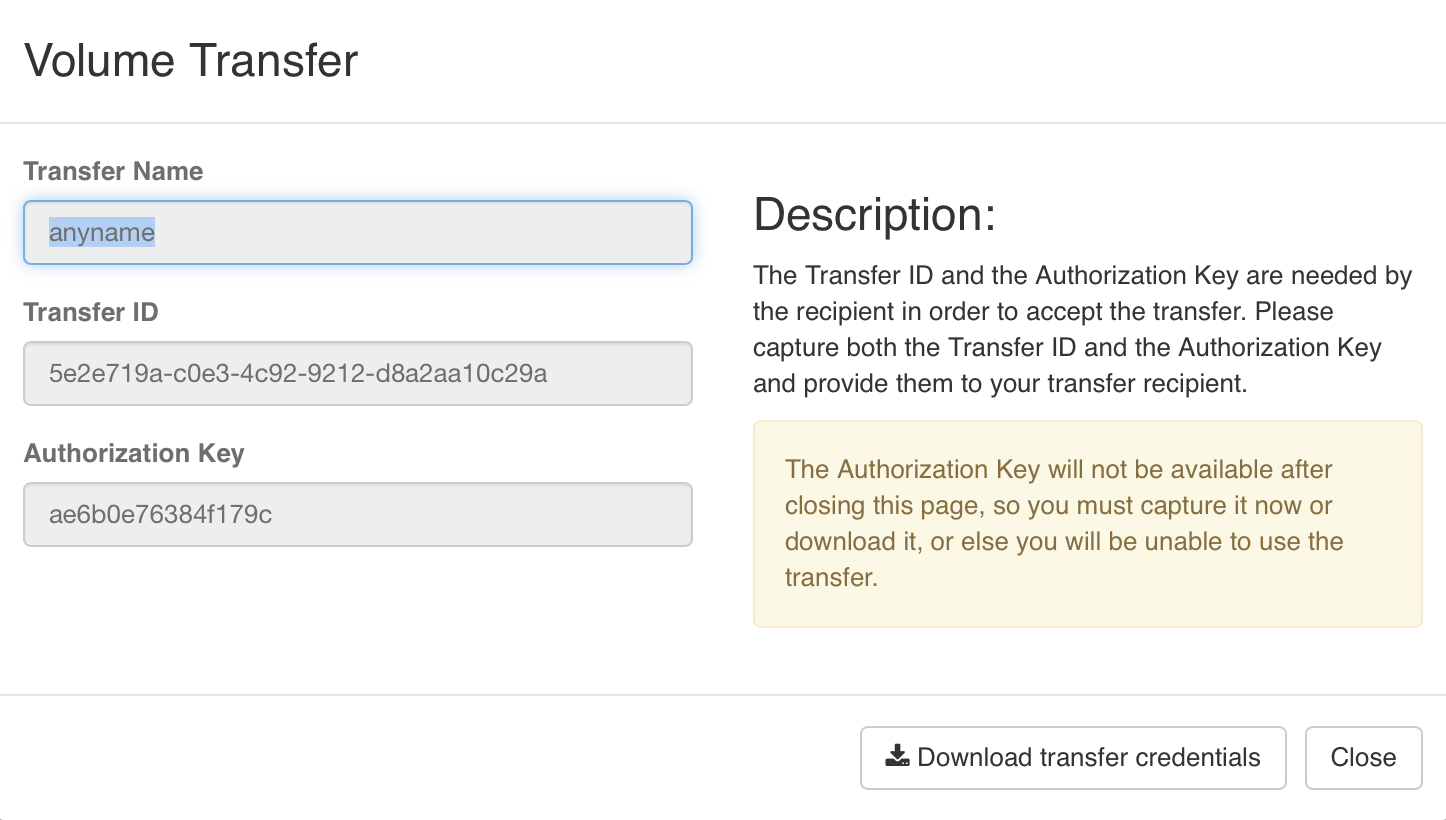
Download the transfer credentials and close the windows.
-
The Volume is ready to be transferred.
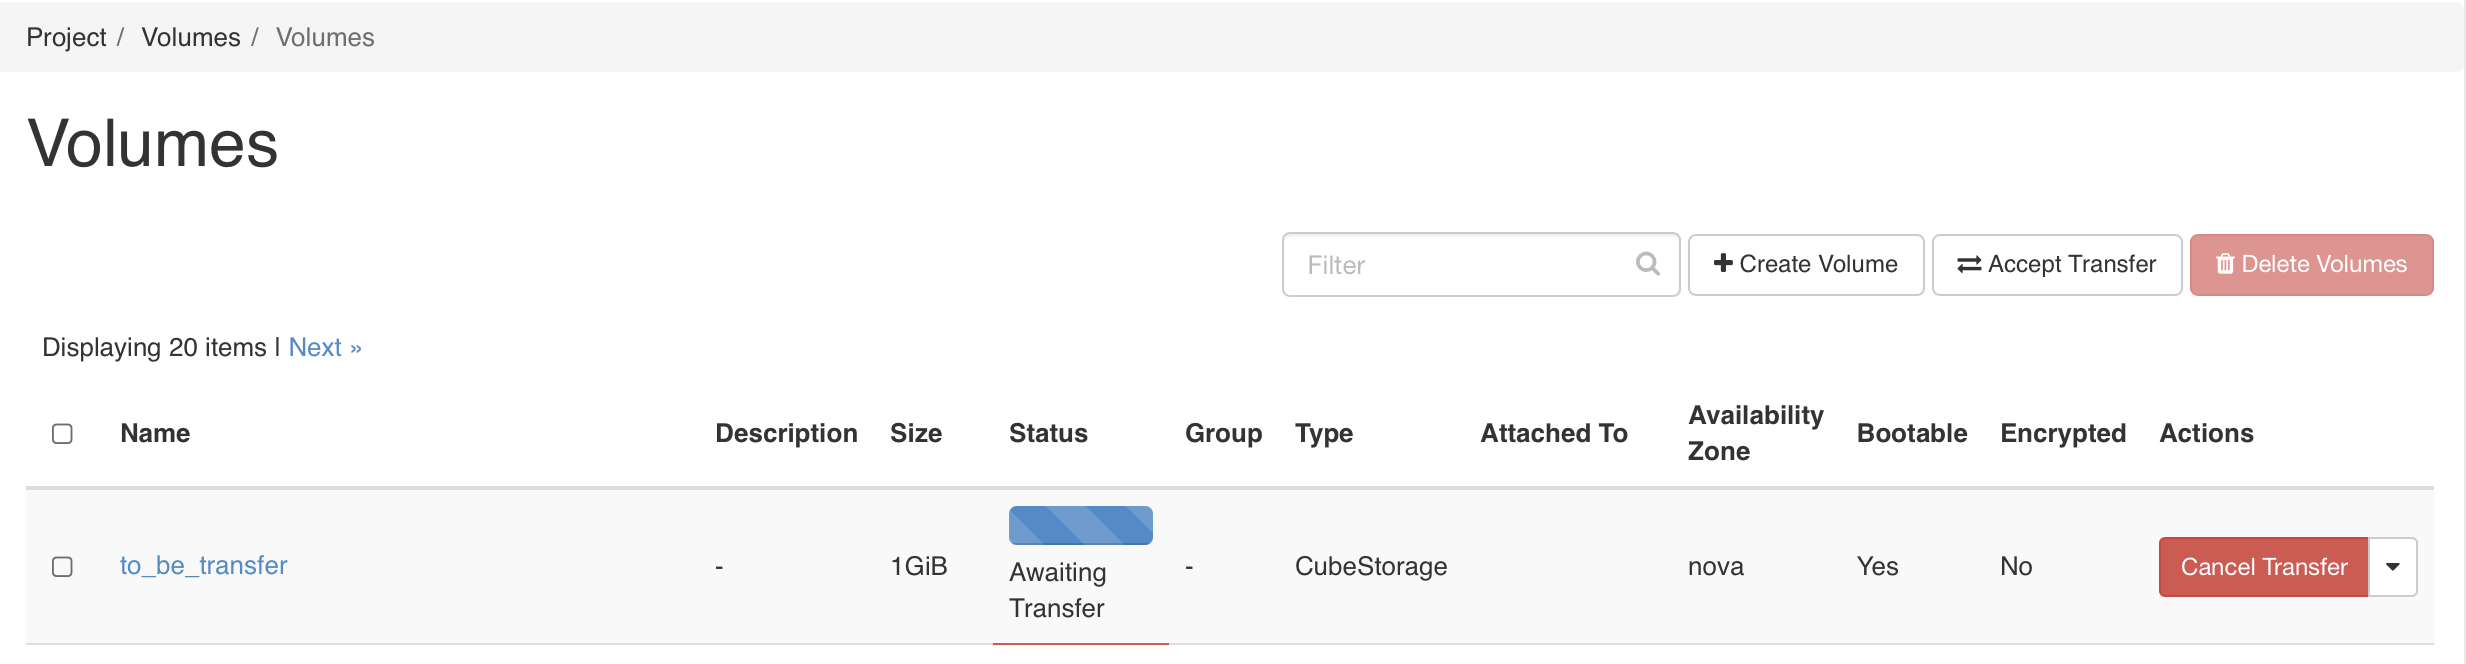
-
Switch to New Project, Goto Project > Volumes > Volumes, Click on
Accept Transfer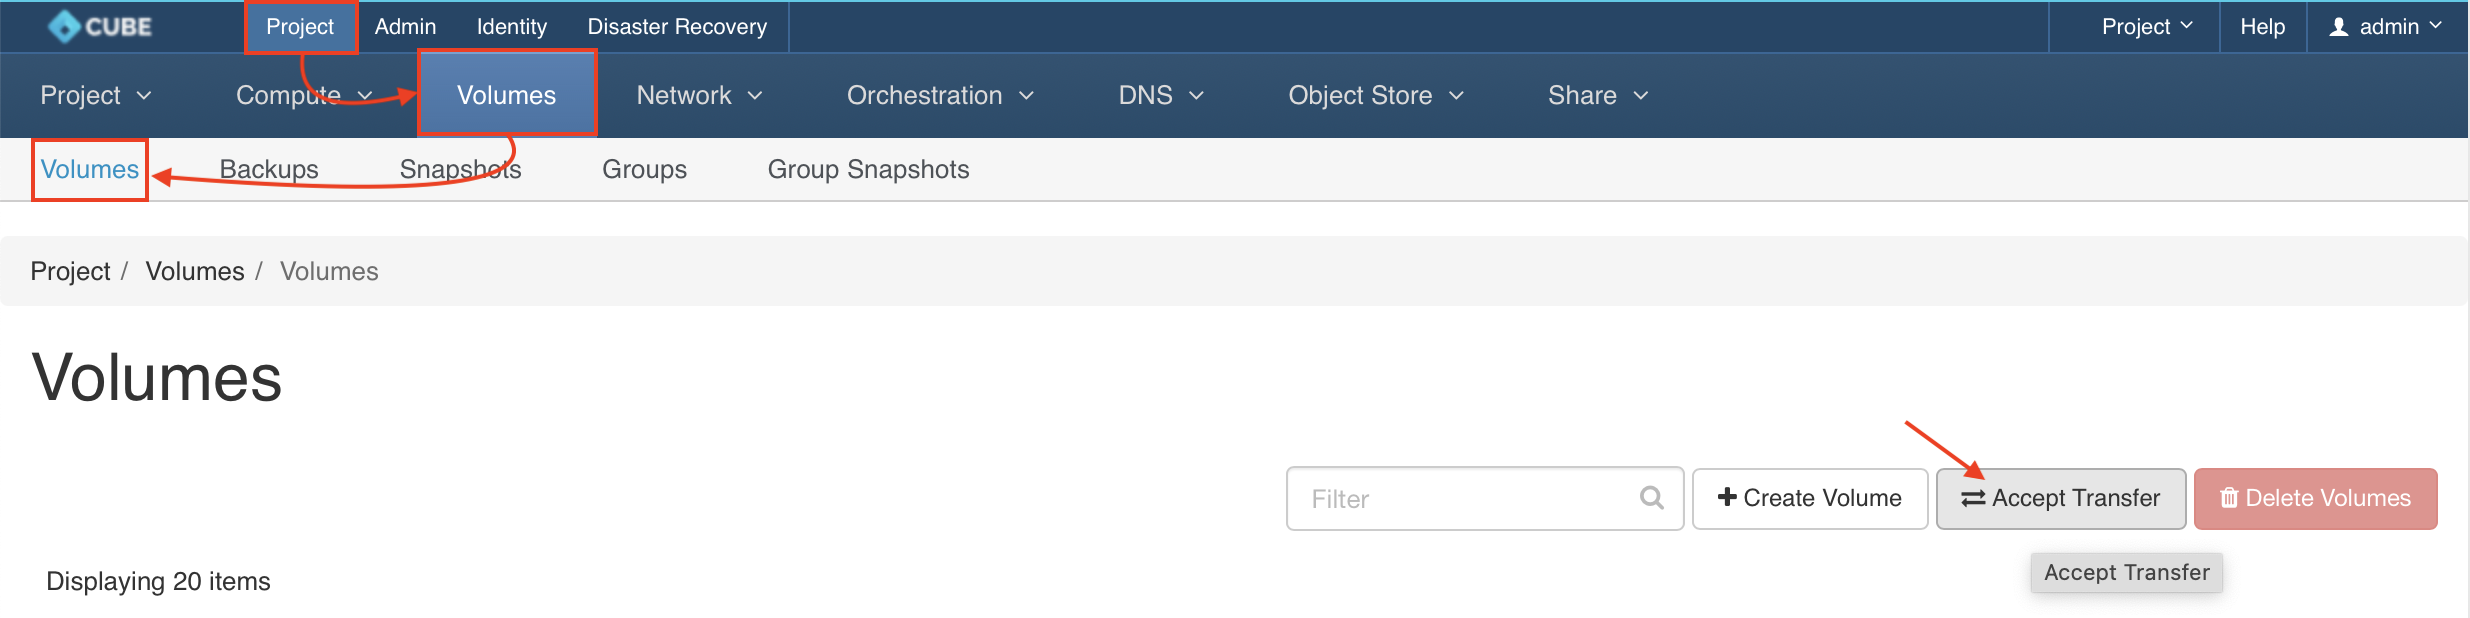
-
Input the
Transfer ID&Authorization Keyto accept the volume transfer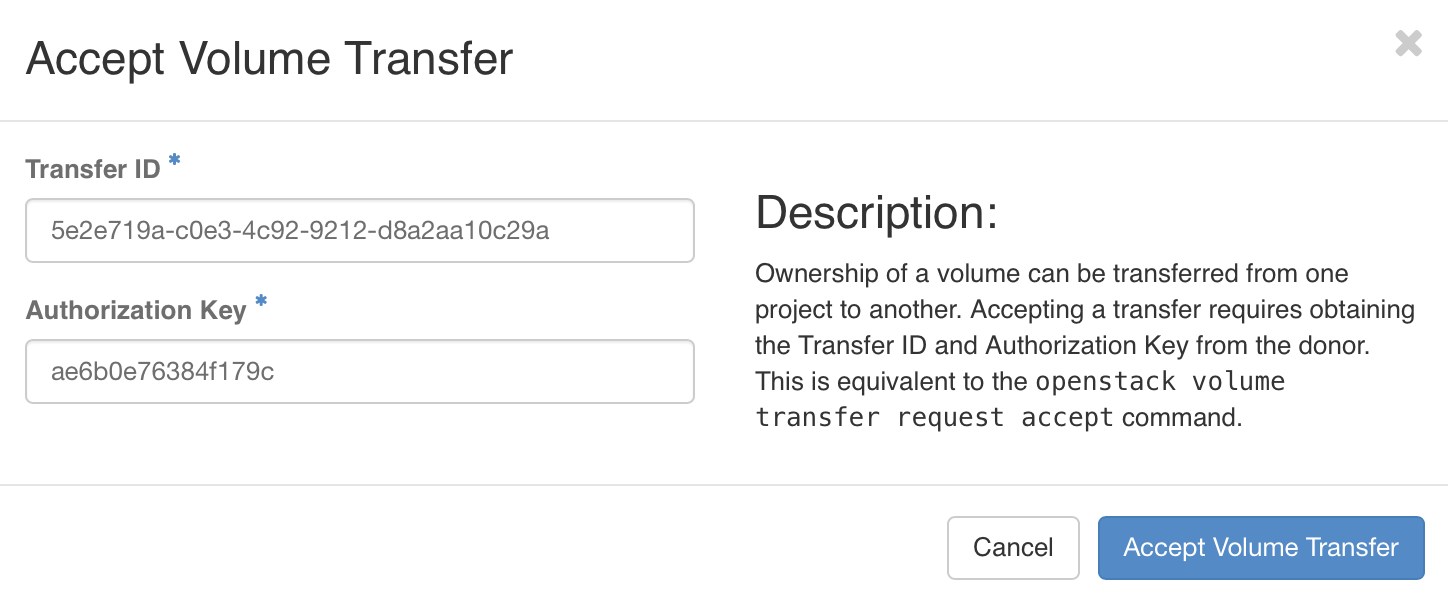
-
Now you can use the transferred volume launch as an Instance