ISOイメージから仮想マシンを作成する
ISOイメージから仮想マシンを作成する概要
ゲストOS用のクラウドイメージが利用できない場合は、ゲストISOファイルから起動して手動でインストールすることができます。 このガイドでは、WindowsゲストOS向けのISOベースの仮想マシンのインストールについて解説します。
インストール手順では、適切なイメージを準備してアップロードし、CLIコマンドを実行して仮想ハードウェアを設定し、インストール完了後に再利用可能なGlanceイメージテンプレートに変換する必要があります。 設定が完了すれば、このテンプレートを使用して、インストール作業を繰り返すことなく新しい仮想マシンを展開できます。
業務内容
- 必要なイメージを入手する:Windowsのインストール用ISOイメージおよび必要なドライバイメージをダウンロードします。 Windowsゲストの場合、通常はハードウェアとの互換性を確保するために、VirtIOドライバーのISOイメージが含まれます。
- イメージのアップロードと設定:ISOファイルを環境に追加し、新しい仮想マシンに割り当てます。 この手順では、仮想マシンがインストールメディアから起動できるように、仮想ハードウェアを設定します。
- オペレーティングシステムのインストール:ISOイメージからVMを起動し、Windowsのインストールを完了させます。 これは標準的なOSのインストール手順と同様ですが、ドライバの設定に関してゲストOS固有の手順がいくつか追加されています。
- VMをテンプレートに変換する:インストールが完了したら、インストール済みのボリュームを一般化して、Glanceに再利用可能なイメージテンプレートとして保存します。 これは、今後作成される仮想マシン(VM)のベースとなるマスターイメージです。
- テンプレートからVMを展開:保存したテンプレートを使用して、必要に応じて新しいWindows VMを起動できます。一貫性があり、繰り返し実行可能で、すぐに使用できます。
前提条件
ISOイメージを使用して仮想マシンを作成するには、以下のファイルが必要です:
- ISOイメージ:公式のソースまたはリポジトリから、ゲストOSの起動用ISOイメージをダウンロードしてください。
- VirtIO ドライバーパック:CubeCOS で最適な互換性とパフォーマンスを得るには、Windows オペレーティングシステム用の VirtIO ドライバーをインストールしてください。
必要なISOイメージをCubeCOSイメージストアにアップロードする
カスタムISOイメージをアップロード
-
ローカルマシンで、OSベンダーの公式サイトまたは検証済みのリポジトリから必要なISOイメージをダウンロードしてください。
-
端末セッションを開きます。
-
クラスタのVIPへの管理アクセス権を持つコンピュータから、
scpコマンドを使用してISOイメージをCubeCOSイメージストアにアップロードしてください。次のコマンド内の画像名とクラスタIPを置き換えてください:
scp replace-with-your-image-name.iso root@<your-cluster-vip>:/mnt/cephfs/glance/ -
アップロードが完了するまでお待ちください。 所要時間は、画像のサイズとネットワークの帯域幅によって異なります。
VirtIO ドライバーパックのアップロード
-
VirtIOの安定版ダウンロードページ からVirtIOドライバーパックをダウンロードしてください。
-
端末セッションを開きます。
-
クラスタのVIPへの管理アクセス権を持つコンピュータから、
scpコマンドを使用してISOイメージをCubeCOSイメージストアにアップロードしてください。次のコマンド内の画像名とクラスタIPを置き換えてください:
scp virtio-win.iso root@<your-cluster-vip>:/mnt/cephfs/glance/ -
アップロードが完了するまでお待ちください。 所要時間は、画像のサイズとネットワークの帯域幅によって異なります。
仮想マシンのインストール用にインストールボリュームを準備する
ISOイメージとドライバーパックは、仮想マシンのインストール中にボリュームとして接続できるようになる前に、イメージとしてインポートする必要があります。
:::tip[Repeat [OS ISOおよびドライバーパック用アクション]
先に進む前に、以下の項目についても同じ手順を繰り返してください:
- オペレーティングシステムのインストール用ISOイメージ。
- 該当する場合は、ドライバーパック。
:::
-
端末セッションを開きます。
-
SSH経由でクラスタのVIPに接続し、
rootユーザーとしてログインしますssh root@<your-cluster-vip> -
ISOファイルがイメージディレクトリに正常にアップロードされたことを確認してください。
ls /mnt/cephfs/glance/ -
アップロードされたイメージから起動可能なボリュームを作成します。
- Windowsの場合は、Windows OSタブを使用して、Windowsシステムに必要な追加のOS仕様を指定してください。
- Linuxおよびその他のインストールメディア(VirtIOドライバーパックを含む)については、「Linuxおよびその他のOS」タブを使用してください。
- Windows OS
- Linux and other OS
openstack image create \--disk-format iso \--container-format bare \--public \--property hw_firmware_type=uefi \--property hw_machine_type=q35 \--property hw_scsi_model=virtio-scsi \--property hw_disk_bus=virtio \--property os_secure_boot='optional' \--property os_type=windows \--file <replace-with-full-path-to-iso-image>.iso \<replace-with-imported-image-name>.isoopenstack image create \--disk-format iso \--container-format bare \--public \--property hw_firmware_type=uefi \--property hw_machine_type=q35 \--property hw_scsi_model=virtio-scsi \--property hw_disk_bus=virtio \--property os_secure_boot='optional' \--file <replace-with-full-path-to-iso-image>.iso \<replace-with-imported-image-name>.iso
テンプレート仮想マシンを作成する
ISOベースの仮想マシンを作成するには、Novaコマンドラインインターフェース(CLI)を介して手動で操作する必要があります。
CLI を使用して ISO ベースの仮想マシンを作成する
-
SSHでターミナルを開きます。
-
SSH経由でクラスタのVIPに接続し、
rootユーザーとしてログインしますssh root@<your-cluster-vip> -
テンプレート仮想マシンを作成するには、以下のパラメータを置き換えてからコマンドを実行してください。
- 仮想マシンの名前:仮想マシンの表示名を入力してください。
- フレーバー:仮想マシンにリソースを割り当てるために、フレーバーの詳細を入力してください。
- ネットワーク:ネットワーク > ネットワーク に移動してネットワークIDを確認し、仮想マシンで使用するネットワークIDをコピーしてください。
- ブートイメージのUUID:Compute > Images に移動し、ISOブートメディアのイメージIDをコピーします。
- (Windowsマシンにのみ適用)VirtIOドライバーのUUID:「Compute」 > 「Images」 に移動し、VirtIOドライバー用メディアのイメージIDをコピーします。
- ブートボリュームのサイズ:ブートボリュームの希望サイズ(GB単位)。
- Windows OS
- Linux and other OS
openstack server create <replace-with-virtual-machine-name> \--flavor <replace-with-flavor-size> \--network <replace-with-network-uuid> \--block-device source_type=image,uuid=<replace-with-boot-media-id>,destination_type=volume,volume_size=10,disk_bus=sata,device_type=cdrom,boot_index=0 \--block-device source_type=image,uuid=<replace-with-virtio-media-id>,destination_type=volume,volume_size=10,disk_bus=sata,device_type=cdrom,boot_index=1 \--block-device source_type=blank,destination_type=volume,volume_size=<replace-with-size-of-boot-volume>,disk_bus=virtio,device_type=disk,boot_index=2openstack server create <replace-with-virtual-machine-name> \--flavor <replace-with-flavor-size> \--network <replace-with-network-uuid> \--block-device source_type=image,uuid=<replace-with-boot-media-id>,destination_type=volume,volume_size=10,disk_bus=sata,device_type=cdrom,boot_index=0 \--block-device source_type=blank,destination_type=volume,volume_size=<replace-with-size-of-boot-volume>,disk_bus=virtio,device_type=disk,boot_index=2 -
CubeCOSのWebベース管理UIを開き、インスタンスが正常に作成され、
ActiveまたはBuildの状態にあることを確認してください。
ISOベースの仮想マシンのインストール
仮想コンソールを使用してWindowsゲストOSをインストールする
WindowsのインストールISOからVMを起動したら、OSのセットアップを完了する前に、必要なVirtIOドライバをインストールしてください。 これらのドライバーにより、WindowsはCubeCOSが提供する仮想ネットワークインターフェースとストレージディスクを認識できるようになります。 これらがなければ、インストーラはブートディスクを認識できず、インストール中およびインストール後はネットワークに接続できなくなります。
-
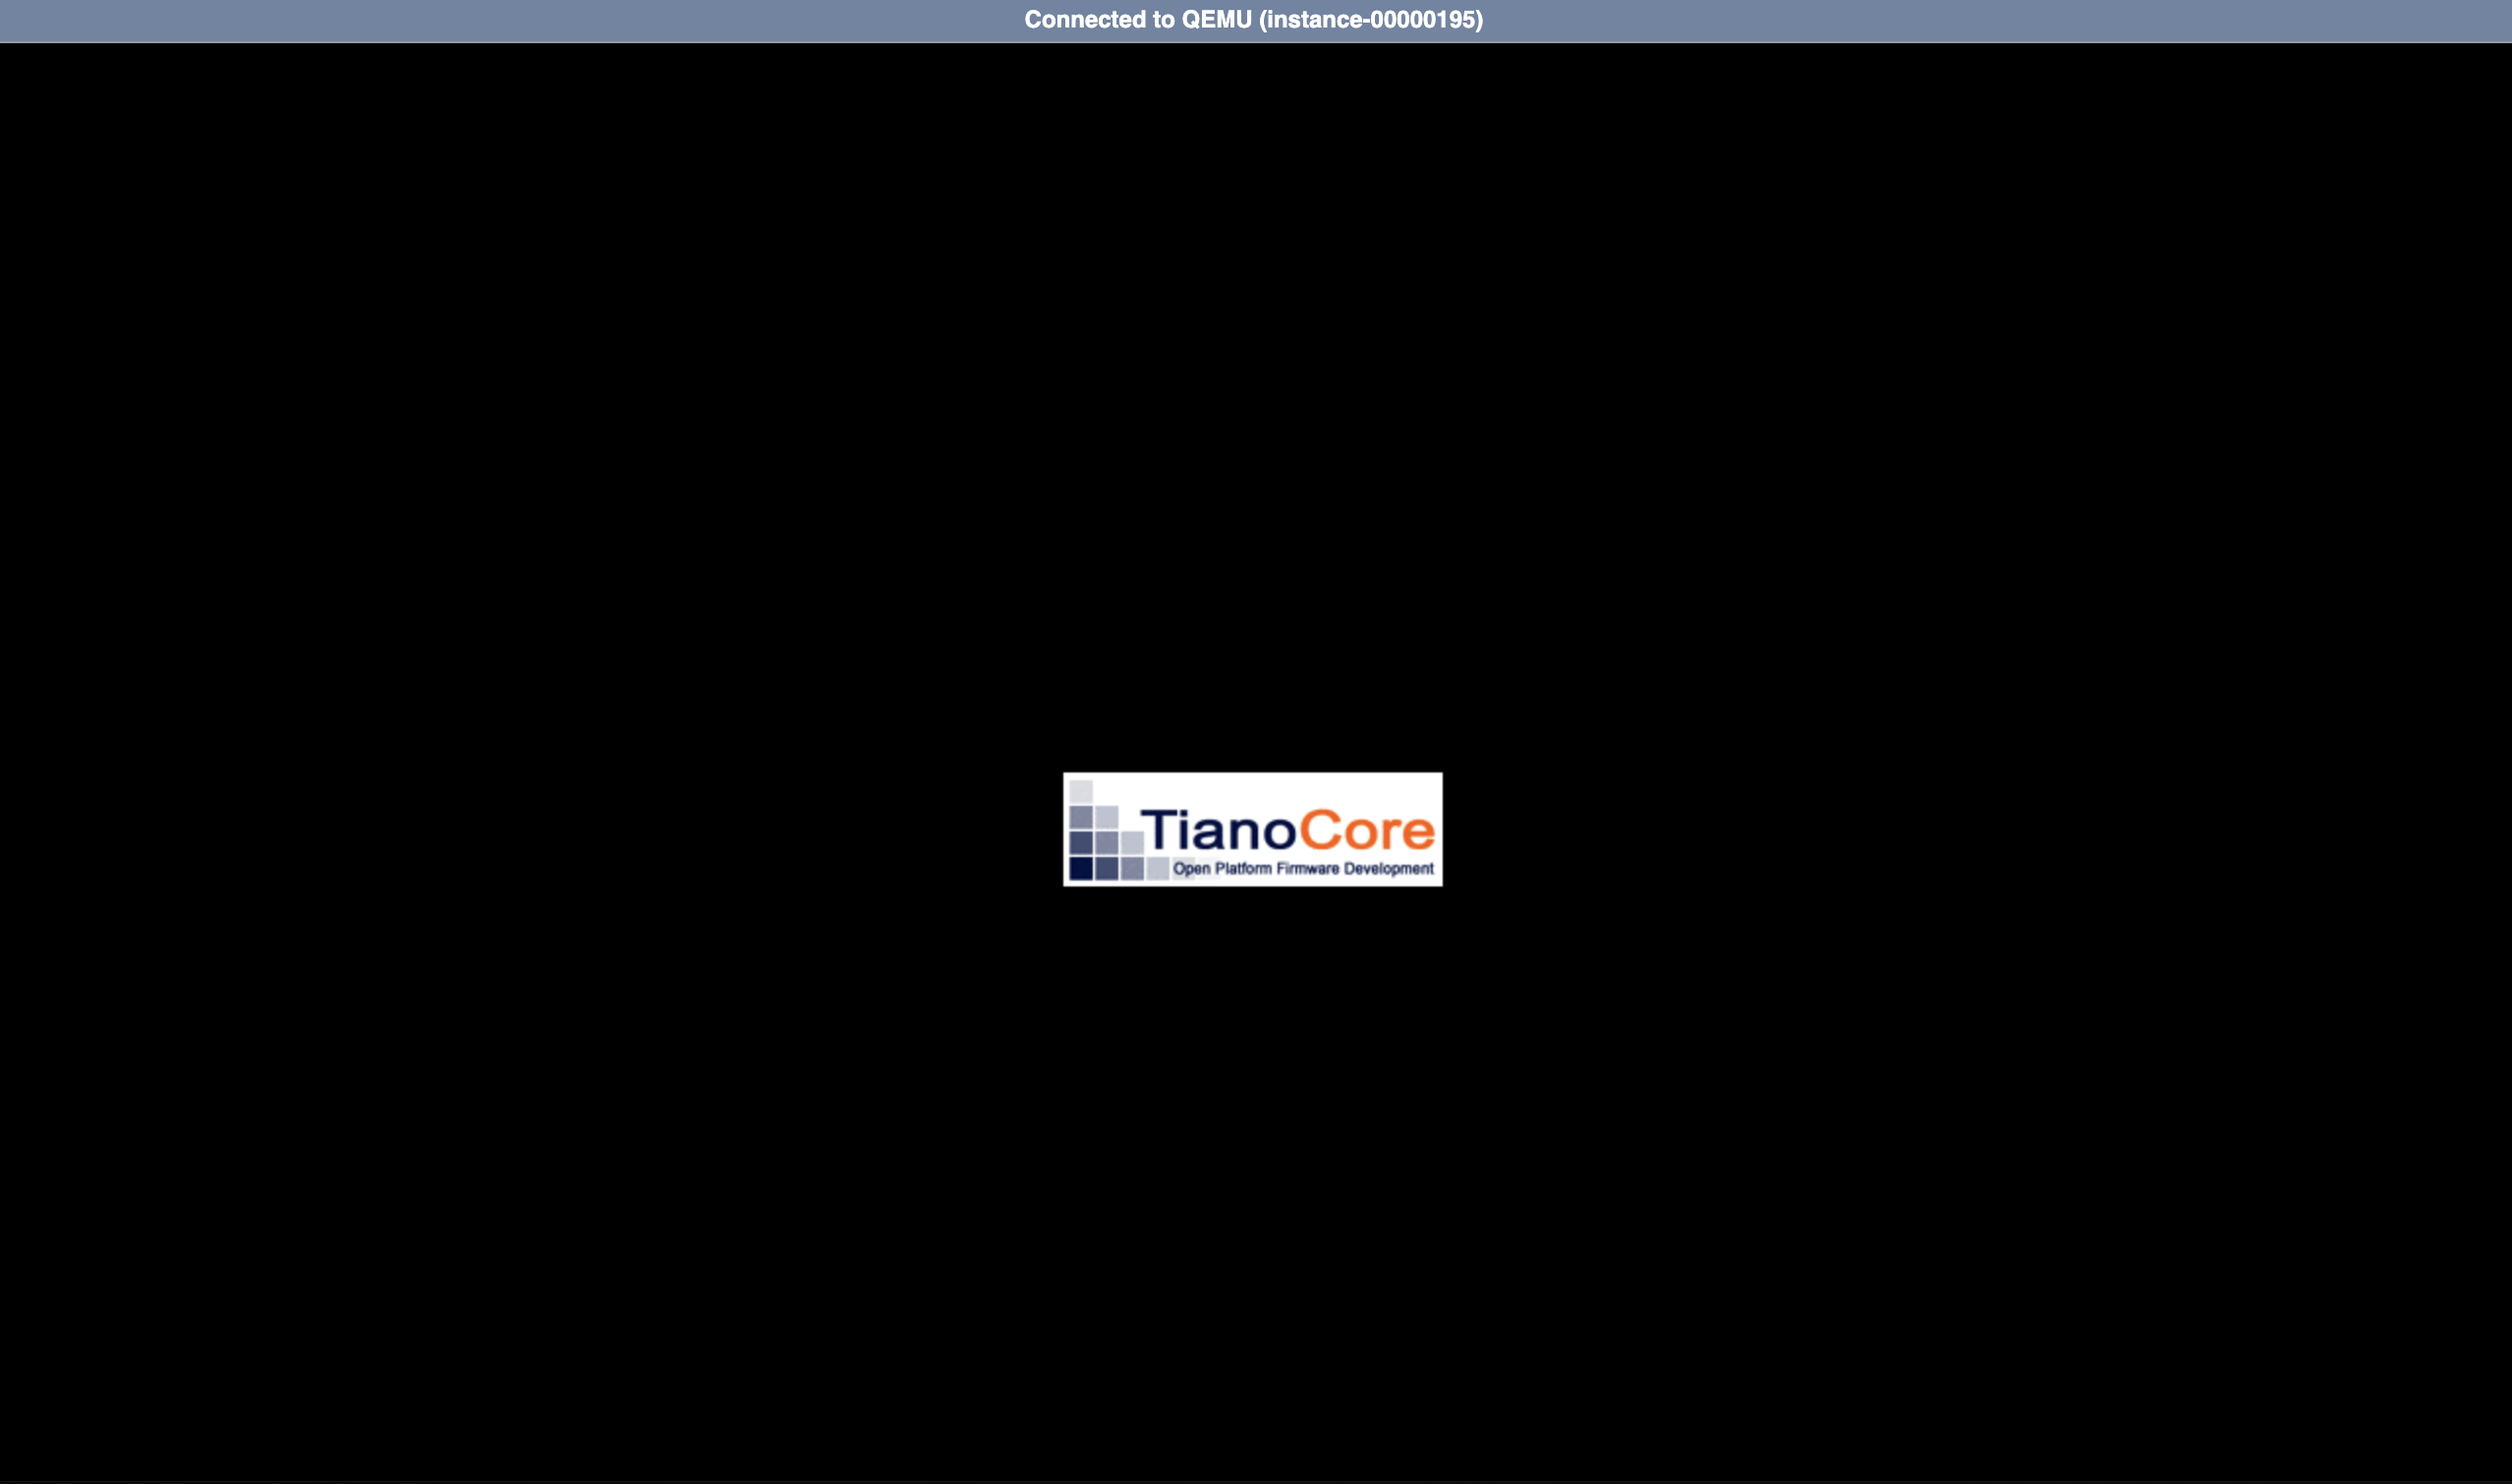
プロンプトが表示されたら、「CDまたはDVDから起動するには、任意のキーを押してください」と表示されます。
-
VirtIO ドライバーパックから必要なドライバーを参照するには、
Load Driverを選択してディレクトリを参照してください。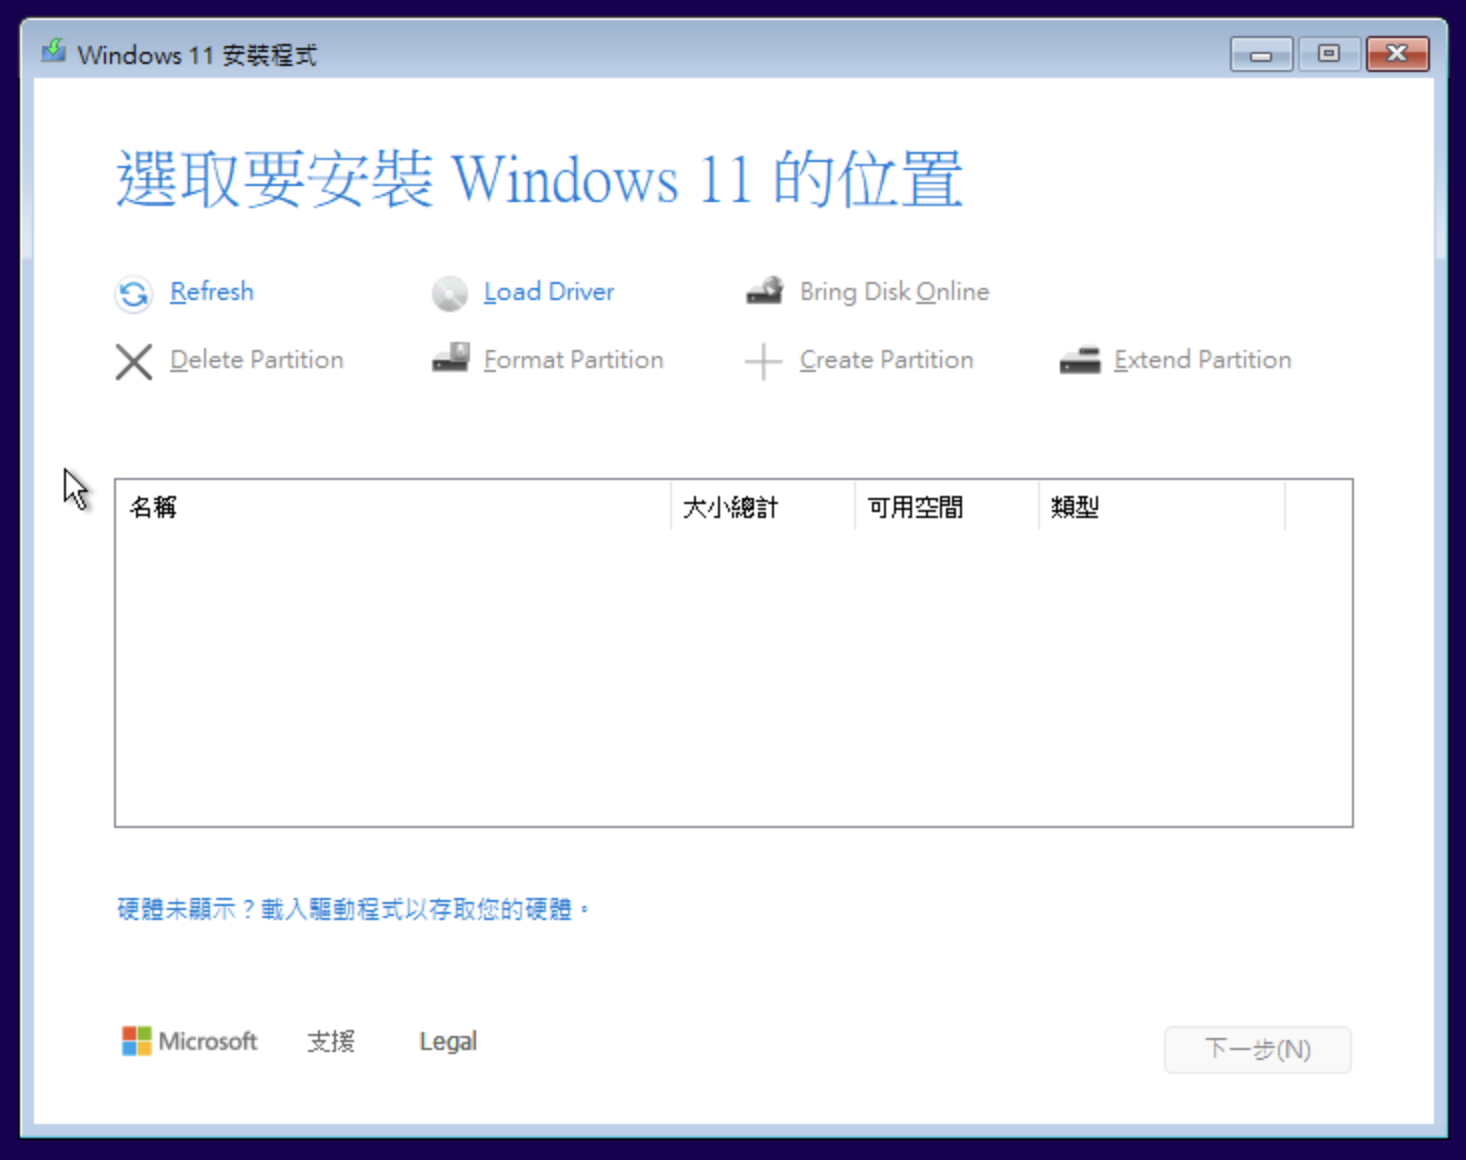
-
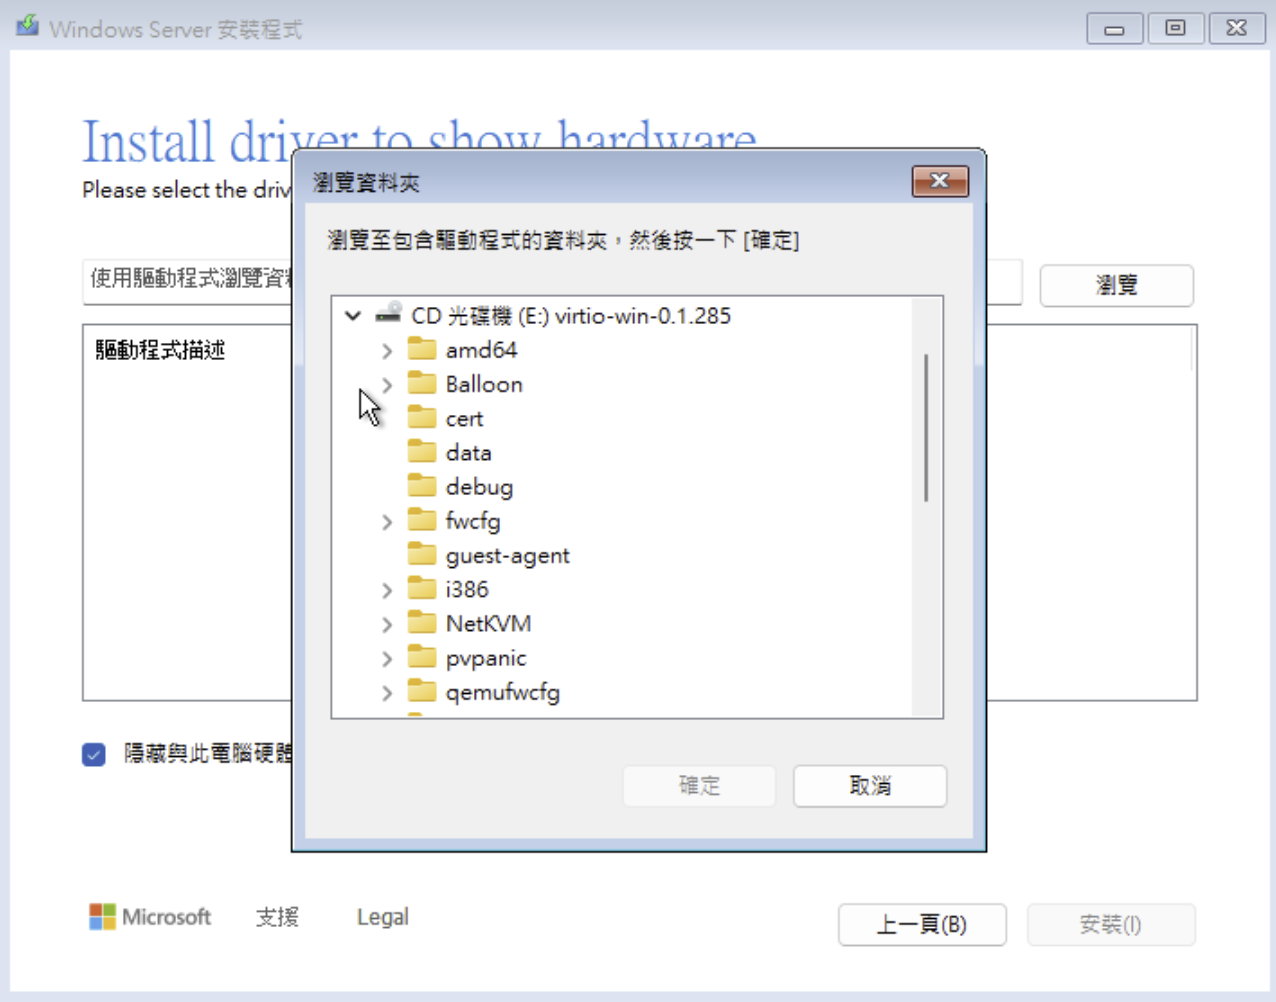
virtio-win-<version>ディスクを選択し、以下の必須ドライバーをインストールしてください:NetKVM: インストール時およびインストール後の処理においてネットワーク機能をサポートするネットワークドライバ。NetKVMフォルダを開きます。- お使いのWindowsのバージョンに対応するフォルダを選択してください。
- フォルダ内のドライバをスキャンするには、
amd64フォルダを選択し、[スキャン] をクリックしてください。 - 「次へ」をクリックしてドライバーをインストールしてください。
viostor:CubeCOSによって接続されたvirtioディスクを検出するために必要なストレージドライバ。viostorフォルダを開きます。- お使いのWindowsのバージョンに対応するフォルダを選択してください。
- フォルダ内のドライバをスキャンするには、
amd64フォルダを選択し、[スキャン] をクリックしてください。 - 「次へ」をクリックしてドライバーをインストールしてください。
-
インストール先のディスクを選択し、ゲストOSのインストールを完了してください。
-
オペレーティングシステムが再起動したら、デフォルトの認証情報でログインしてください。
-
マウントされた
virtio-win-<version>フォルダに移動します。 -
管理者権限で、以下のパッケージを順にインストールしてください:
virtio-win-gt-x64.msi:これは、CubeCOS上でゲストOSが正常に動作するために必要なすべてのドライバーをインストールします。virtio-win-guest-tool.exe: このゲストツールはパフォーマンスの監視機能を提供し、仮想ゲスト環境におけるスナップショット保護機能をサポートするために必要です。
インストール済みの仮想マシンをイメージテンプレートに変換する
ゲストOSのインストールが完了したら、VMのブートボリュームをGlanceイメージに変換します。 作成されたイメージは、今後同じ構成で作成される仮想マシン向けの再利用可能なデプロイメント・テンプレートとして機能します。
-
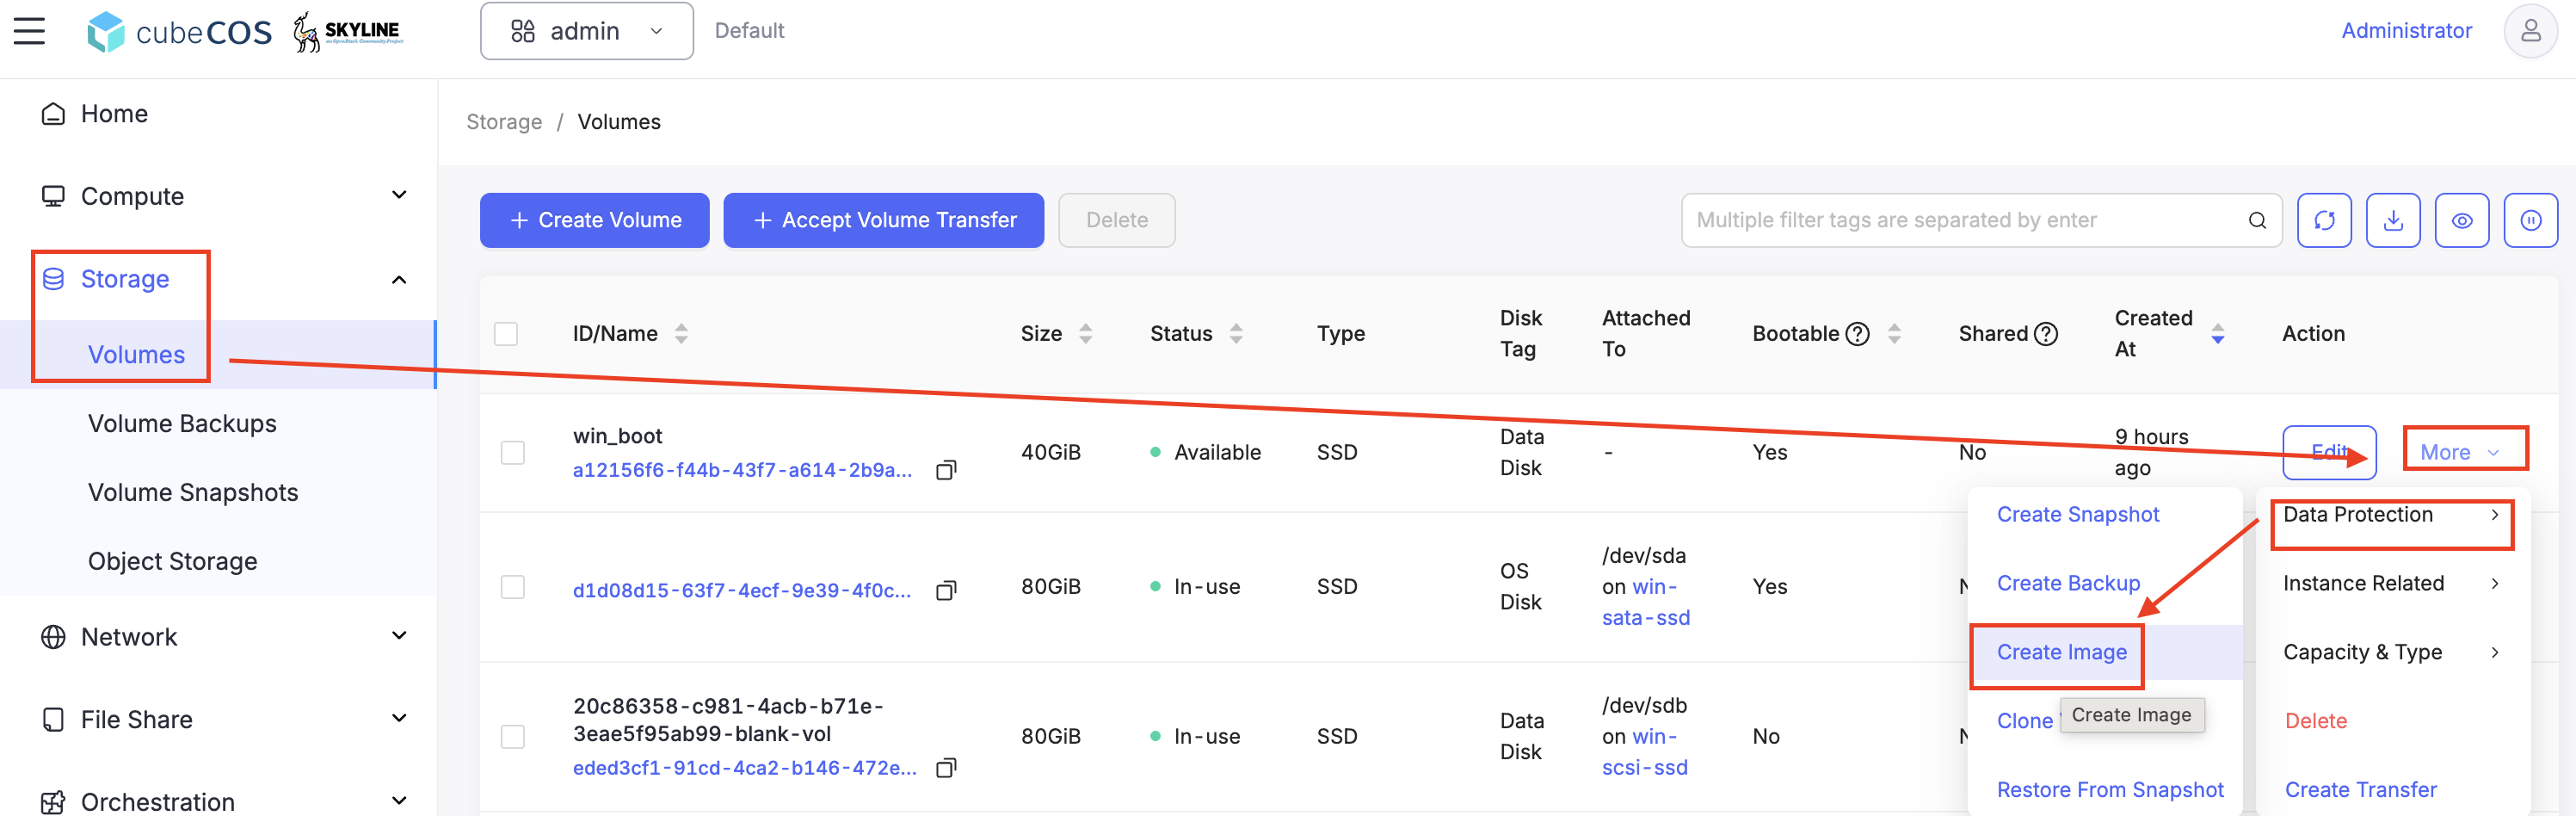
「Storage > Volumes」に移動し、WindowsゲストOSのボリュームを探してください。
-
WindowsゲストOSボリュームの「詳細」ドロップダウンを選択し、「データ保護 > イメージの作成」に進みます。
-
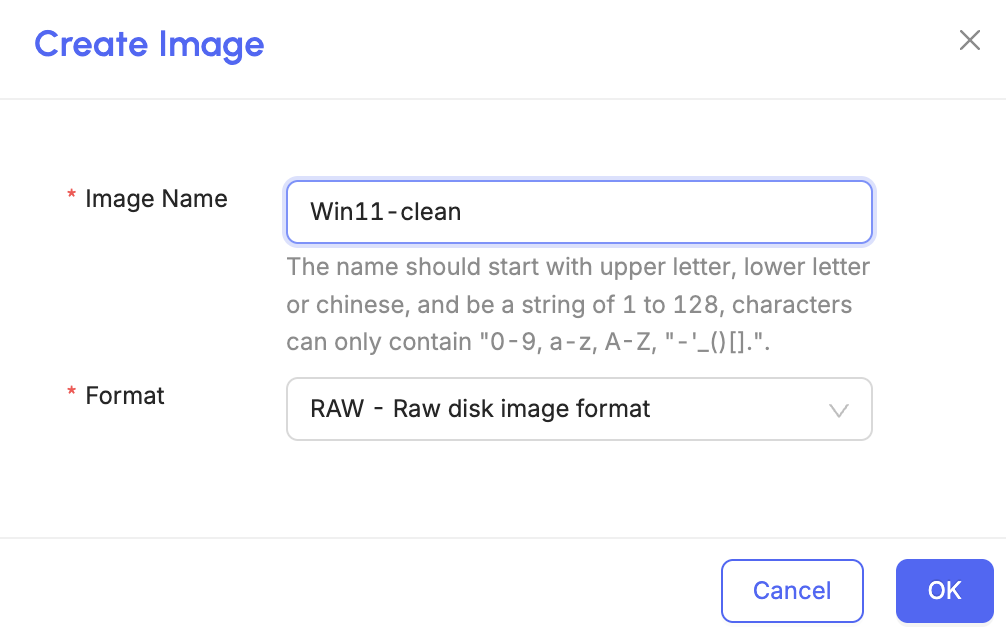
「画像の作成」ダイアログウィンドウで、以下を入力します:
- イメージ名: WindowsゲストOSテンプレートの名前を設定してください。
- フォーマット: ディスクのフォーマットを
RAWに設定します。
-
画像のアップロードが開始され、ステータスは
Uploadingになります。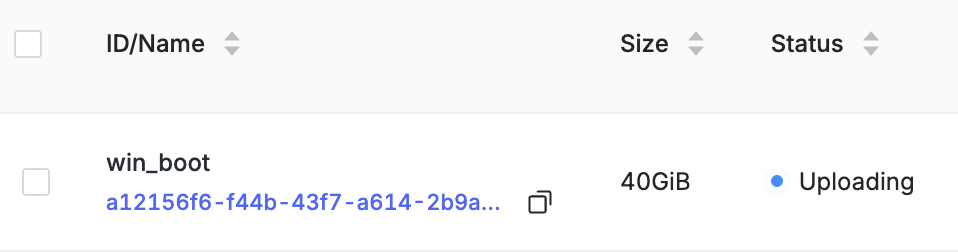
-
「Compute > Images」に移動し、新しく作成されたイメージの状態を確認してください。イメージの作成中は「Saving」と表示されます。
-
ステータスが
Activeと表示された時点で、画像のアップロードは正常に完了しています。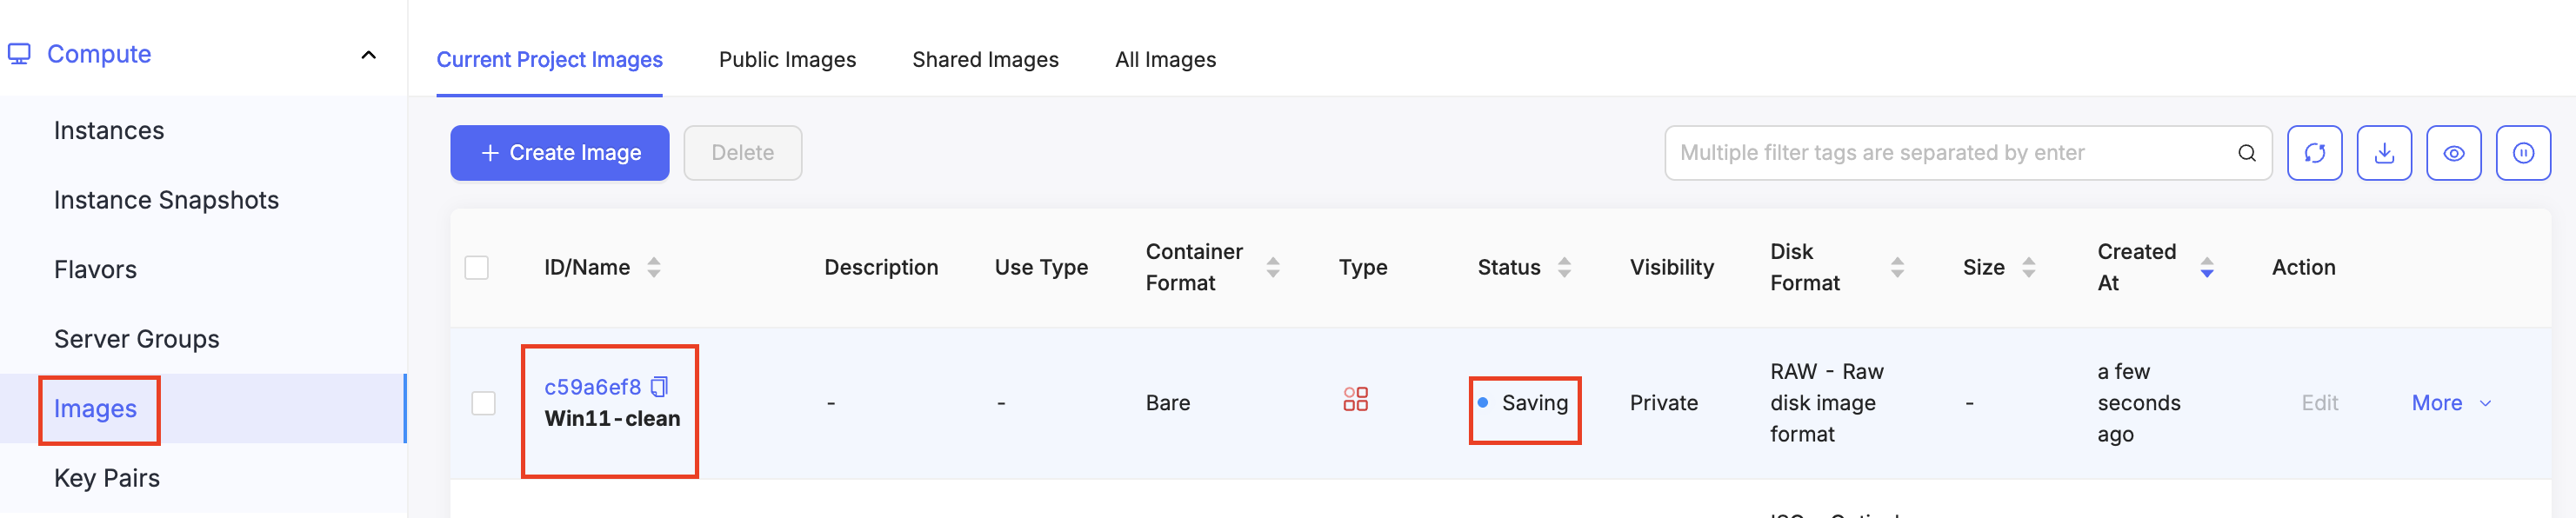
アップロードした画像にメタデータを追加する
このアップロードされた画像を仮想マシンテンプレートとして正しく展開するには、ハードウェアおよびOSのメタデータが必要です。 これらのプロパティは、ハイパーバイザーに対し、ゲストOSのファームウェア、ディスクバス、およびセキュリティ機能をどのように設定すべきかを指示します。 CubeCOS管理UIの管理者ビューからメタデータを設定します。
-
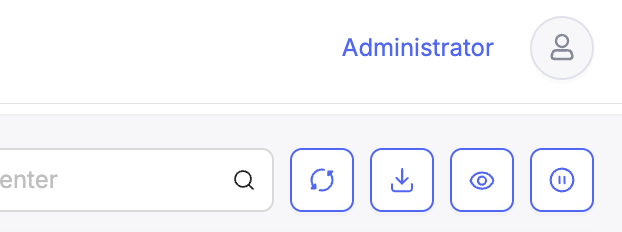
右上の「管理者」をクリックして管理者ビューに切り替える方法については、管理者ビューへのアクセスをご覧ください。
-
「計算」>「画像」を選択し、先ほどアップロードした画像を選択します。
-
必要なメタデータを編集するには、
その他 > メタデータの管理のドロップダウンメニューを選択してください。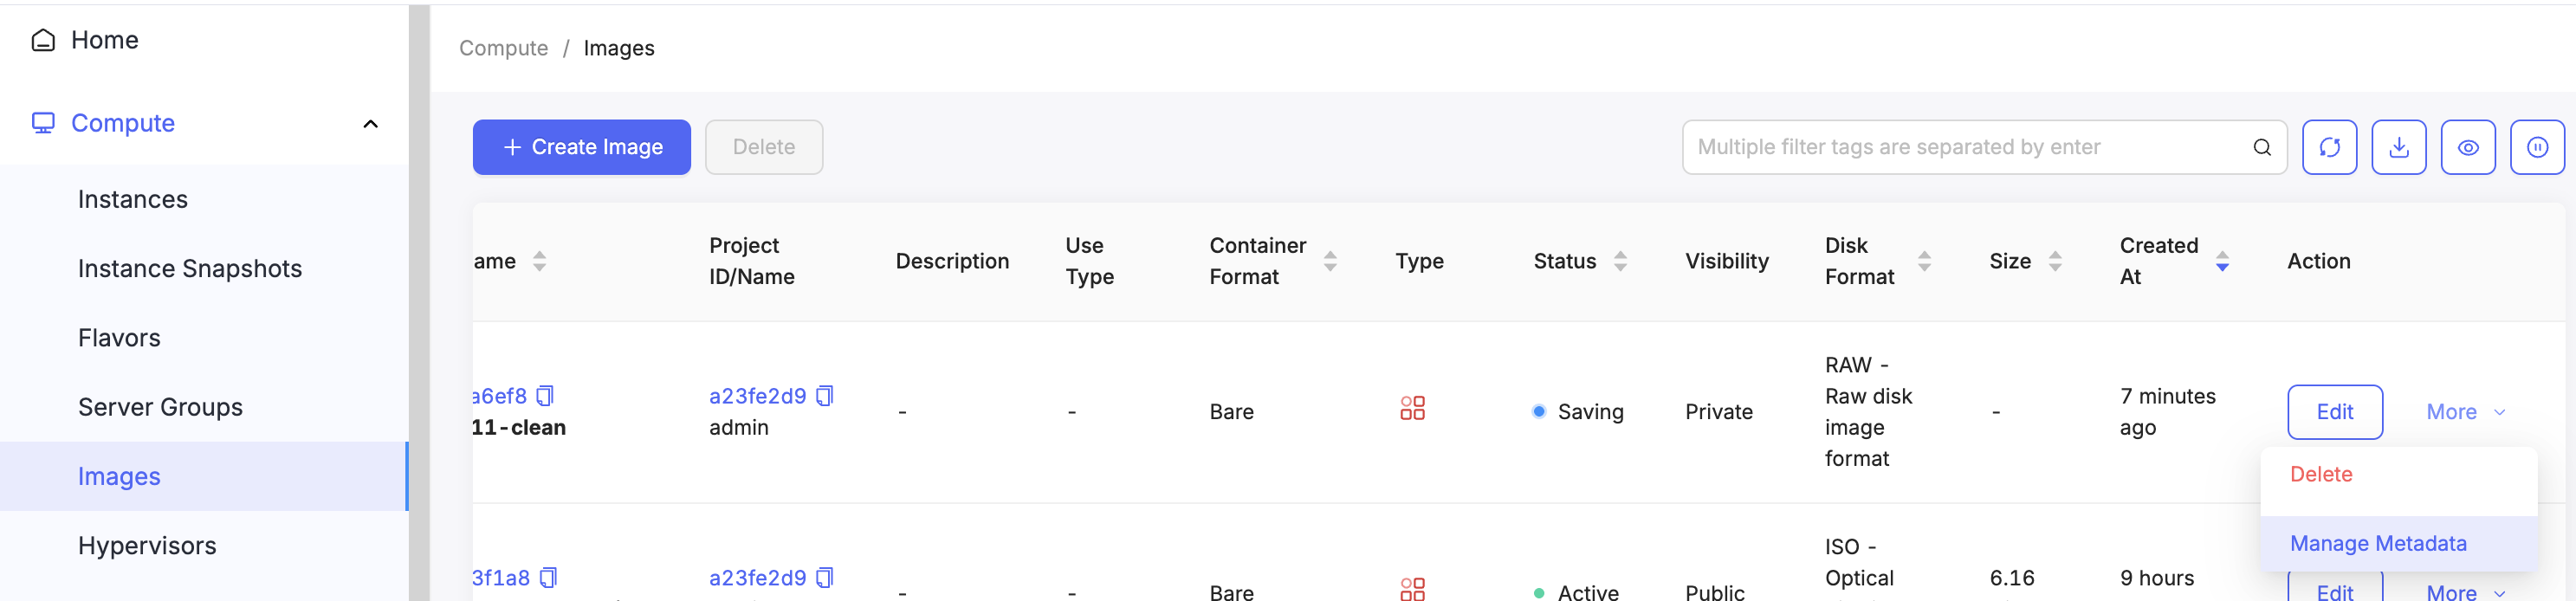
-
画像に以下の
metadataフィールドを追加してください。ゲストOSについては、常にvTPMの要件を満たすようにしてください以下の2つの項目は、ゲストOSで必要とされる場合にのみ追加してください。
- hw_tpm_version = 2.0
- hw_tpm_model = tpm-crb
:::警告[WindowsゲストOSの場合]
以下を設定する必要があります:
- os_type=windows
:::
- Windows OS
- Linux and other OS
メタデータフィールド 値 hw_firmware_type uefi hw_disk_bus virtio hw_machine_type q35 hw_scsi_model virtio-scsi os_secure_boot optional hw_tpm_version 2.0 hw_tpm_model tpm-crb os_type windows 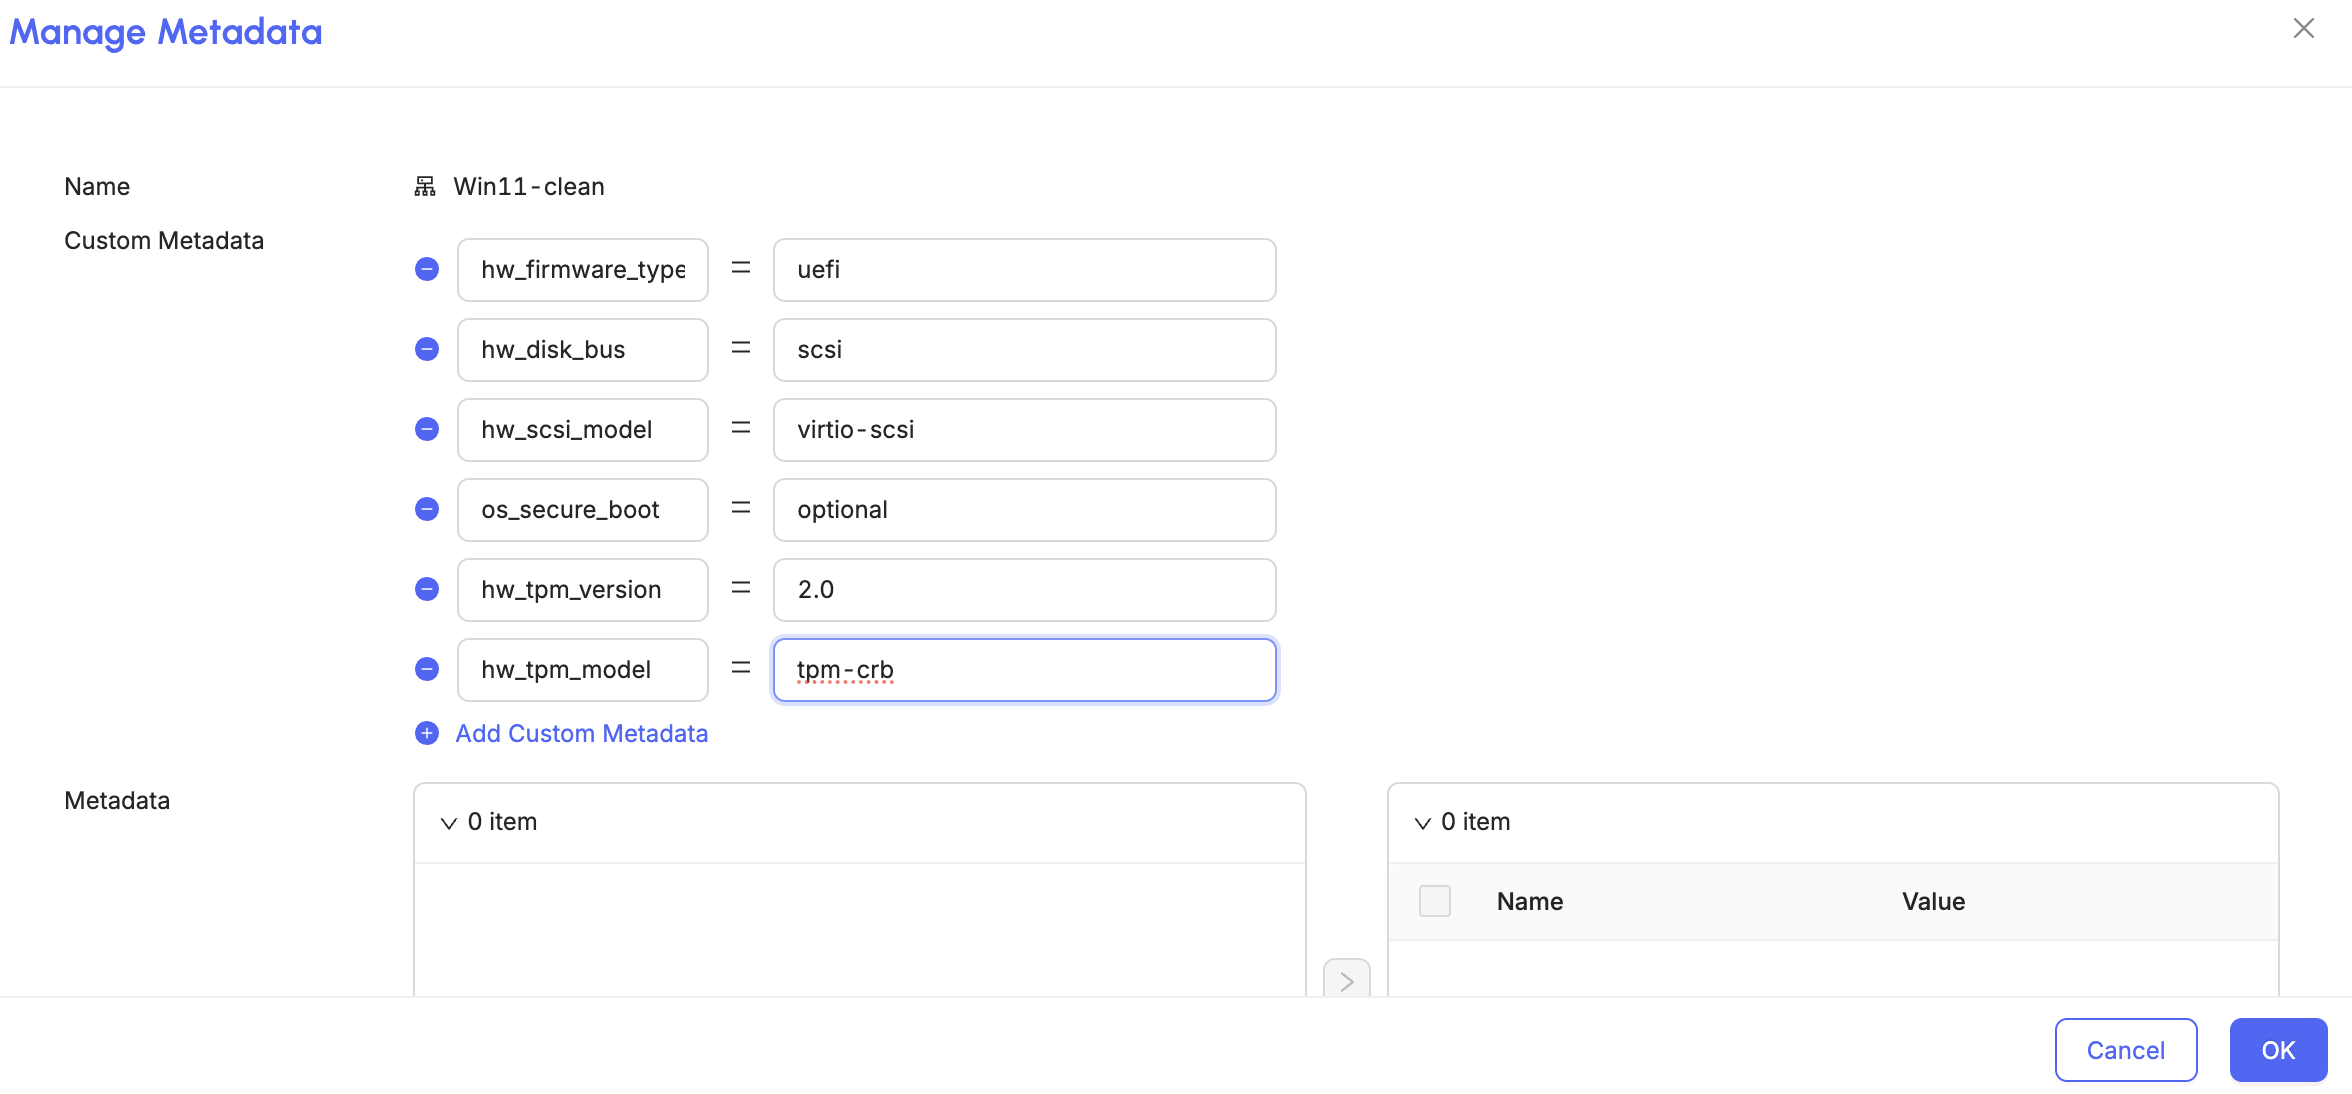
メタデータフィールド 値 hw_firmware_type uefi hw_disk_bus virtio hw_machine_type q35 hw_scsi_model virtio-scsi os_secure_boot optional -
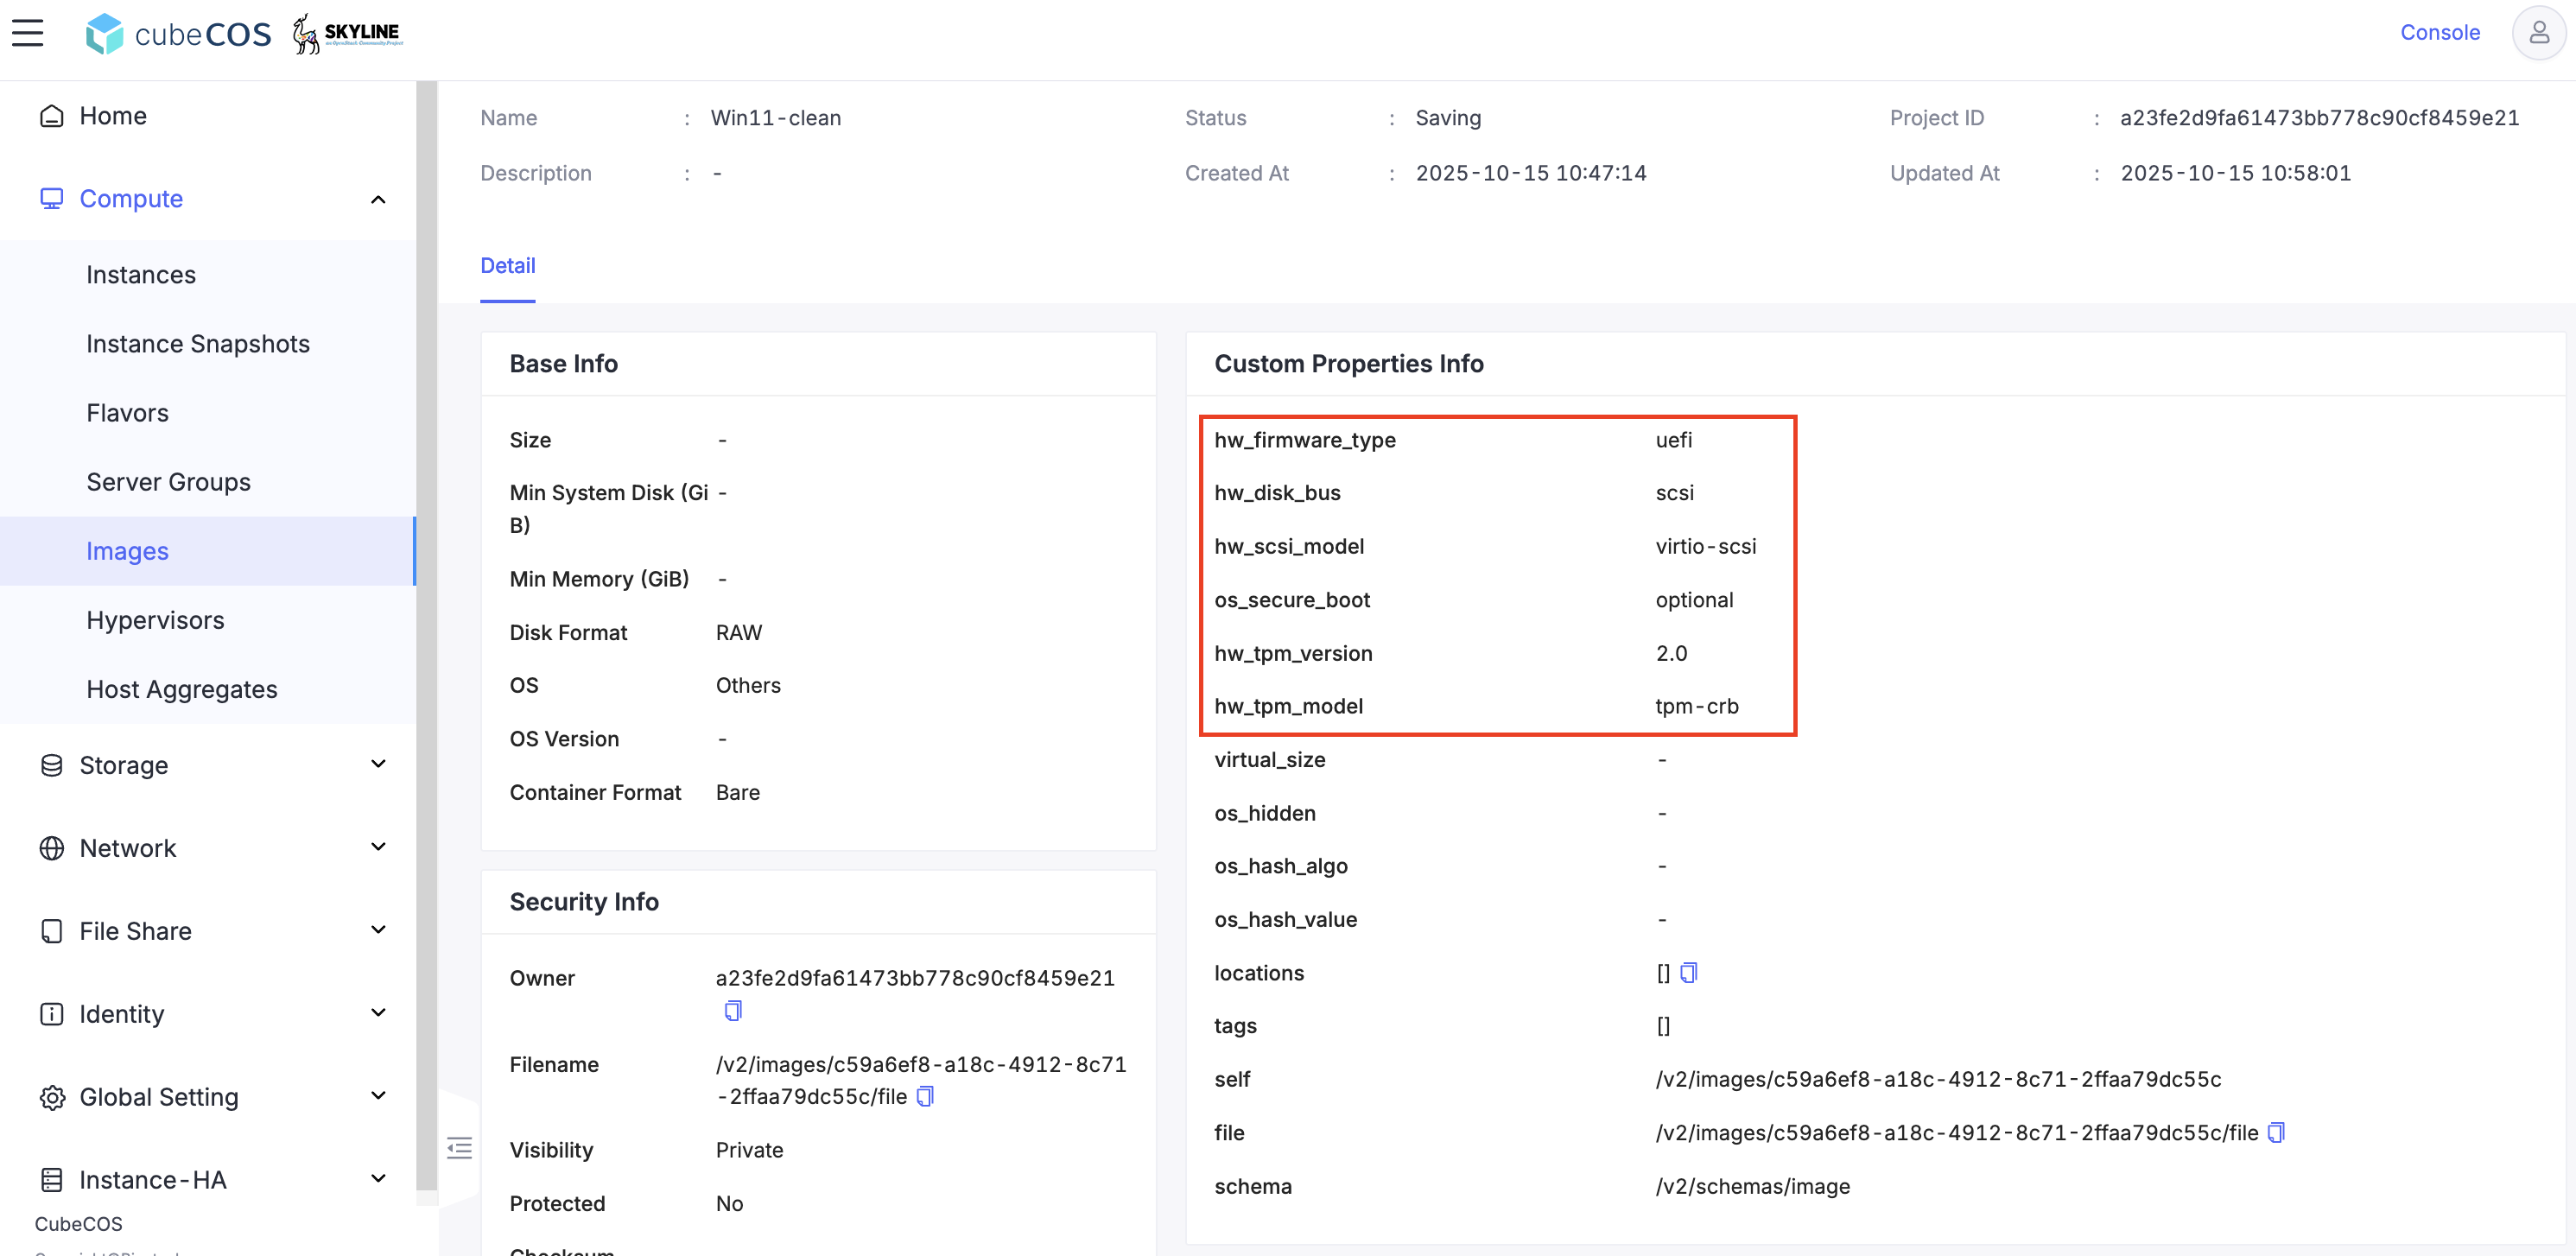
画像名を選択して詳細を開き、すべてのメタデータが正しく適用されていることを確認してください。
-
確認が完了したら、このテンプレートを使用して新しい仮想マシンを作成できます。