# How to create an A record using DNSaaS

> Designate is a multi-tenant DNS-as-a-Service (DNSaaS) component in CubeCOS. It provides a REST API secured by Keystone authentication and integrates with Nova and Neutron. Designate supports various DNS backends, including Bind9 and PowerDNS 4.

Designate is a multi-tenant DNS-as-a-Service (DNSaaS) component in CubeCOS. It provides a REST API secured by Keystone authentication and integrates with Nova and Neutron. Designate supports various DNS backends, including Bind9 and PowerDNS 4.

## Setting the DNS of Network {#setting-the-dns-of-network}

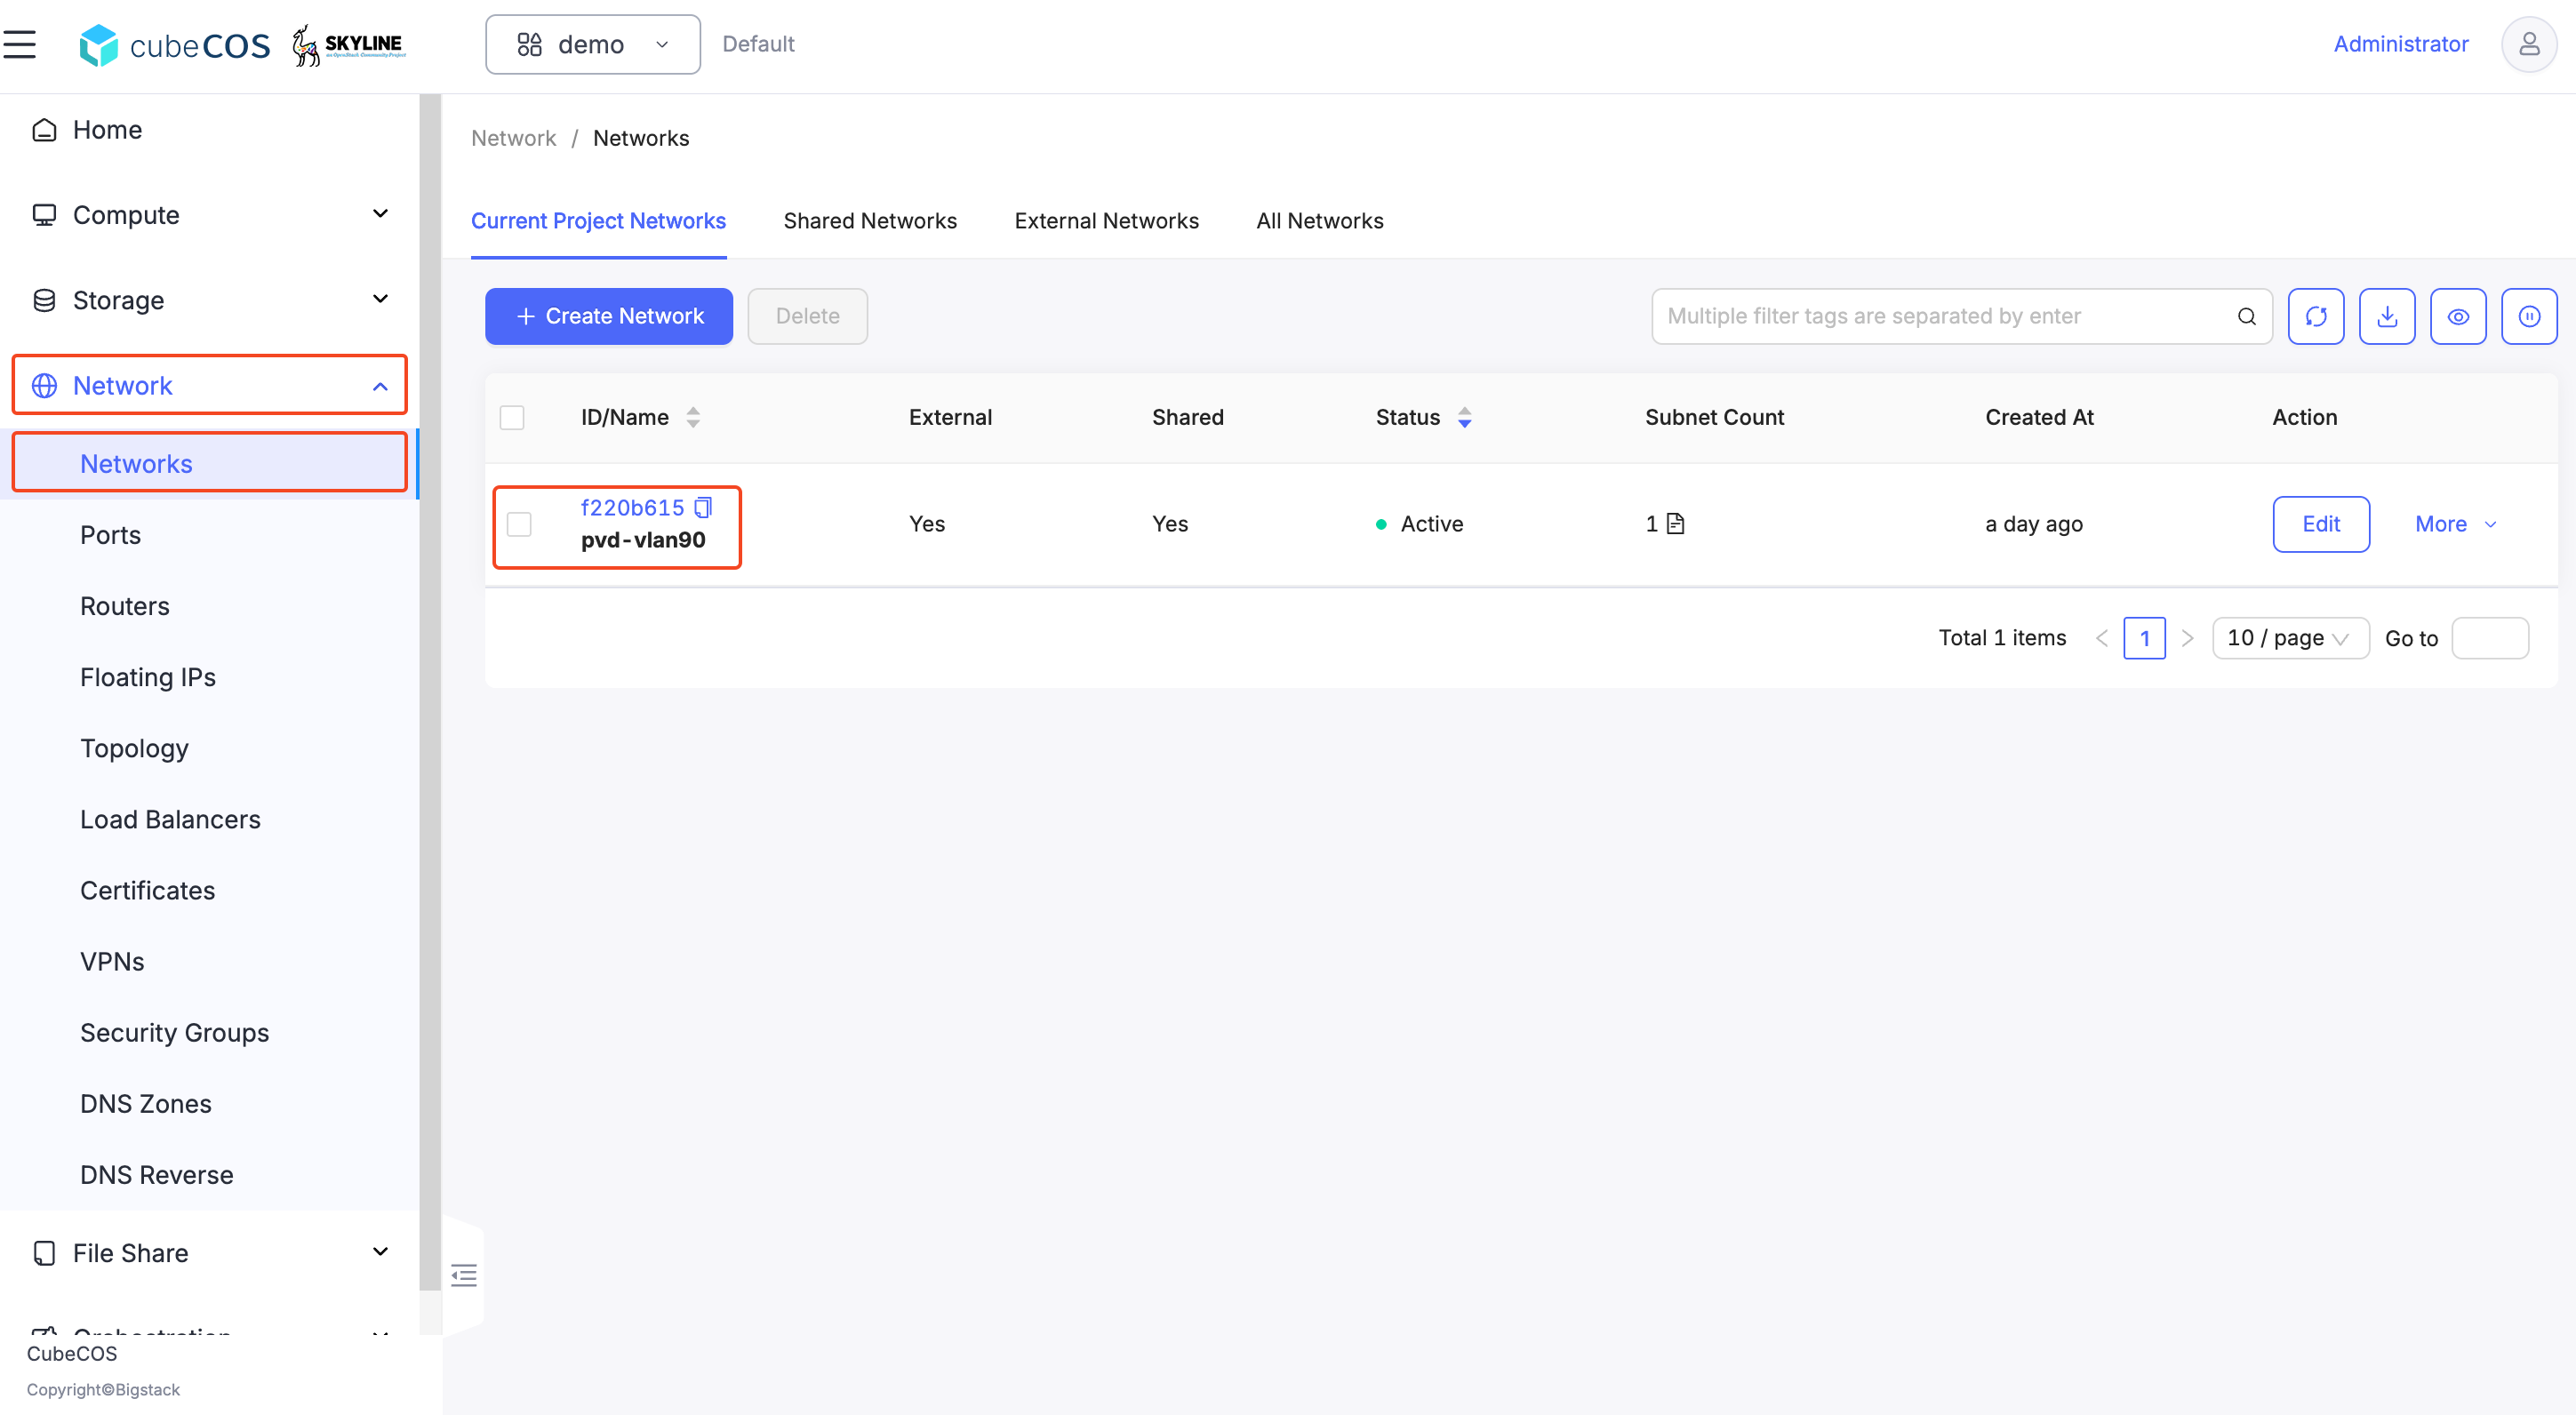
1. Navigate to `Network > Networks`, click on the `Network ID` from the list of your Networks.

   ![/assets/dns/dns-1.png](/assets/dns/skyline-dns-1.png)

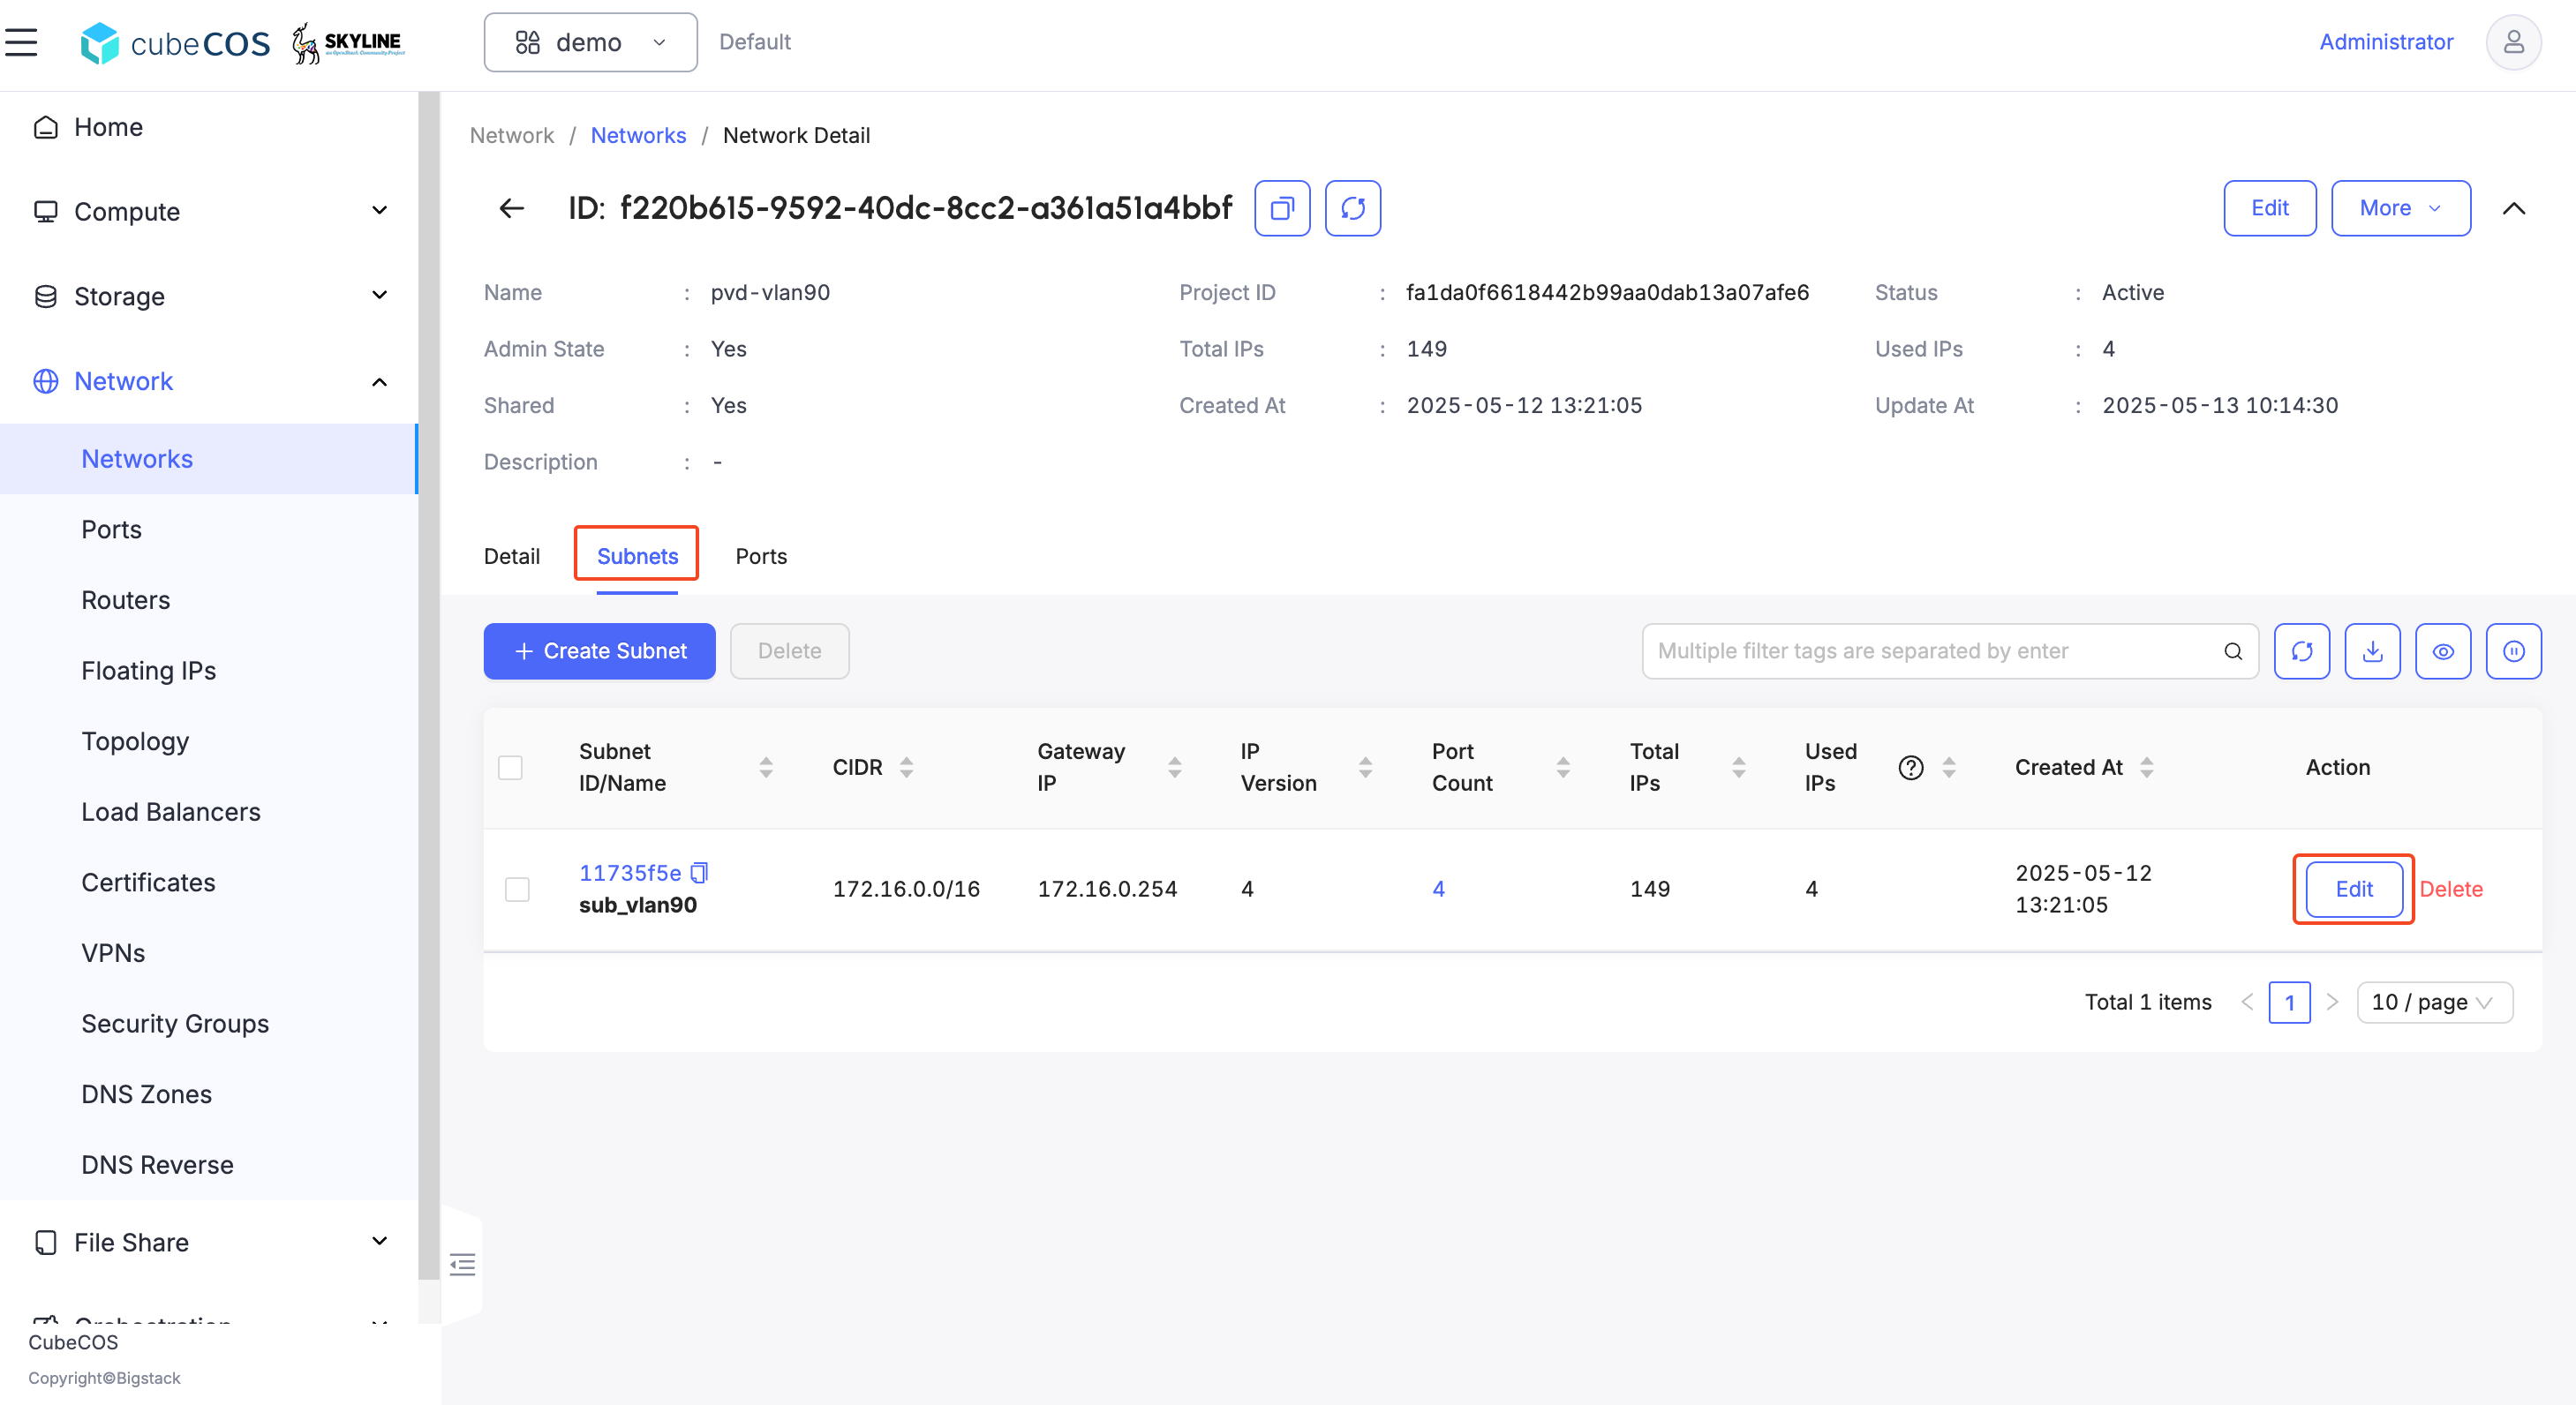
2. Select `Subnets` on the banner. Then click `Edit` on the desired subnet.

   ![/assets/dns/dns-2.png](/assets/dns/skyline-dns-2.png)

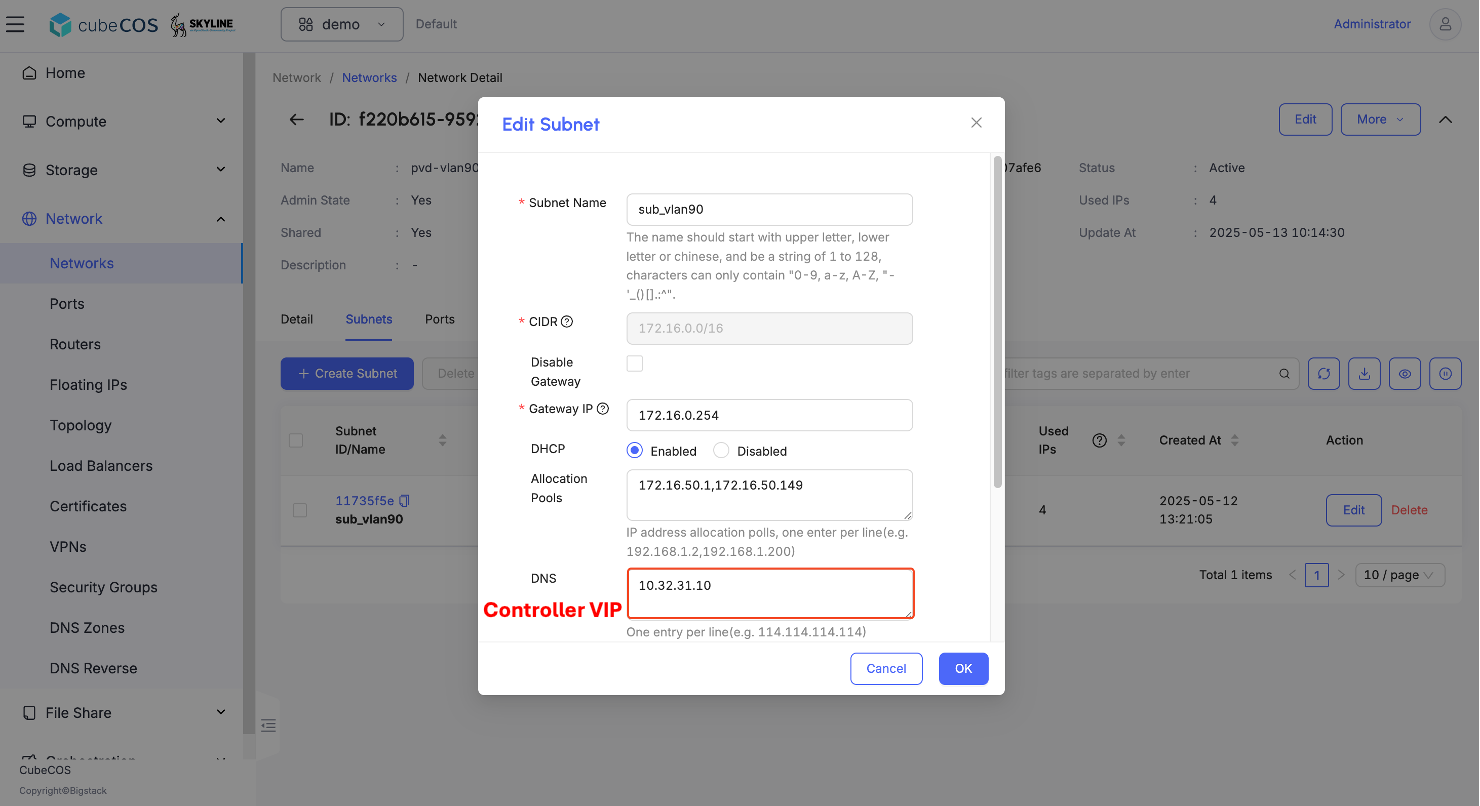
3. Input `Controller VIP` as value at in `DNS` section.

   ![/assets/dns/dns-3.png](/assets/dns/skyline-dns-3.png)

## Create DNS Zone {#create-dns-zone}

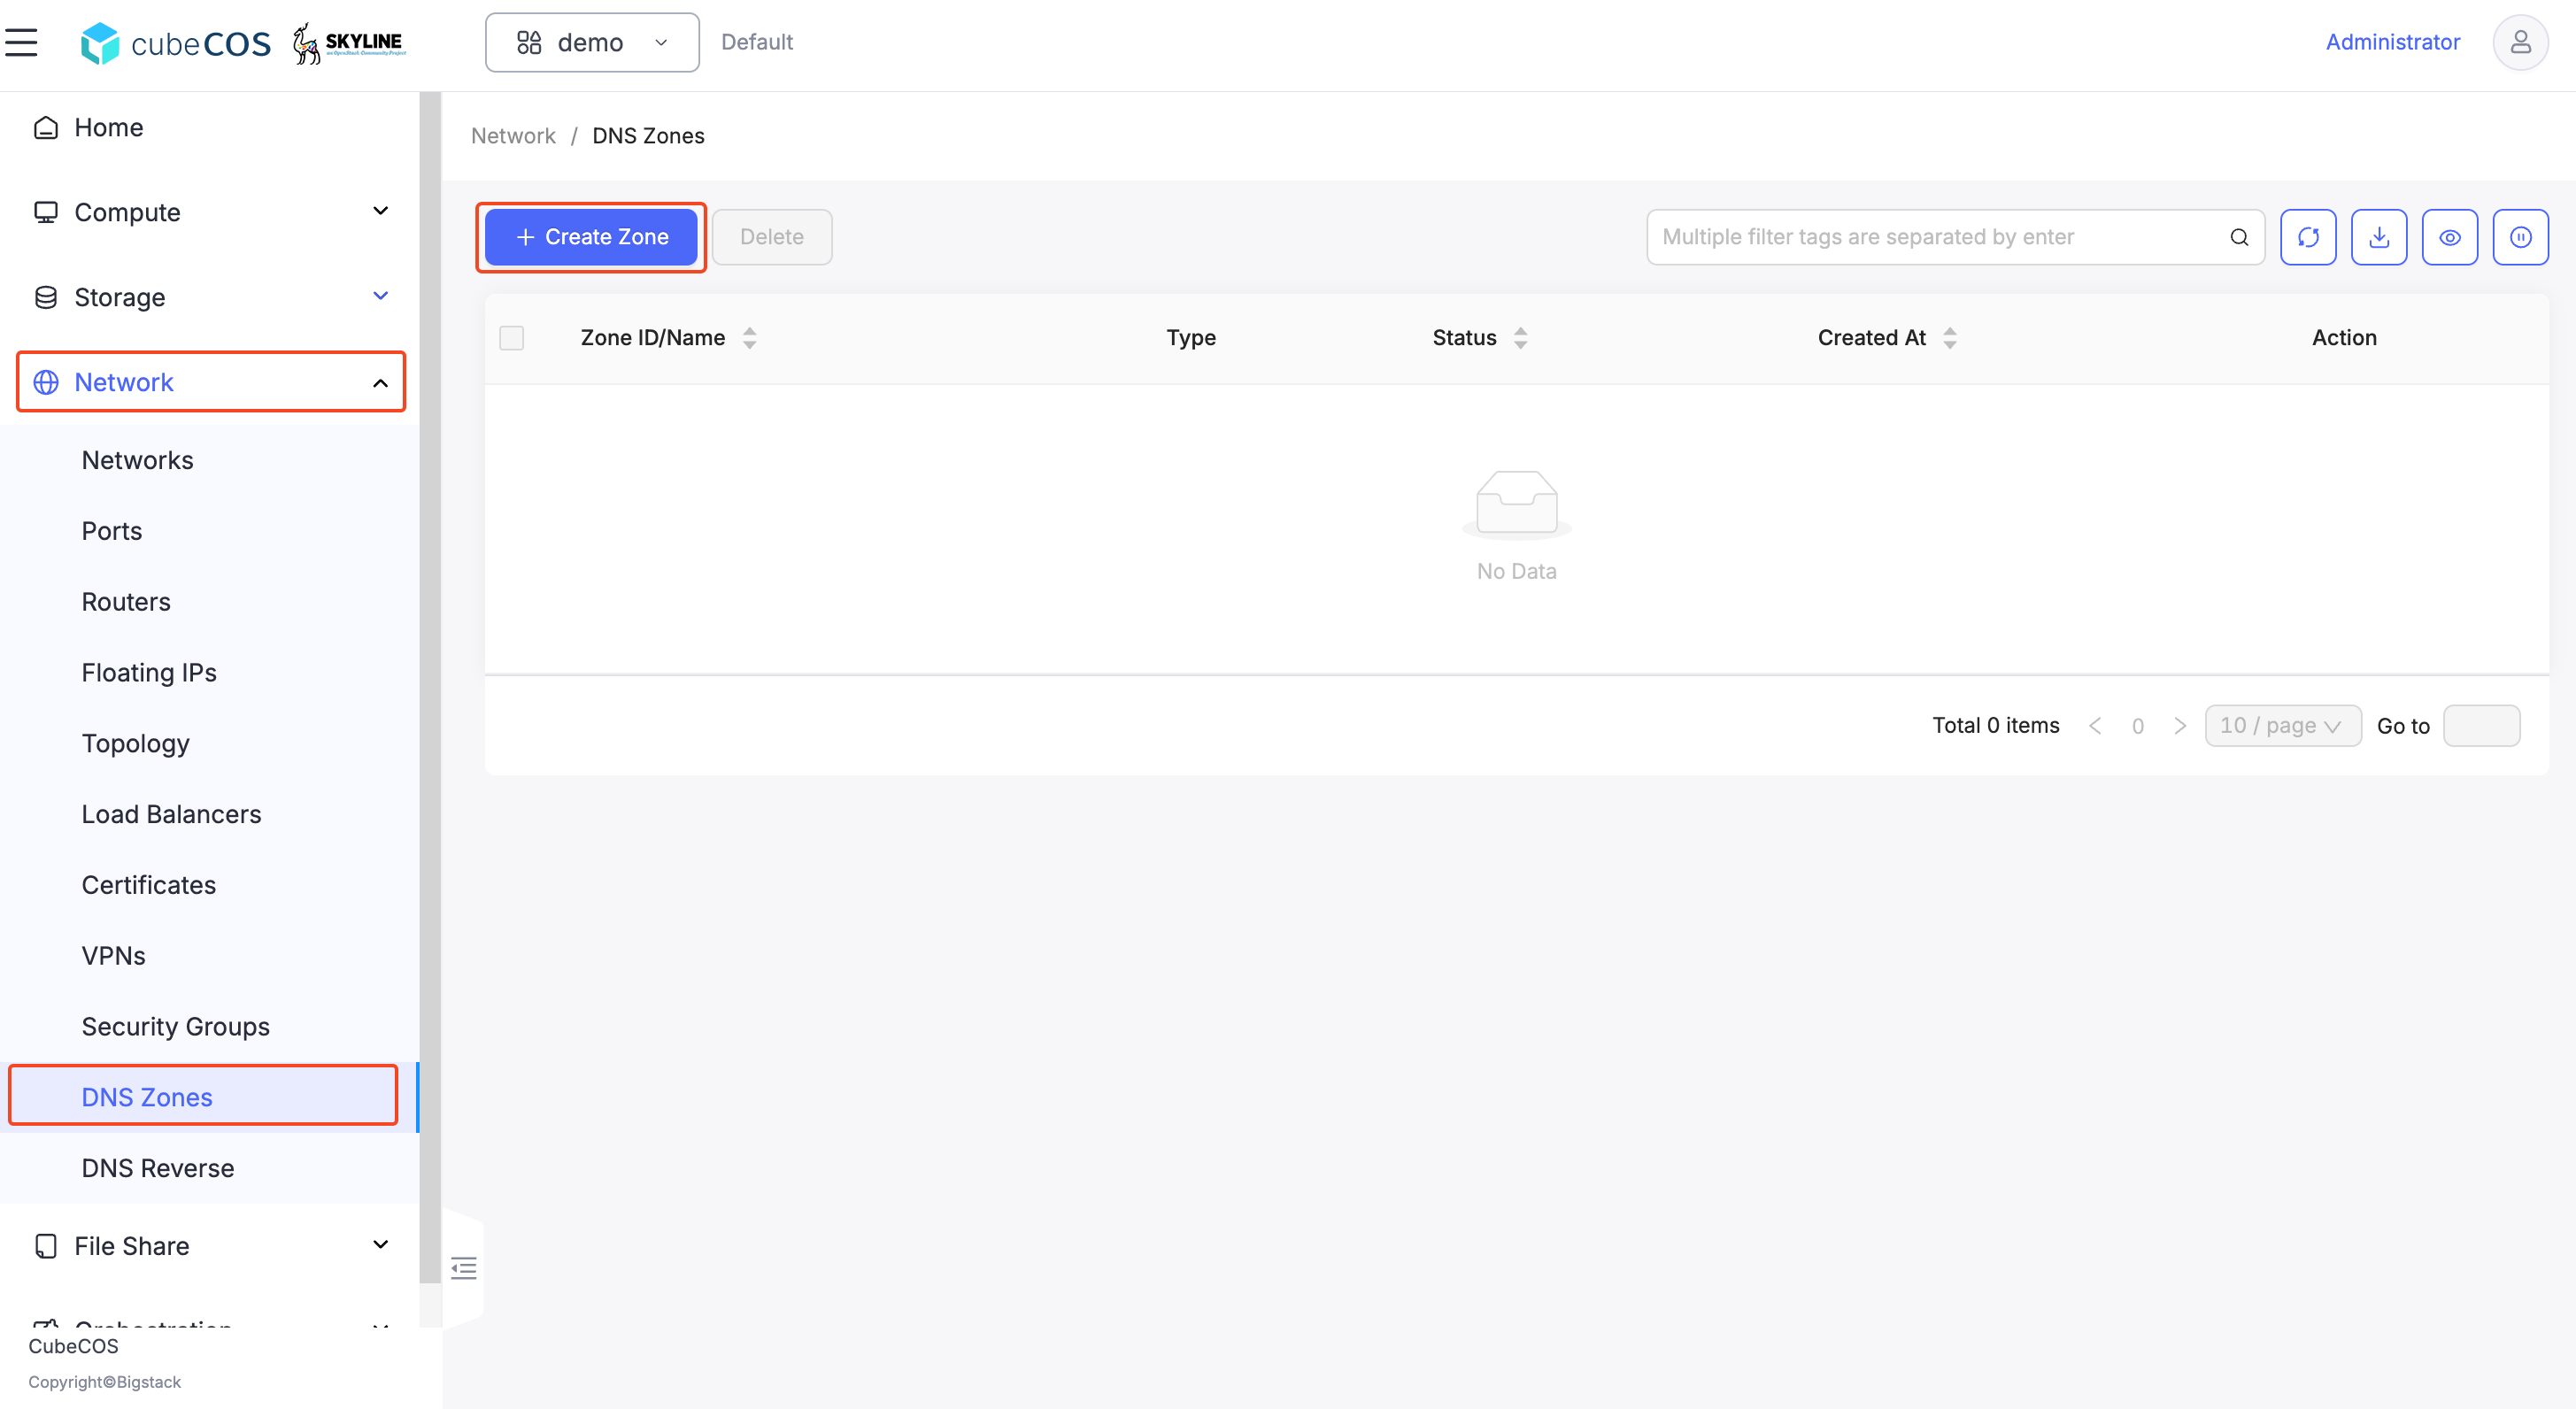
1. Navigate to `Project > Networks > DNS Zones` > `+ Create Zone`.

   ![/assets/dns/dns-4.png](/assets/dns/skyline-dns-4.png)

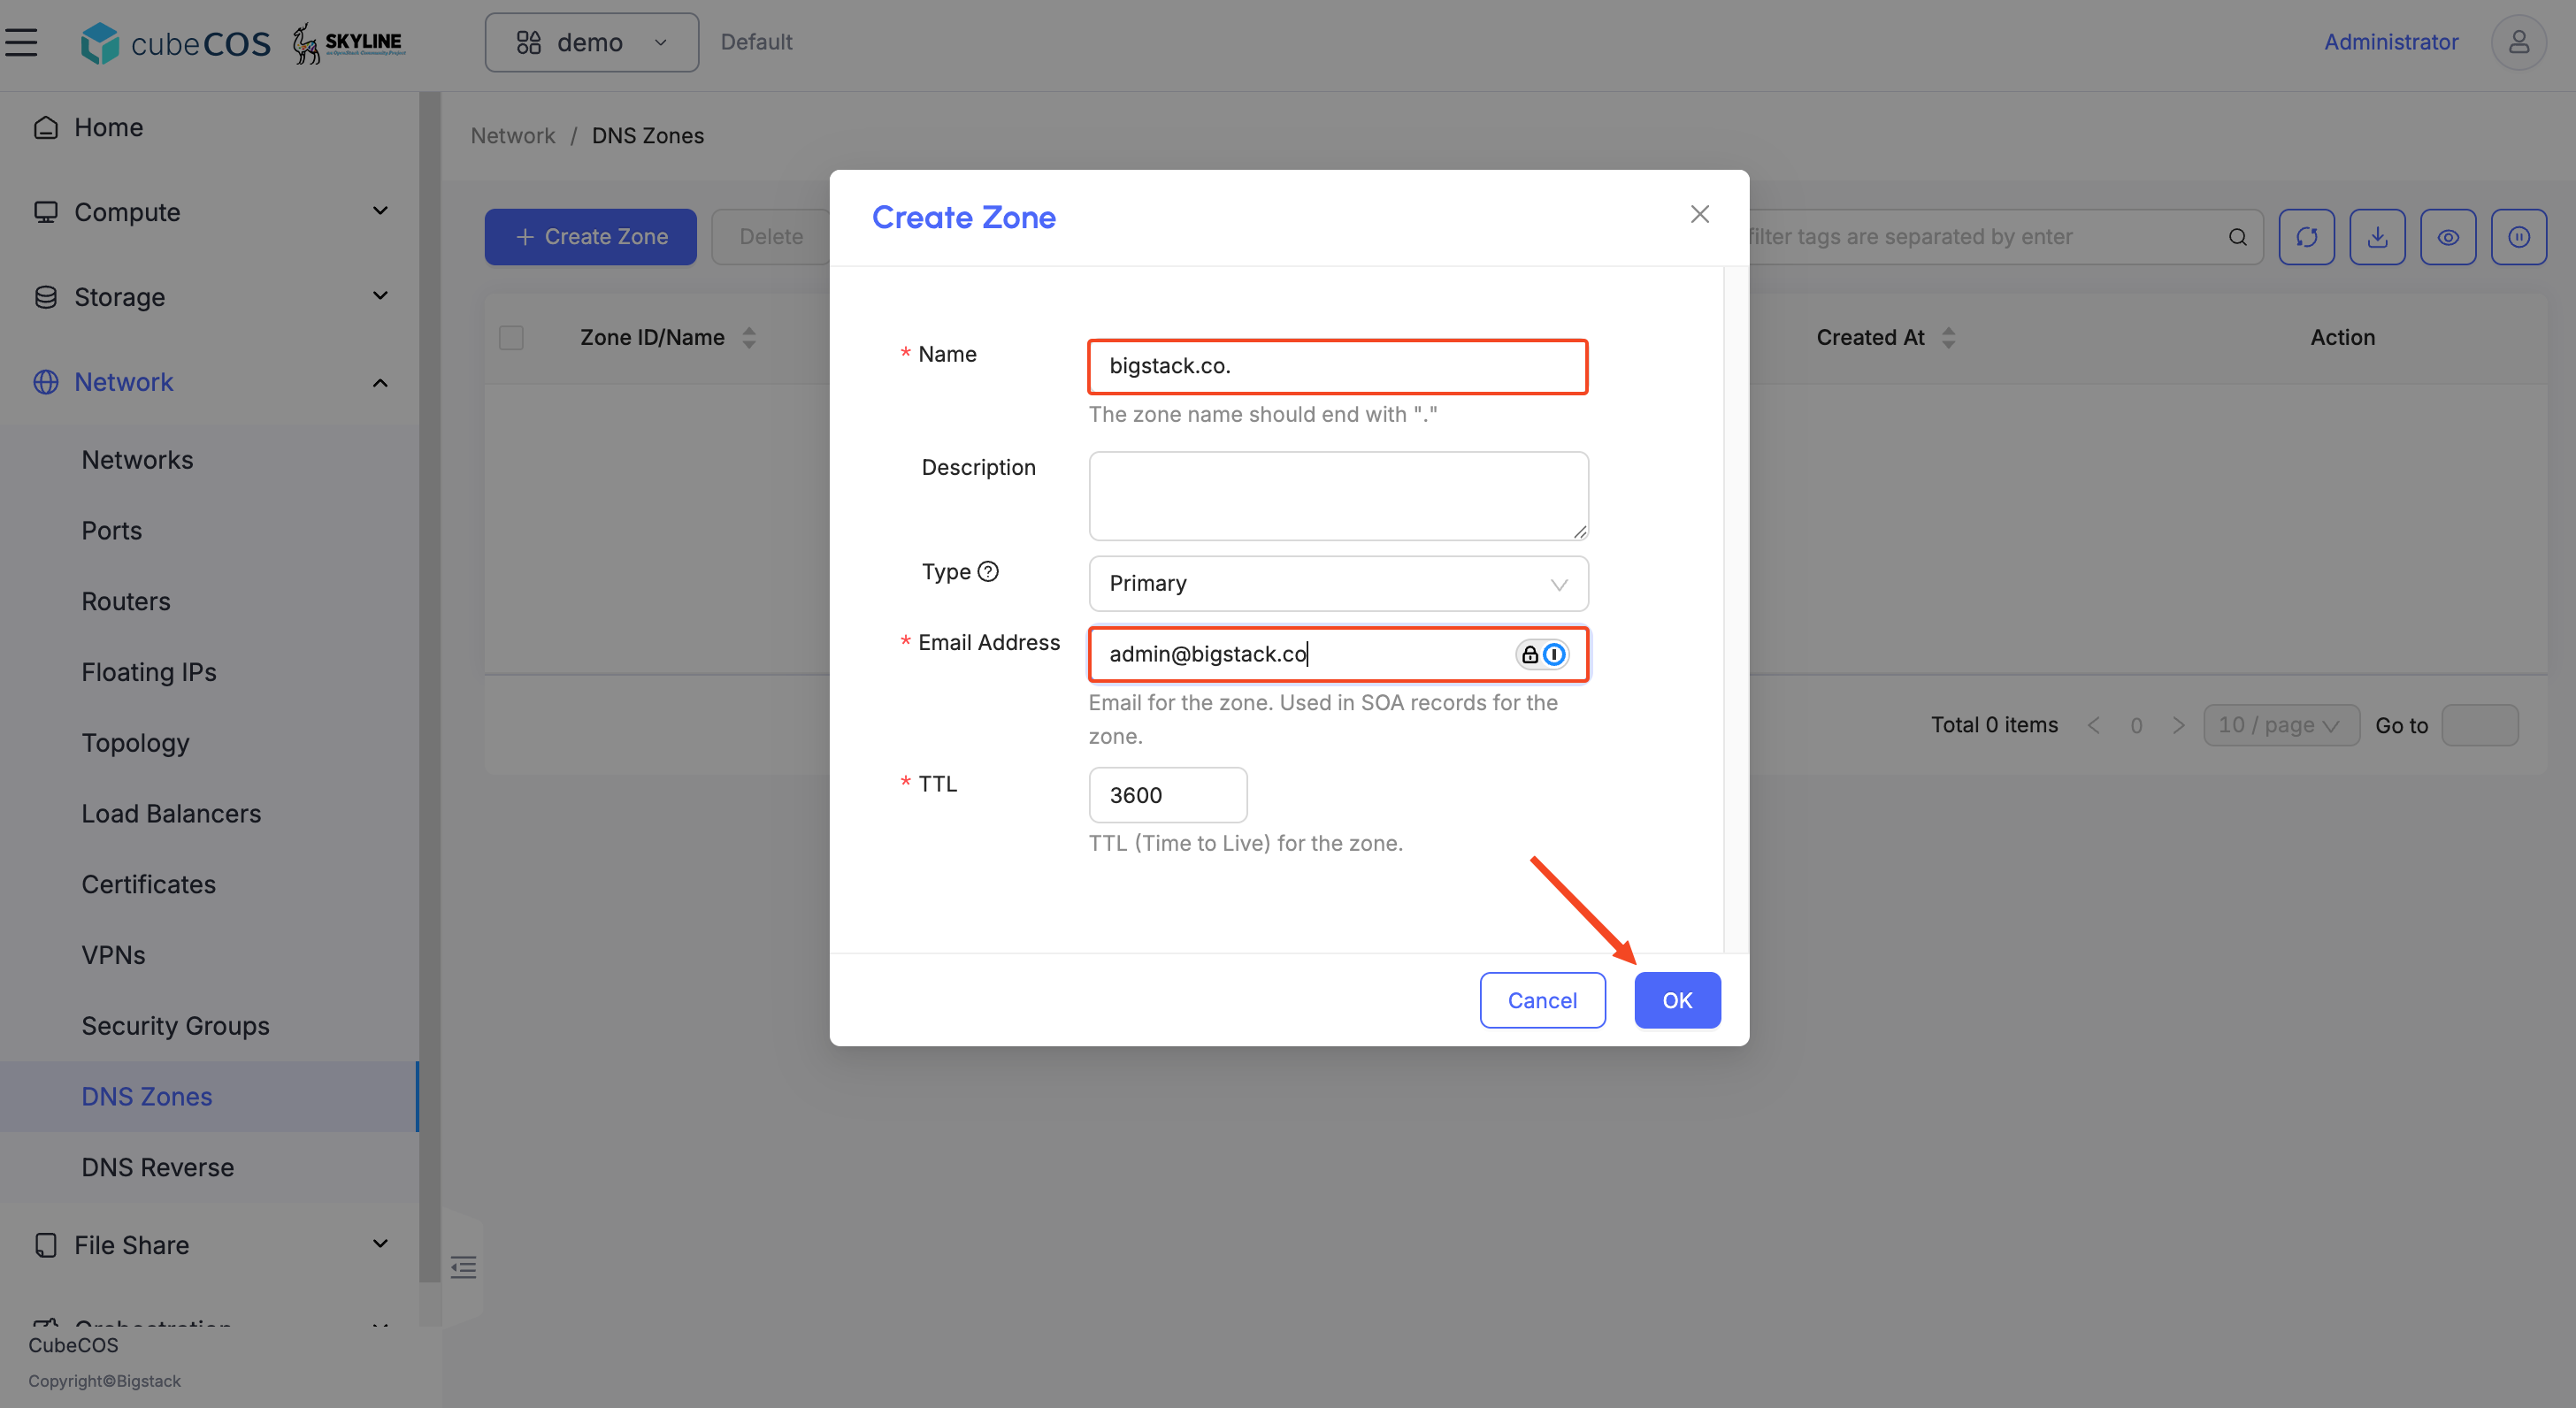
2. Create zone with a preferred/registered domain name.

   ![/assets/dns/dns-5.png](/assets/dns/skyline-dns-5.png)

## Create Record Set {#create-record-set}

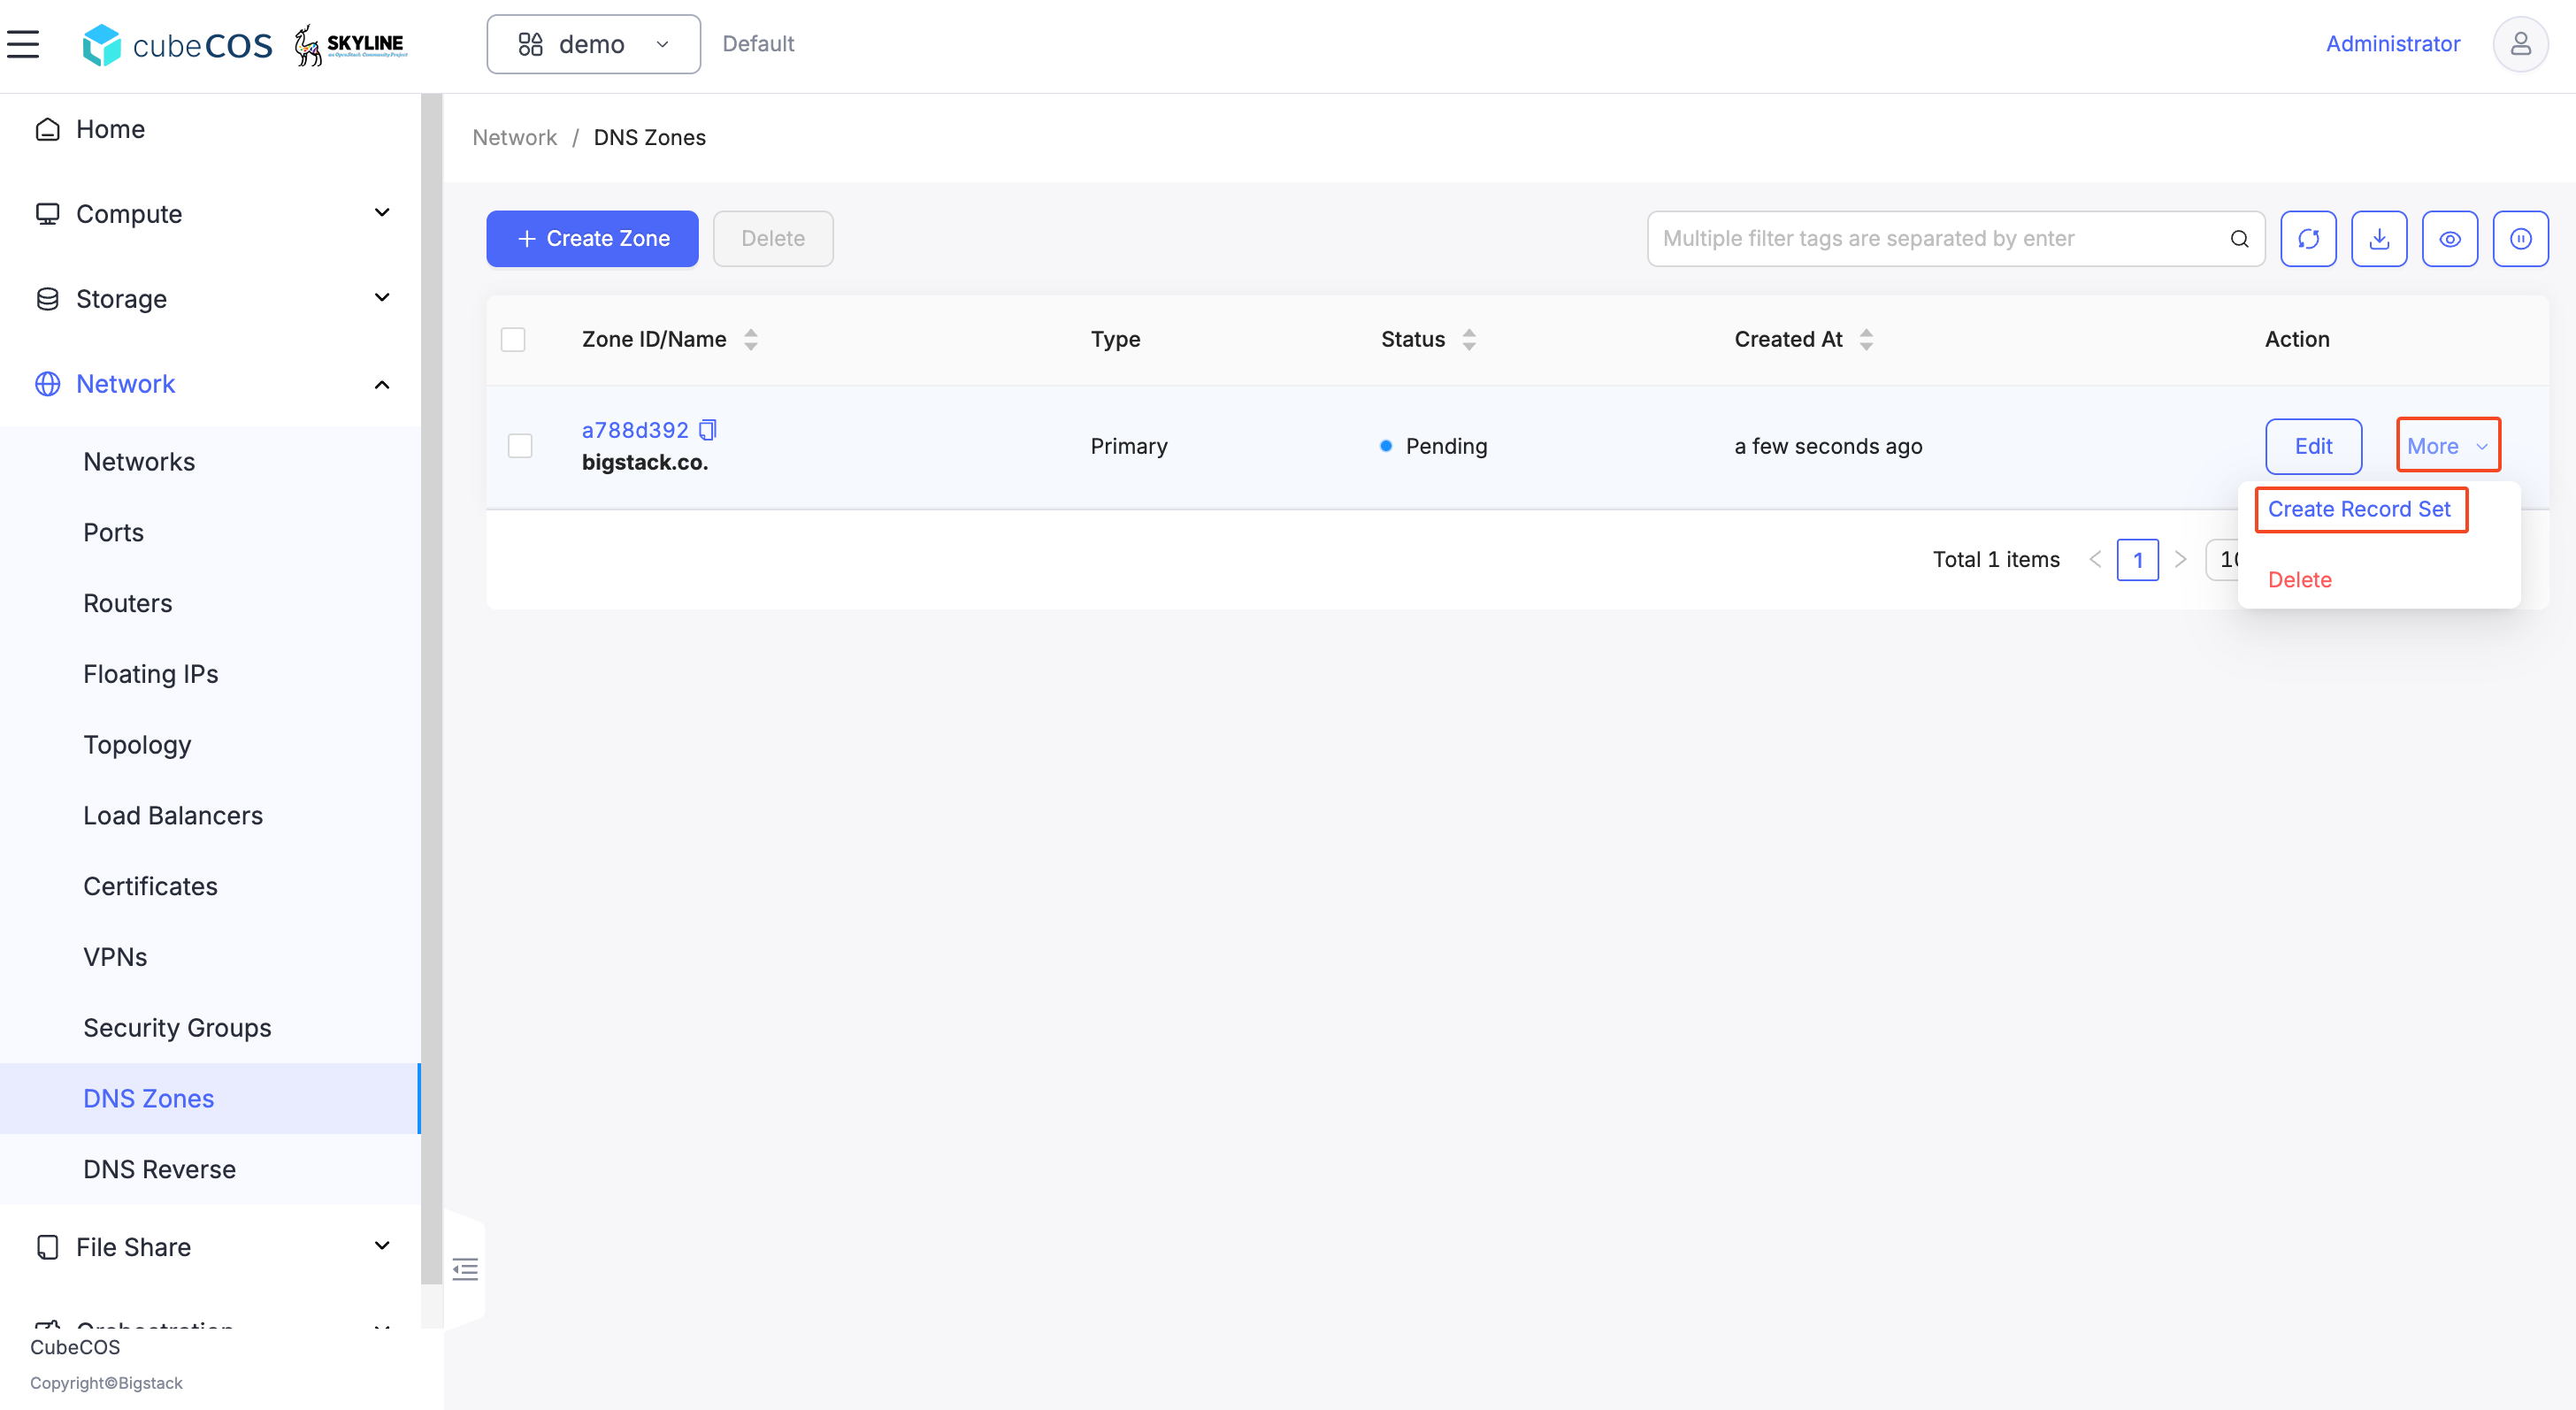
1. Hover to `More`, then click `Create Record Set` at the drop down menu to DNS Zone just created.

   ![/assets/dns/dns-6.png](/assets/dns/skyline-dns-6.png)

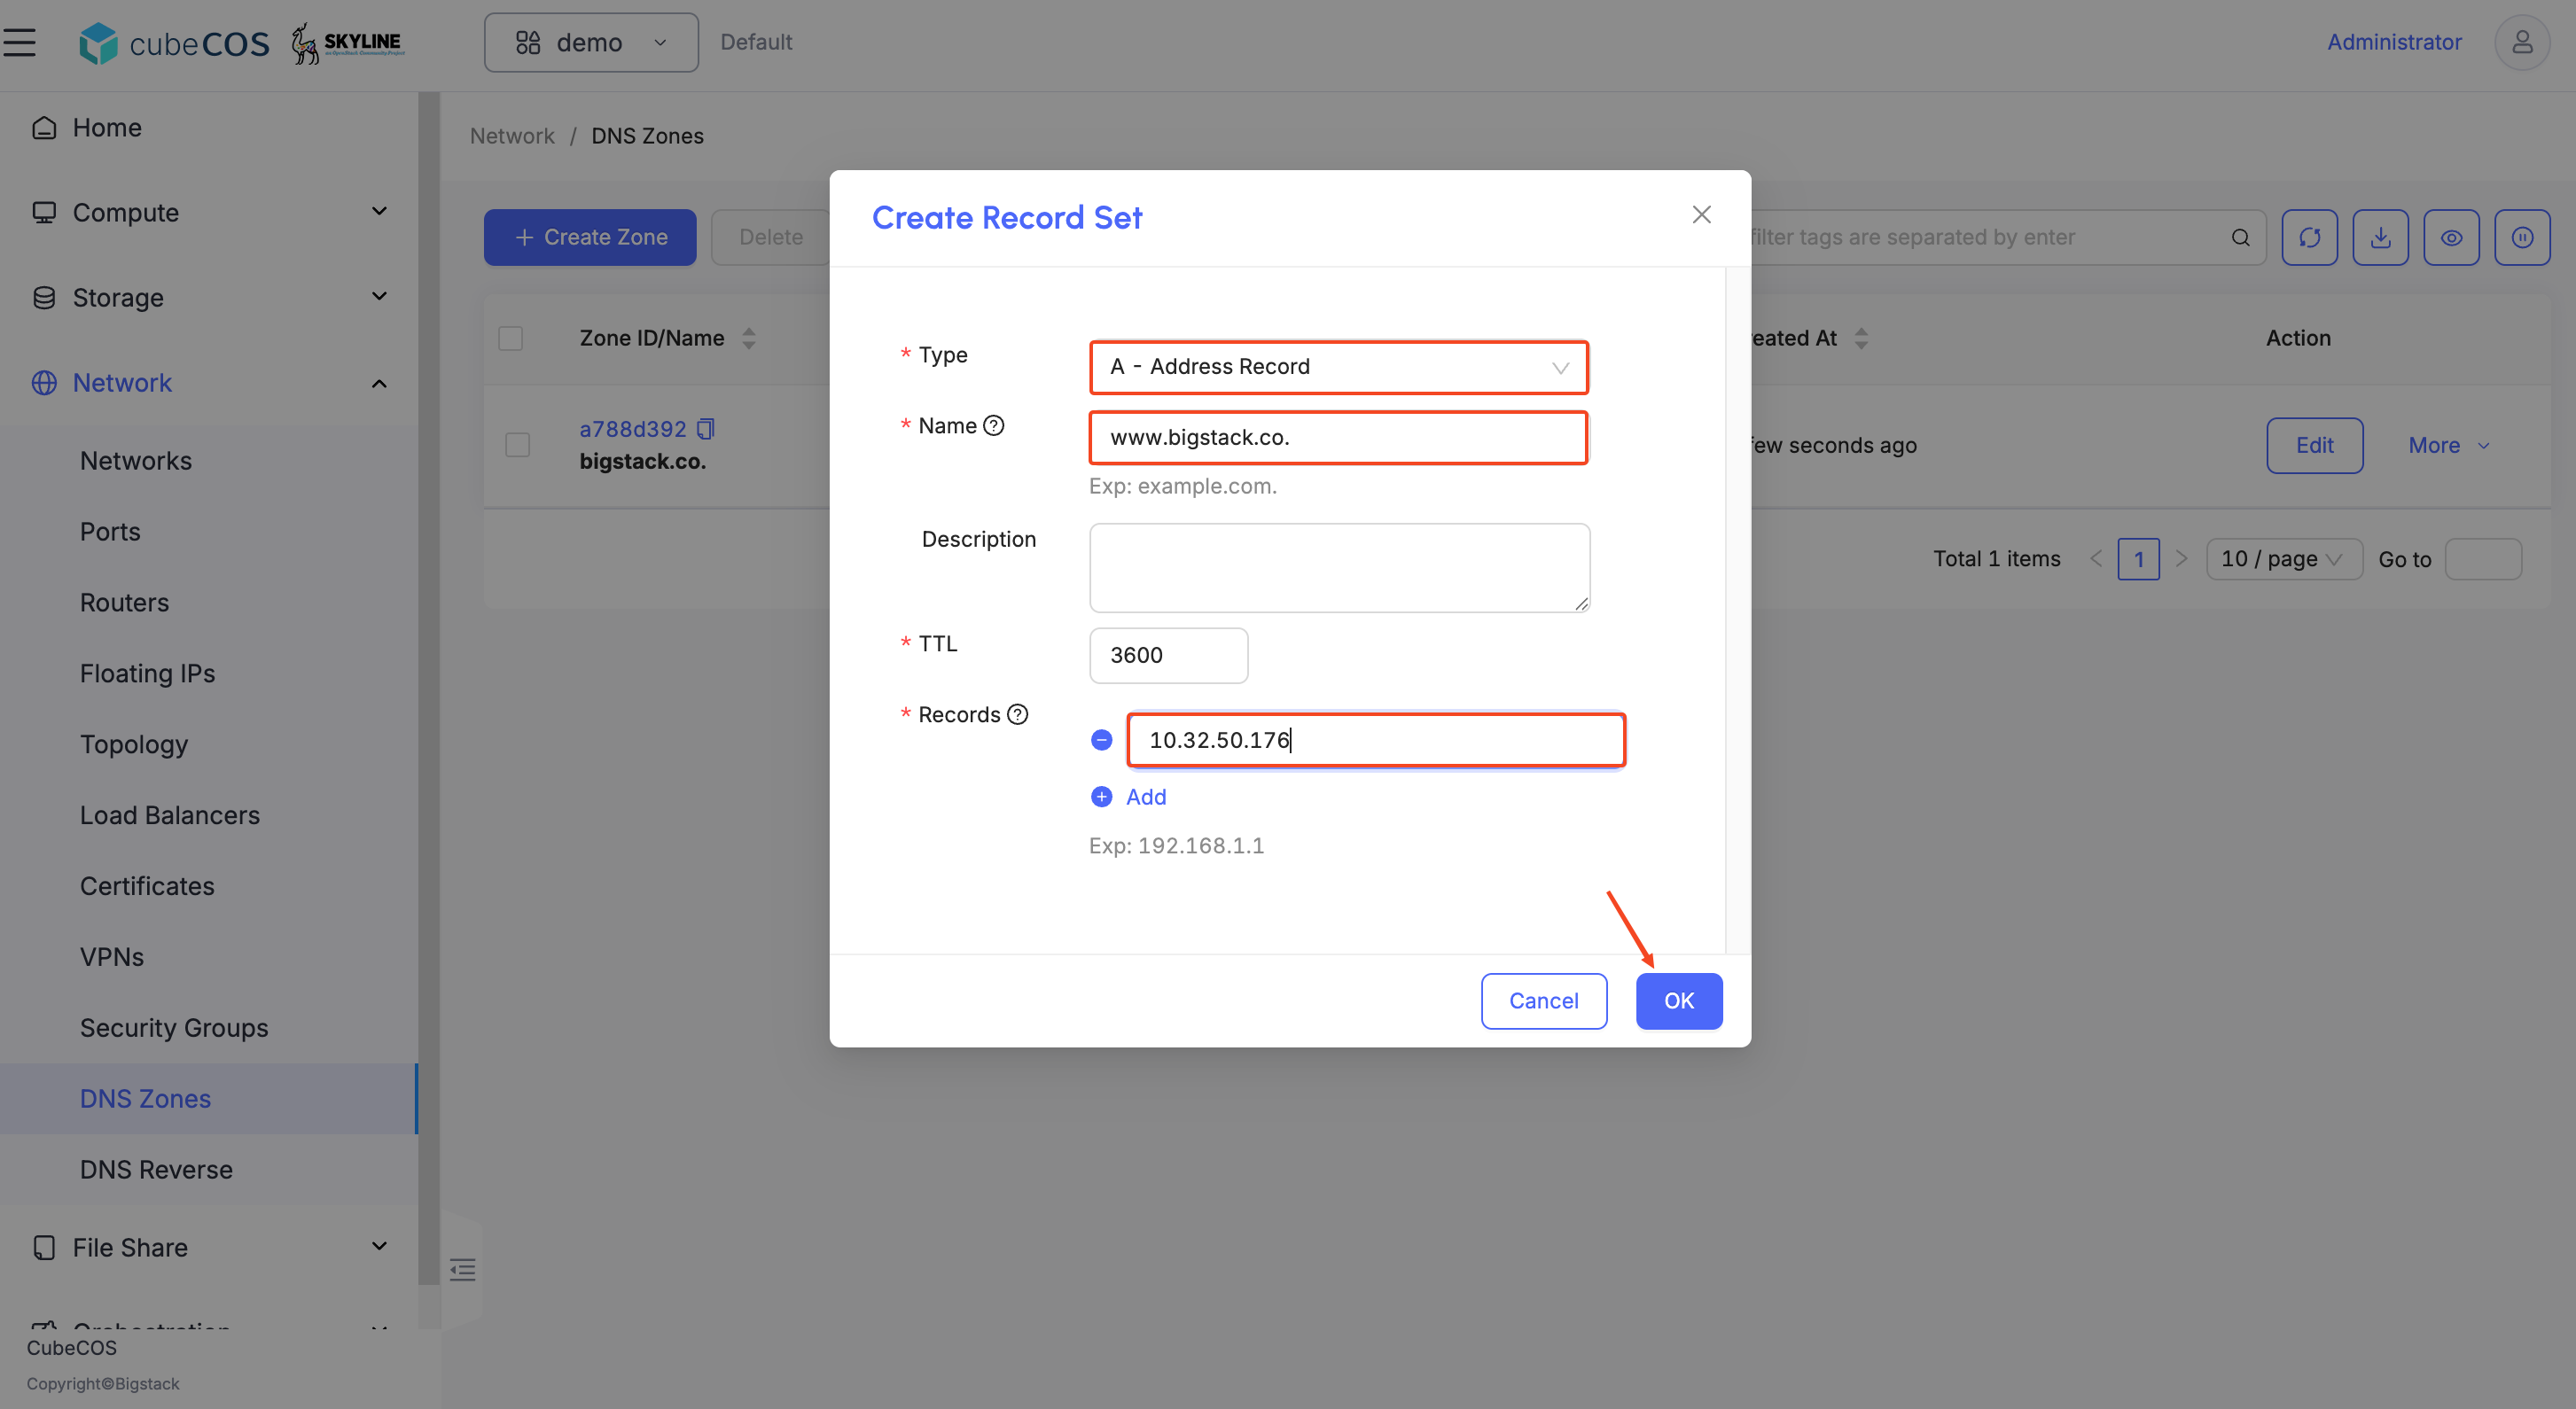
2. Add an `A Record` with the IP address of your Virtual Machine.

   Here is a list of the supported records:
   - A - IPv4 Address Record
   - AAAA - IPv6 Address Record
   - CAA - Certificate Authority Authorization Record
   - CNAME - Canonical Name Record
   - MX - Mail Exchange Record
   - NS - Name Server
   - PTR - Pointer Record
   - SOA - Start Of Authority

   ![/assets/dns/dns-7.png](/assets/dns/skyline-dns-7.png)

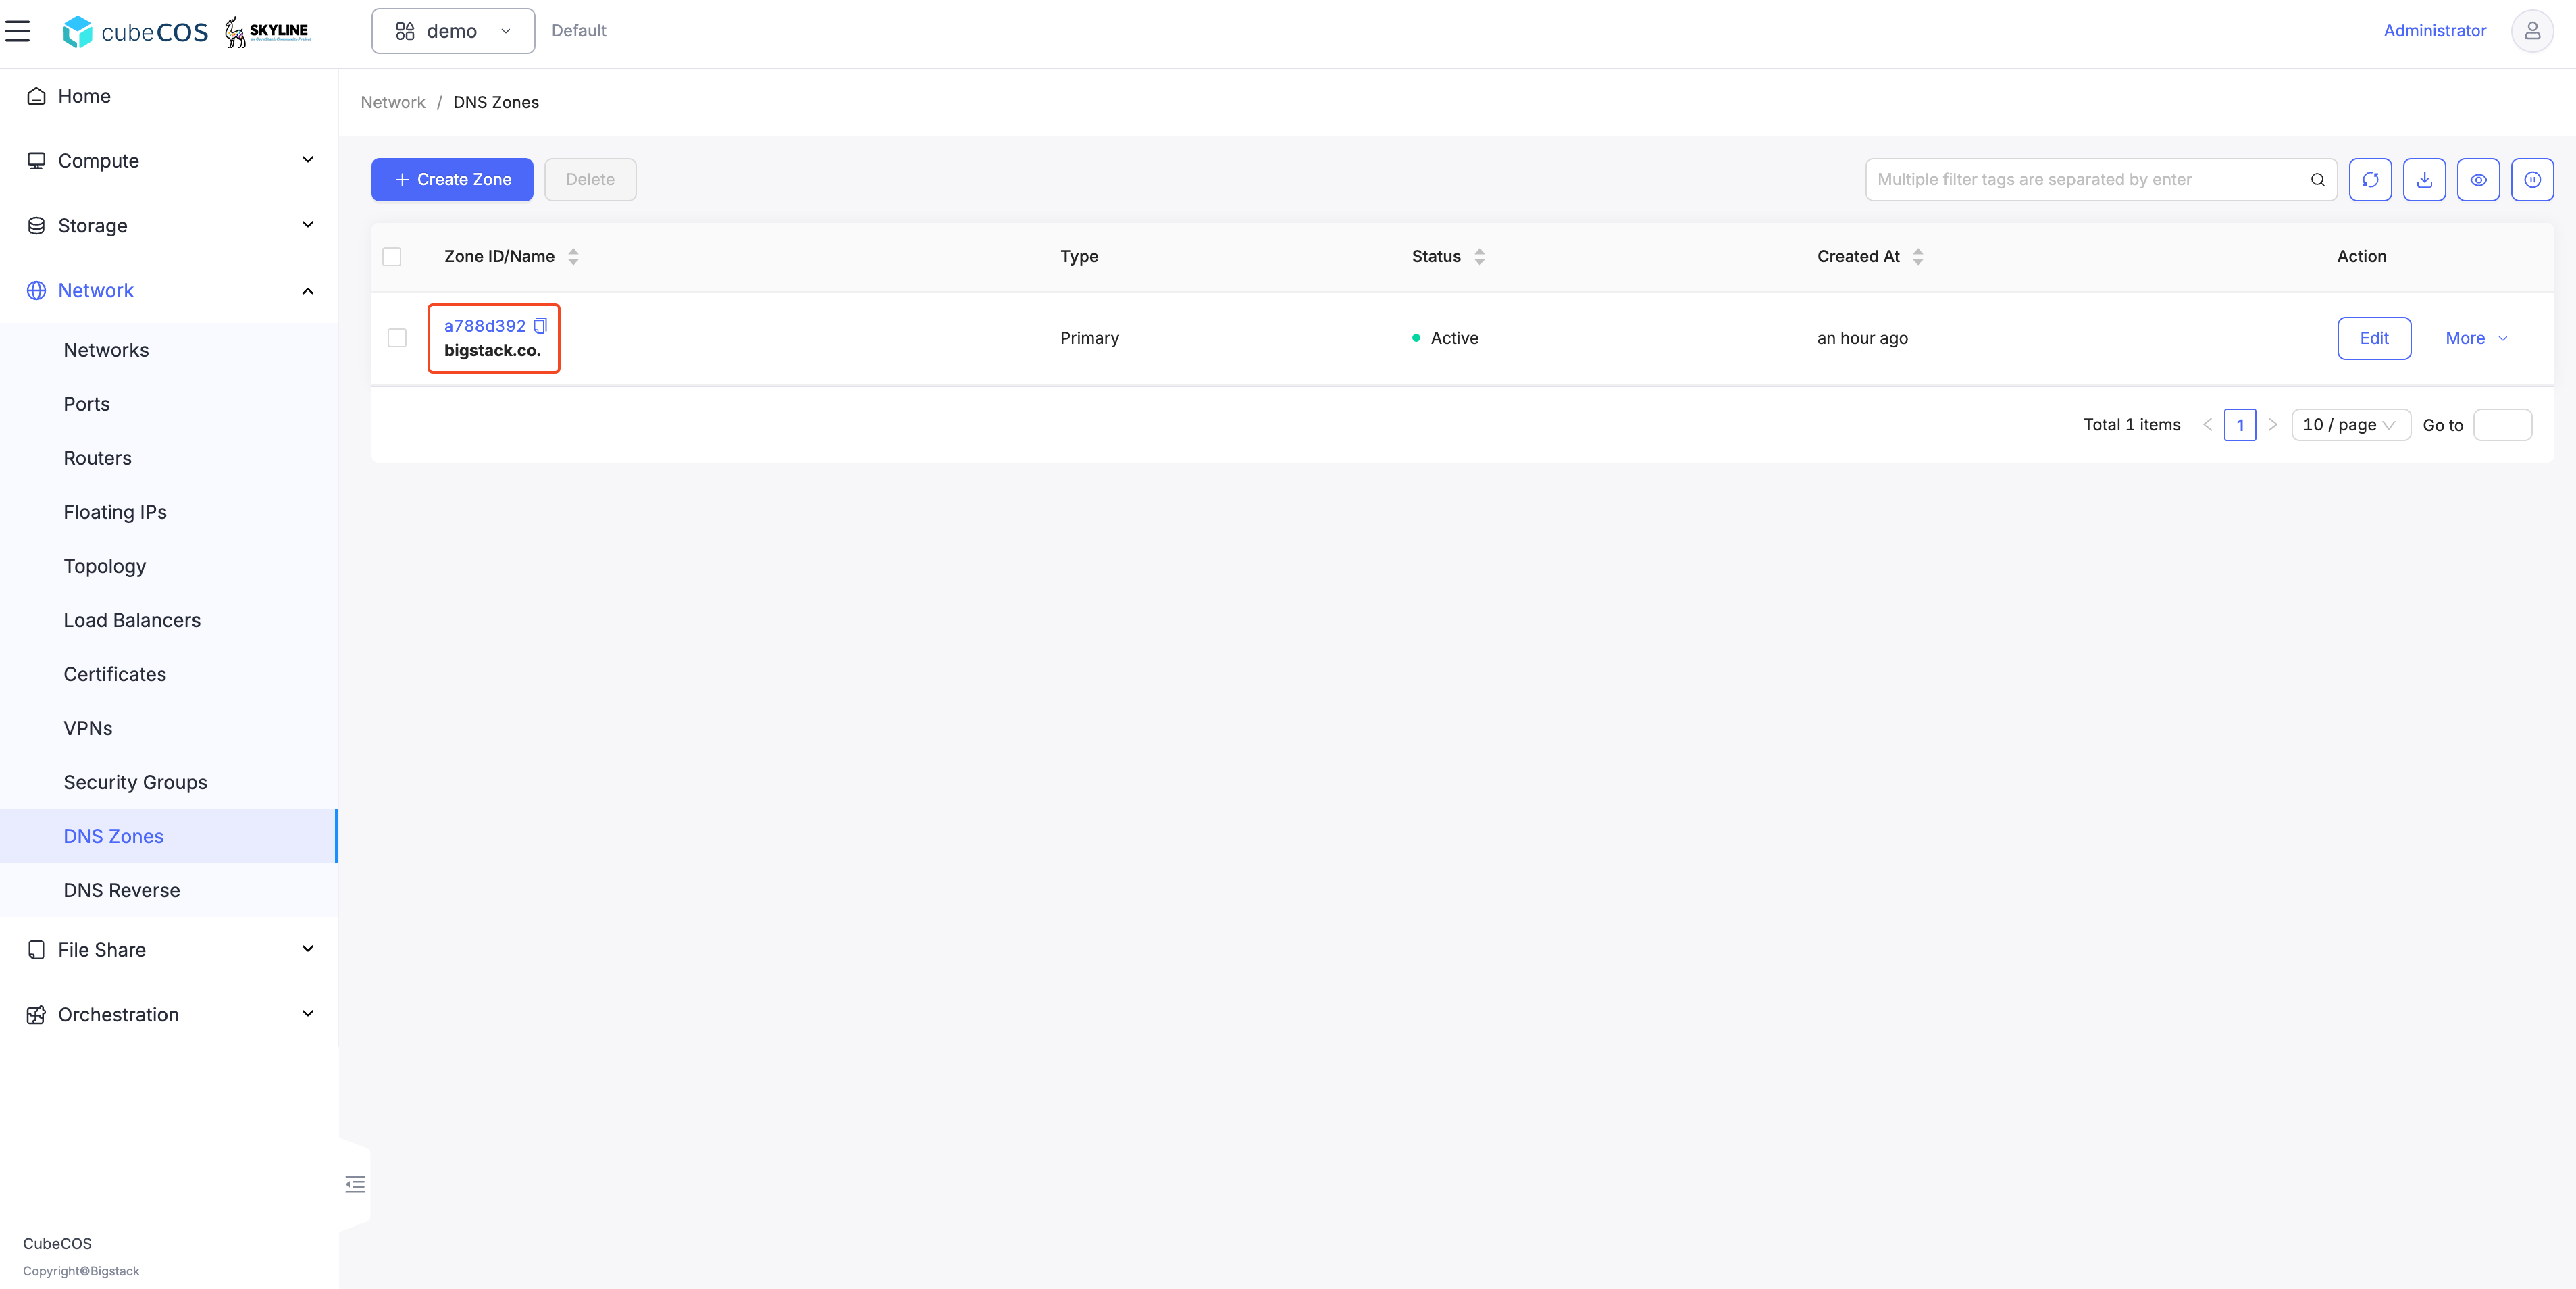
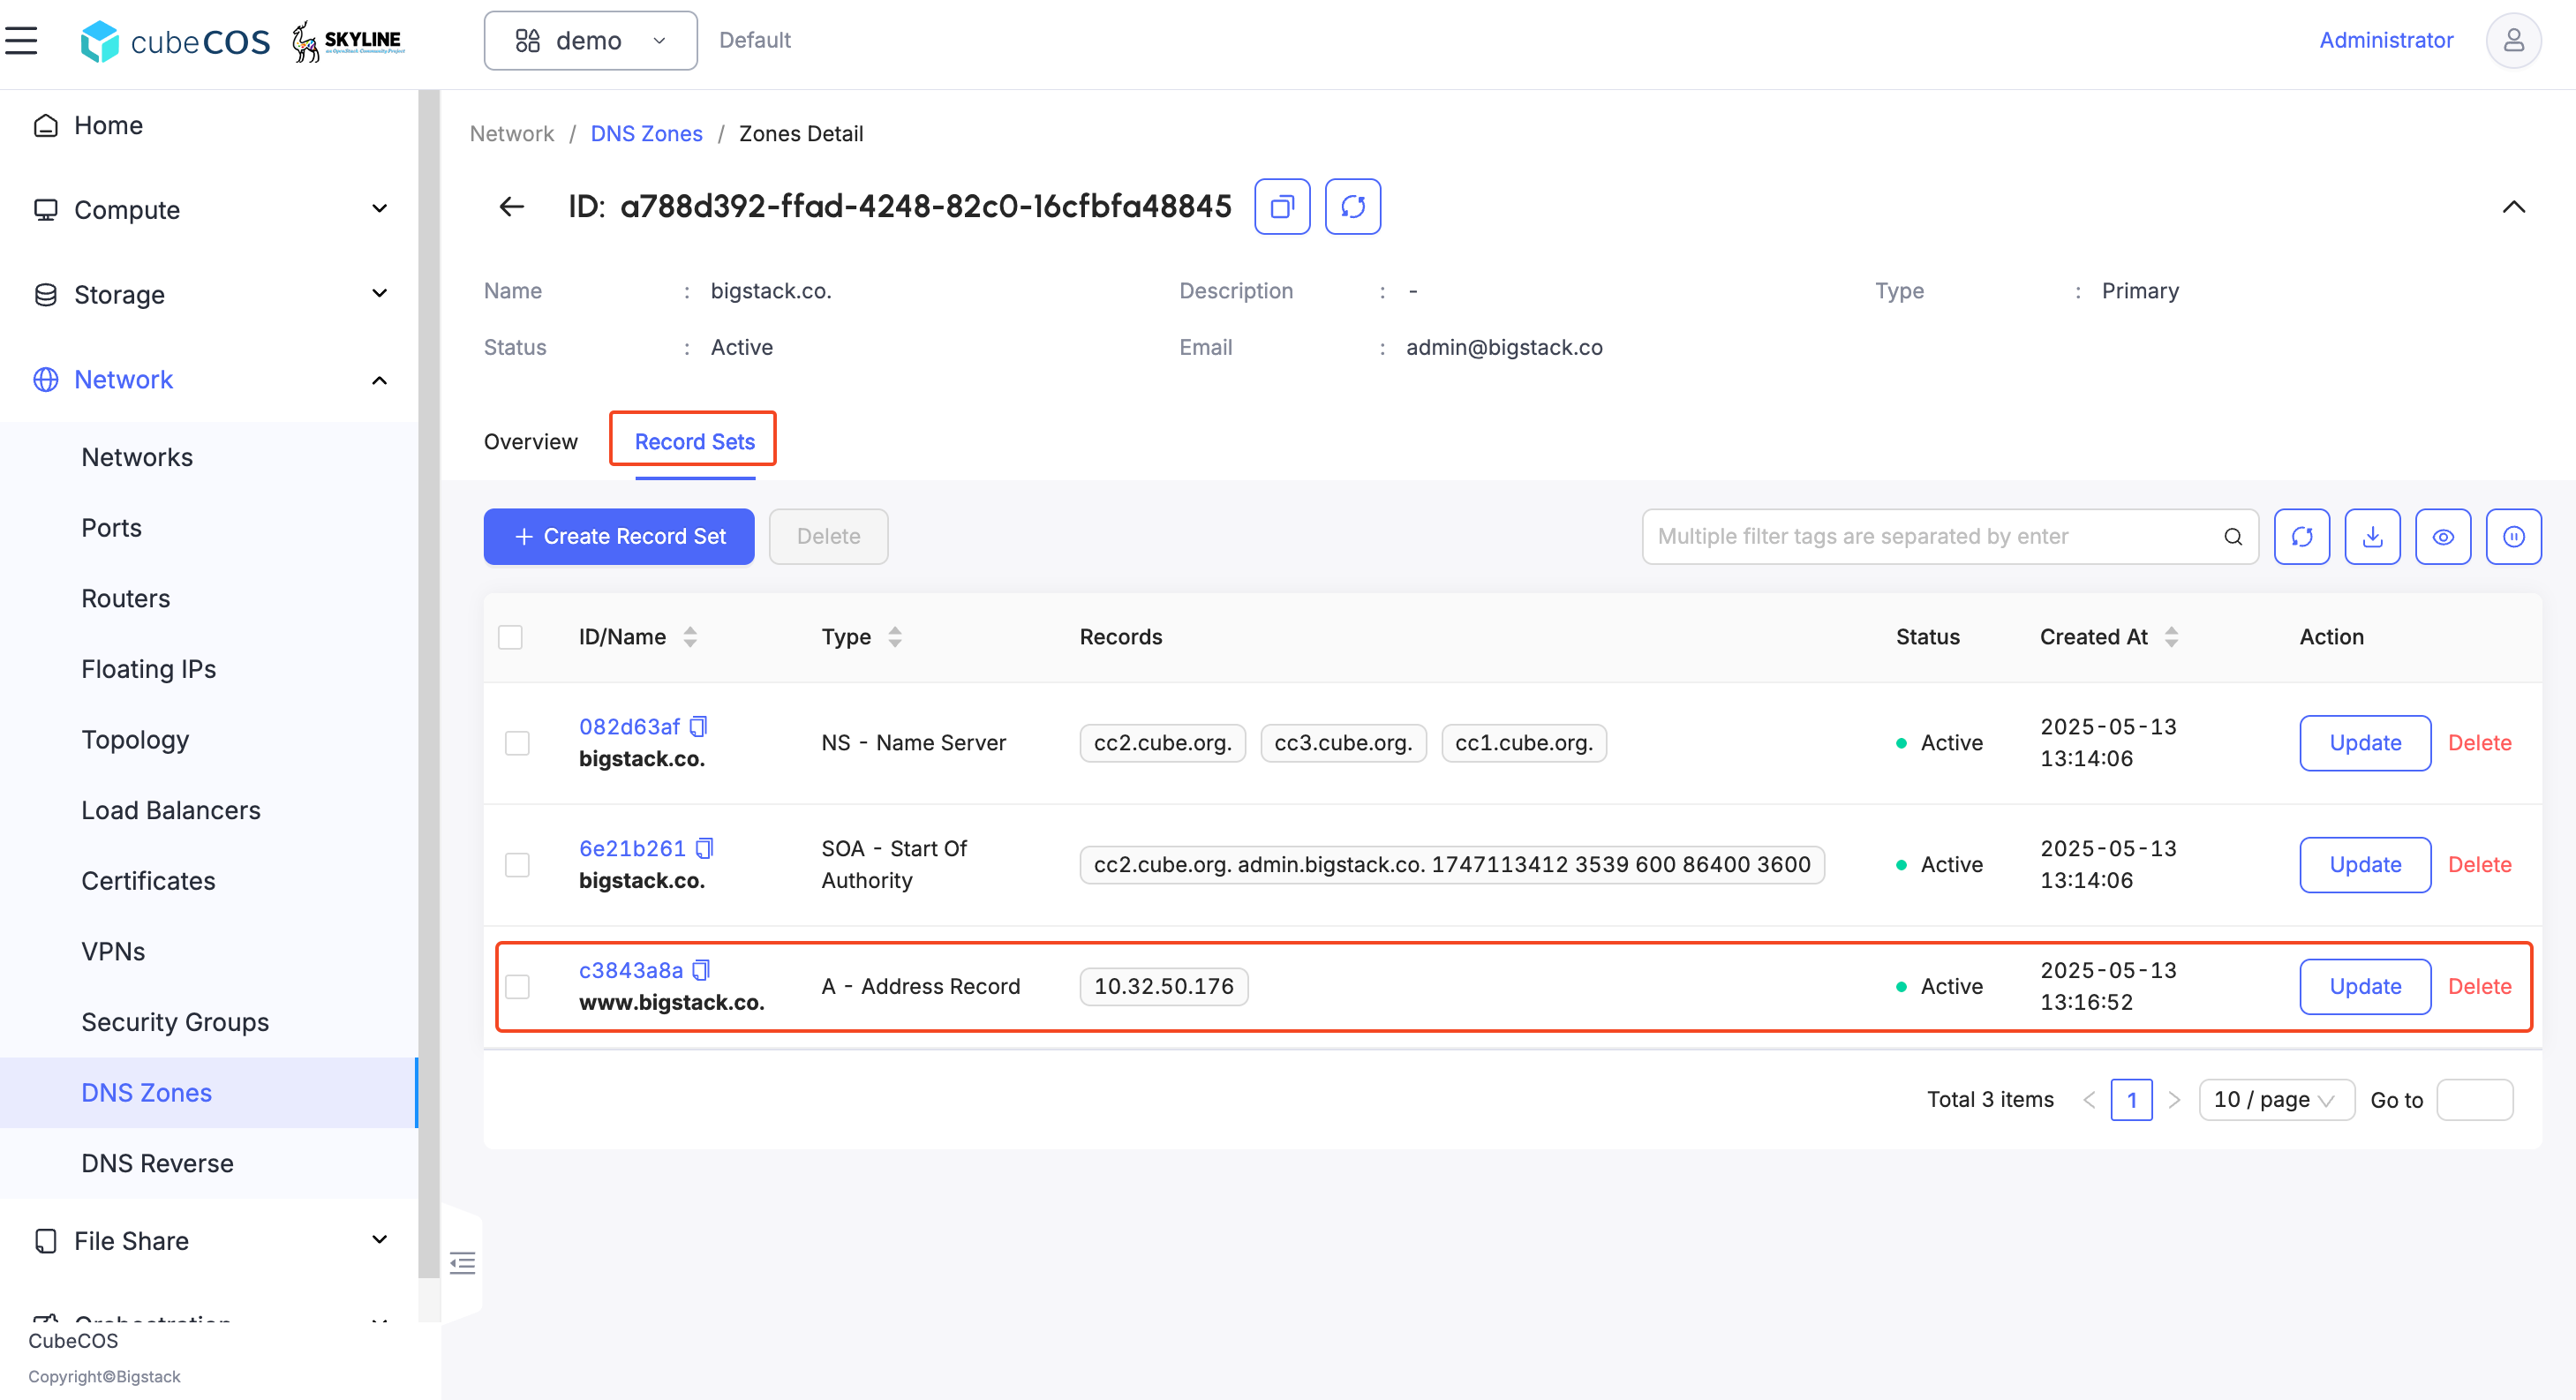
3. Verify record set creation by click the ID of the `Zone` again.

   ![/assets/dns/dns-8.png](/assets/dns/skyline-dns-8.png)

4. Select `Record Sets` on the banner to review the change done.

   ![/assets/dns/dns-9.png](/assets/dns/skyline-dns-9.png)

## Test the DNS {#test-the-dns}

- Navigate to your virtual machine console and `nslookup www.bigstack.co`
- Alternatively, you can change your compute DNS and try it out

```bash
   [root@test-dns ~]# nslookup www.bigstack.co 10.32.31.10
   Server: 10.32.31.10
   Address: 10.32.31.10#53

   Name: www.bigstack.co
   Address: 10.32.50.176
```