# How to assign users to CubeCOS projects

> Learn how to assign users to a projecta in CubeCOS to manage access, permissions, and resource usage effectively.

This guide provides instructions on how to **assign users to a project** within CubeCOS. Projects enable administrators to control access and permissions for different users, ensuring that resources are used efficiently and securely.

## Assign users to CubeCOS projects {#assign-users-to-cubecos-projects}

1. Follow [1-Access the administration](./administrator-view.md) panel to enter the administrator view.
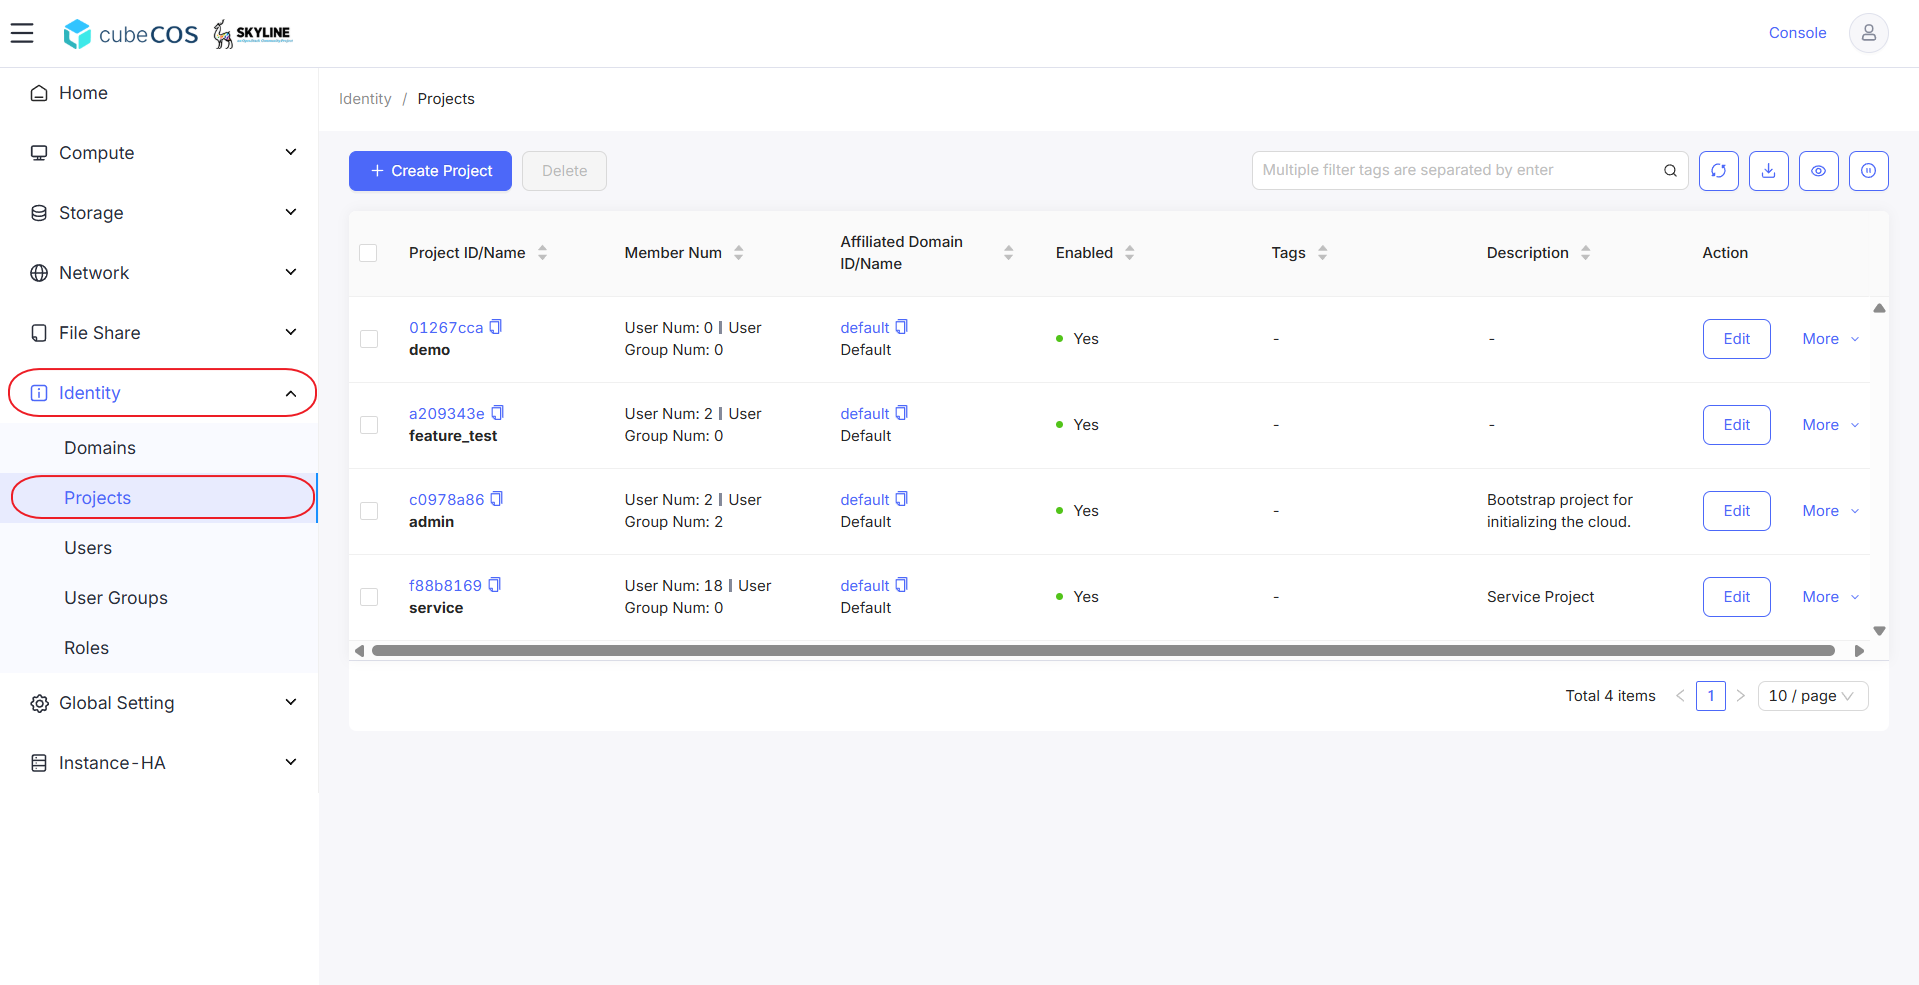
2. Navigate to `Identity > Projects` to view a list of all projects.

   ![/assets/identity/assign_to_project_1.png](/assets/identity/assign_to_project_1.png)

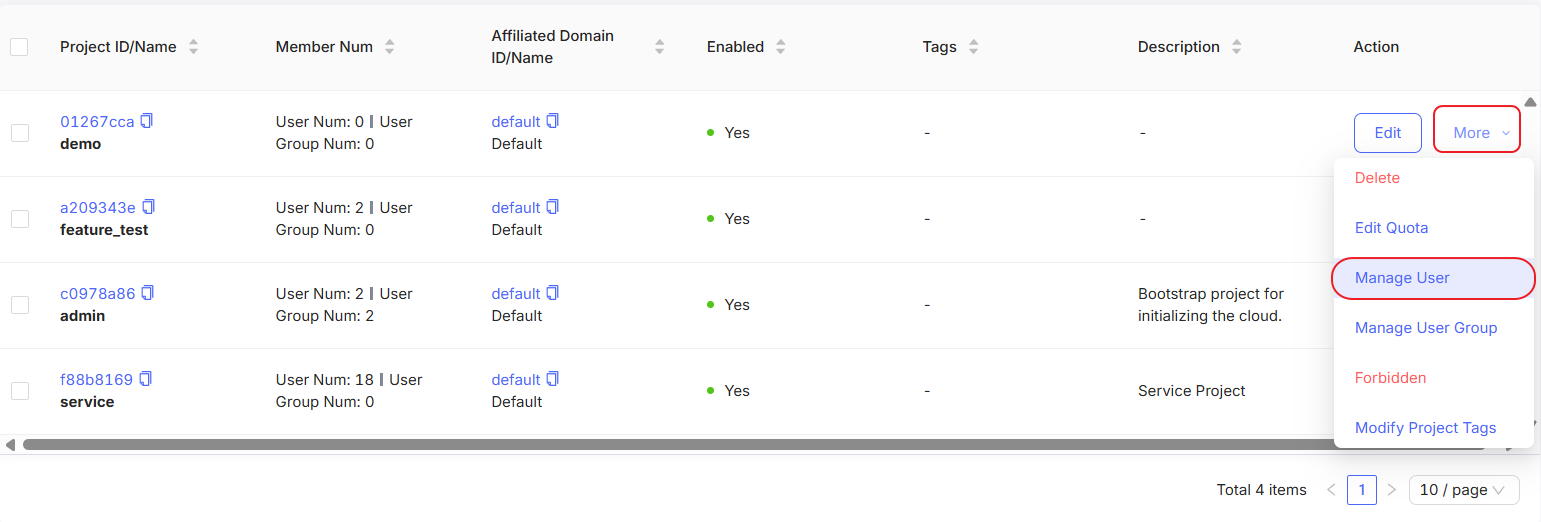
3. Select your project, then click `More`. Select `Manage User` at the drop-down menu.

   ![/assets/identity/assign_to_project_2.png](/assets/identity/assign_to_project_2.png)

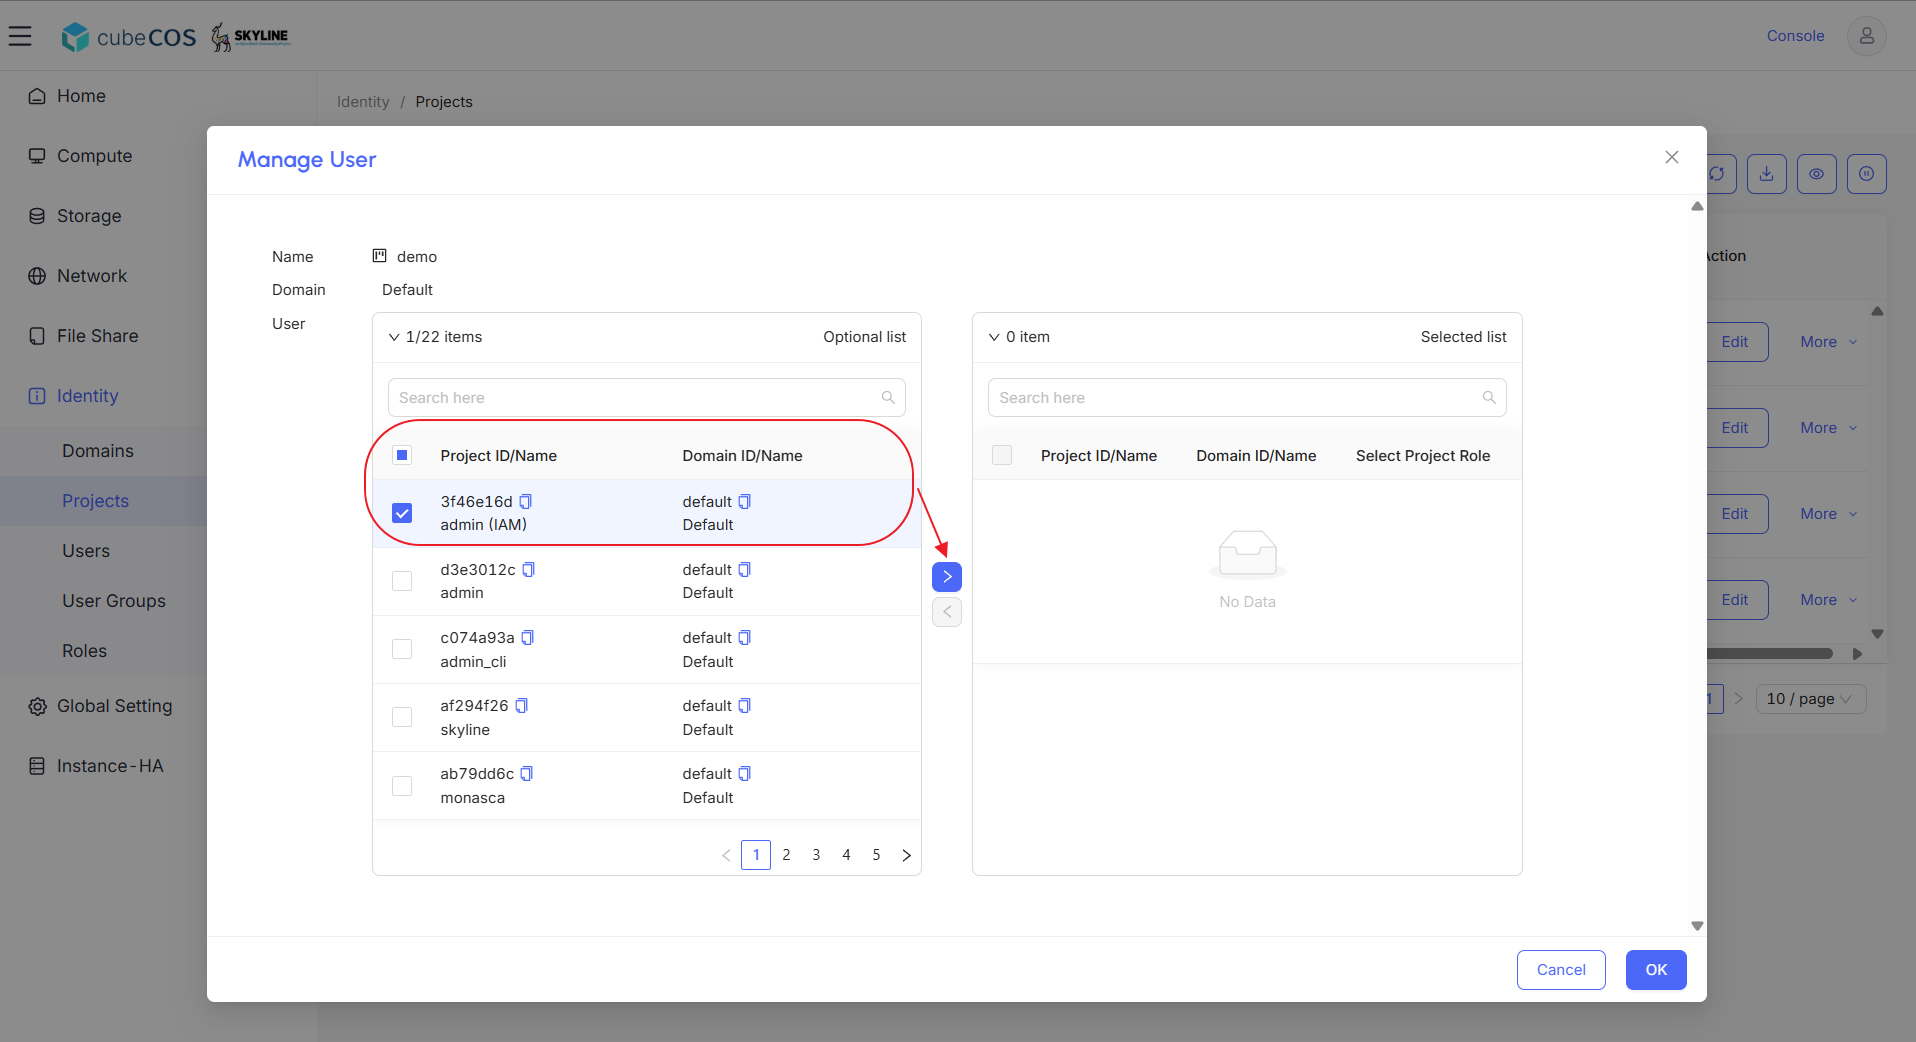
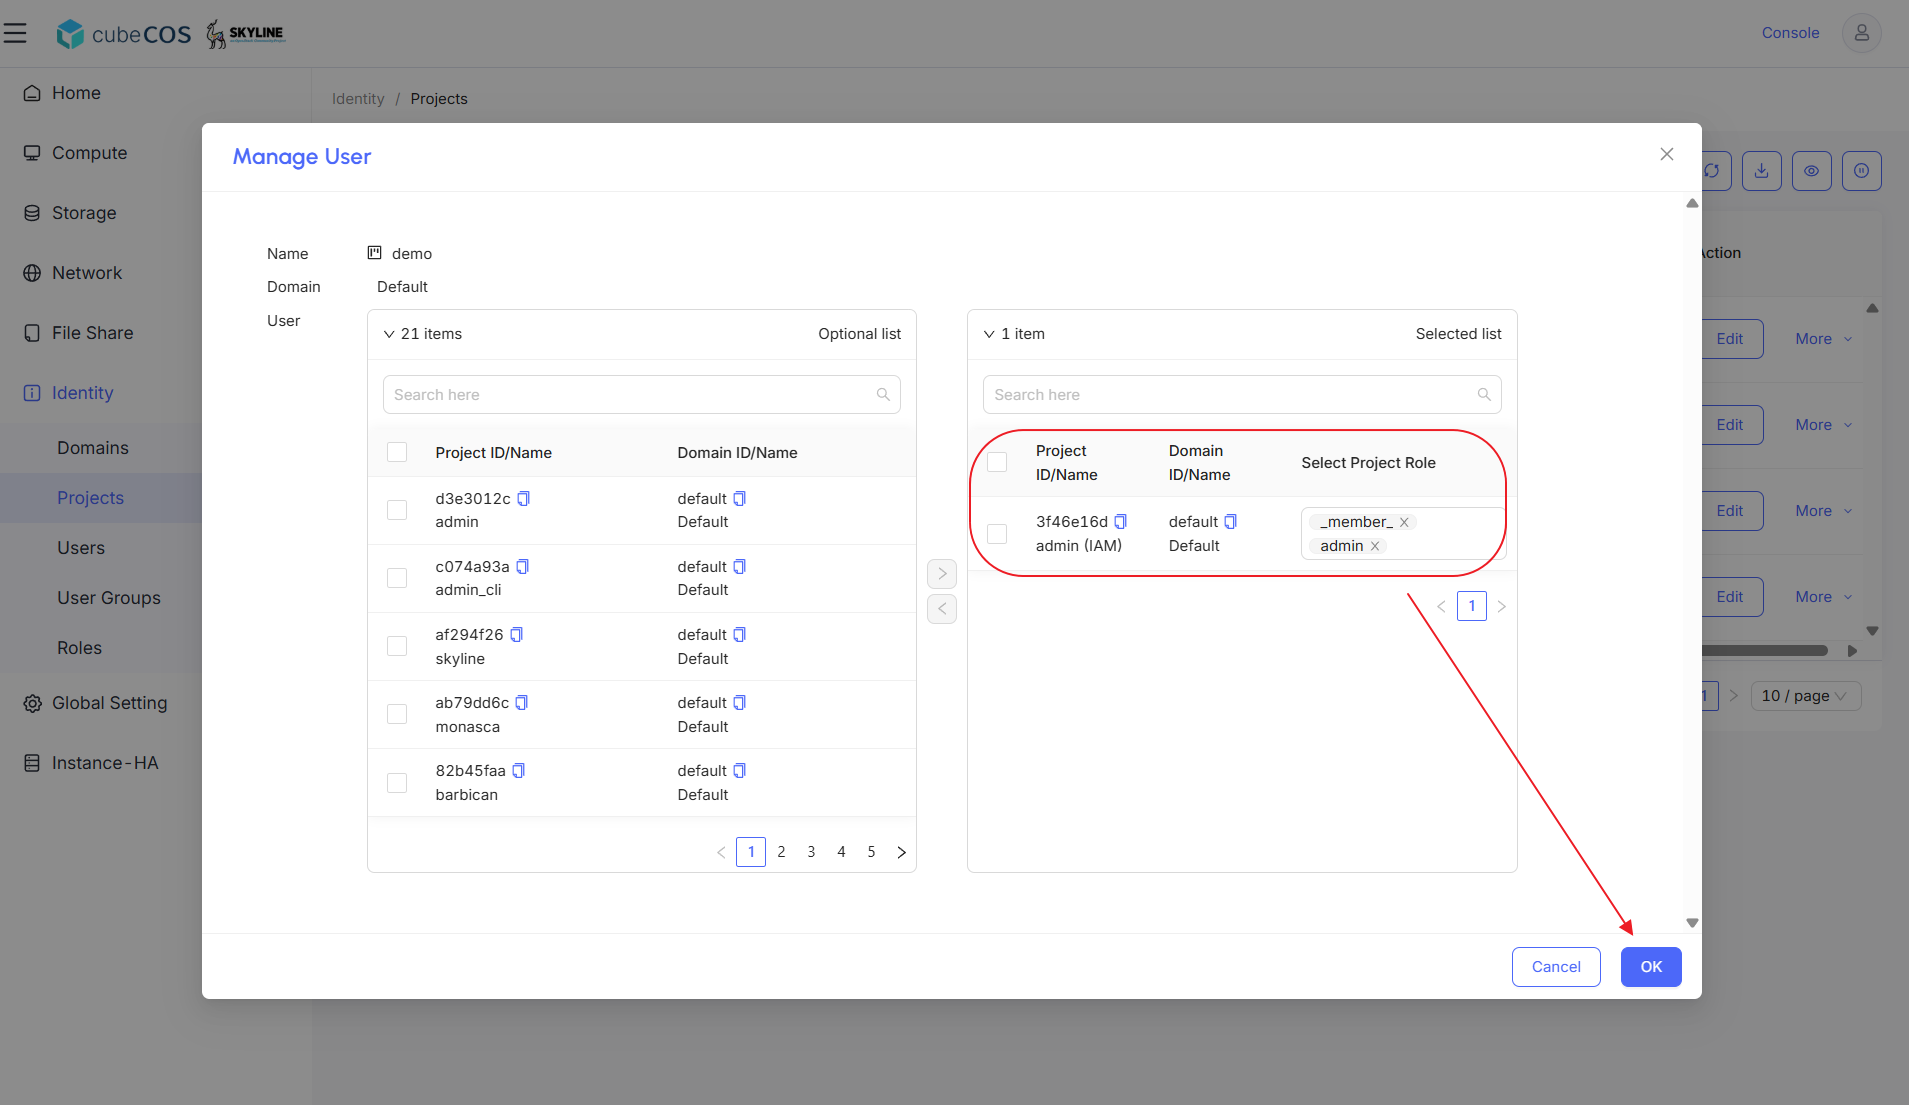
4. On the `Manage User` page, select the user(s) you want to add to the project. Click the `>` button to assign them to the project.

   ![/assets/identity/assign_to_project_3.png](/assets/identity/assign_to_project_3.png)

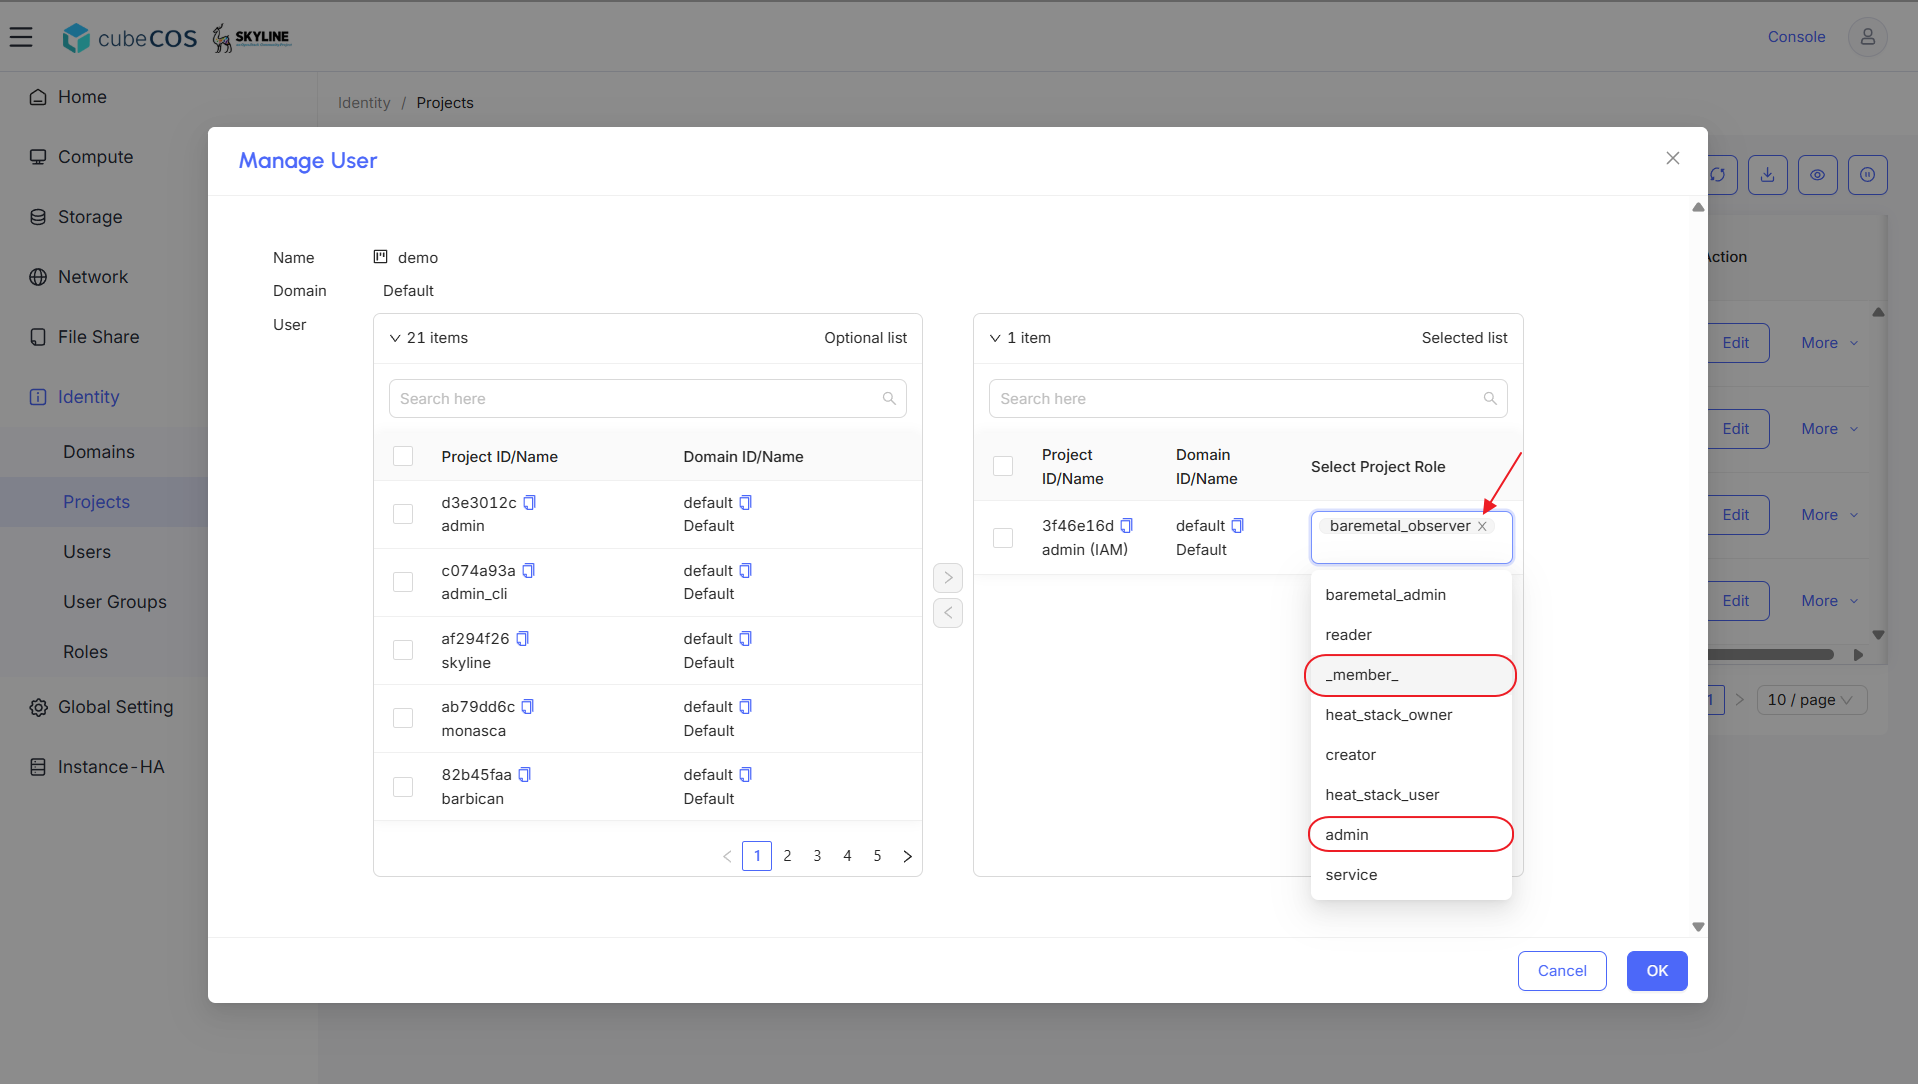
5. Assign the newly added user the appropriate roles for project-level privileges in the Selected list:
   - **`admin`** — full project administration.
   - **`_member_` _and_ `reader`** — for a standard (non-admin) project user. Assign **both**: `_member_` grants project membership, and `reader` is required to view images. Without `reader`, the user cannot list images or launch instances from them, and image operations fail with `You are not authorized to complete get_images action`.

   ![/assets/identity/assign_to_project_4.png](/assets/identity/assign_to_project_4.png)

   :::note

   A standard user also needs to launch instances from an image that their project can access. Import the image into the user's project (or share it with the project) — see [Import via CLI](../compute/images/import-images-via-cli.md). A `public` image owned by another project (for example, `admin`) is not sufficient for a `_member_` user to boot from.

   :::

6. After assigning all Project Role privileges in the Selected list, click `OK` to apply the changes.

   ![/assets/identity/assign_to_project_5.png](/assets/identity/assign_to_project_5.png)

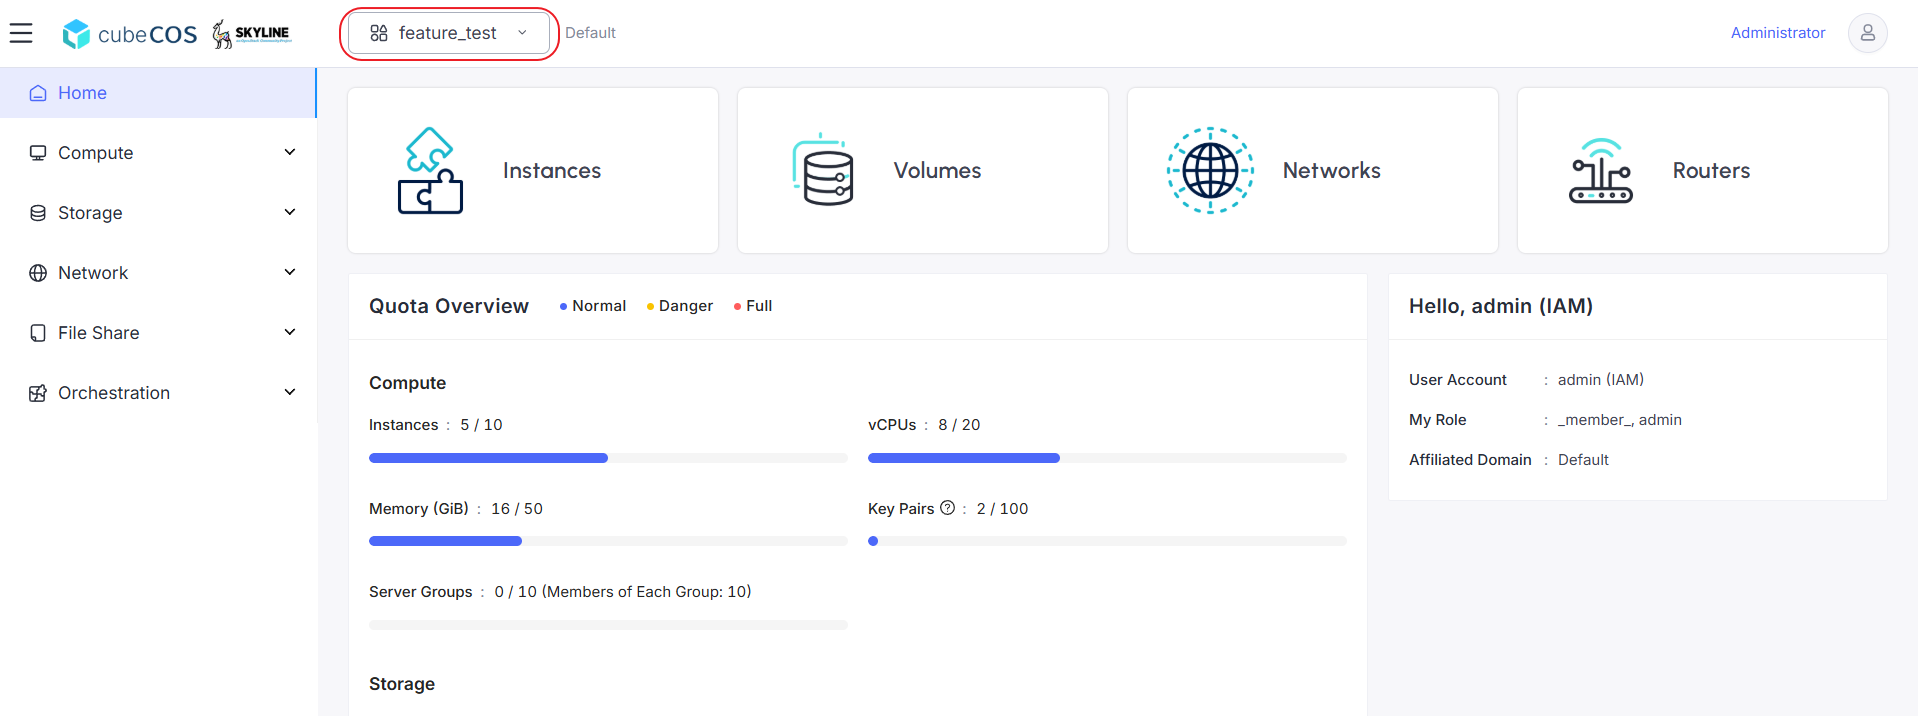
7. Navigate to `Project`, then click the project list dropdown in the top-left corner.

   ![/assets/identity/assign_to_project_6.png](/assets/identity/assign_to_project_6.png)

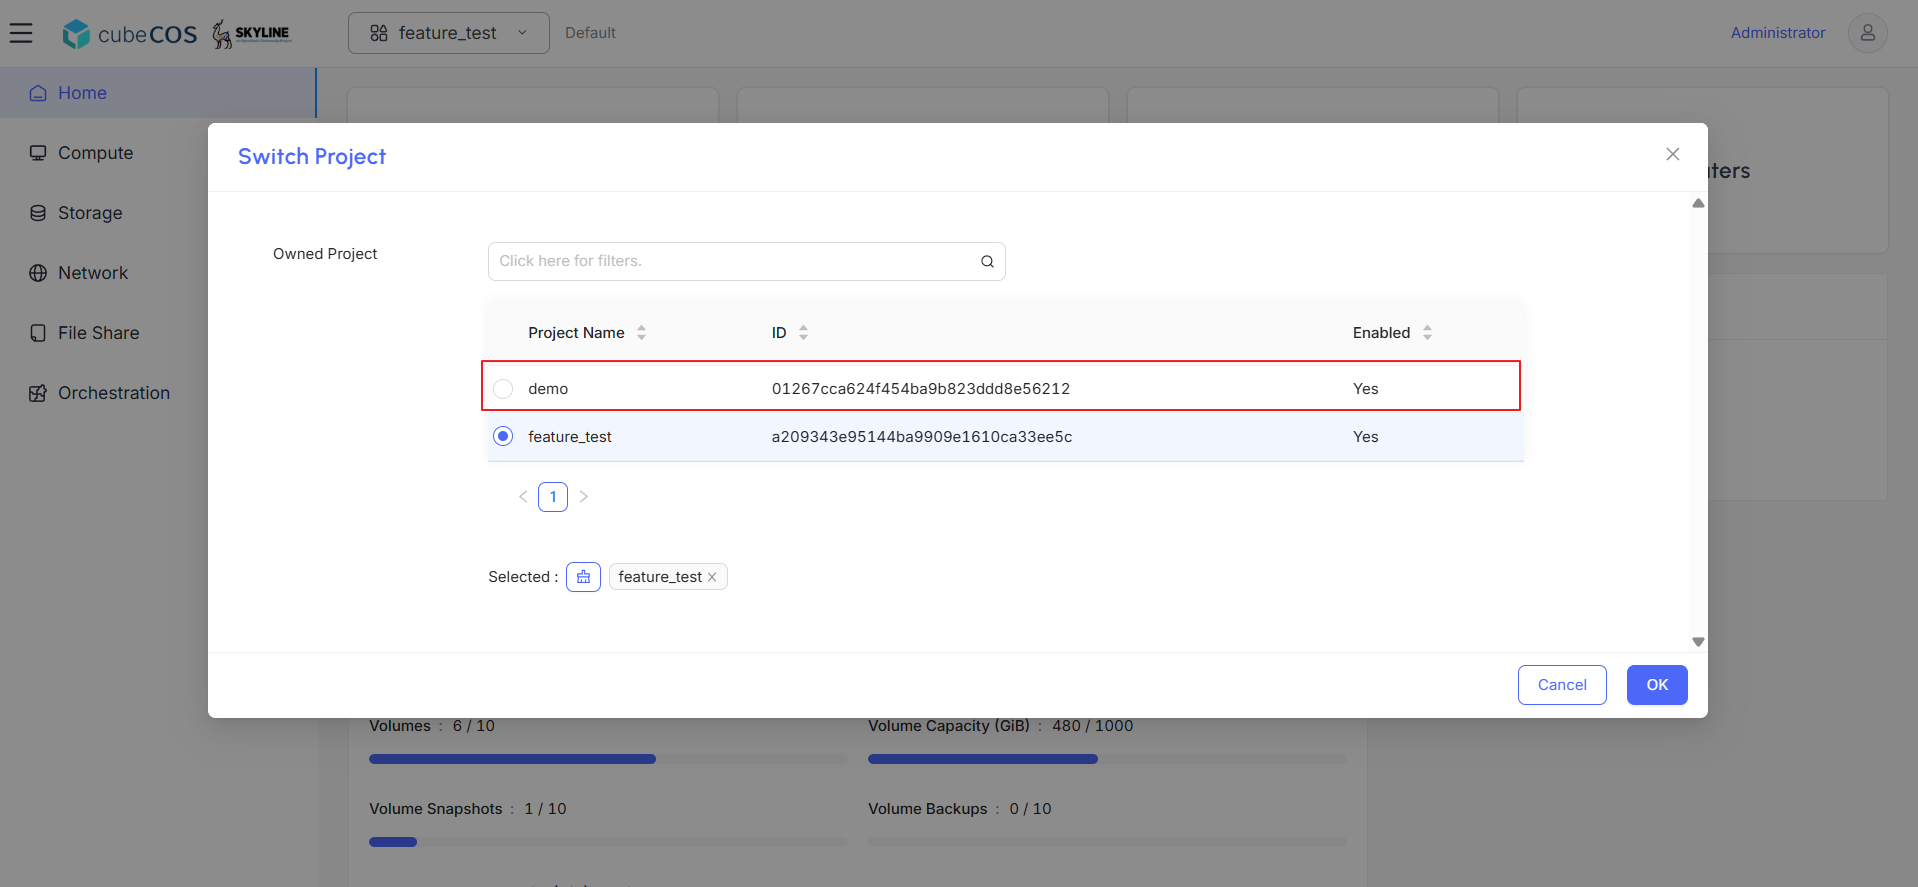
8. After modifying project role permissions, verify that the newly added project appears in the `Owned Project` list.

   ![/assets/identity/assign_to_project_7.png](/assets/identity/assign_to_project_7.png)