# How to create and manage user groups (Local) in CubeCOS

> Learn how to create and manage user groups in CubeCOS using the local identity service. User groups simplify permission management by allowing role assignments at the group level.

## Create and manage user groups overview {#create-and-manage-user-groups-overview}

This guide explains how to create and manage **user groups** within the CubeCOS system using the local identity management interface. User groups provide a centralized way to manage permissions and access control by organizing users into logical groups and assigning project roles collectively.

**Benefits of User Groups:**

- **Centralized Permission Management:** Assign roles to groups instead of individual users
- **Simplified Administration:** Add or remove users from groups to manage their access
- **Consistent Access Control:** Ensure all group members have the same project privileges
- **Scalability:** Easily manage large numbers of users through group-based assignments

## Prerequisites {#prerequisites}

- Administrator access to the CubeCOS dashboard
- Users created following the [Create User (Local)](local-user-create.md) guide
- Understanding of project roles and permissions

## Create and assign users to local user groups {#create-and-assign-users-to-local-user-groups}

1. Follow [1-Access the administration](./administrator-view.md) panel to enter the administrator view.
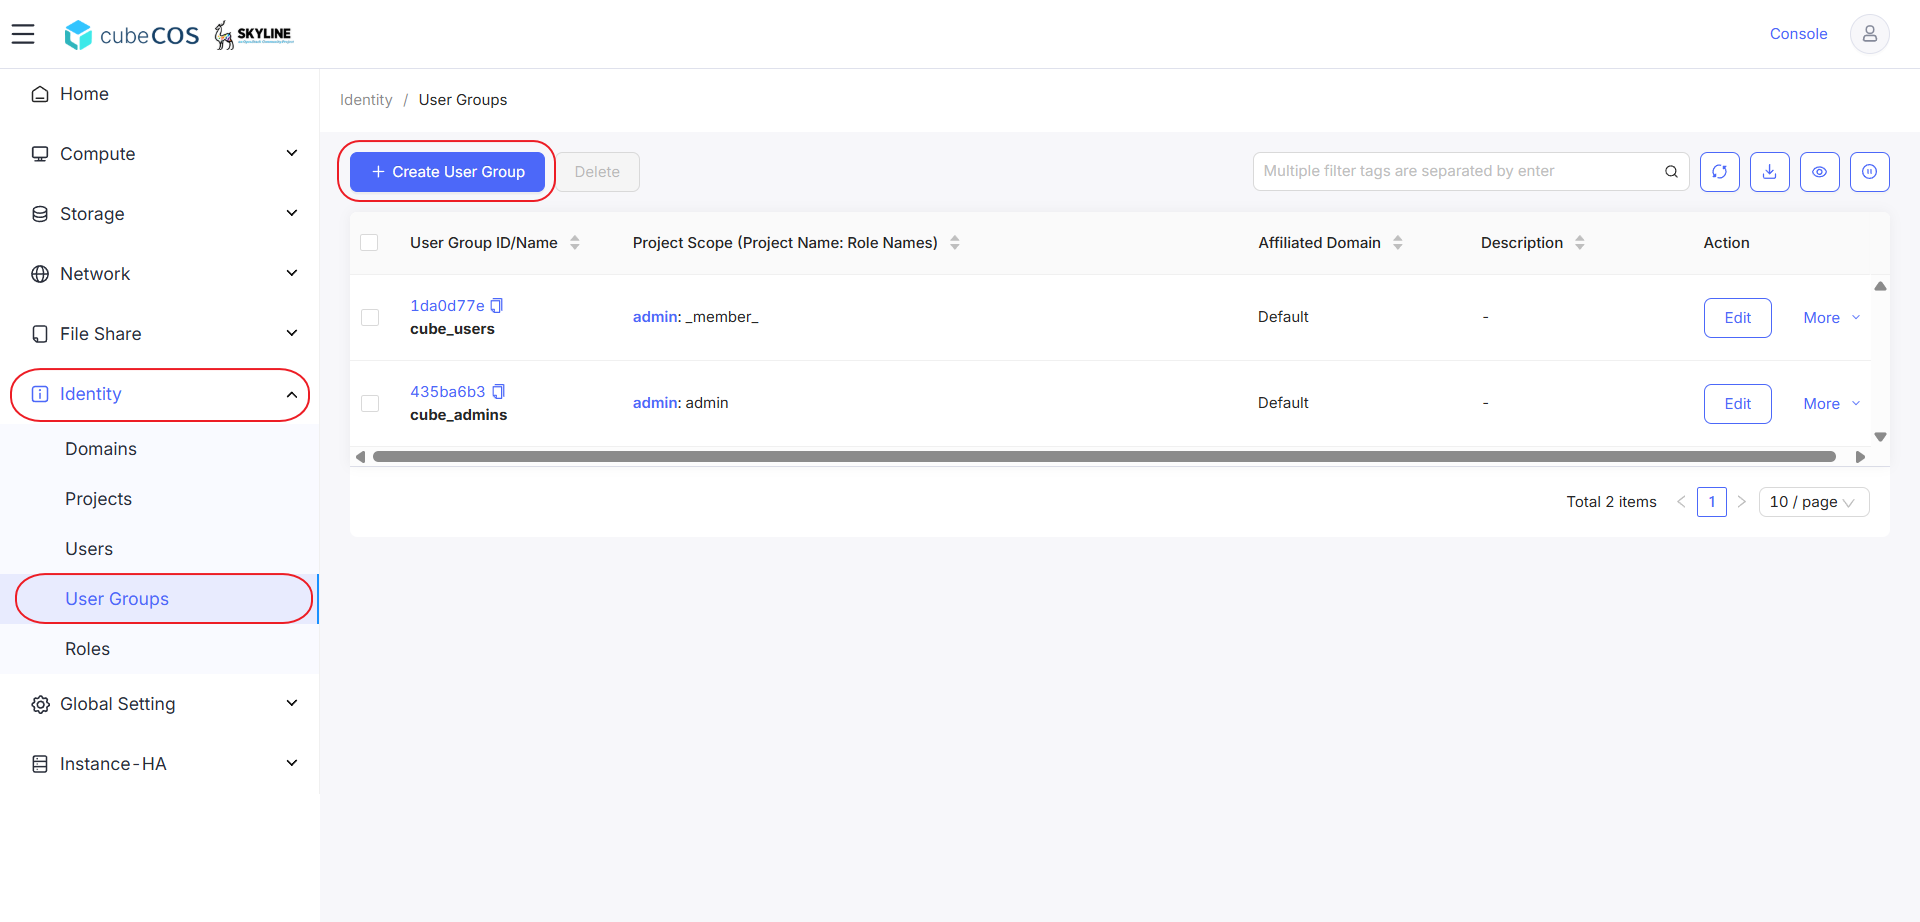
2. Navigate to `Identity > User Groups` and click `+ CREATE USER GROUP` to begin creation.

   ![/assets/identity/create_group_local_1.png](/assets/identity/create_group_local_1.png)

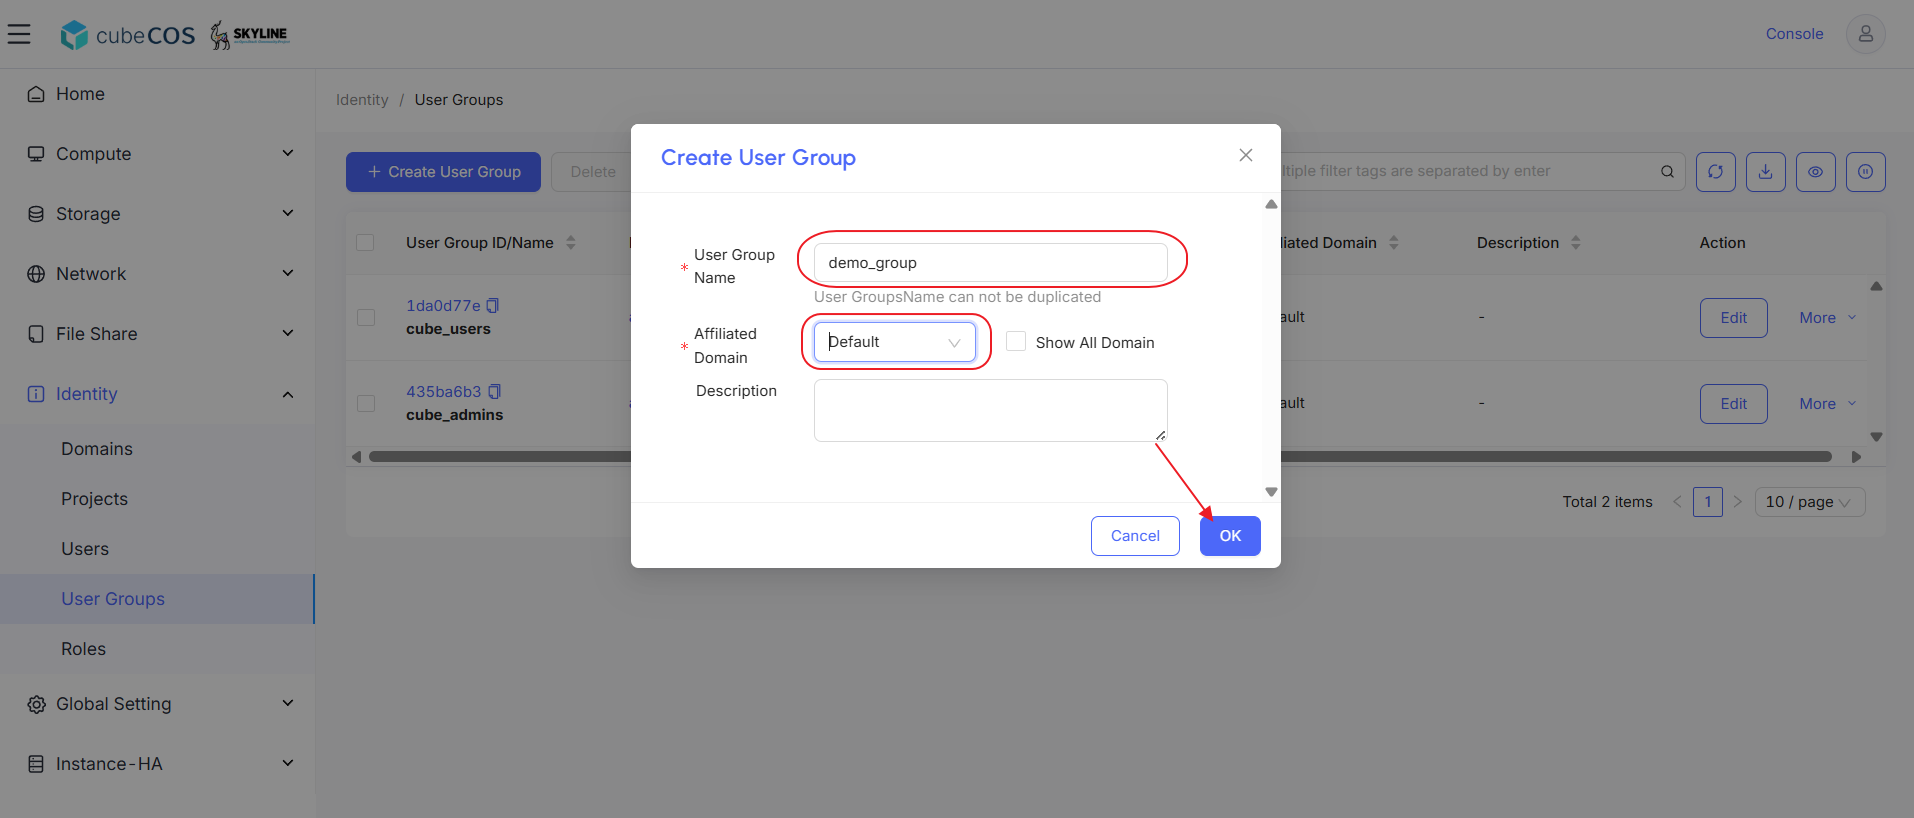
3. Enter `User Group Name` and select `Affiliated Domain` from its drop down menu, click `OK`.

   ![/assets/identity/create_group_local_2.png](/assets/identity/create_group_local_2.png)

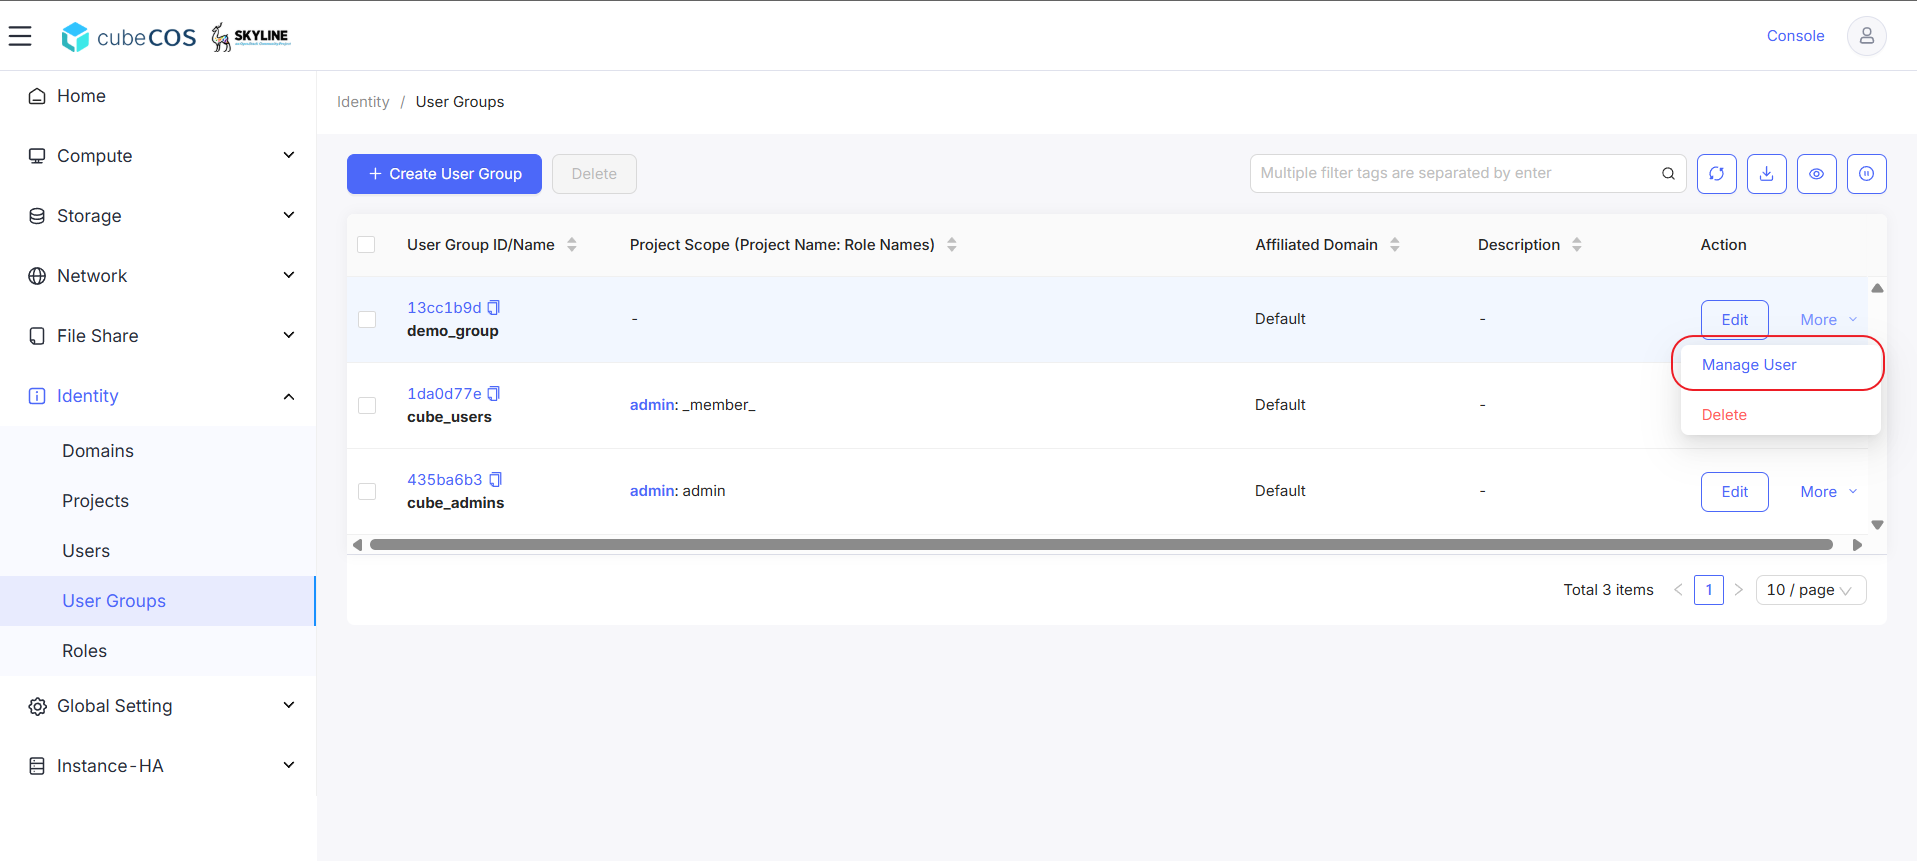
4. Choose your `User Group`, then click `More`. Select `Manage User` at the drop-down menu after creation.

   ![/assets/identity/create_group_local_3.png](/assets/identity/create_group_local_3.png)

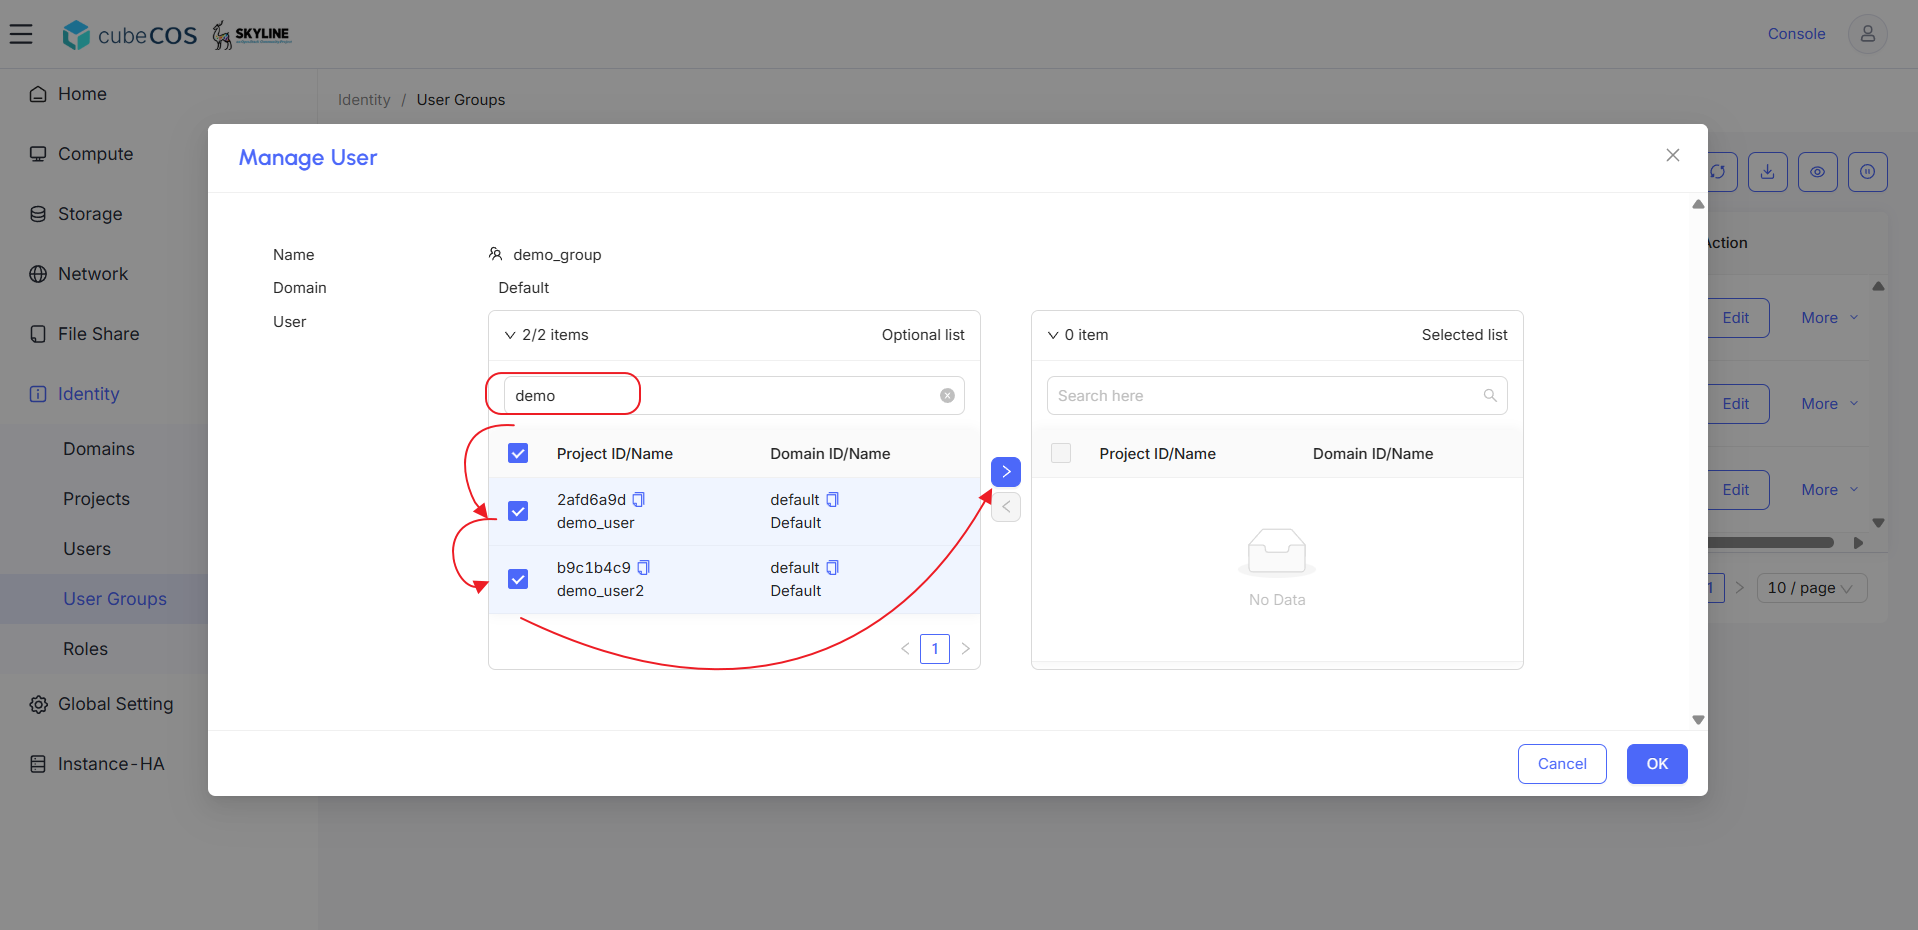
5. Add users to the `Selected list` by selecting them from the `Optional list` and clicking the `>` icon to move them to the `Selected list`.

   ![/assets/identity/create_group_local_4.png](/assets/identity/create_group_local_4.png)

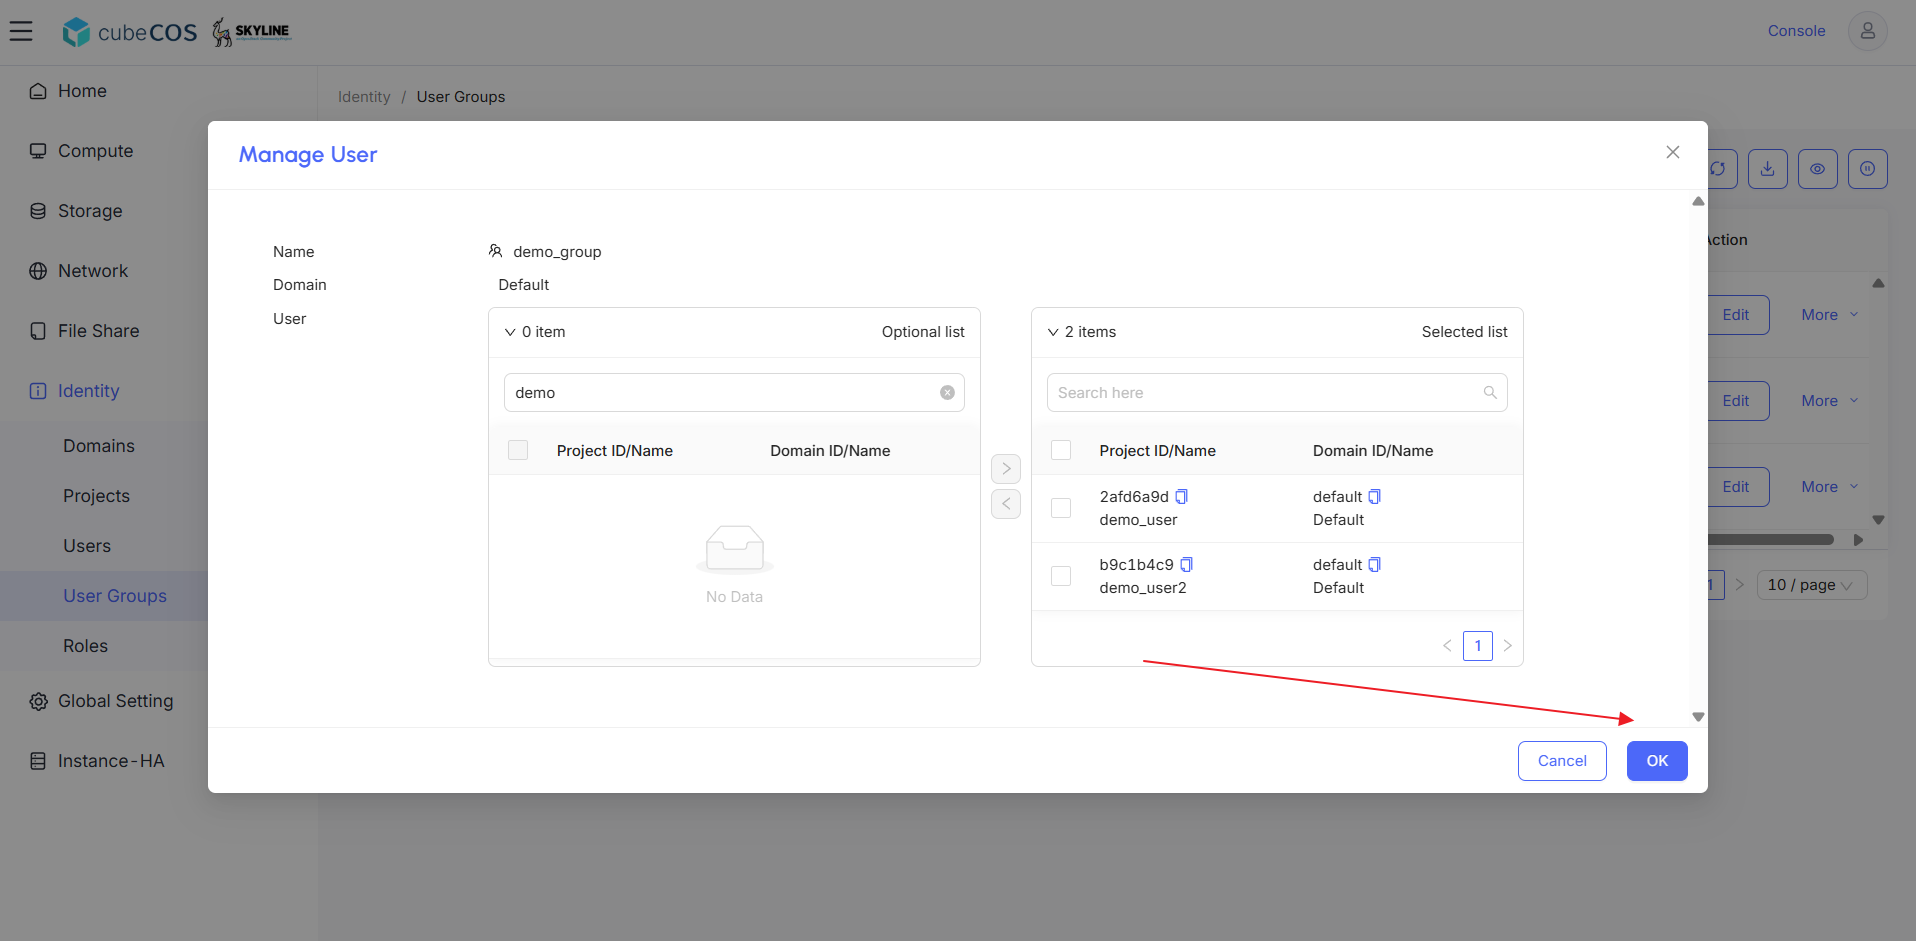
6. Verify users appear in the `Selected list`, click `OK` to apply.

   ![/assets/identity/create_group_local_5.png](/assets/identity/create_group_local_5.png)

7. Users are now added into the project. Next, assign and mange user permissions within a group.

## Assign and manage user permissions within local user groups {#assign-and-manage-user-permissions-within-local-user-groups}

1. Follow [1-Access the administration](./administrator-view.md) panel to enter the administrator view.
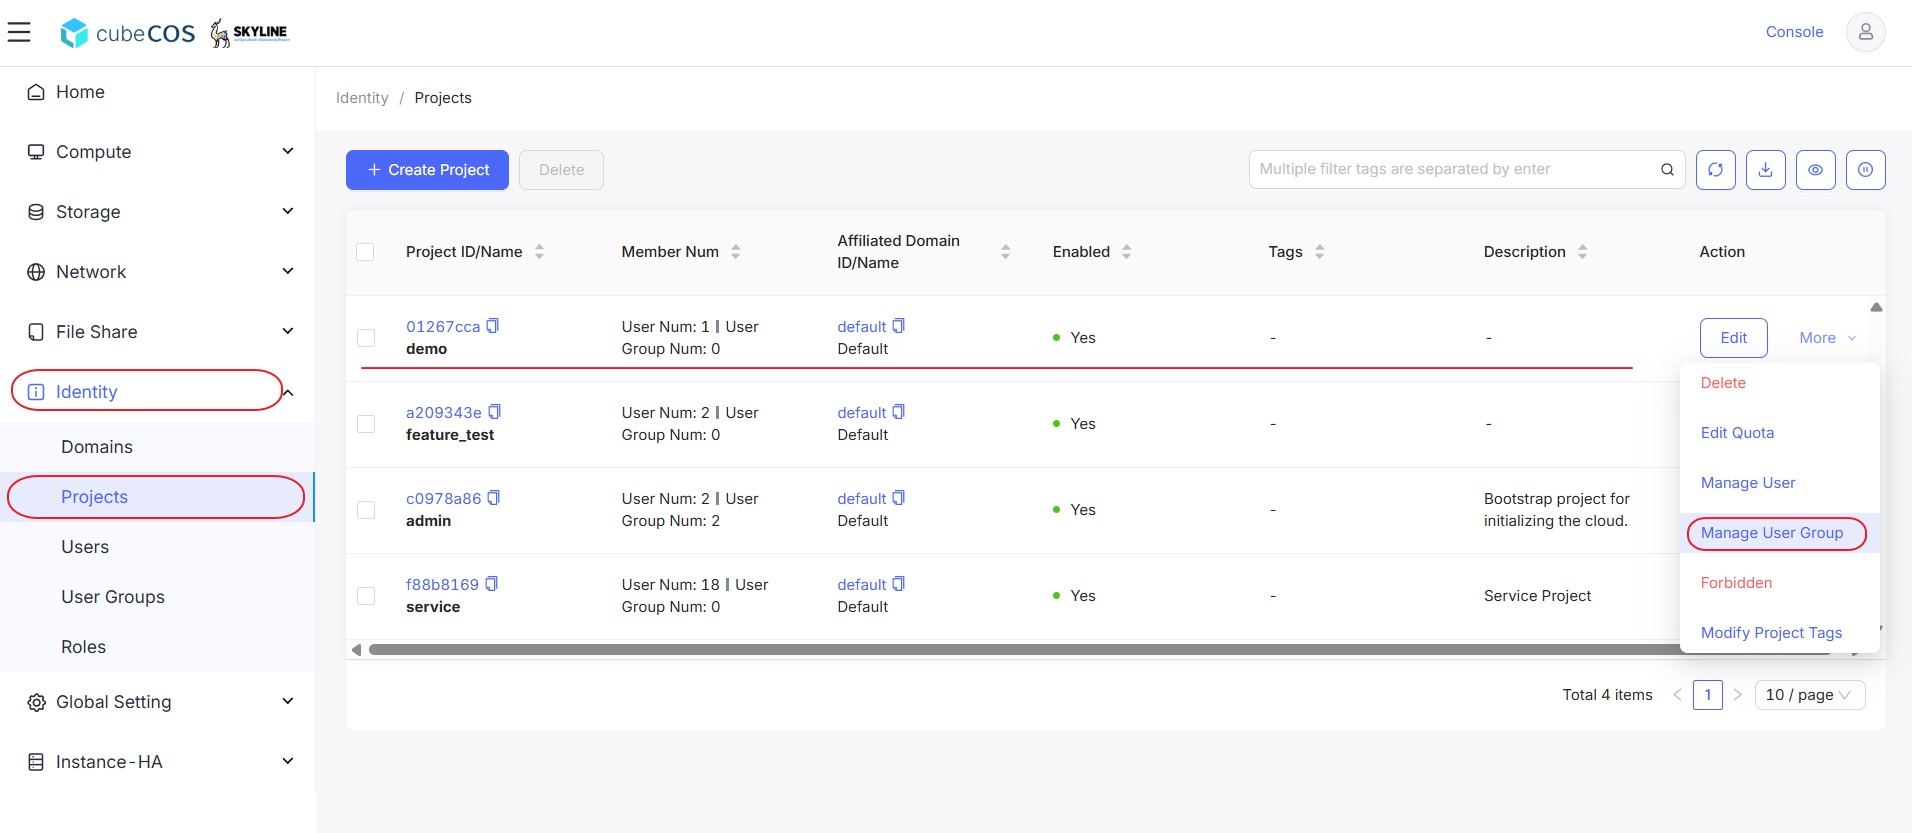
2. Navigate to `Identity > Projects`, choose the desired project, then click `More`. Select `Manage User Group` from the drop-down menu.

   ![/assets/identity/create_group_local_6.png](/assets/identity/create_group_local_6.png)

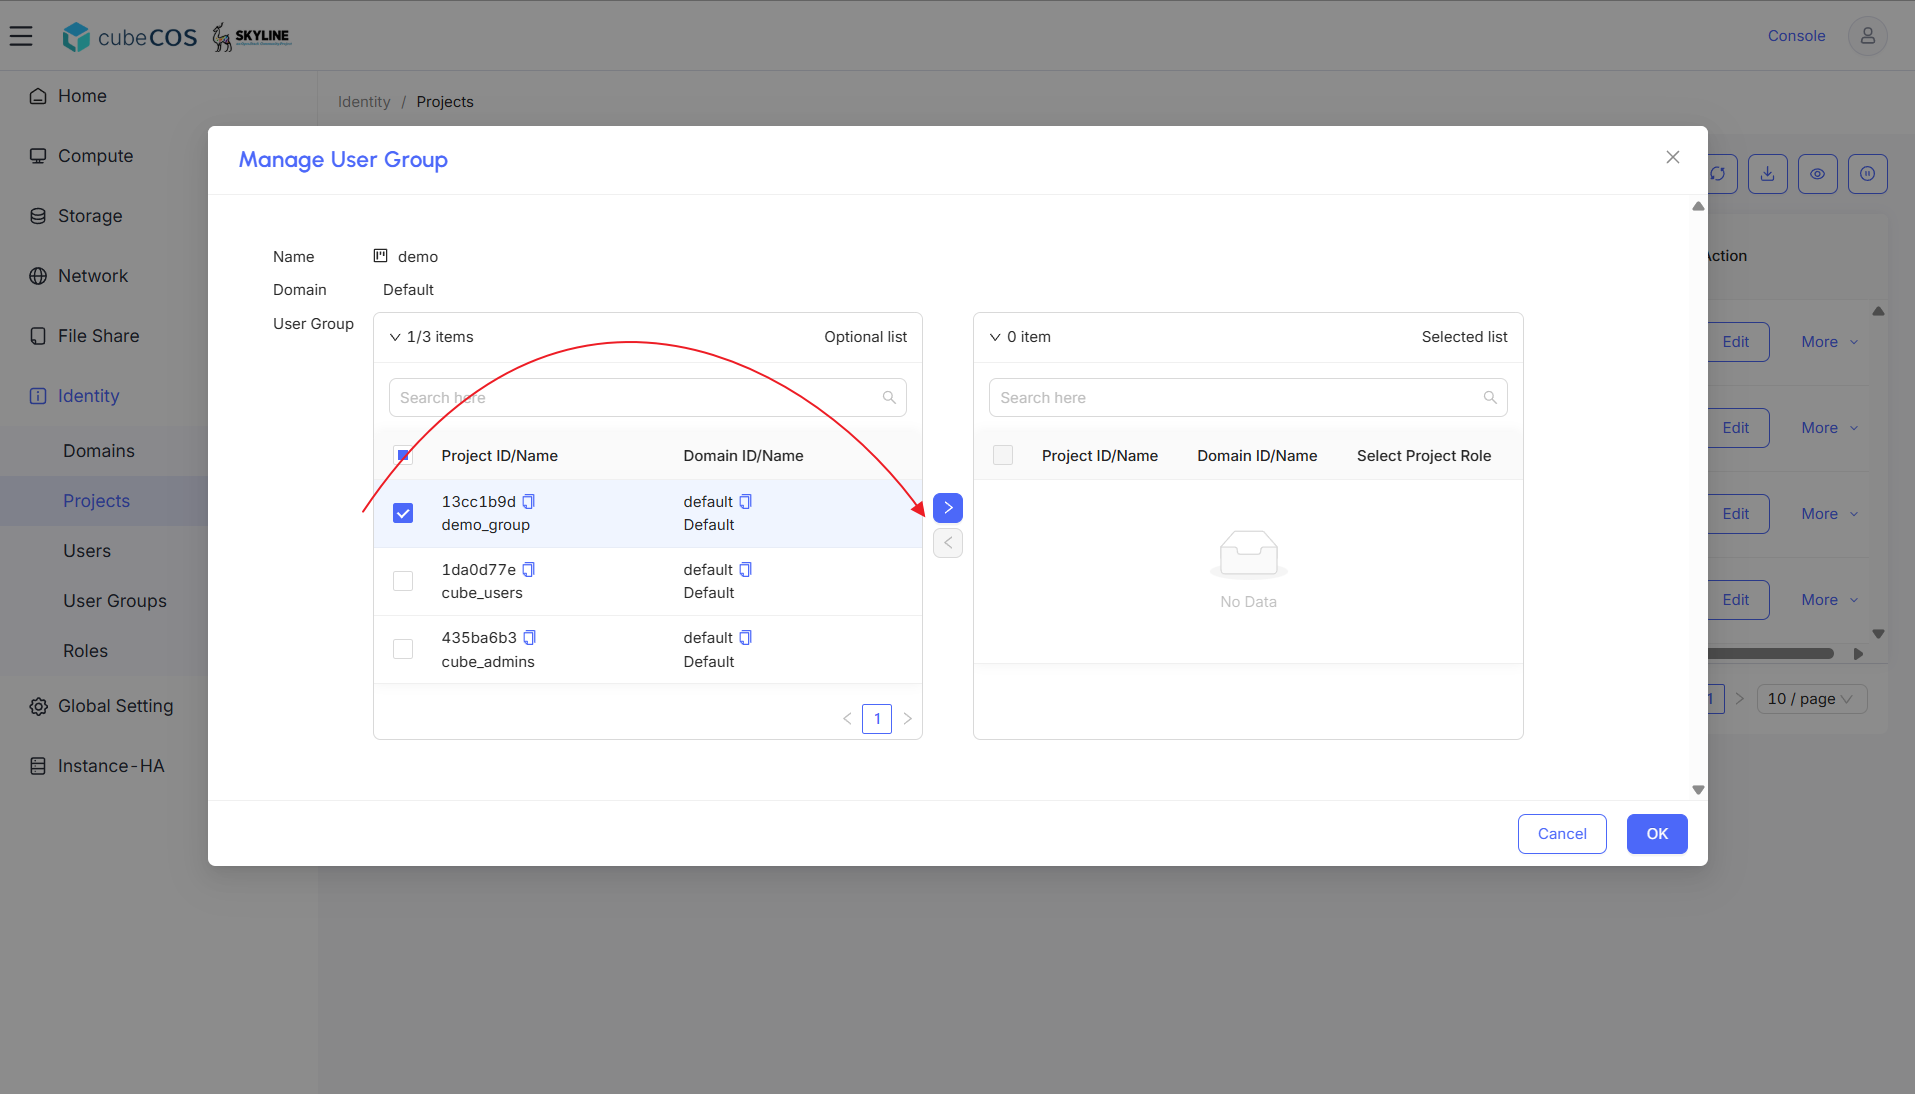
3. To add user groups, select them from the `Optional list` and click the `>` icon to move them to the `Selected list`.

   ![/assets/identity/create_group_local_7.png](/assets/identity/create_group_local_7.png)

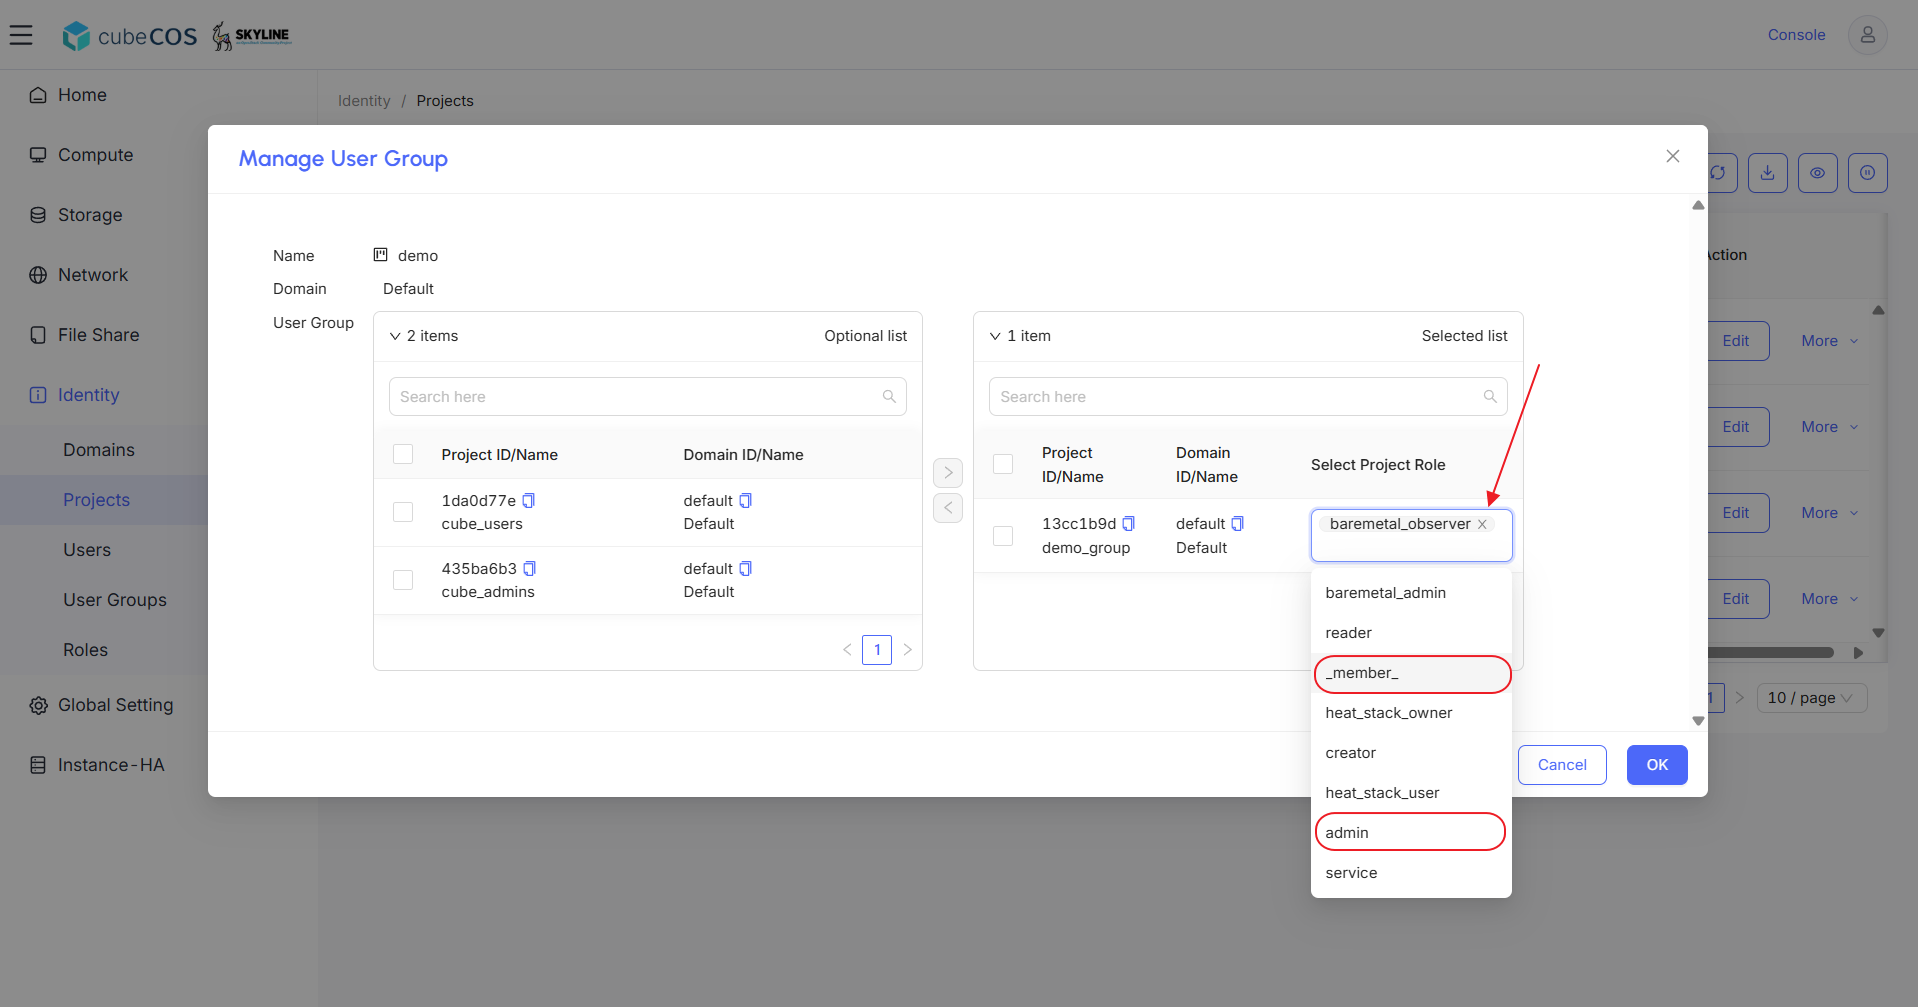
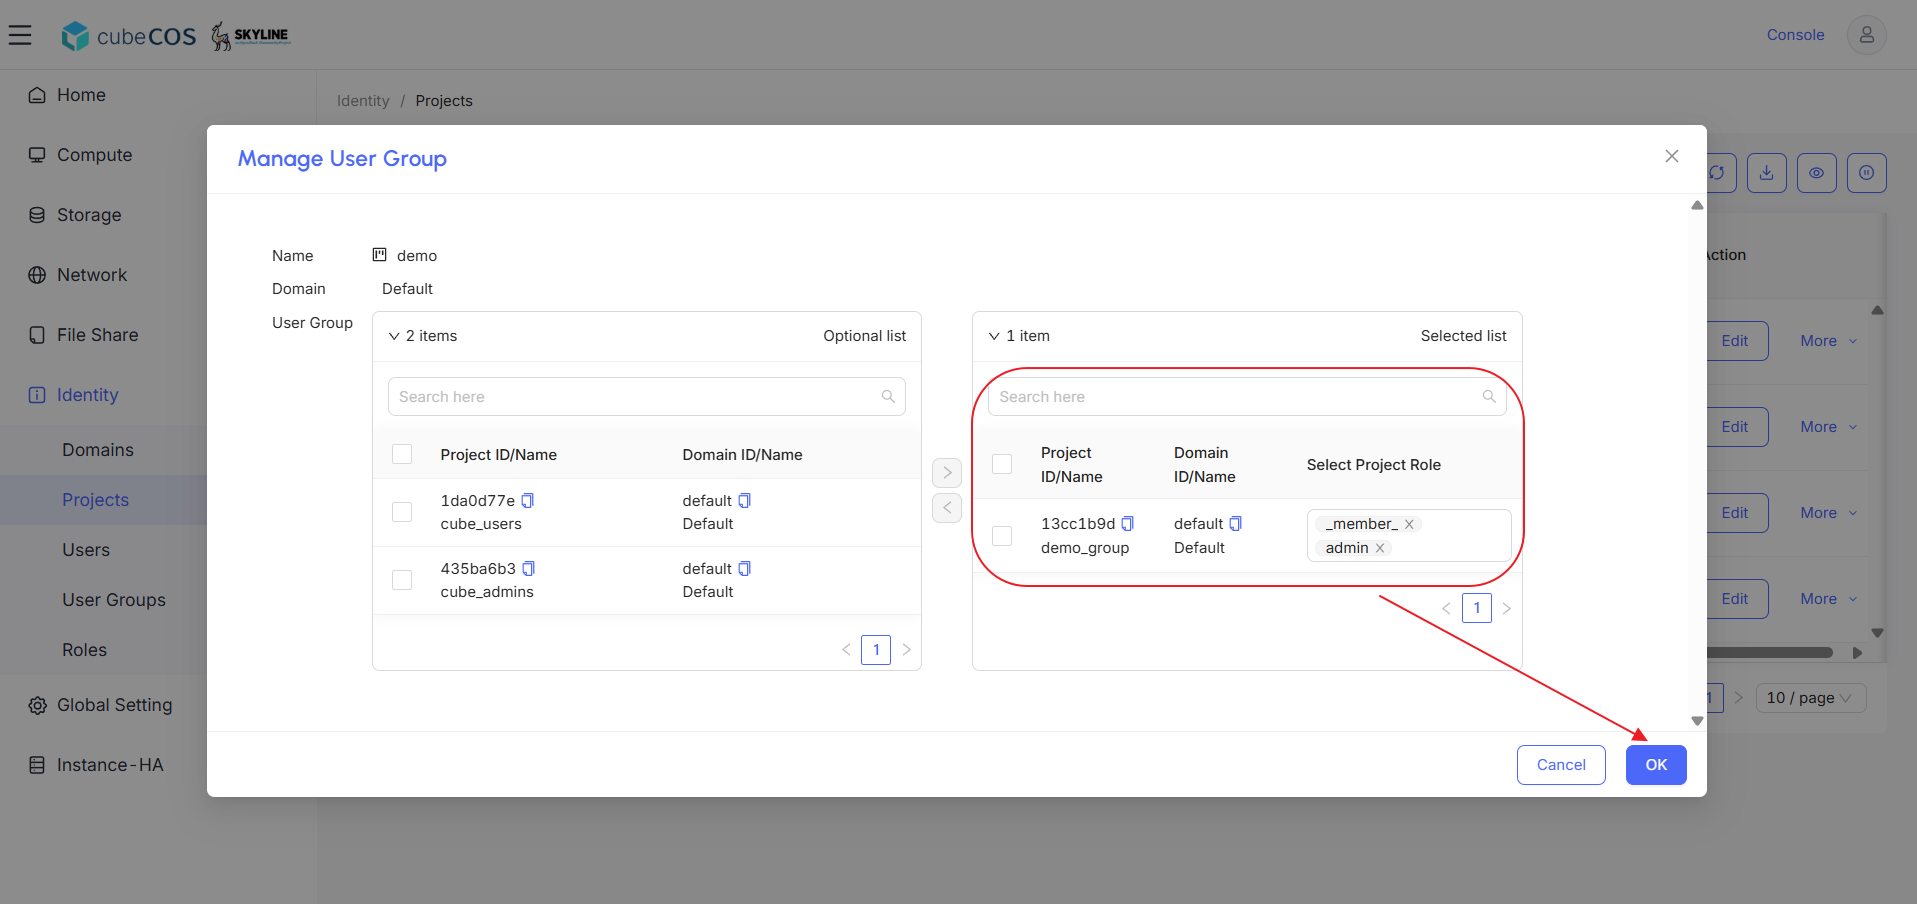
4. In the Selected list, assign `admin` and `_member_` Project Role privileges.

   ![/assets/identity/create_group_local_8.png](/assets/identity/create_group_local_8.png)

5. After modifying all Project Role privileges in the Selected list, click `OK` to apply.

   ![/assets/identity/create_group_local_9.png](/assets/identity/create_group_local_9.png)

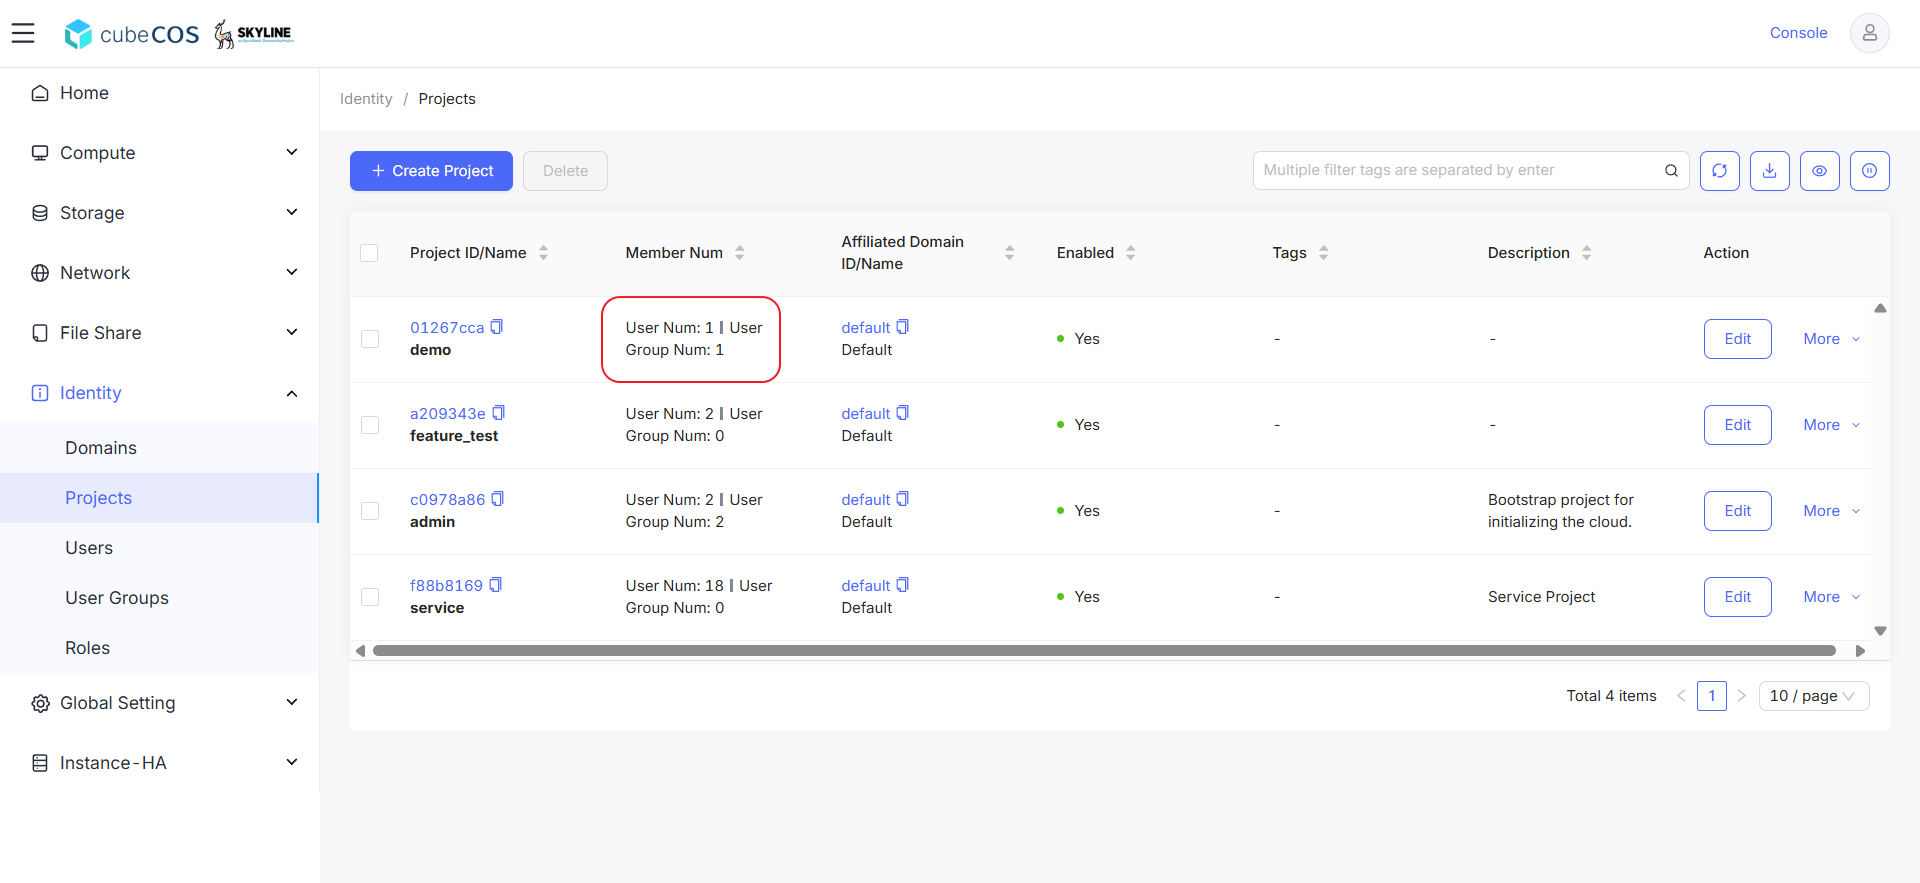
6. Check the Member Num column to verify the application.

   ![/assets/identity/create_group_local_10.png](/assets/identity/create_group_local_10.png)