# Enable communication between two private networks by configuring a static route

> <!--
   link :
      ../compute/novnc_console.md
-->

<!--
   link :
      ../compute/novnc_console.md
-->

In CubeCOS, a static route is a manually defined routing rule used to direct traffic from one network to another through a specified next-hop IP address.

## The network topology {#the-network-topology}

The sample network topology includes two distinct subnets:

1. Subnet 10
   1. Subnet address: `192.168.10.0/24`
   2. Subnet router: `pri_10_to_pvd`
   3. Subnet gateway (IP of external network): `172.16.3.201`
2. Subnet 20
   1. Subnet address: `192.168.20.0/24`
   2. Subnet router: `pri_20_to_pvd`
   3. Subnet gateway (IP of external network): `172.16.3.123`

### Topology of the current enviroment {#topology-of-the-current-enviroment}

```bash
   VM[192.168.10.30]──Network[192.168.10.0/24]──Router[pri_10_to_pvd]
                                 |
                                 |  GW: 172.16.3.201
                                 |
                              (External Link)
                                 |
                                 |  GW: 172.16.3.123
                                 |
   VM[192.168.20.30]──Network[192.168.20.0/24]──Router[pri_20_to_pvd]
```

## Configuring static routes to connect the two subnets {#configuring-static-routes-to-connect-the-two-subnets}

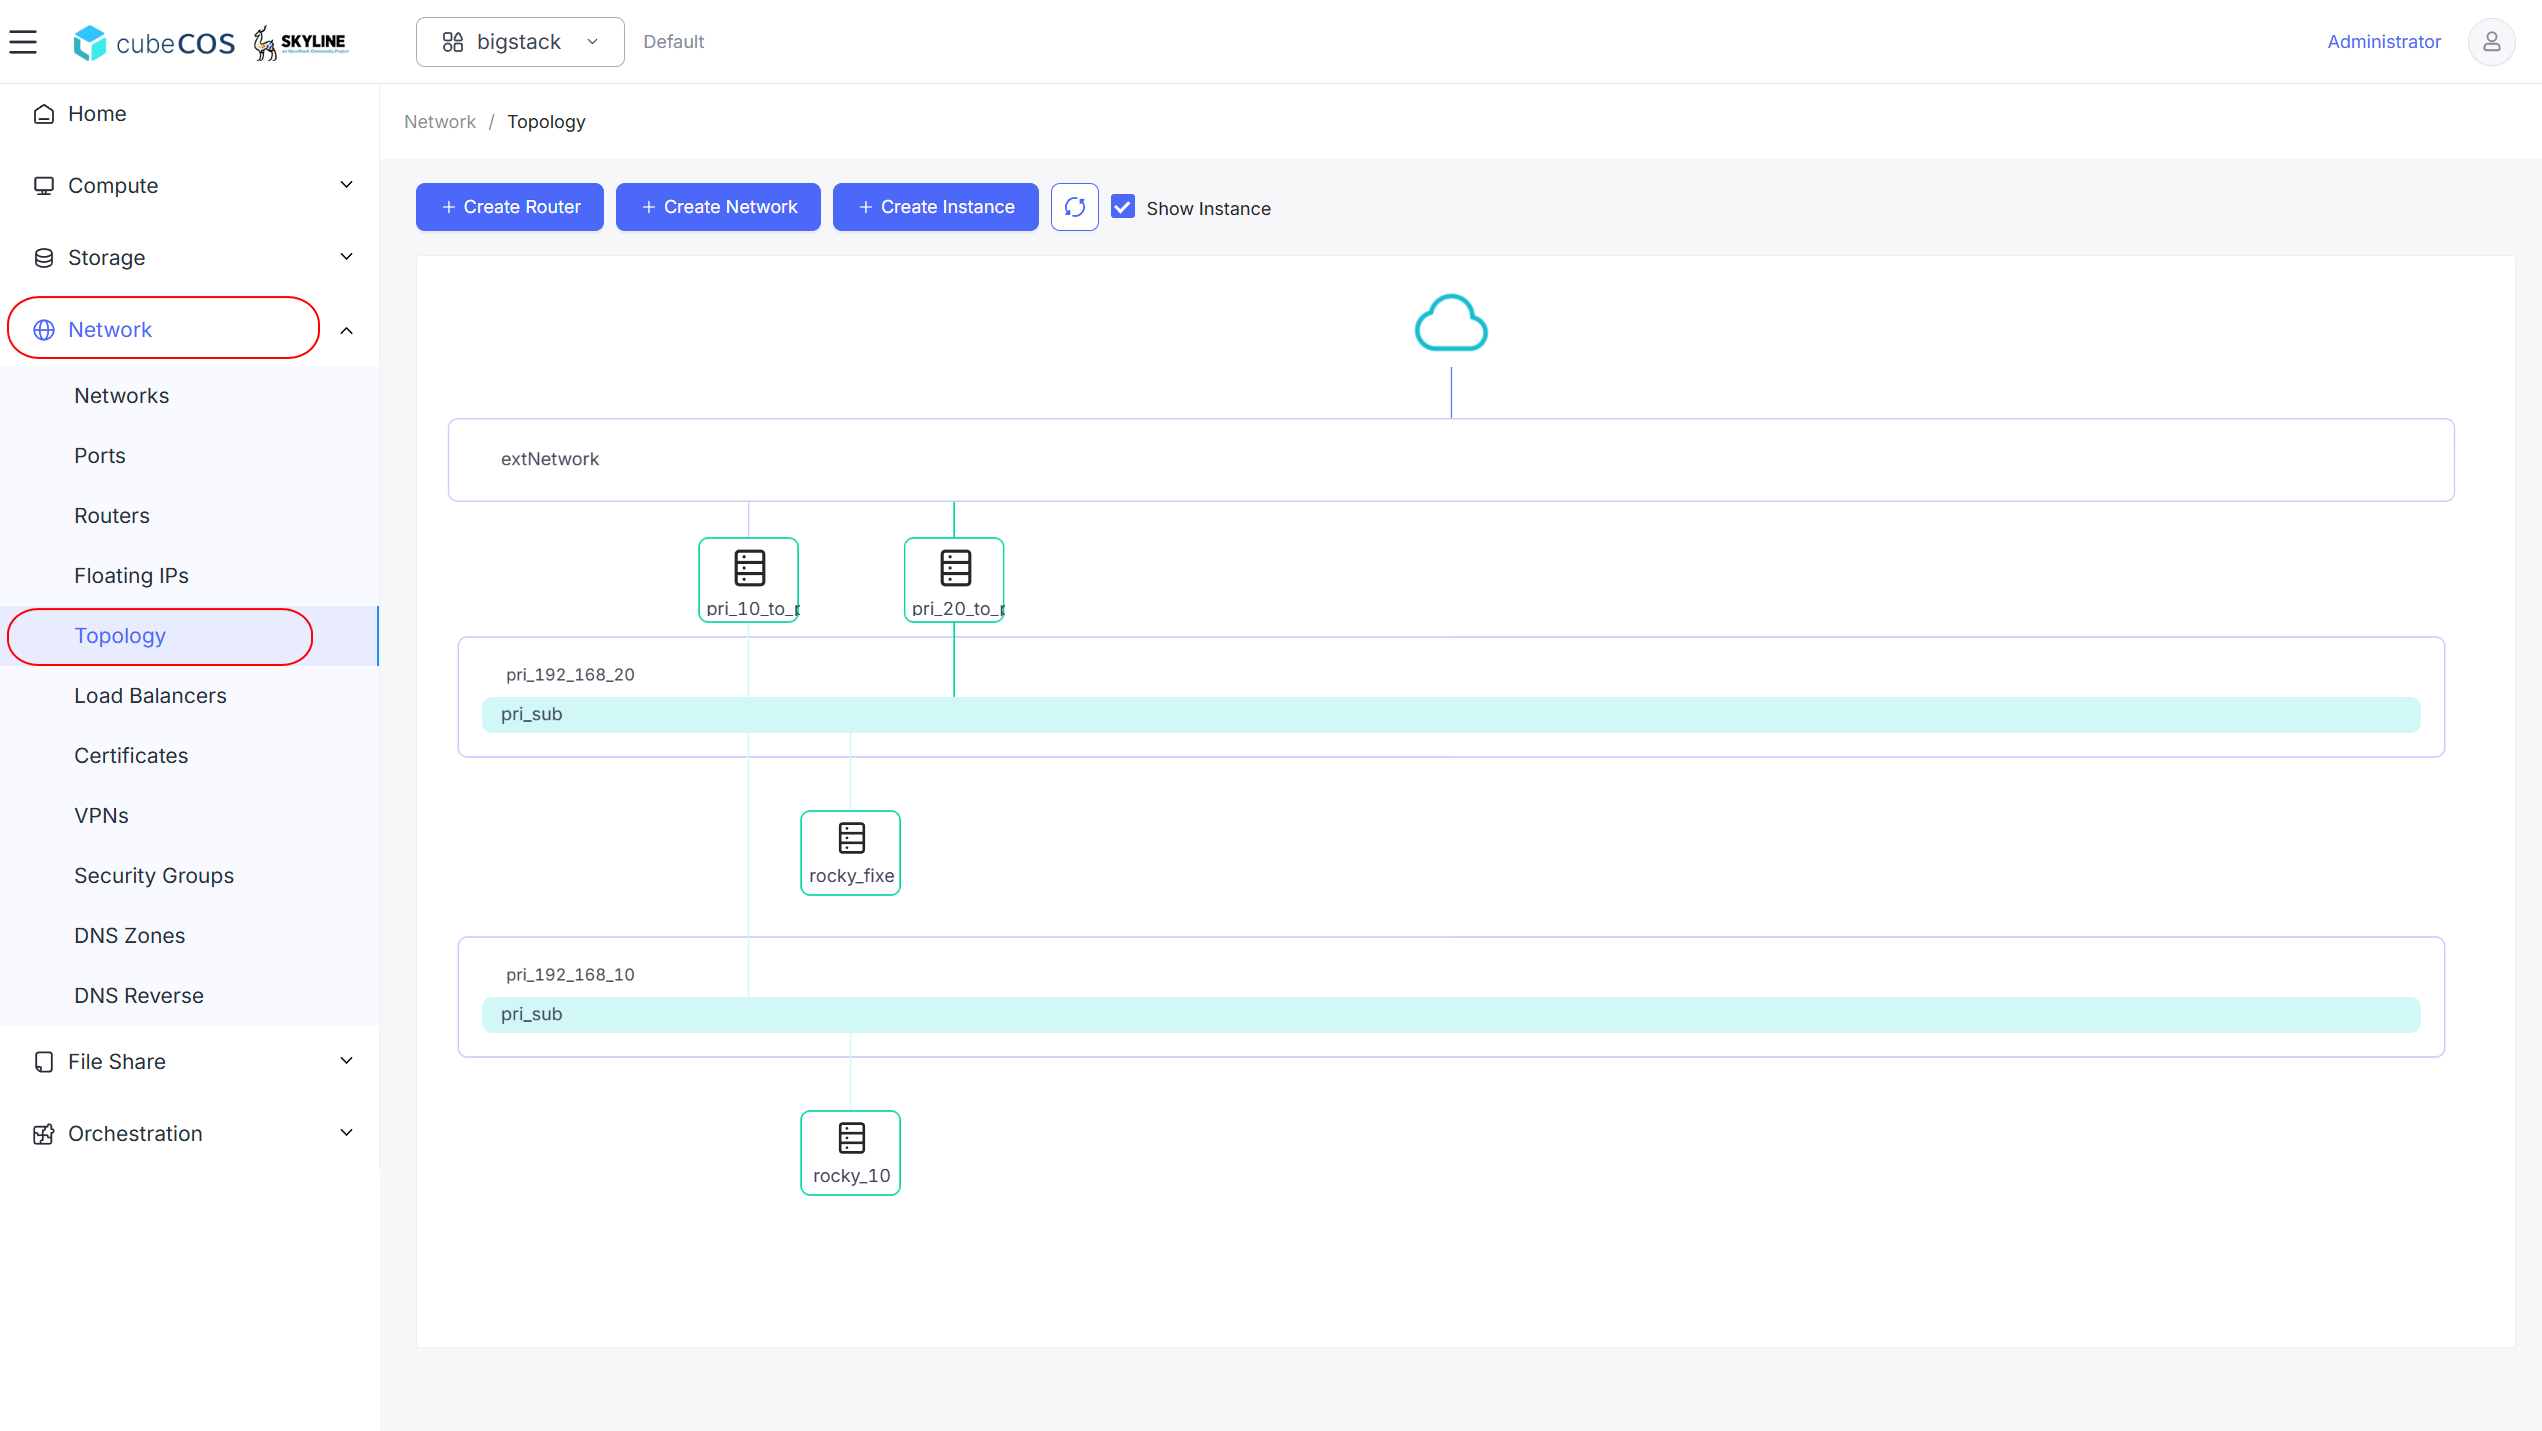
1. Navigate to `Project > Network > Topology`.

   ![/assets/network/static_route_1.png](/assets/network/static_route_1.png)

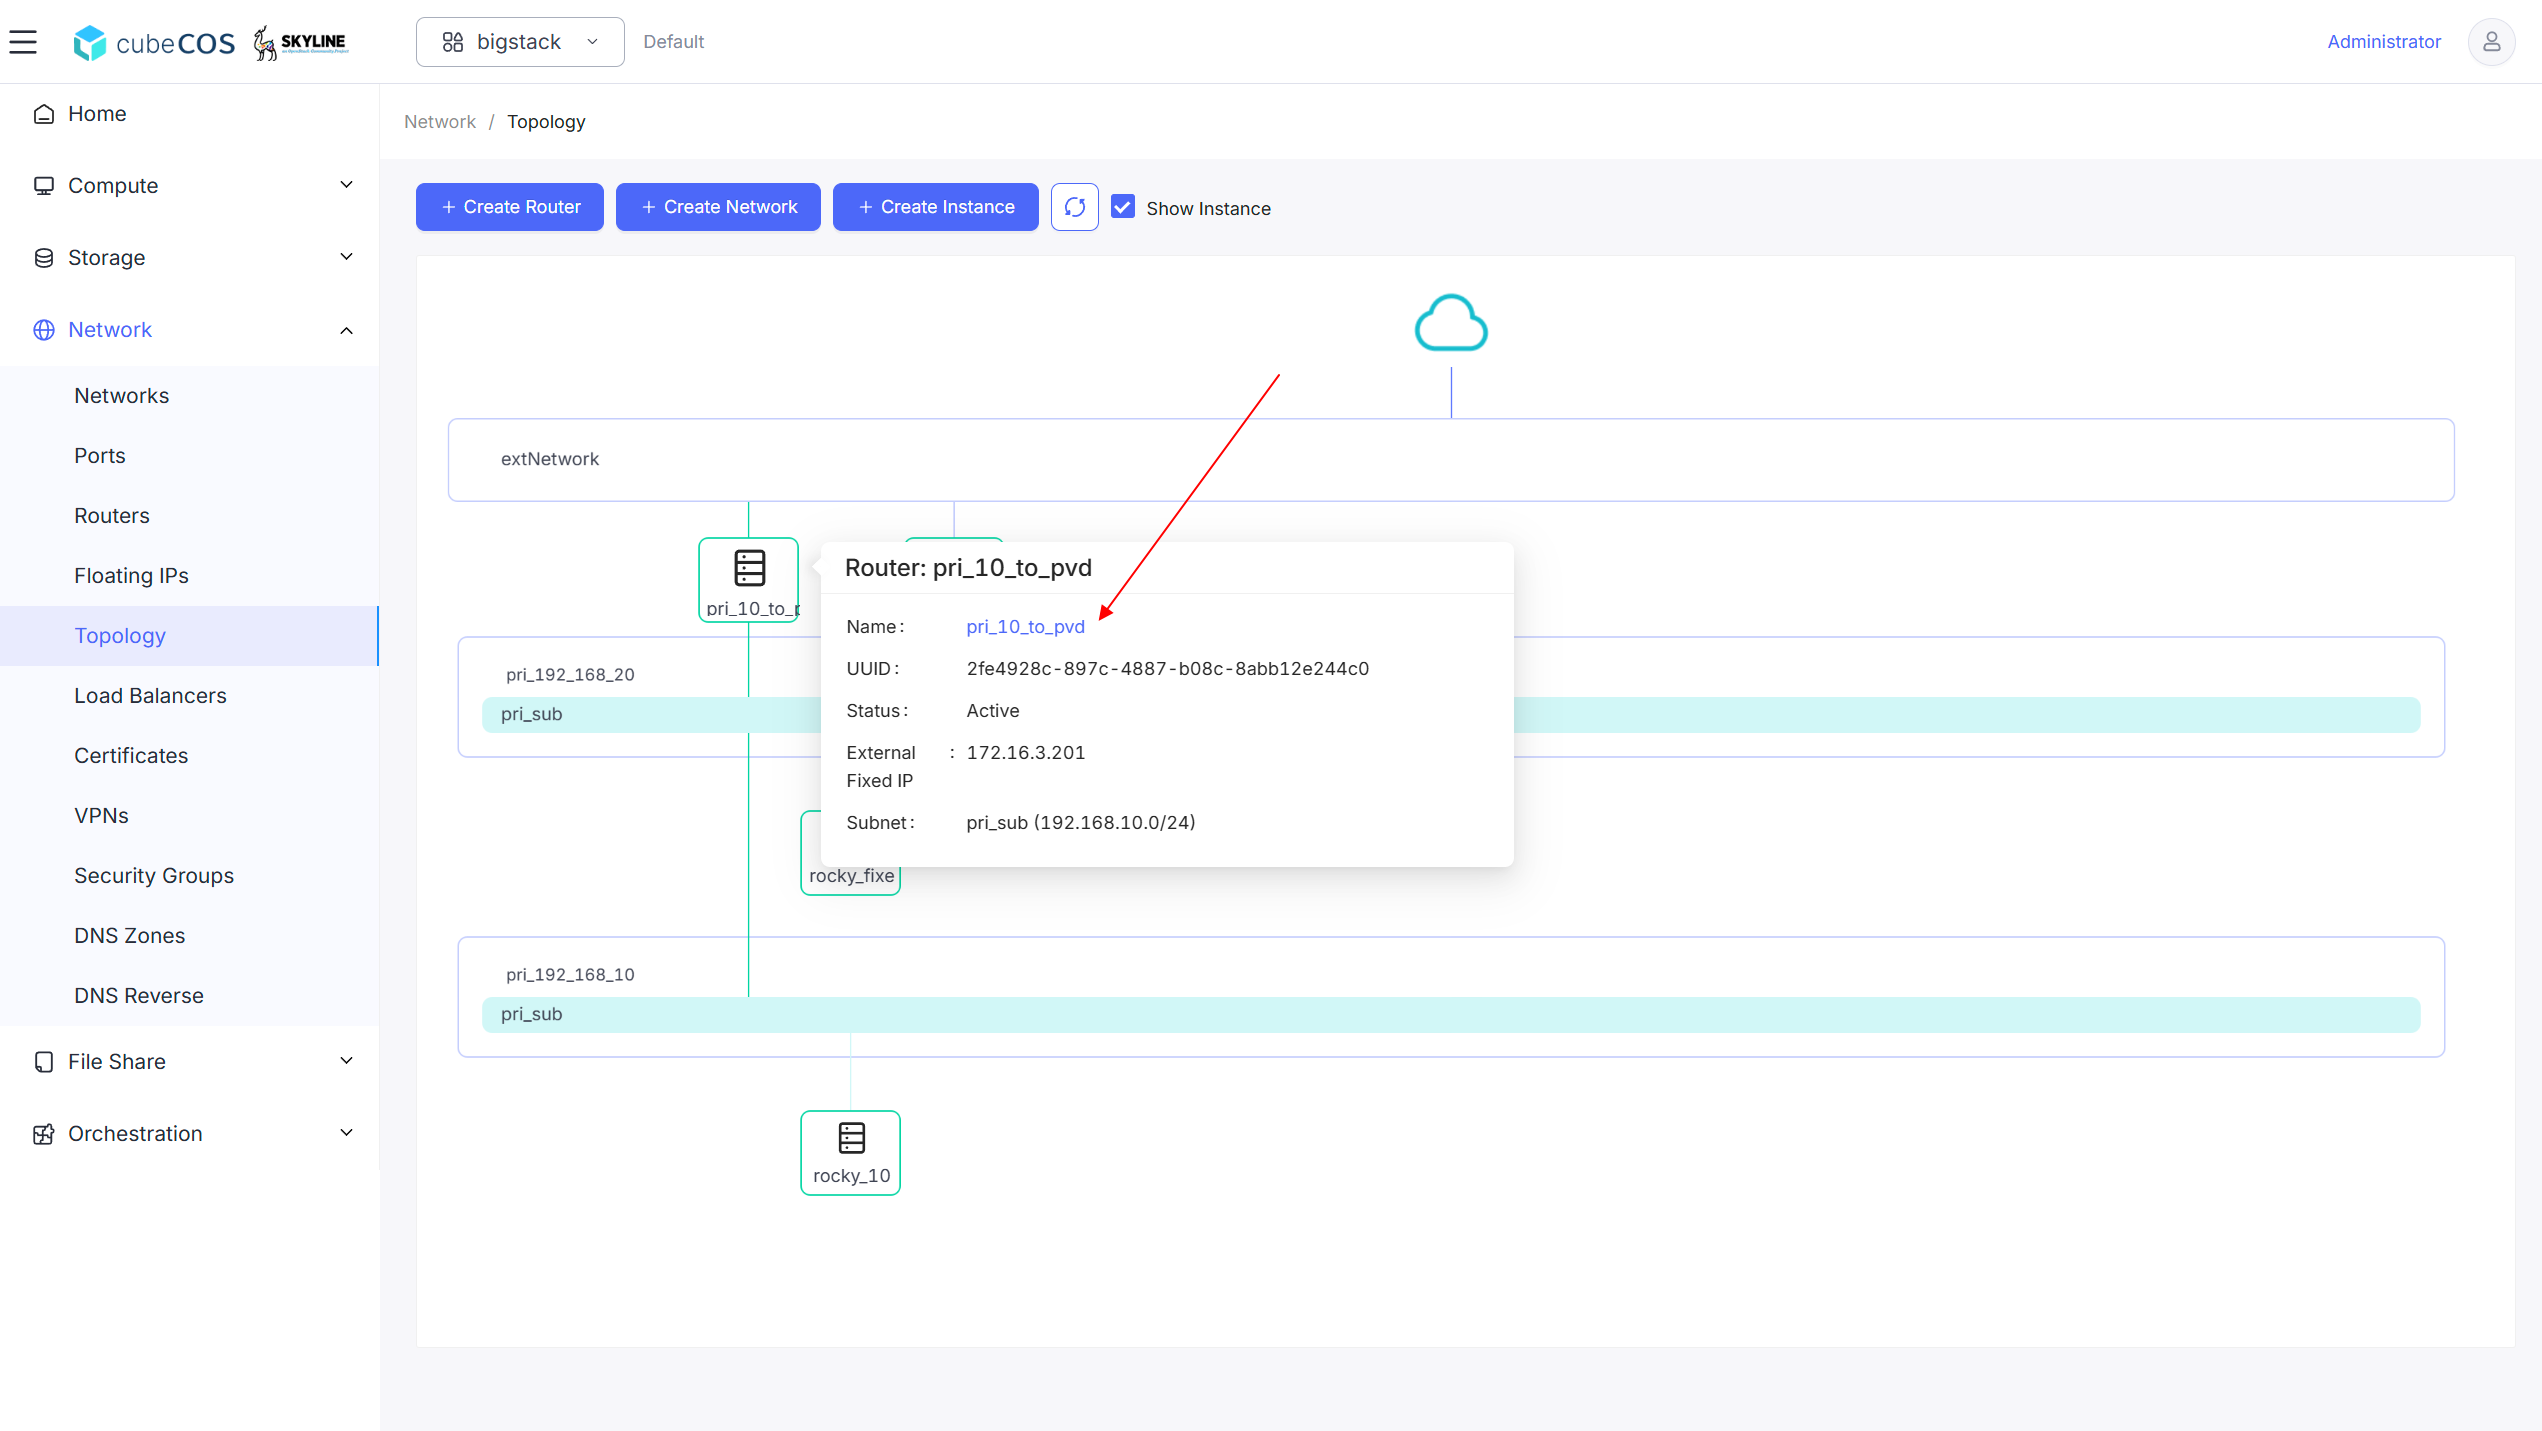
2. Click the name of the router.

   ![/assets/network/static_route_2.png](/assets/network/static_route_2.png)

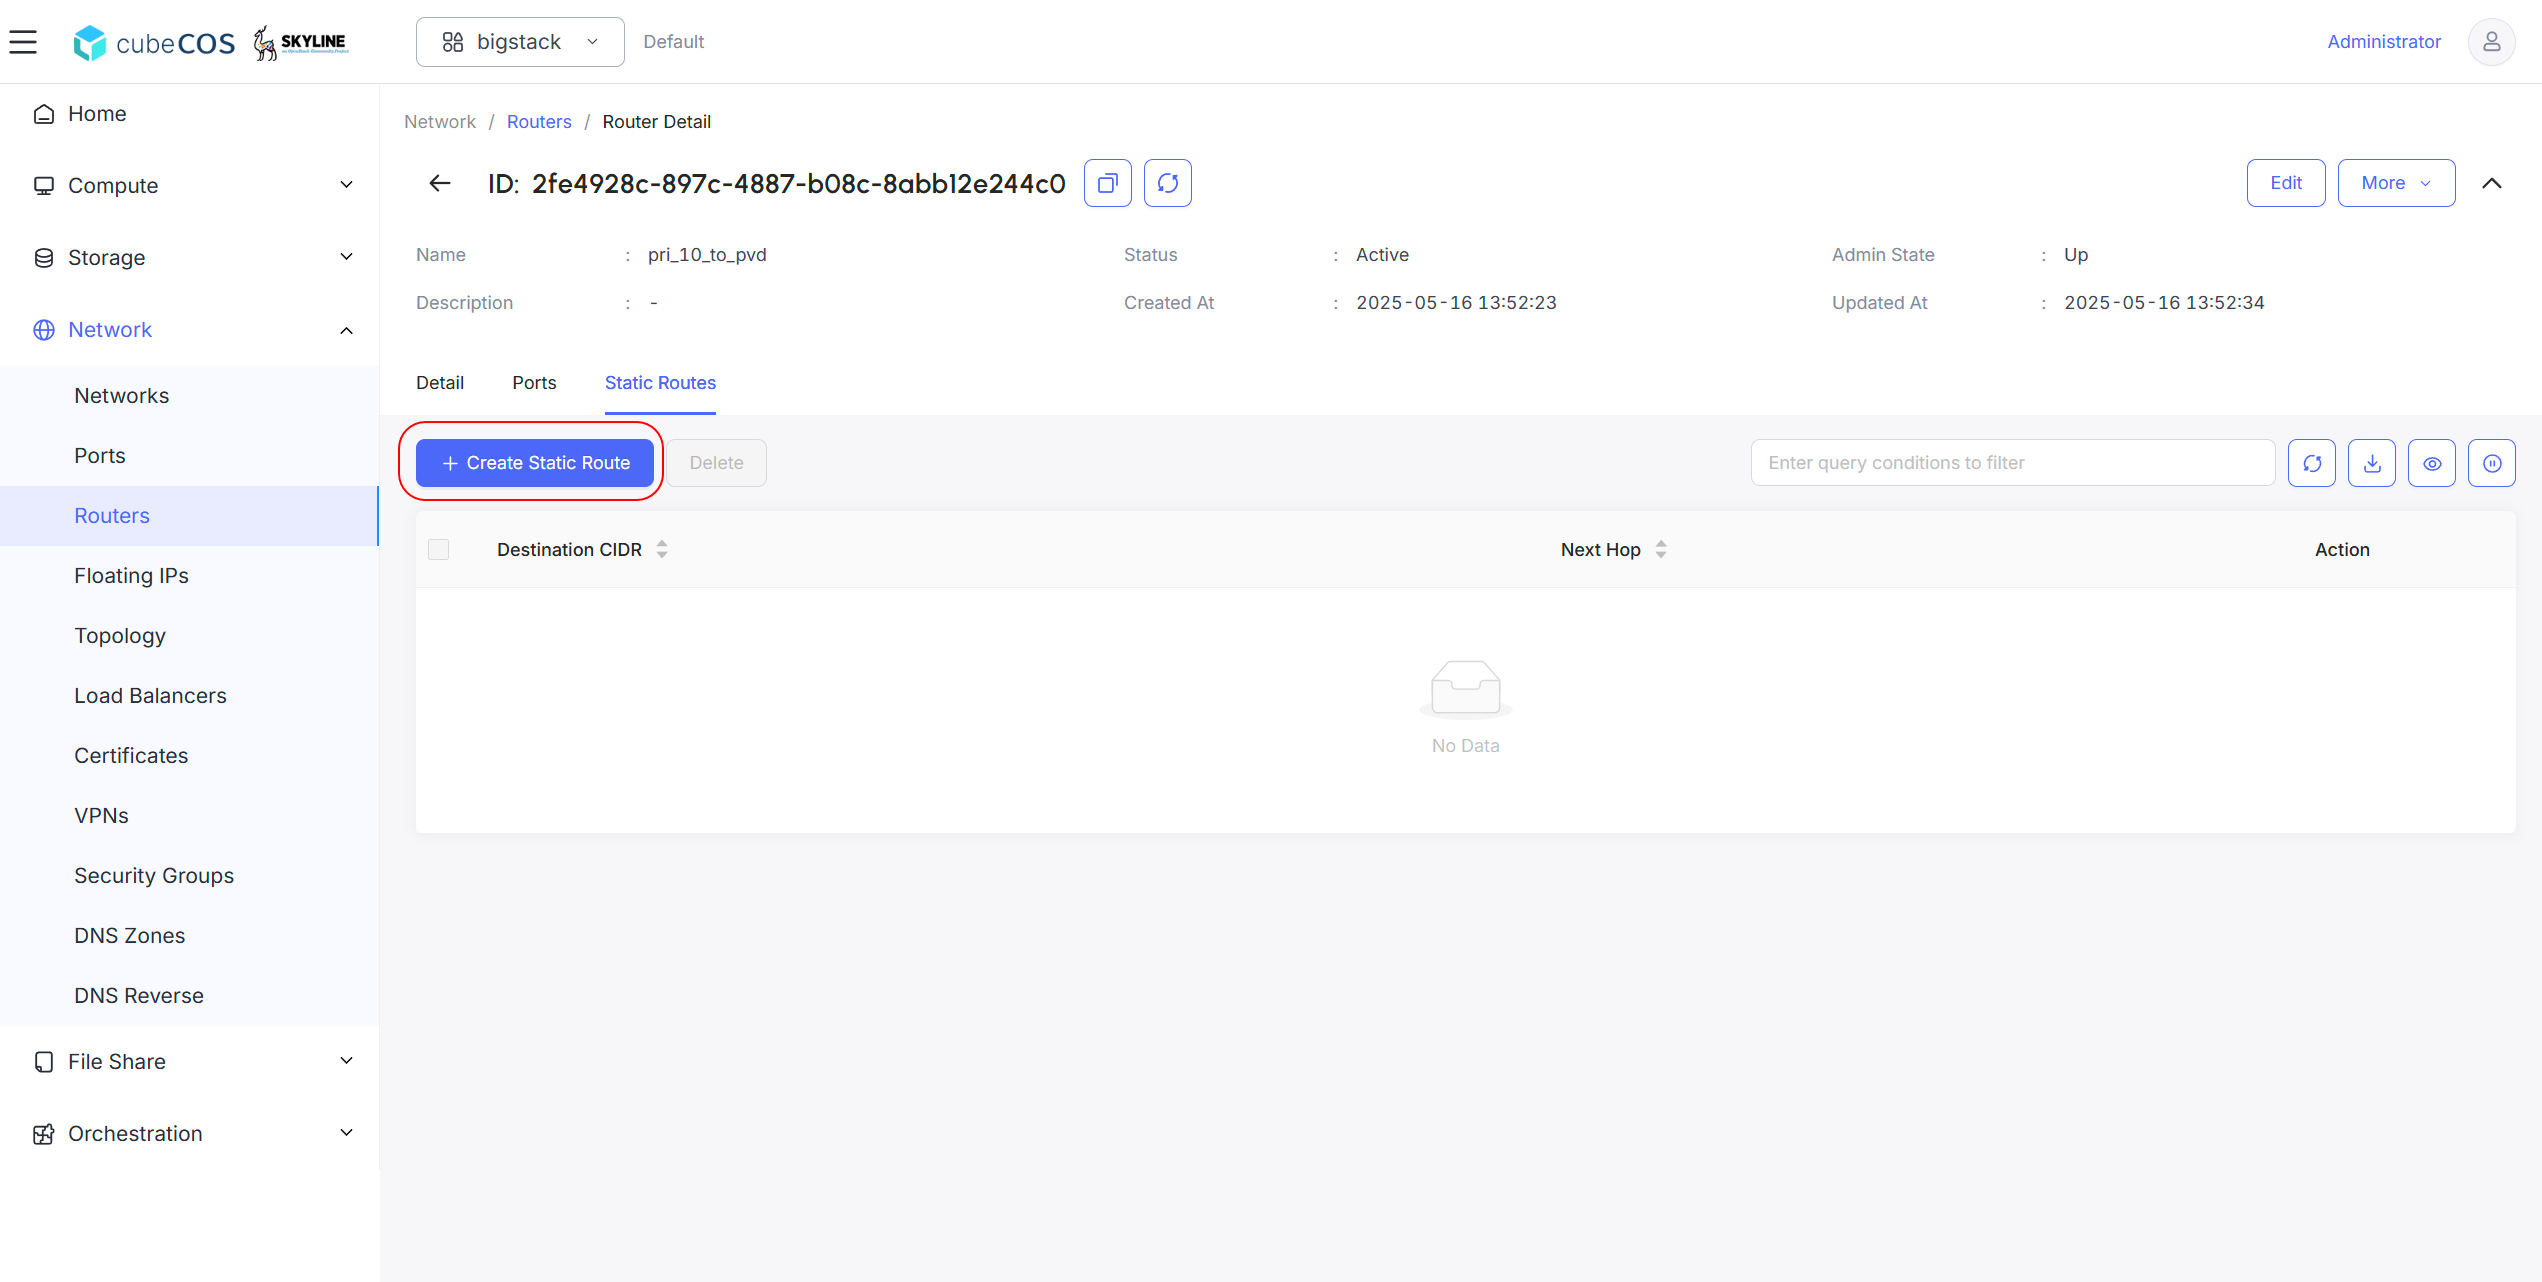
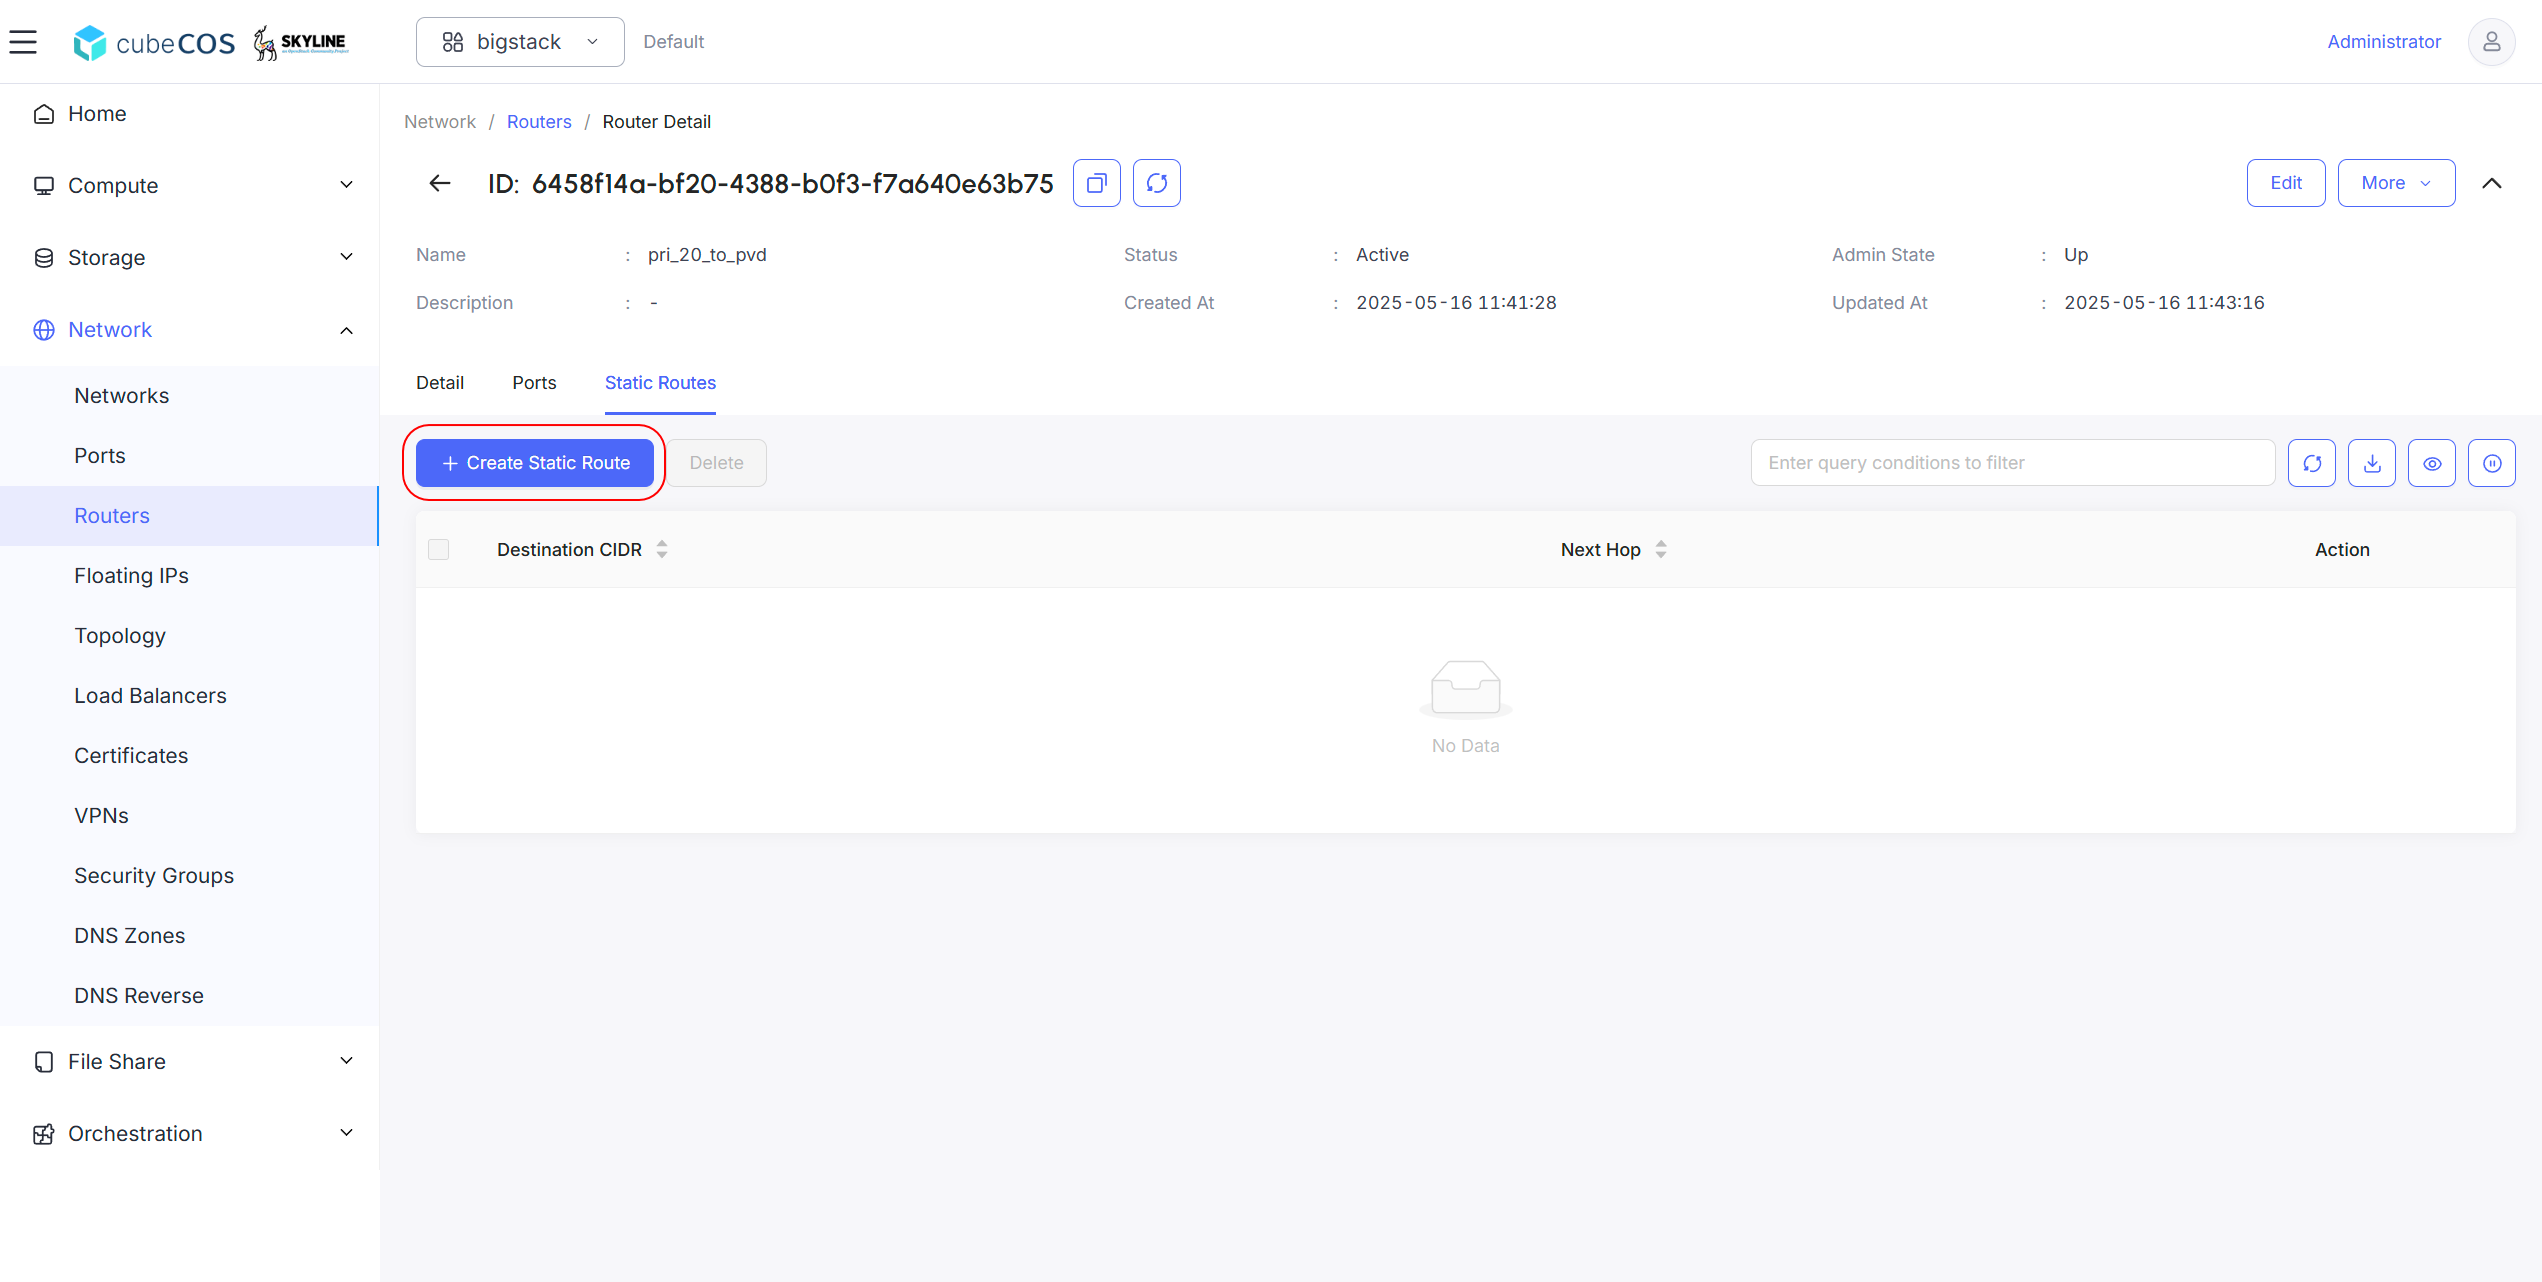
3. Click `Static Routes` on the banner, then click `+ Create Static Route`.

   ![/assets/network/static_route_3.png](/assets/network/static_route_3.png)

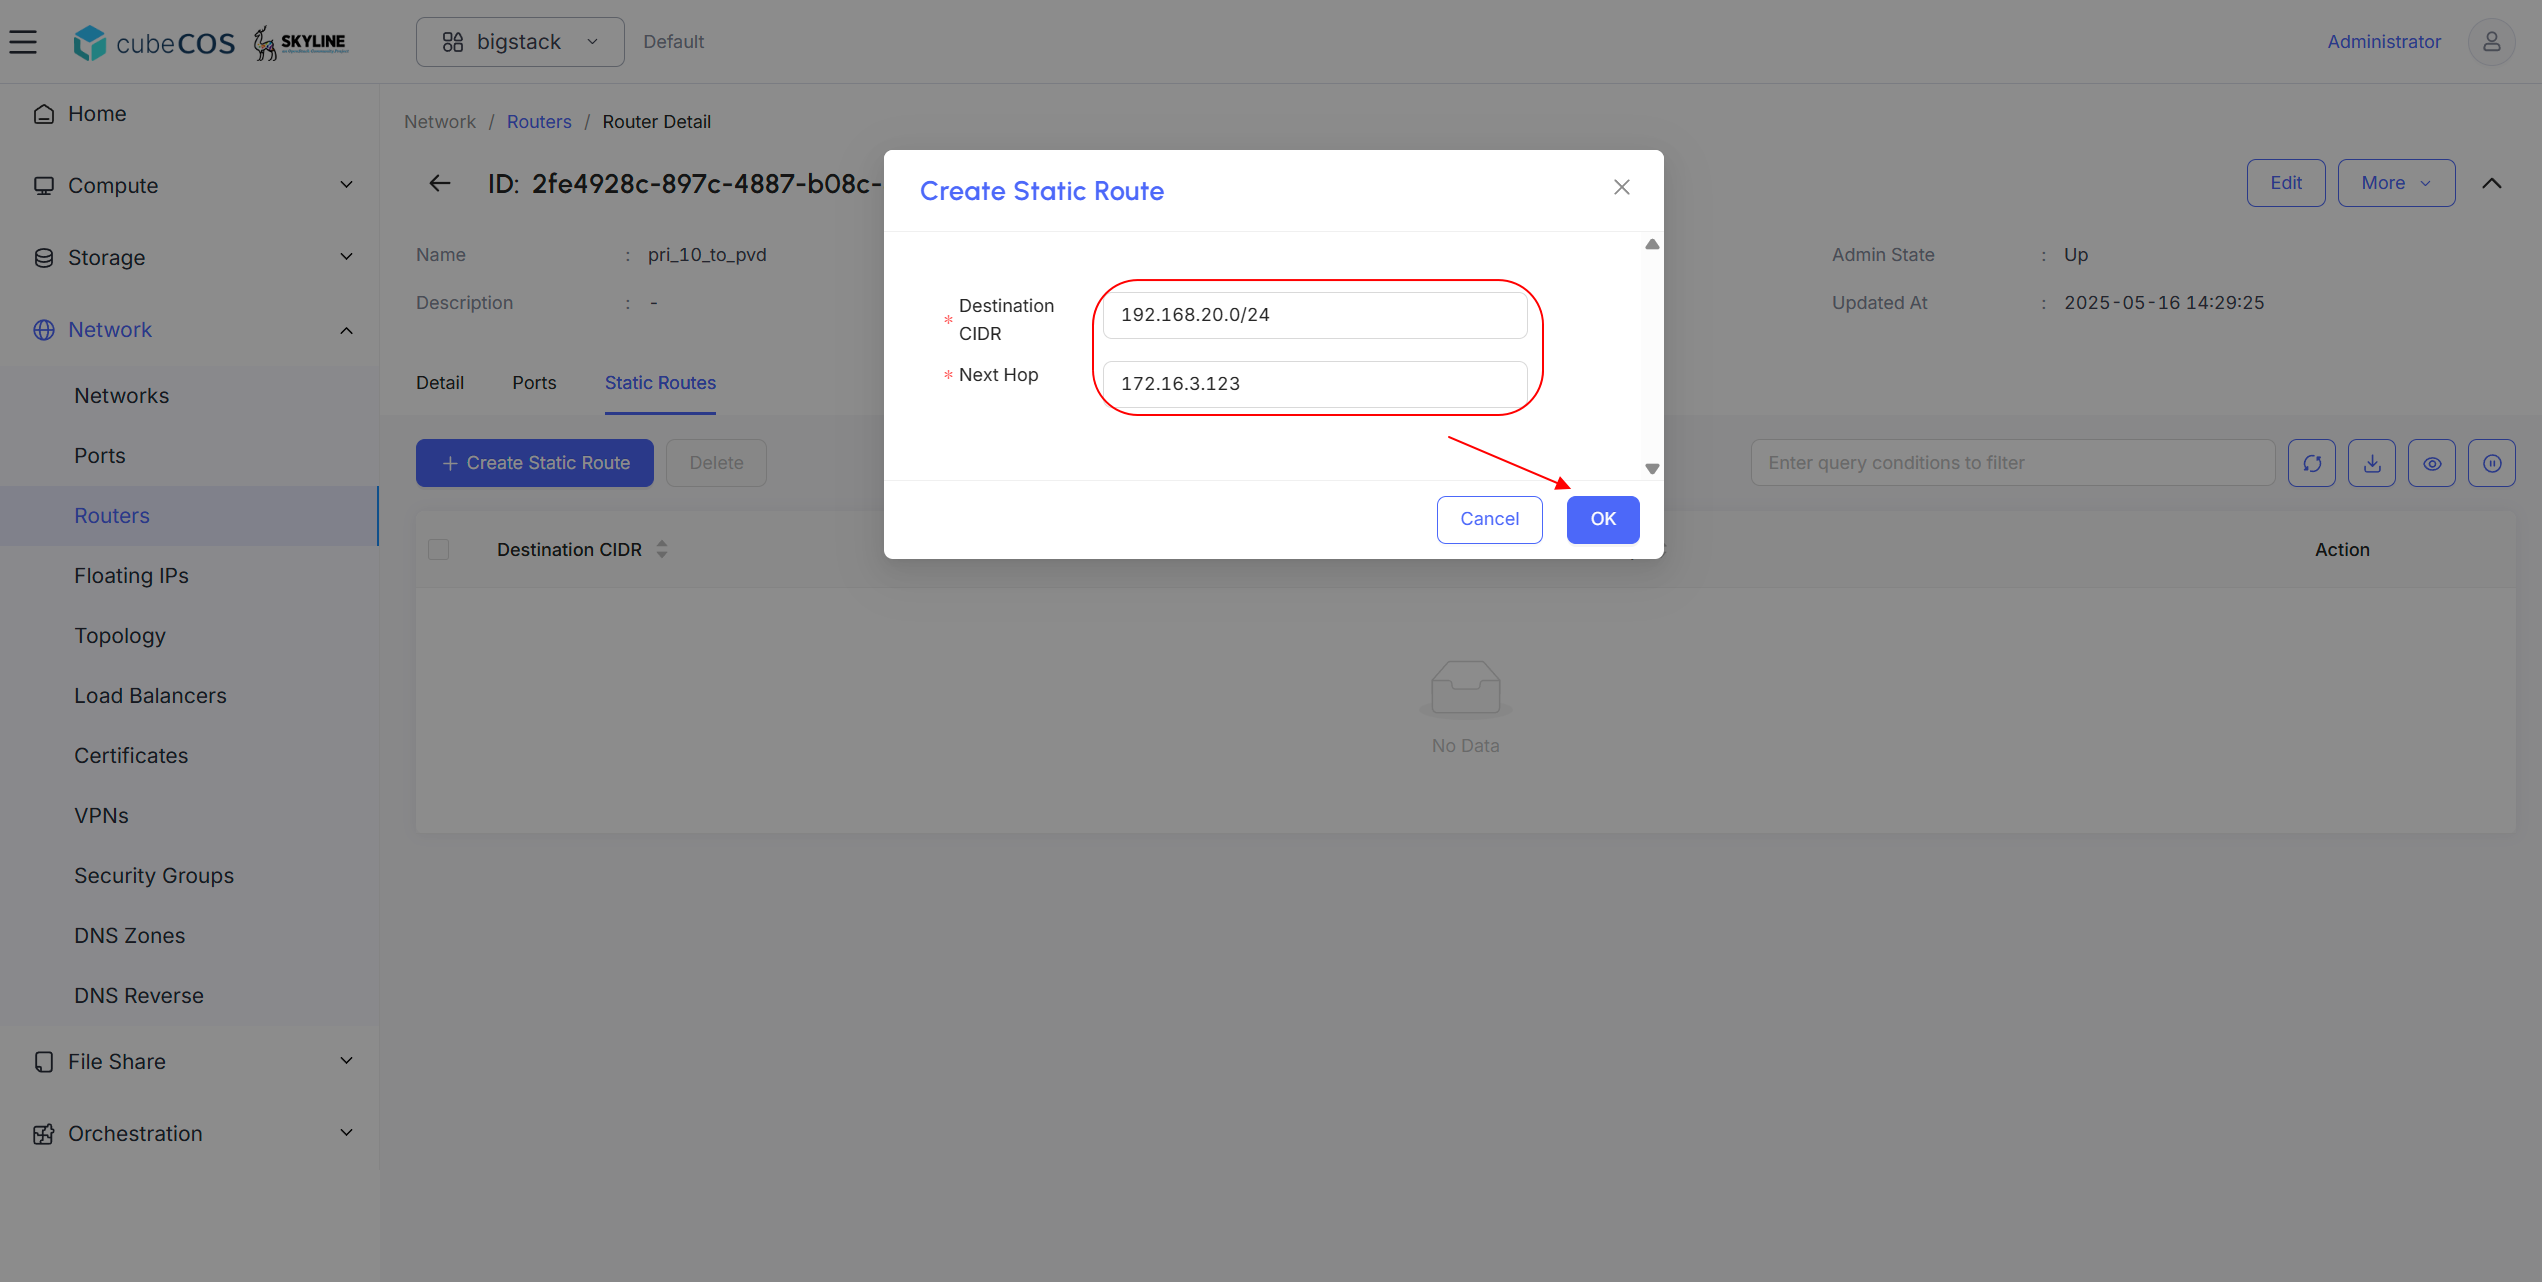
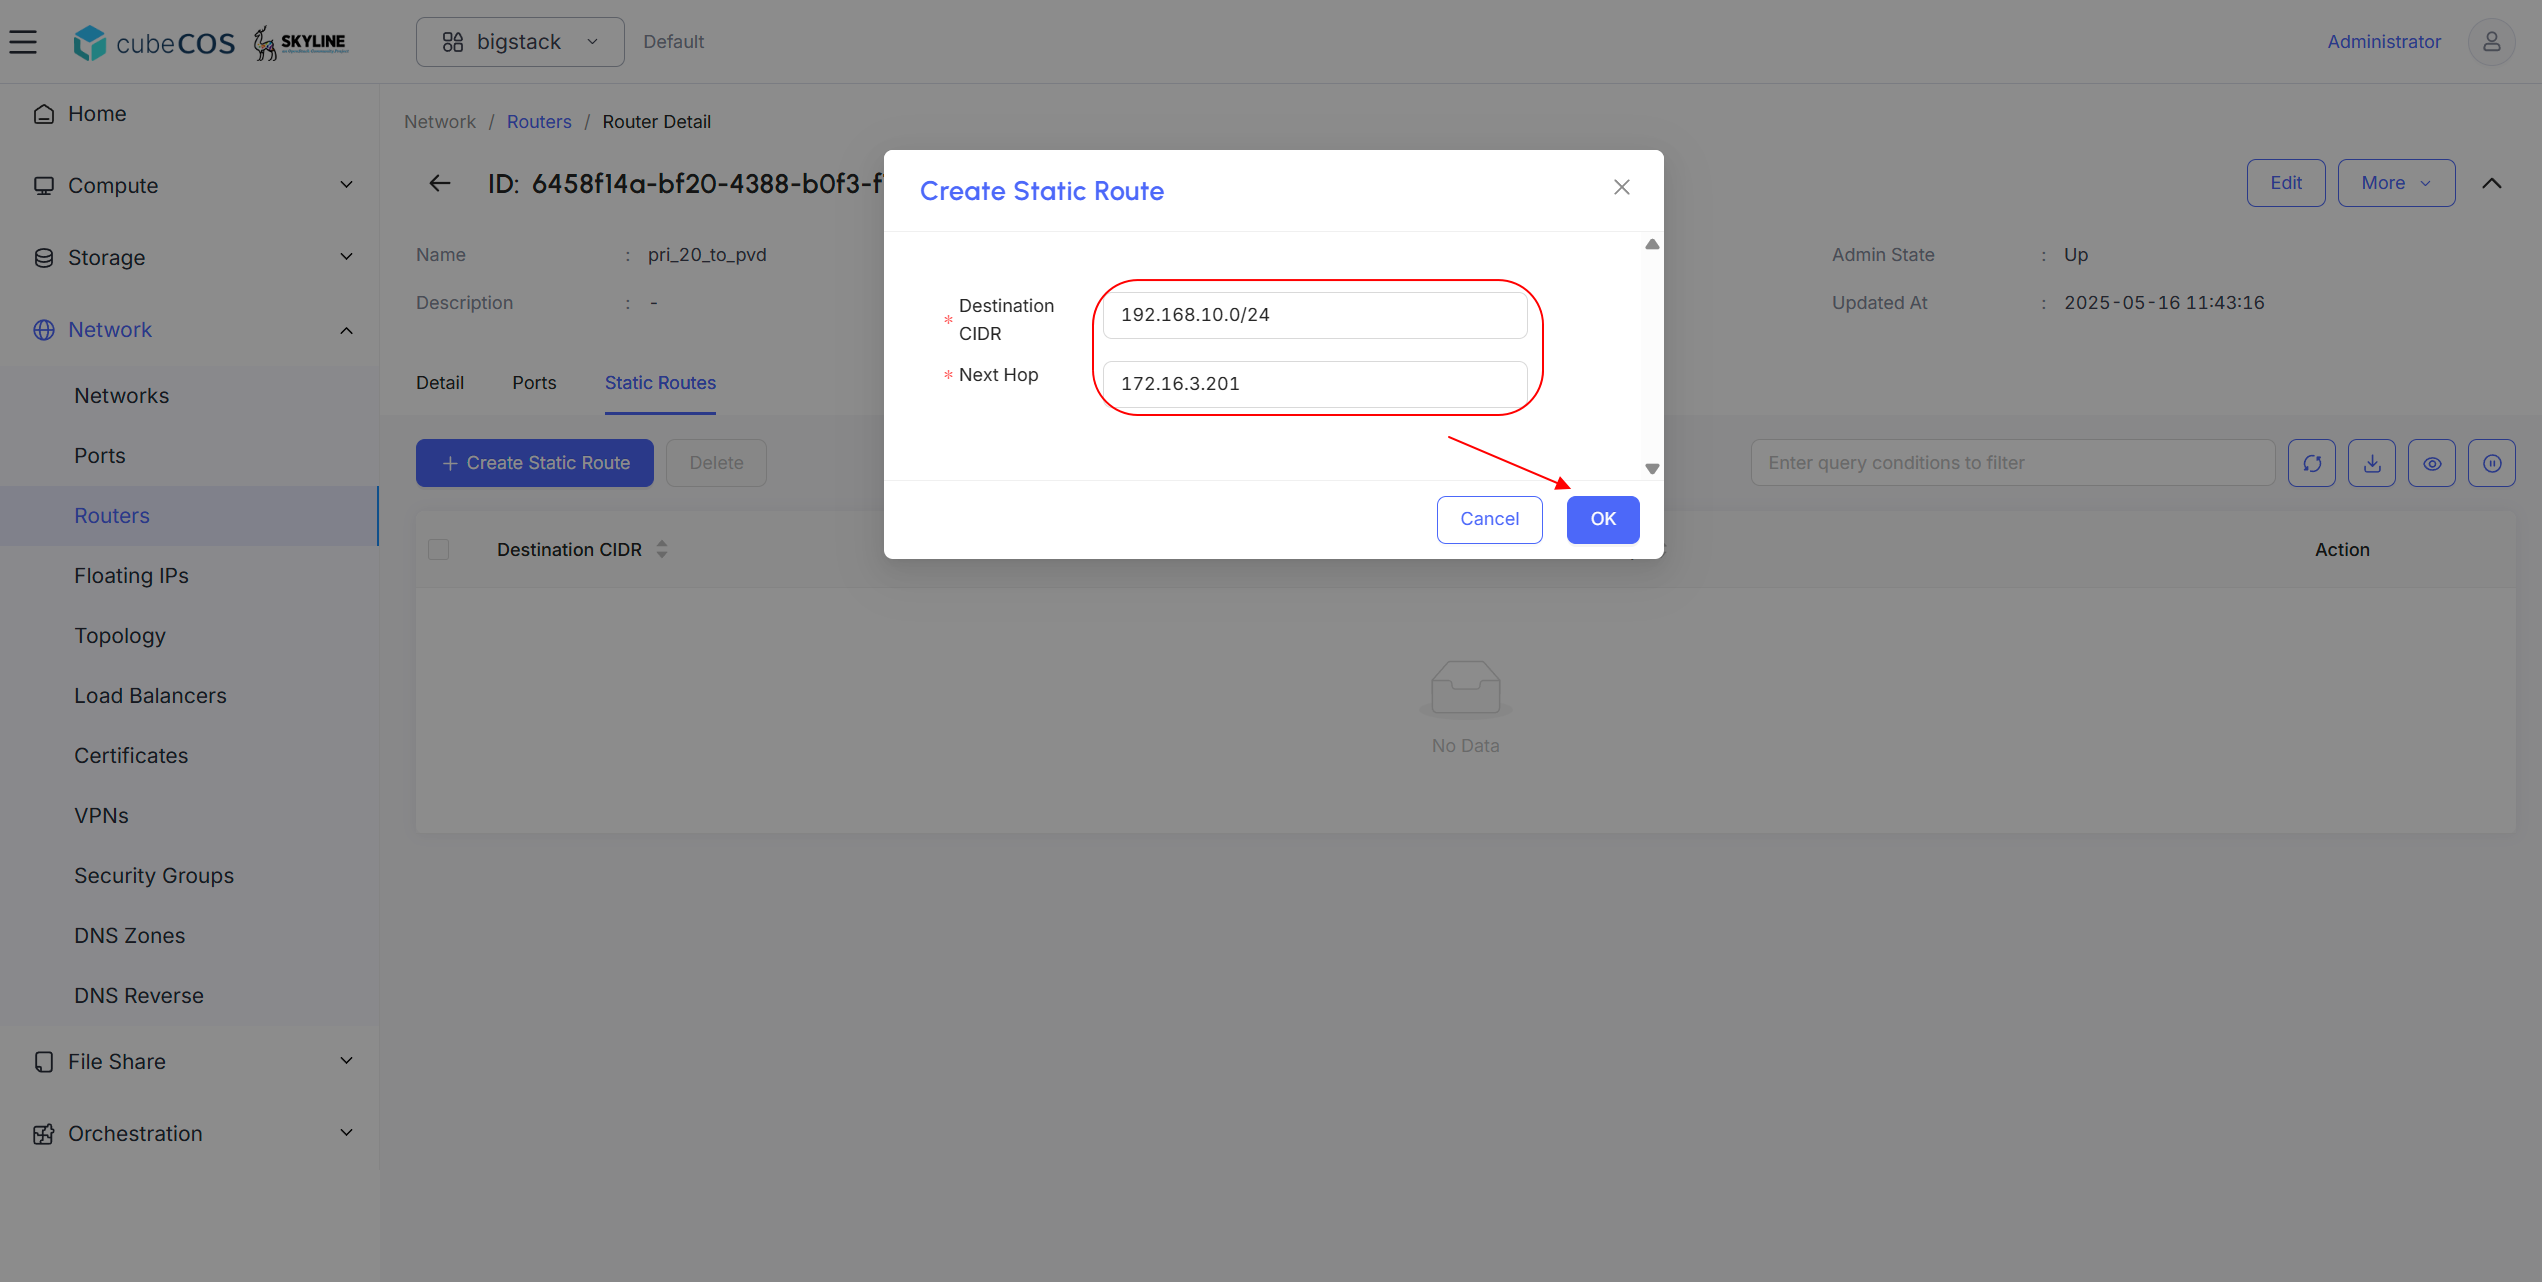
4. Assign `Destination CIDR` and `Next Hop`, then click `OK`.

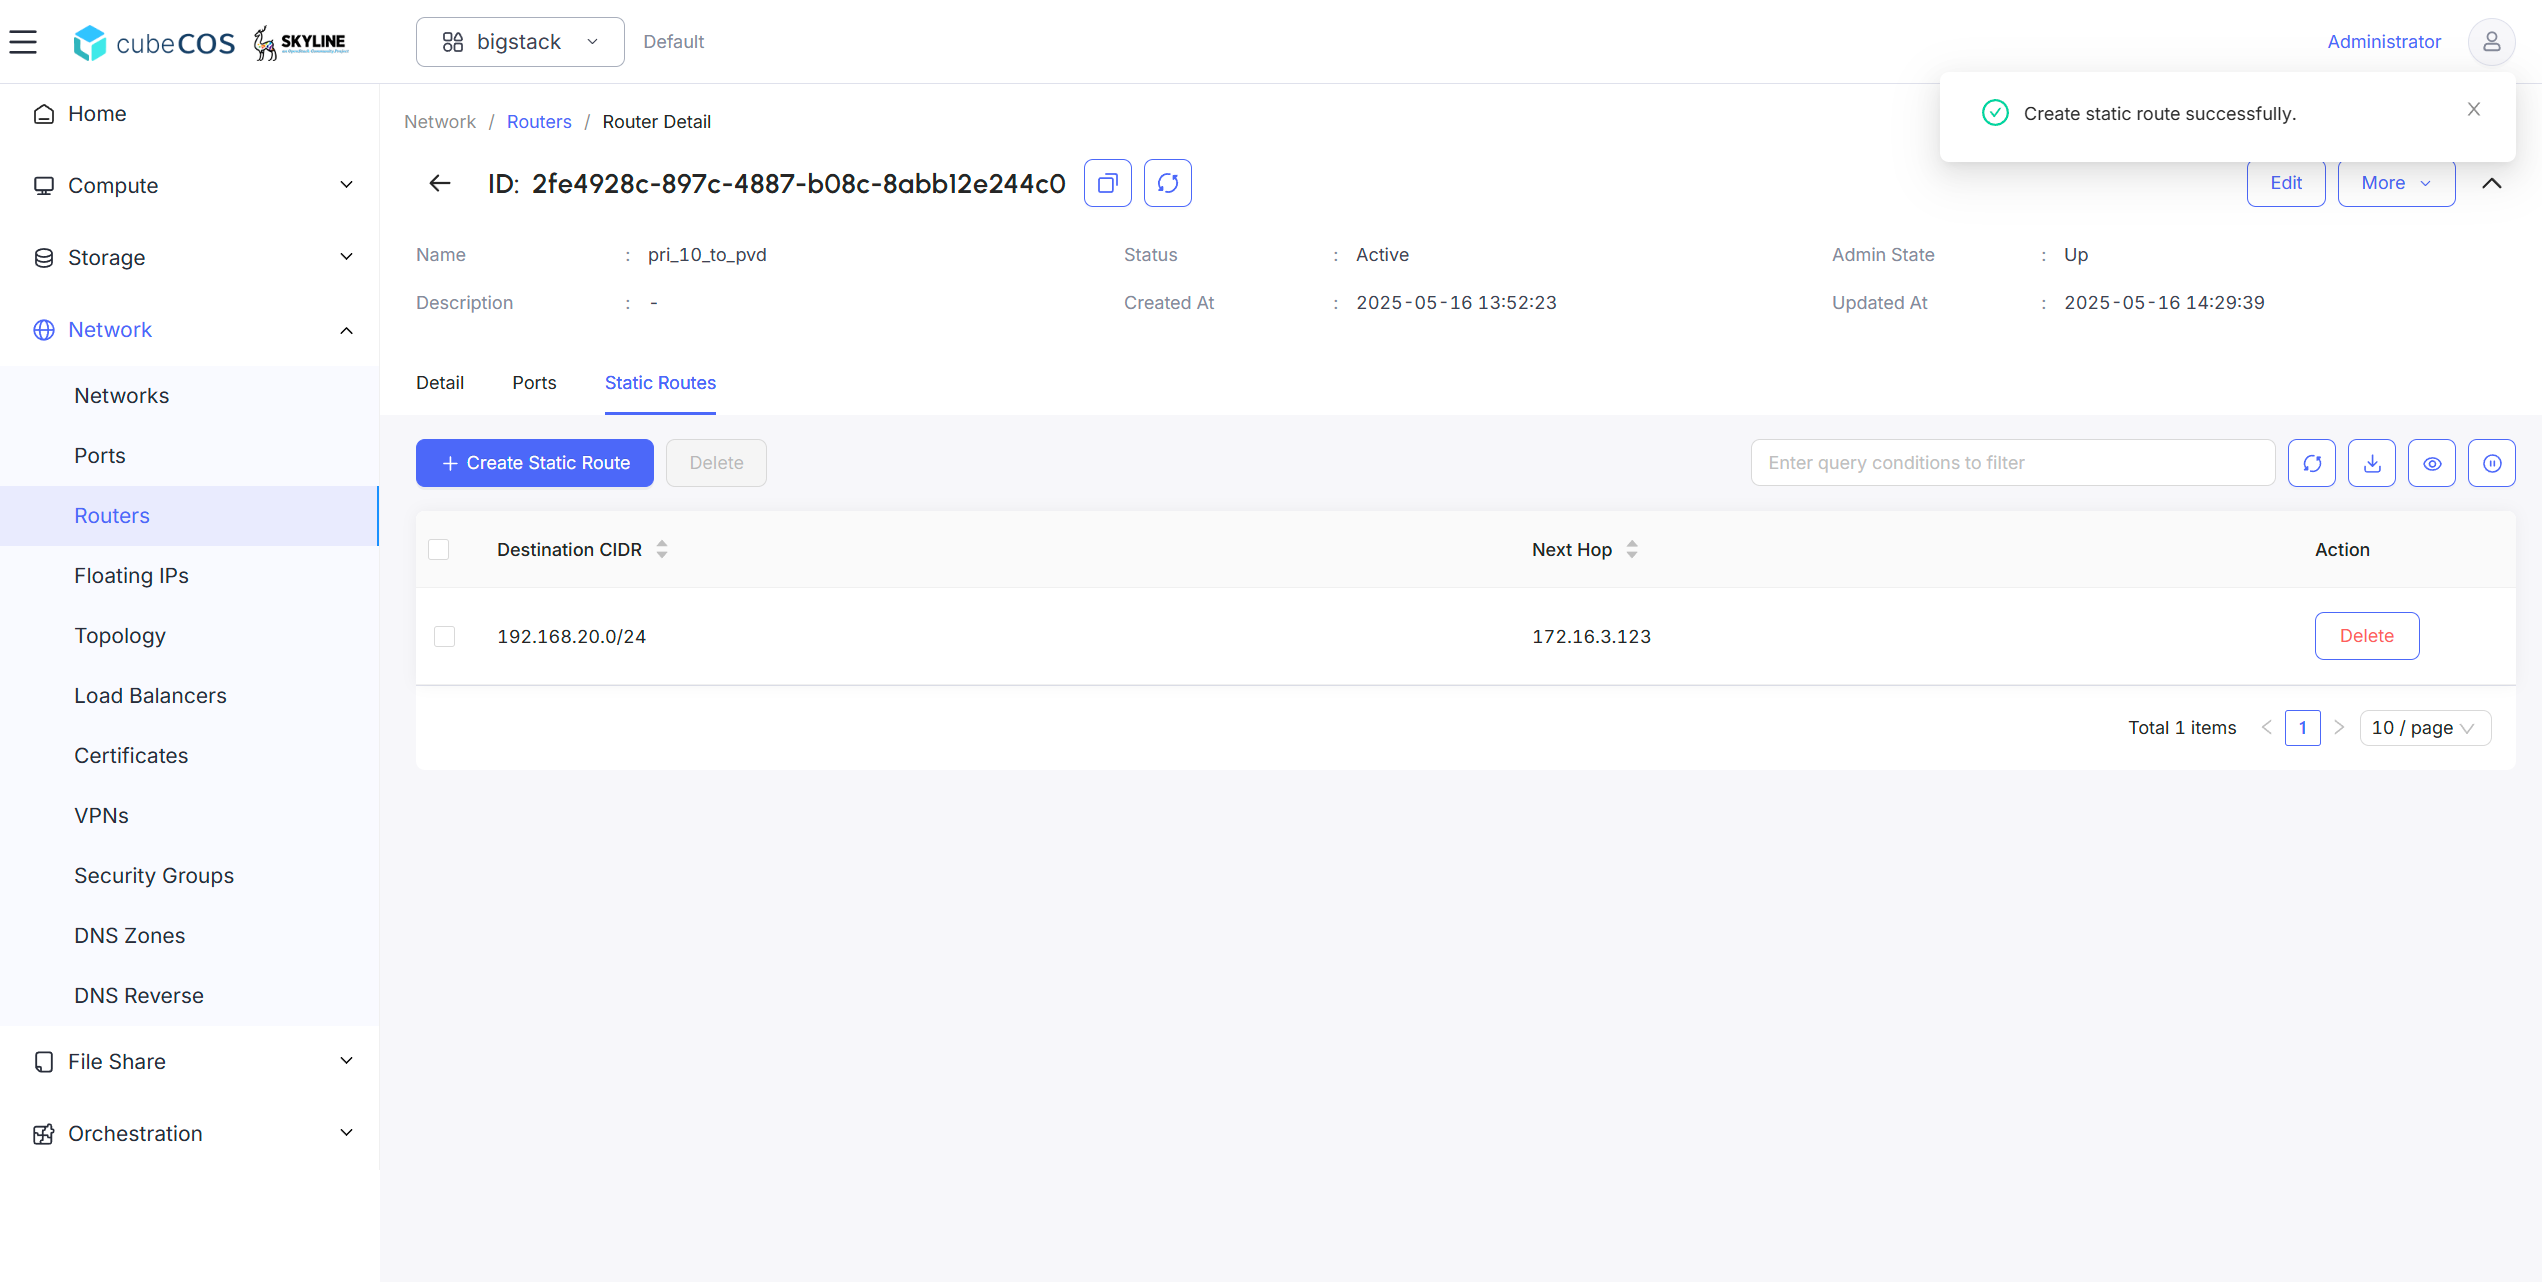
   Configure the `pri_10_to_pvd` router in `Subnet 1` to reach `Subnet 2` by adding a static route to `192.168.20.0/24` with the next hop set to `172.16.3.123`.

   ![/assets/network/static_route_4.png](/assets/network/static_route_4.png)
   ![/assets/network/static_route_5.png](/assets/network/static_route_5.png)

5. Repeats steps 3 and 4 to the other router.

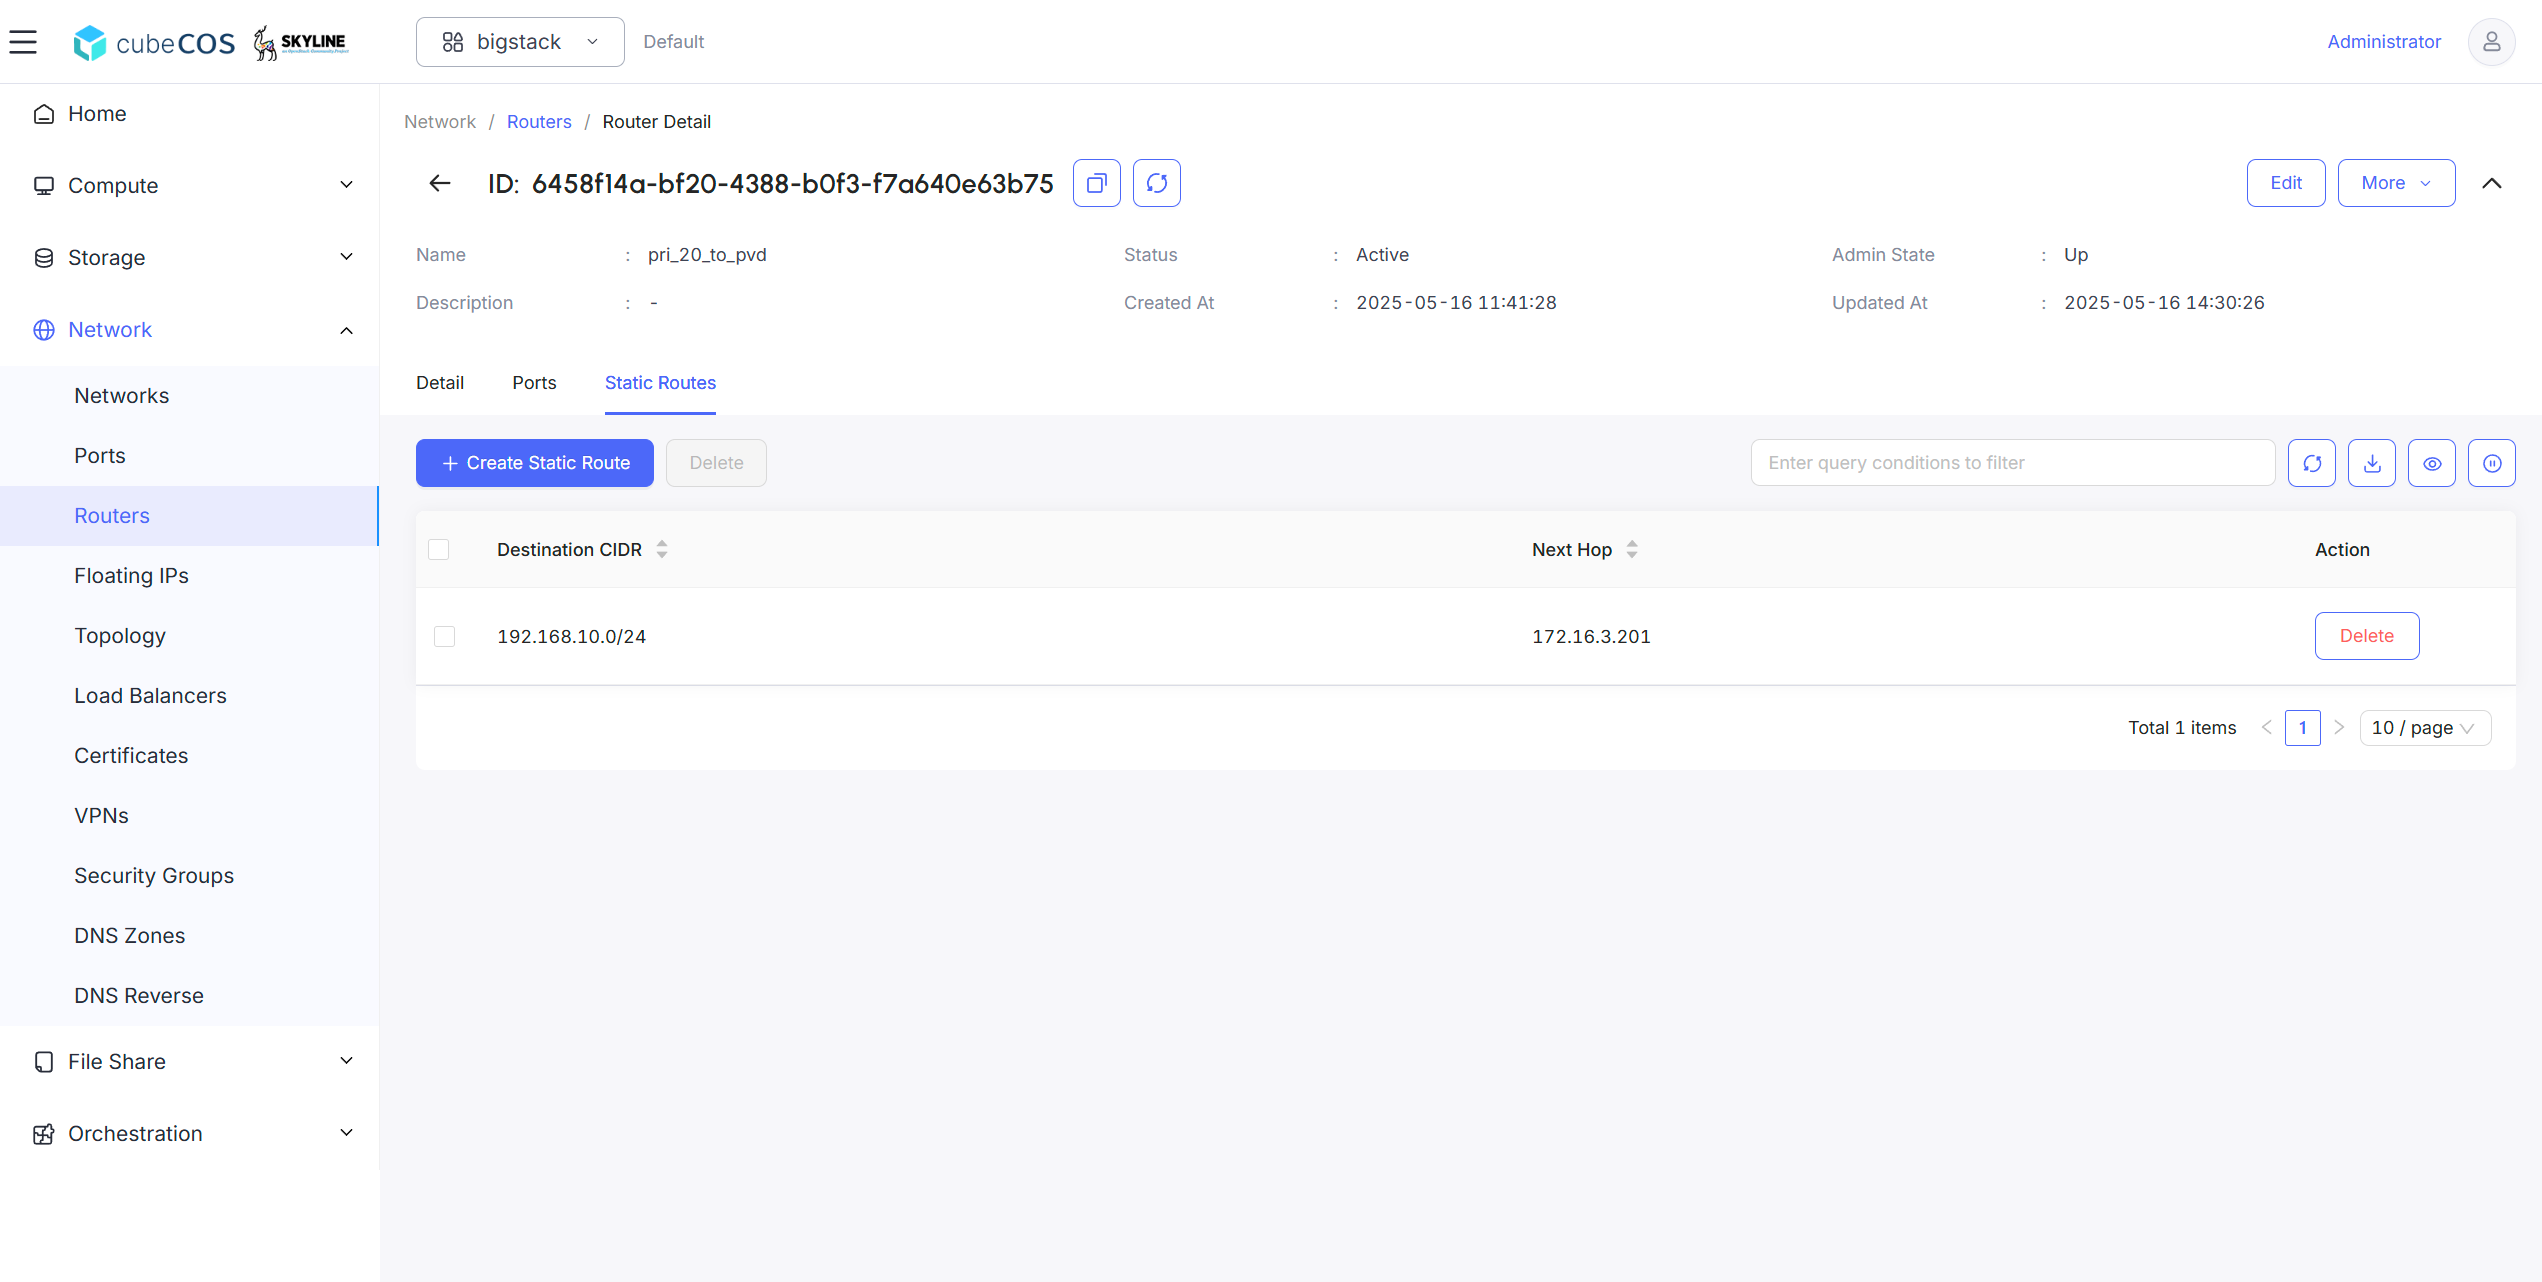
   Configure the `pri_20_to_pvd` router in `Subnet 2` to reach `Subnet 1` by adding a static route to `192.168.10.0/24` with the next hop set to `172.16.3.201`.

   ![/assets/network/static_route_6.png](/assets/network/static_route_6.png)
   ![/assets/network/static_route_7.png](/assets/network/static_route_7.png)
   ![/assets/network/static_route_8.png](/assets/network/static_route_8.png)

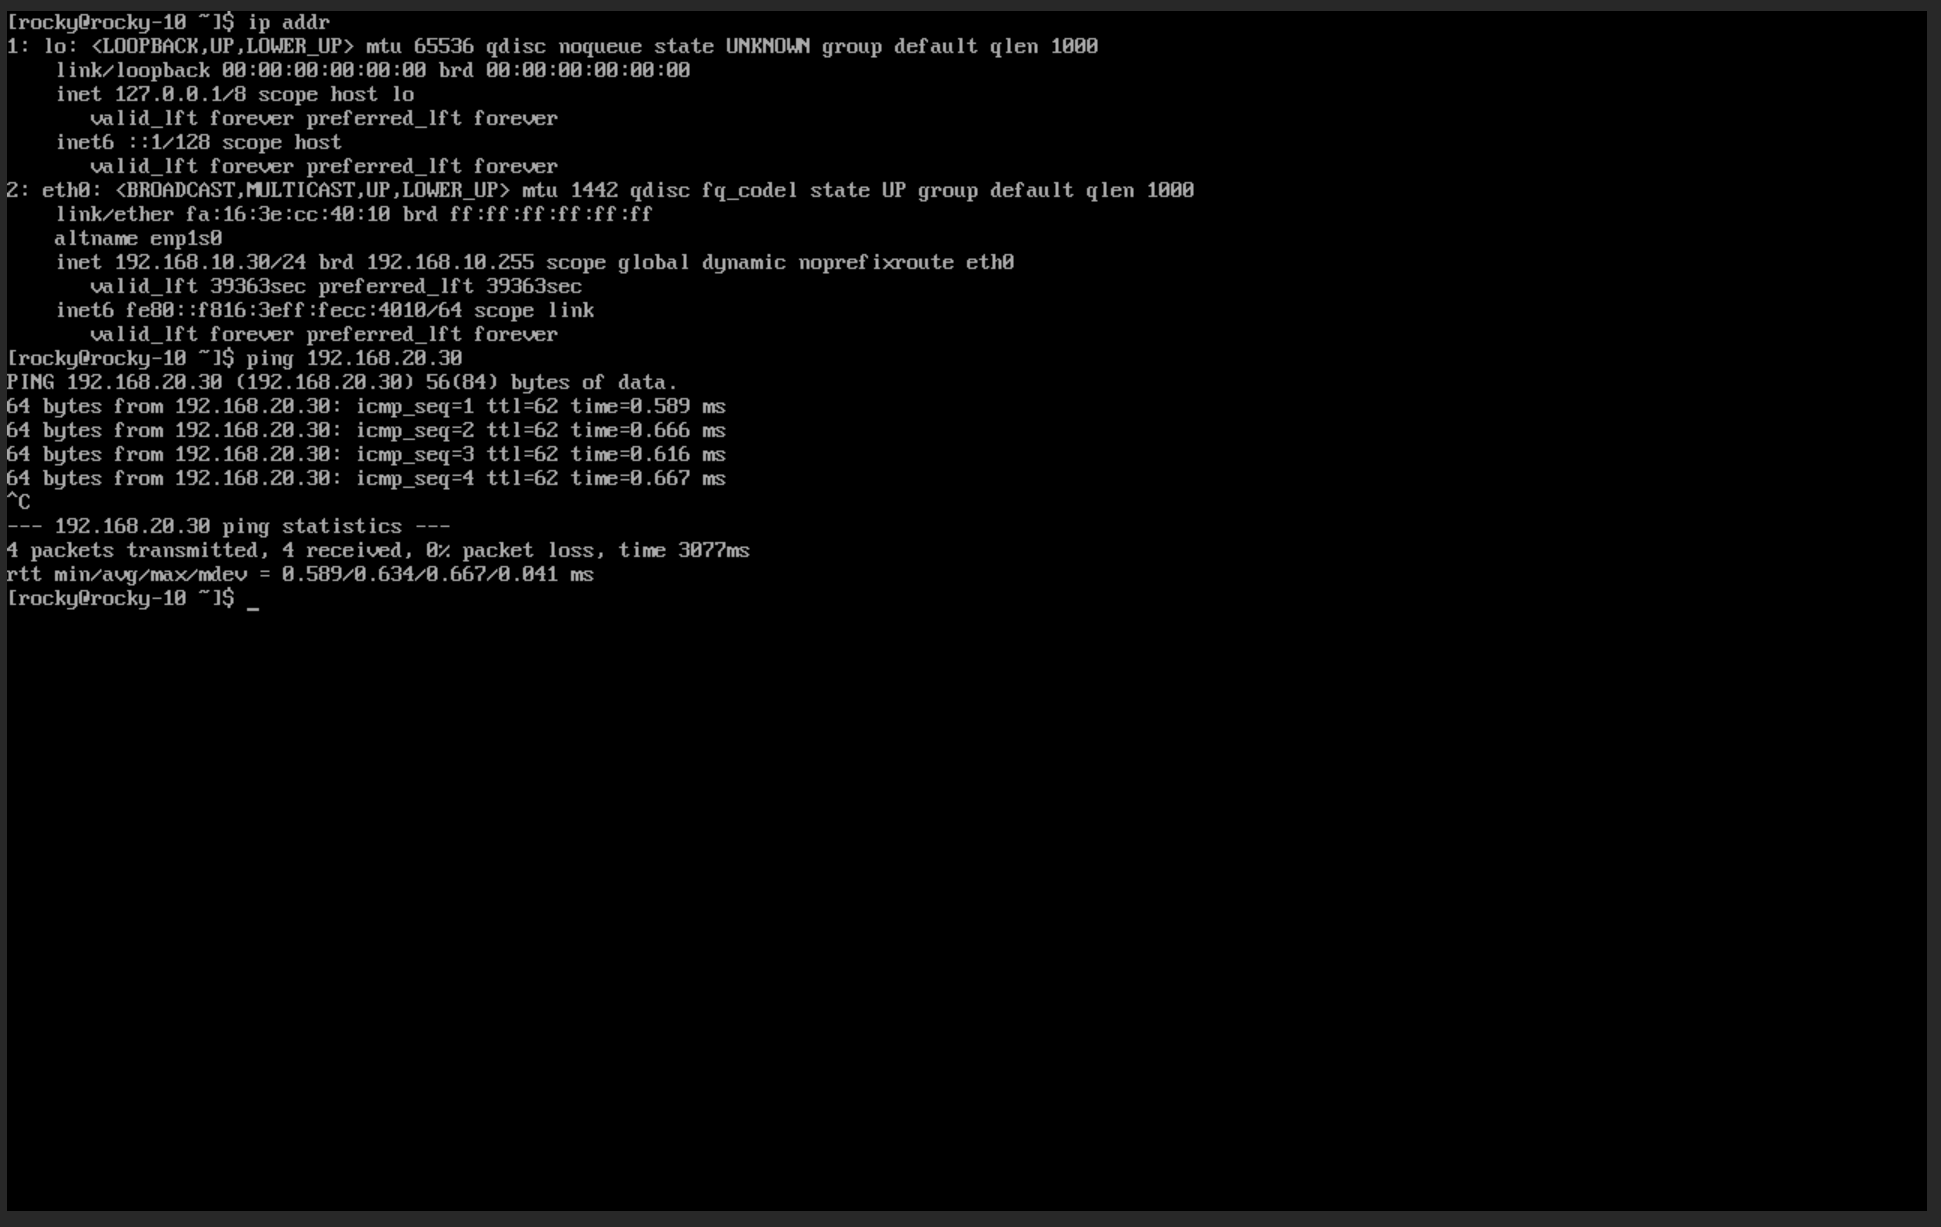
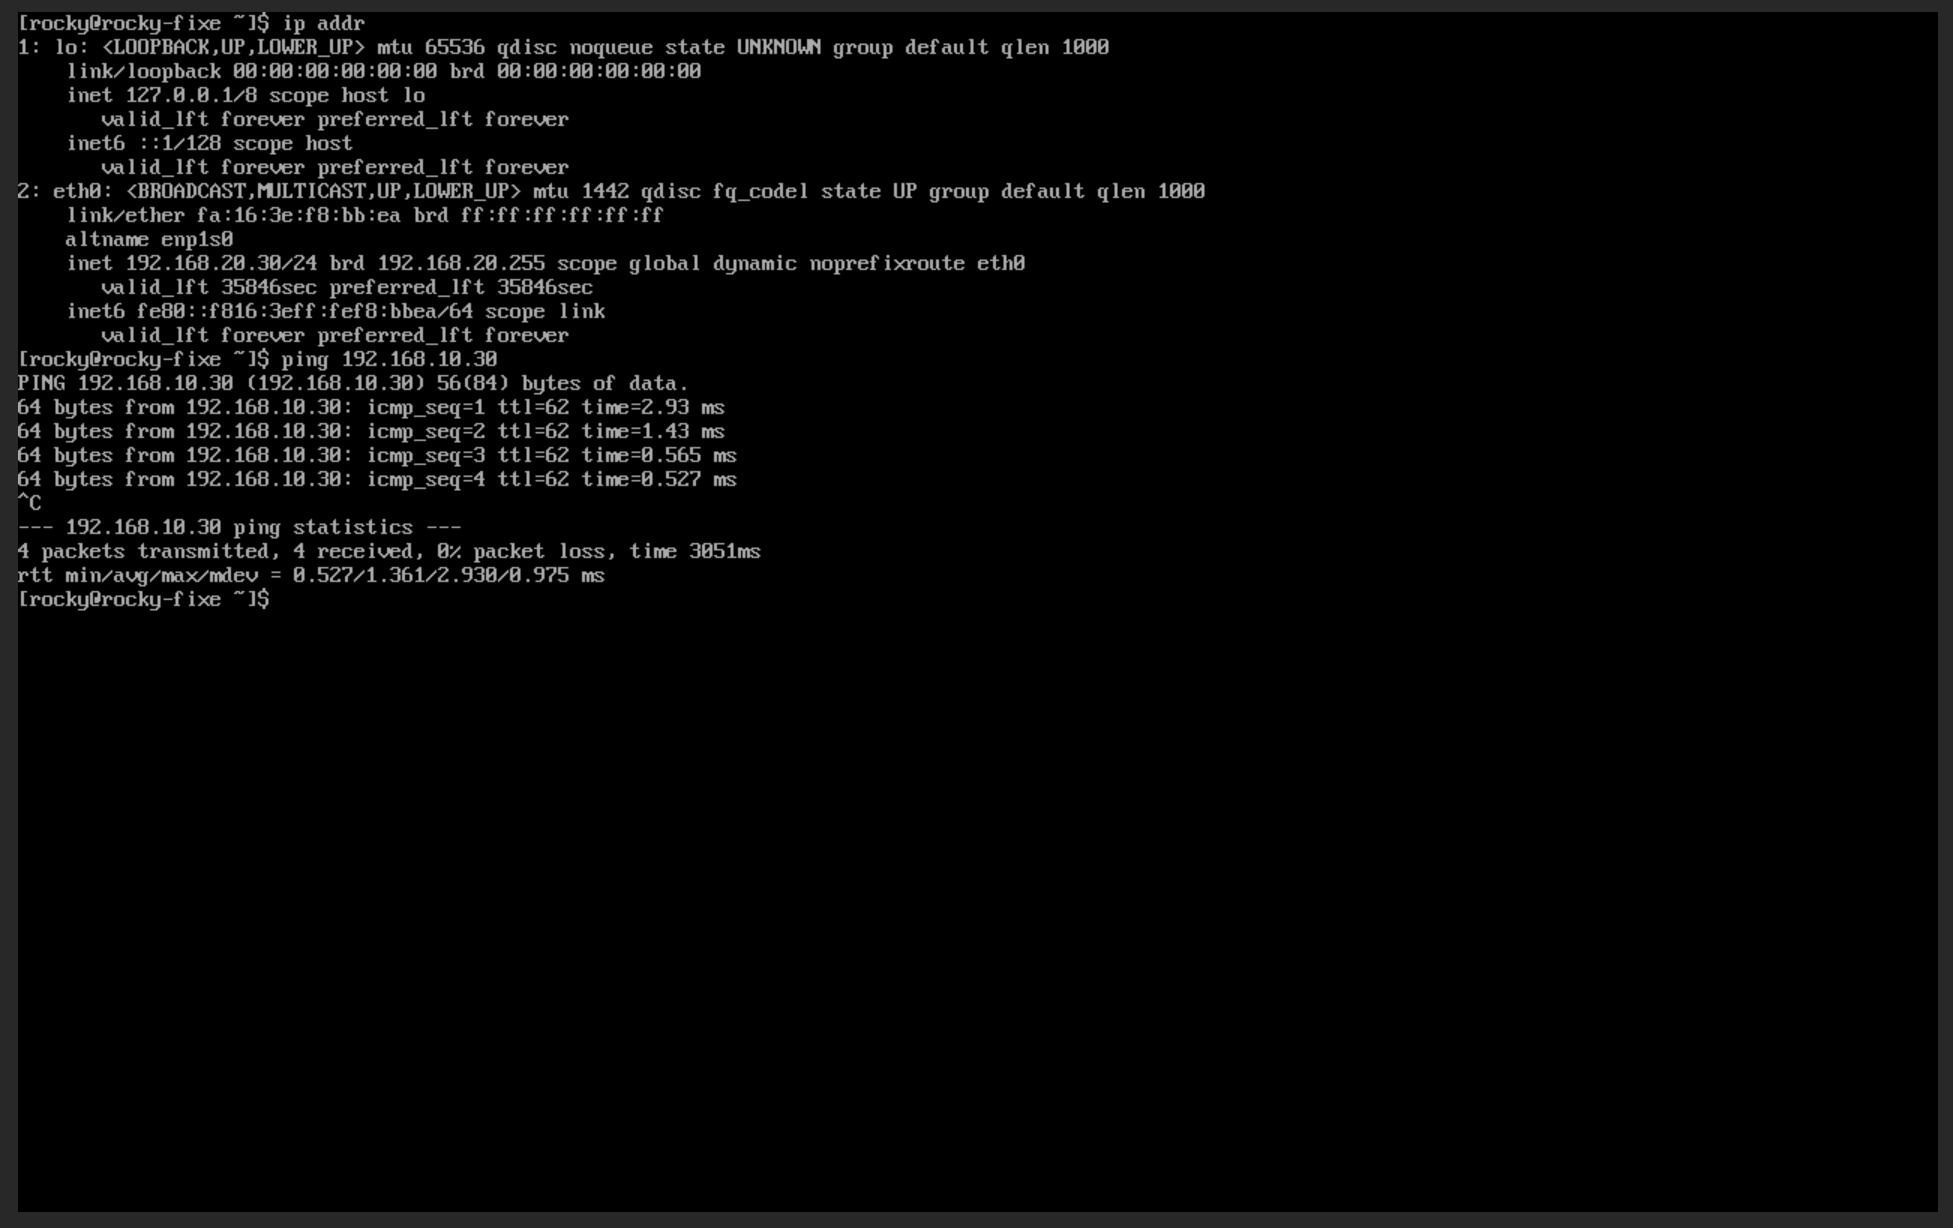
6. Verify the attachment through console. See **[Connect to Instance by noVNC](../compute/novnc_console.md)** for more info.

   The demonstration confirms that VM 192.168.10.30 and VM 192.168.20.30 can successfully communicate with each other using ICMP.

   ![/assets/network/static_route_9.png](/assets/network/static_route_9.png)
   ![/assets/network/static_route_10.png](/assets/network/static_route_10.png)