# Create and attach a volume

> Use this procedure to provision a new block storage volume. Users can attach Volume to an existing compute instance to provide additional persistent storage.

Use this procedure to provision a new block storage volume. Users can attach Volume to an existing compute instance to provide additional persistent storage.

<!--
   link :
      ../../compute/images/import-images-via-cli.md
      snapshots.md
      ../../compute/novnc_console.md
-->

## Create Volume {#create-volume}

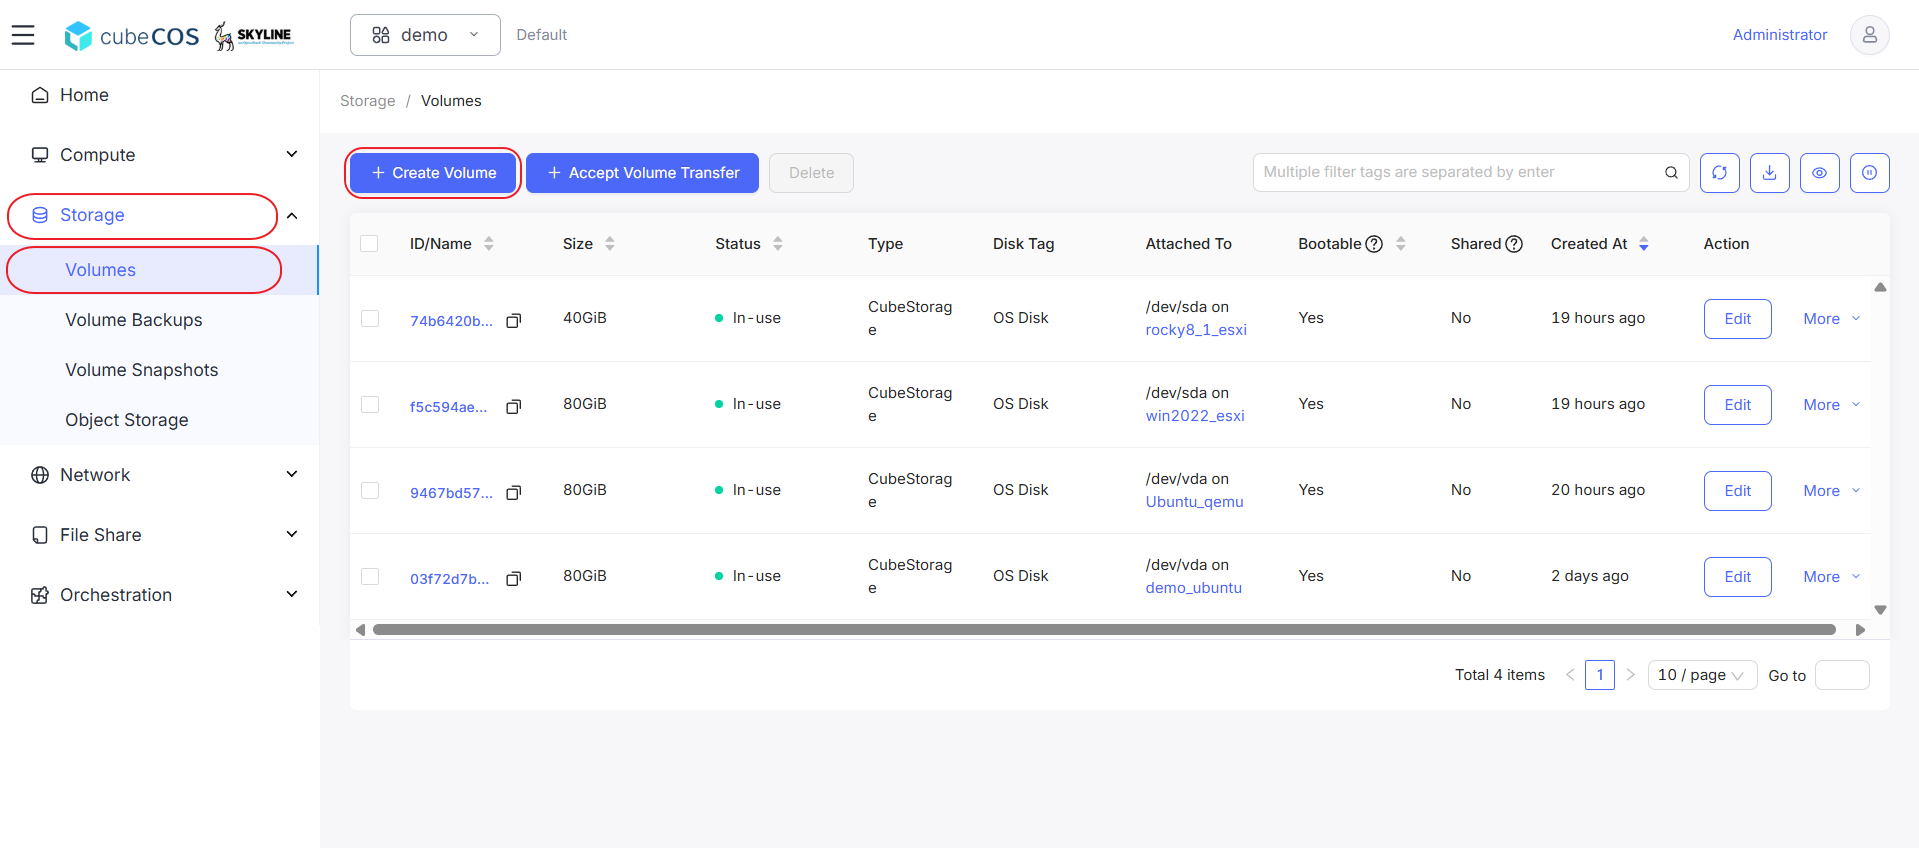
1. Navigate to `Project > Storage > Volumes` > `+ CREATE VOLUME`

   ![/assets/volumes/create_vol_1.png](/assets/volumes/create_vol_1.png)

2. For this creation, fill in the following fields:
   - **Available Zone:** Specify Available Zone of Volume to create in. Choose Not Select unless clearly knowing which to assign.
   - **\*Data Source Type:**
     - **\*Blank Volume** : Create volume without exsist image or volume snapshot.

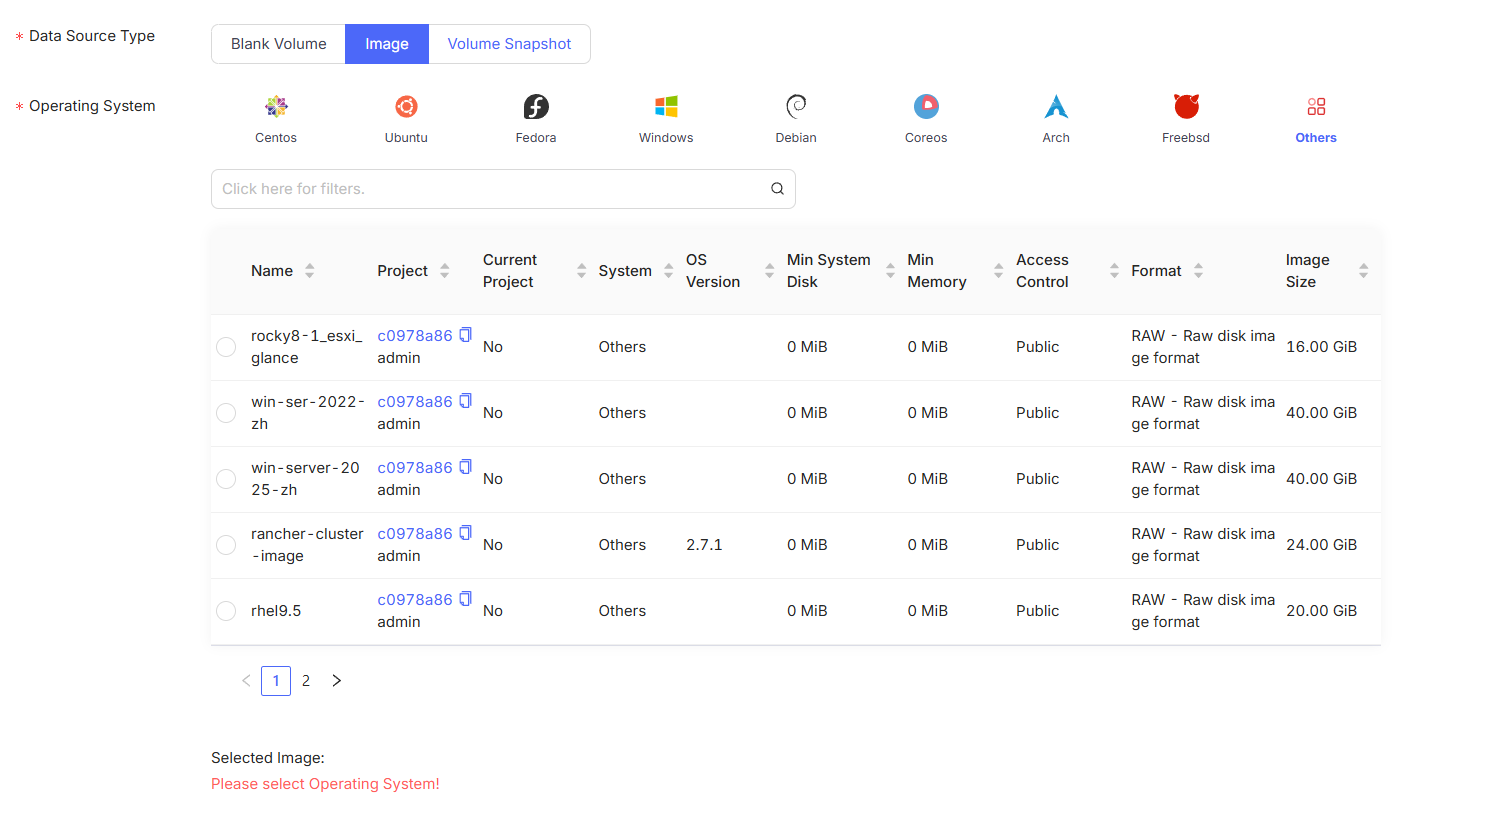
     - **\*Image** : Create volume with exsist image.

       _Following attributes_ :

       **\*Operating System** : images categories by its os type and versions, notices that image imported by CLI will all be categorized in _Others_, can be reassigned its category from `Images`. See **[Import image(CLI)](../../compute/images/import-images-via-cli.md)** for more.

       ![/assets/volumes/create_vol_2.png](/assets/volumes/create_vol_2.png)

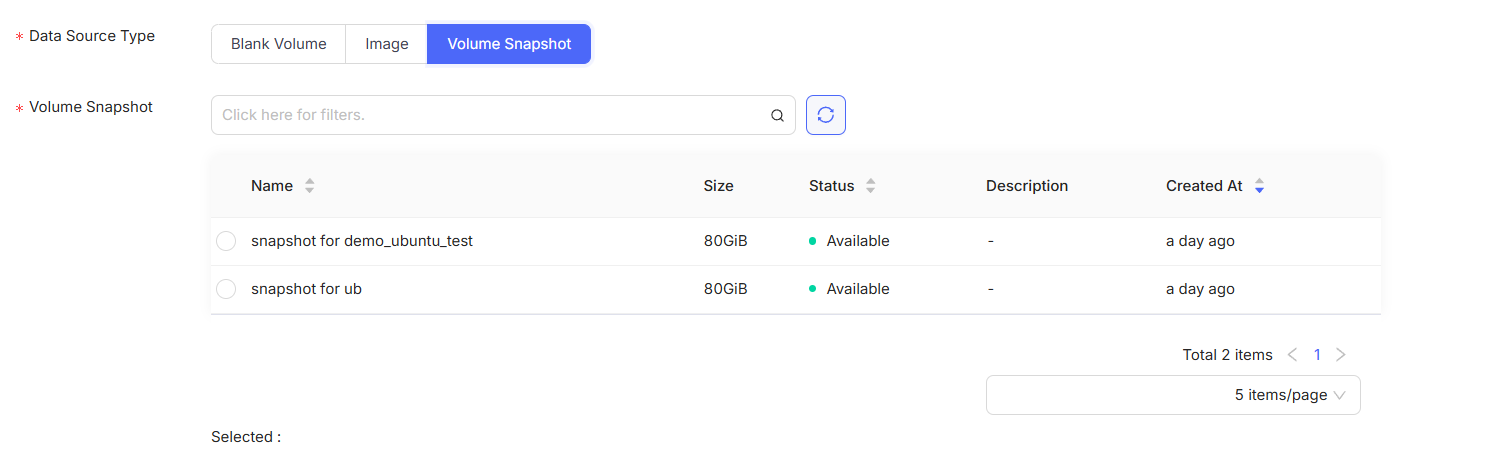
     - **\*Volume Snapshot** : Create volume with exsist volume snapshot.

       _Following attributes_ :

       **\*Volume Snapshot** : images categories by its os type and versions, notices that image imported by CLI will all be categorized in _Others_, can be reassigned its category from `Images`. See **[Volume Snapshots](snapshots.md)** for more.

       ![/assets/volumes/create_vol_3.png](/assets/volumes/create_vol_3.png)

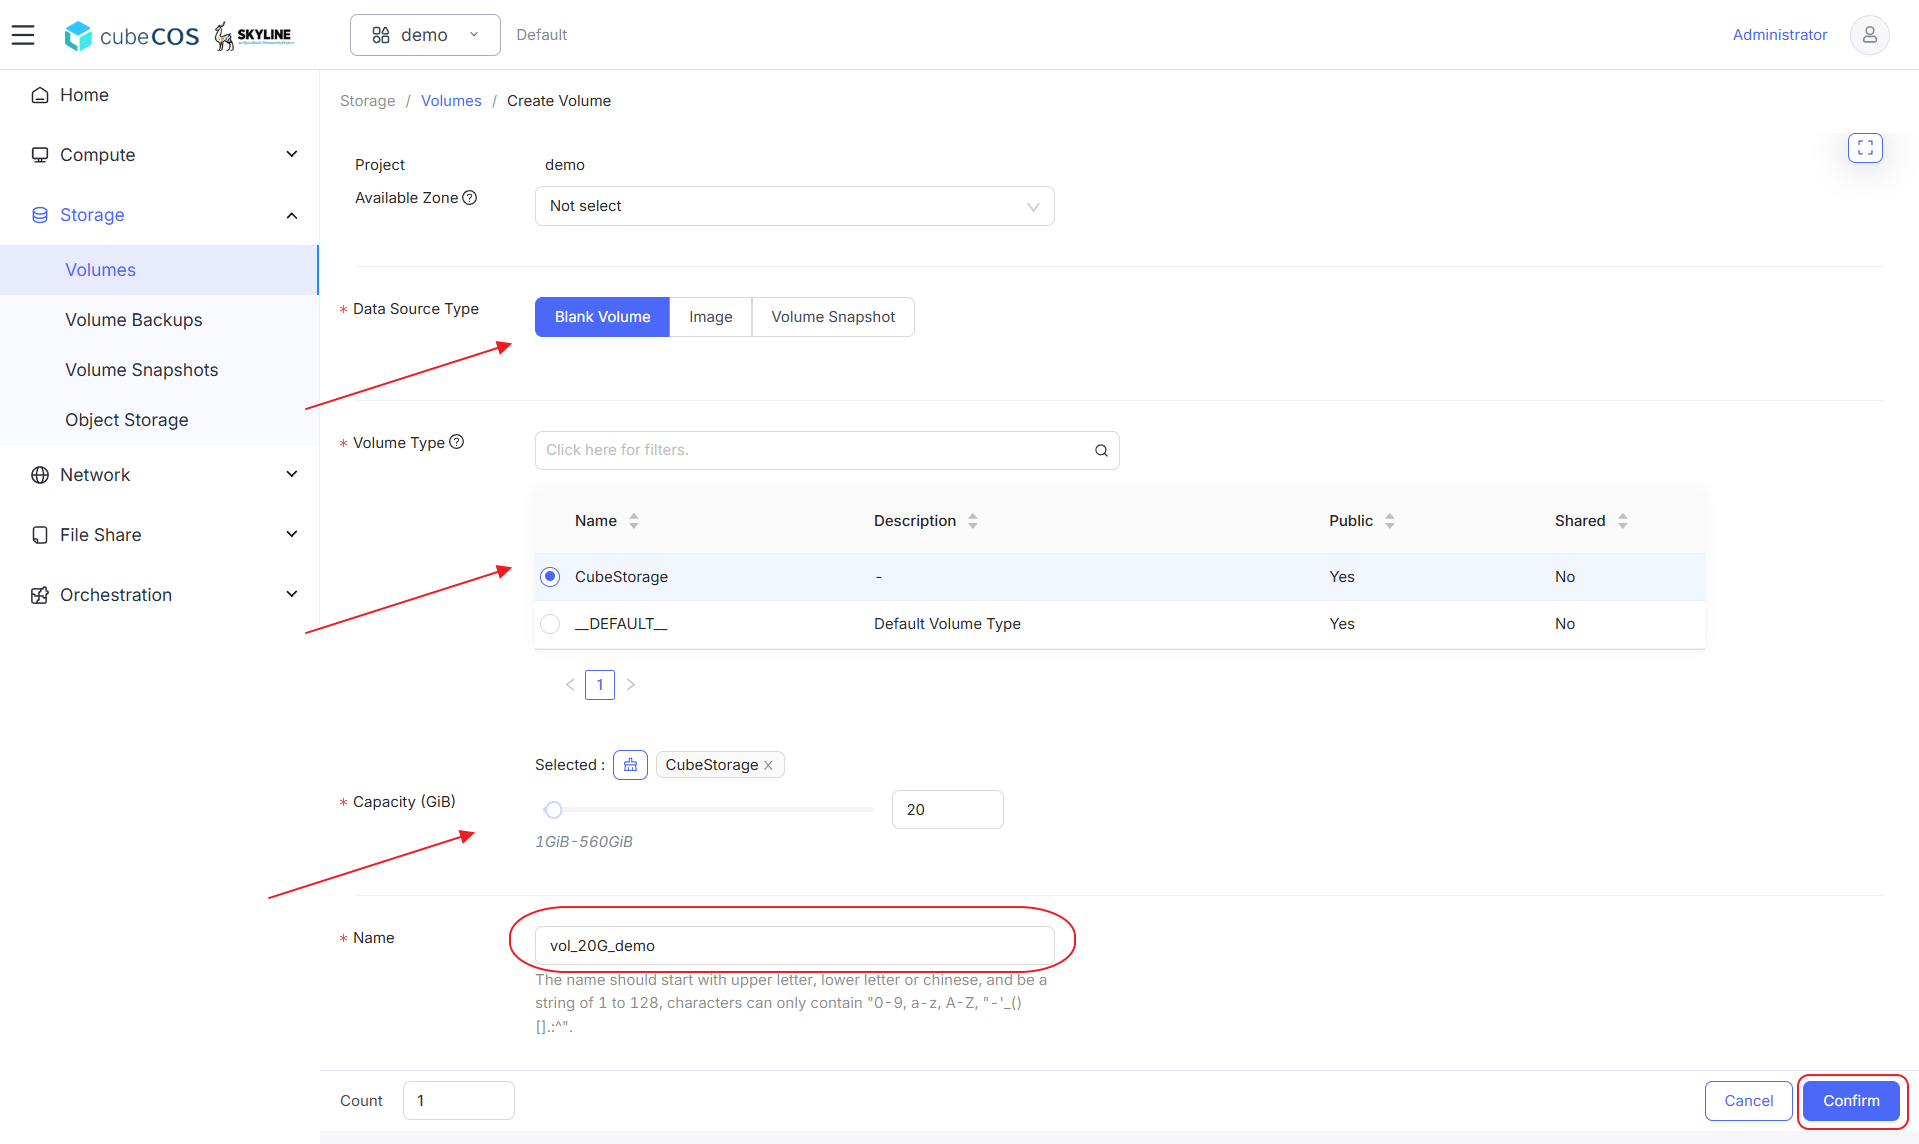
   - **\*Capacity (GiB):** Set capacity of the volume (GiB, minimum 1).
   - **\*Name** : Input desired name of the volume showing on dashboard.

     After filling all fields above, click `Confirm` to apply user creation.

     ![/assets/volumes/create_vol_4.png](/assets/volumes/create_vol_4.png)

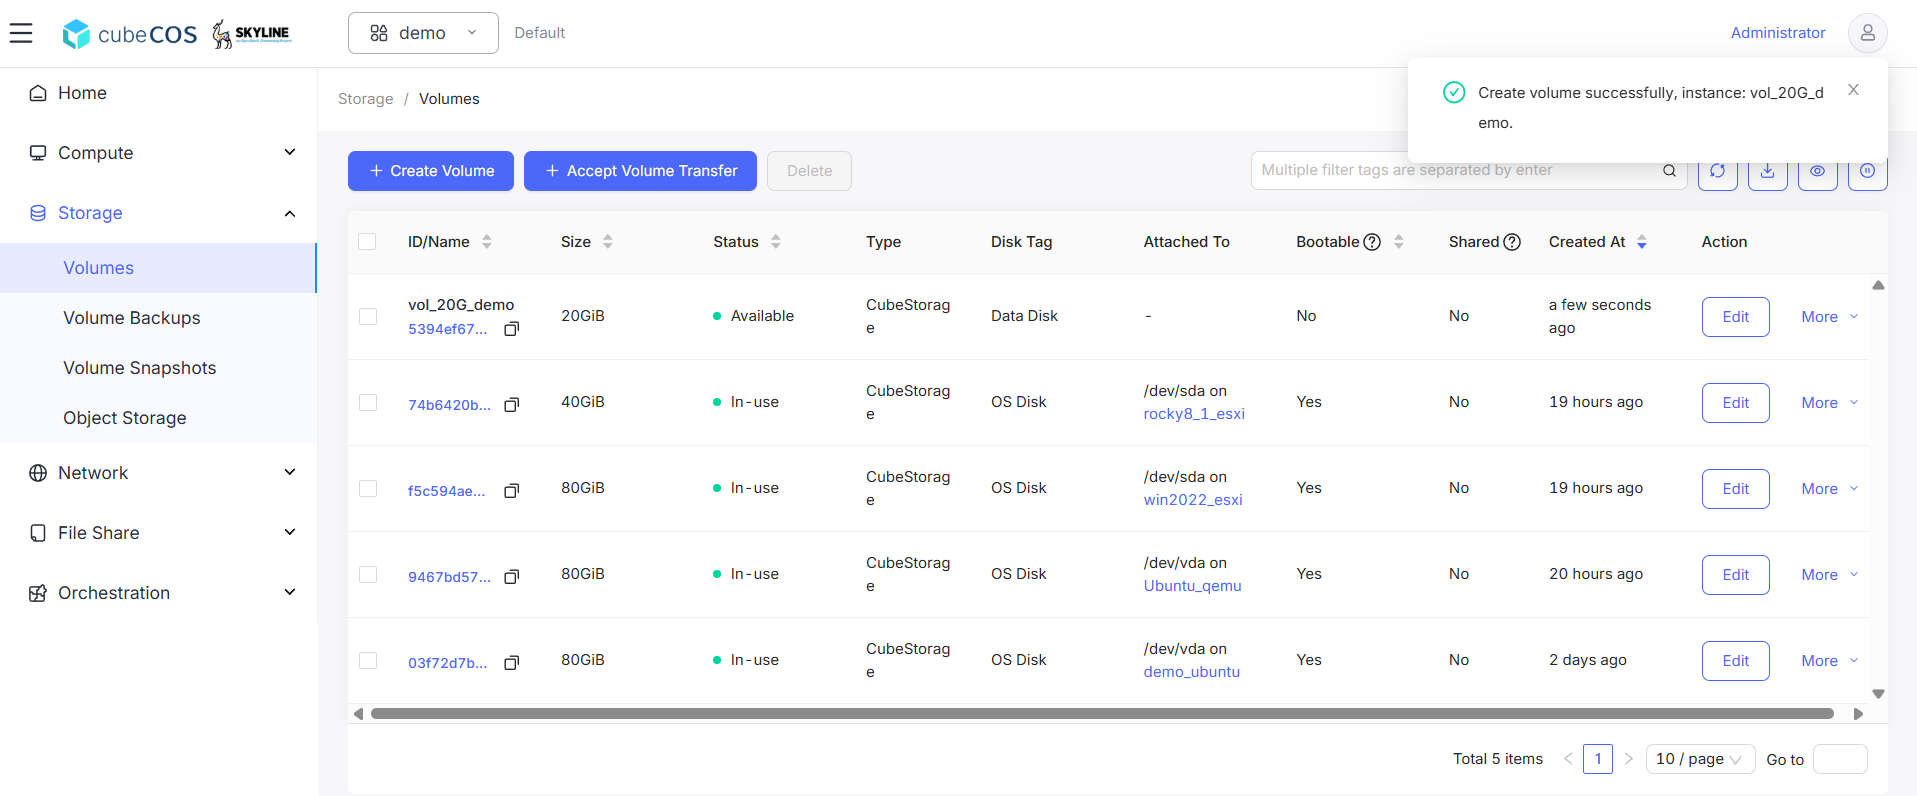
3. Use the dashboard to verify the Volume creation.

   ![/assets/volumes/create_vol_5.png](/assets/volumes/create_vol_5.png)

## Attach Volume {#attach-volume}

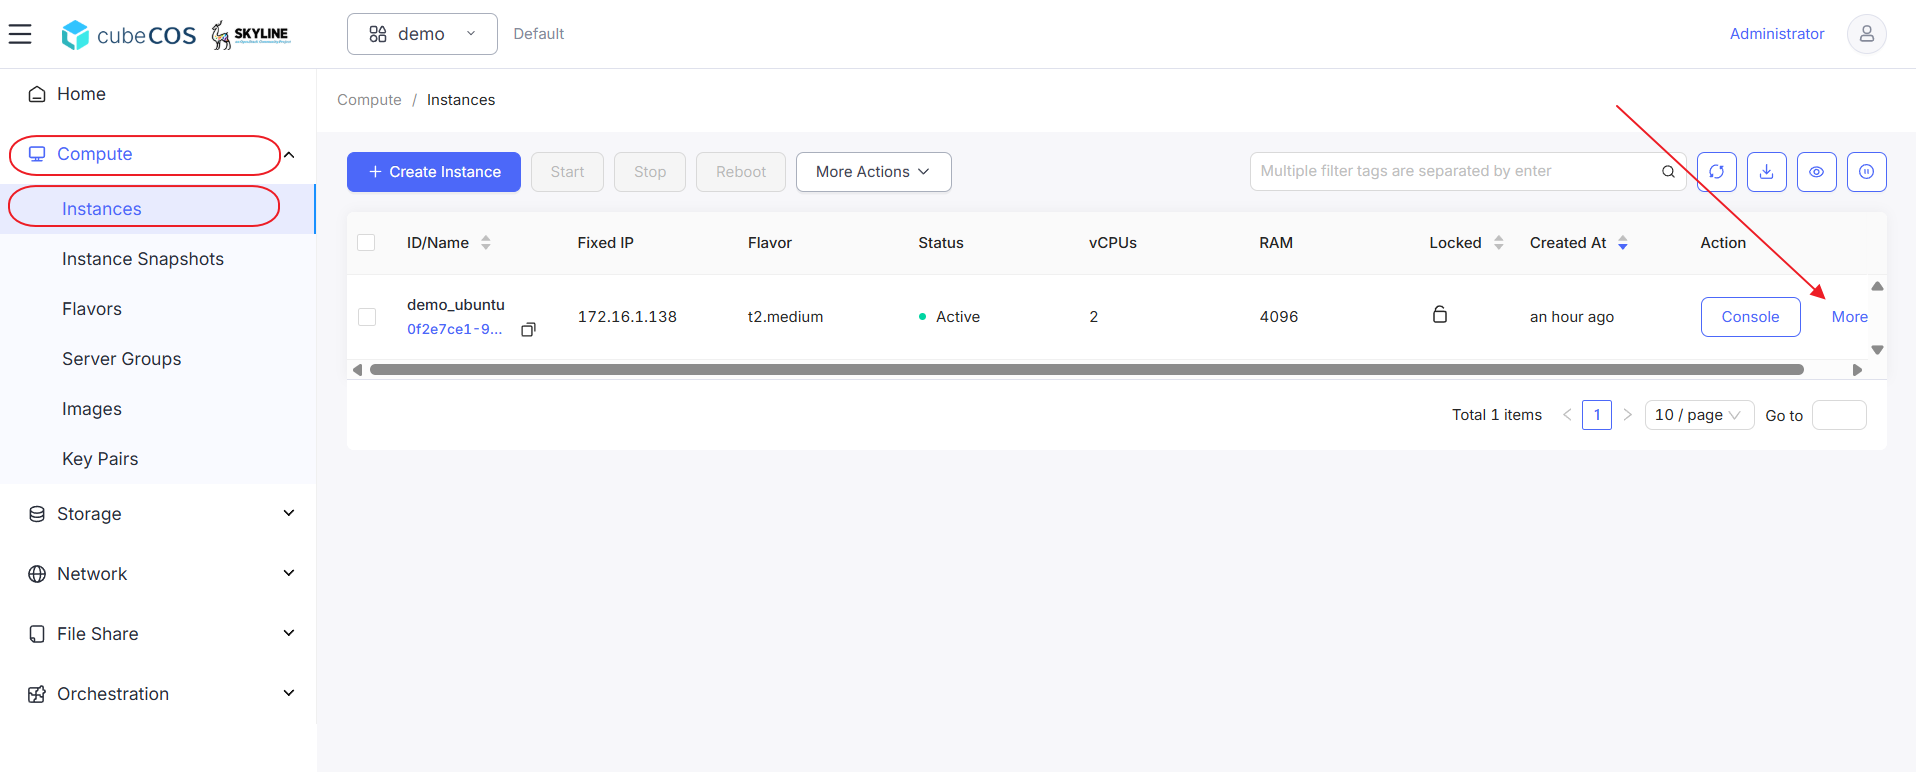
1. Navigate to `Project > Compute > Instances`, choose the desired project, then hover over `More`.

   ![/assets/compute/ins-more.png](/assets/compute/ins-more.png)

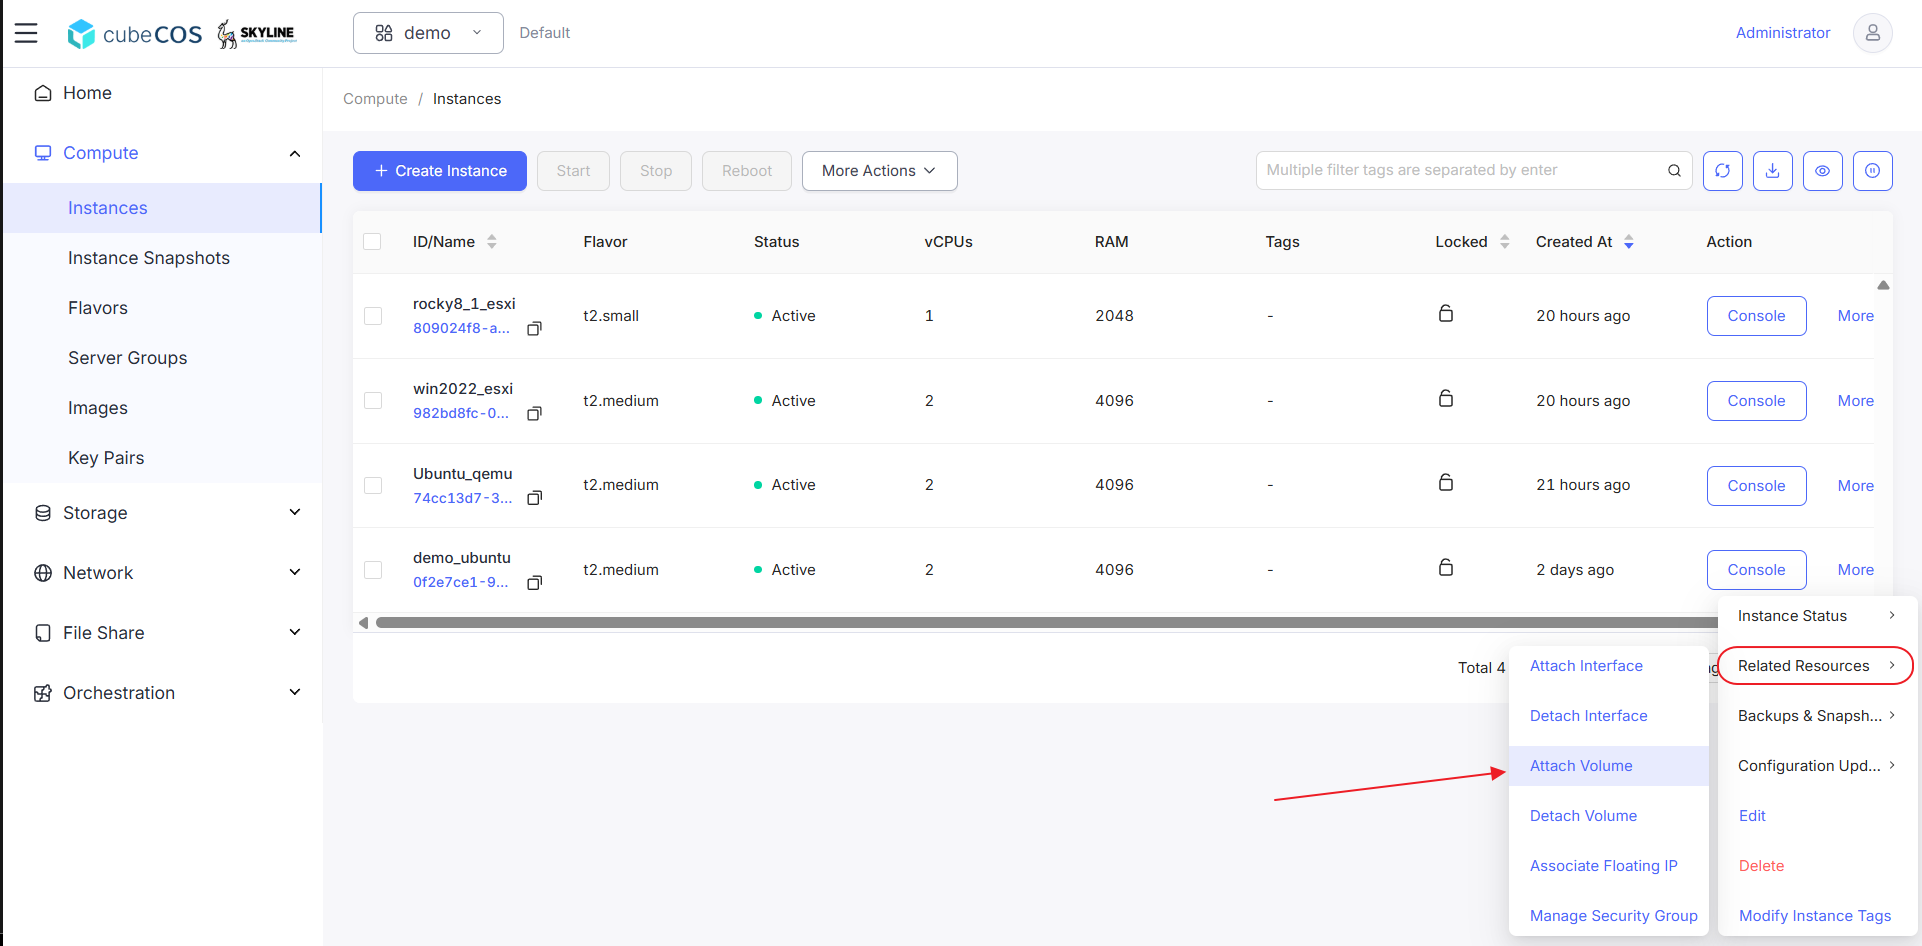
2. Hover over `Related Resources` in the drop-down menu, then click `Attach Volume`.

   ![/assets/volumes/attach_vol_1.png](/assets/volumes/attach_vol_1.png)

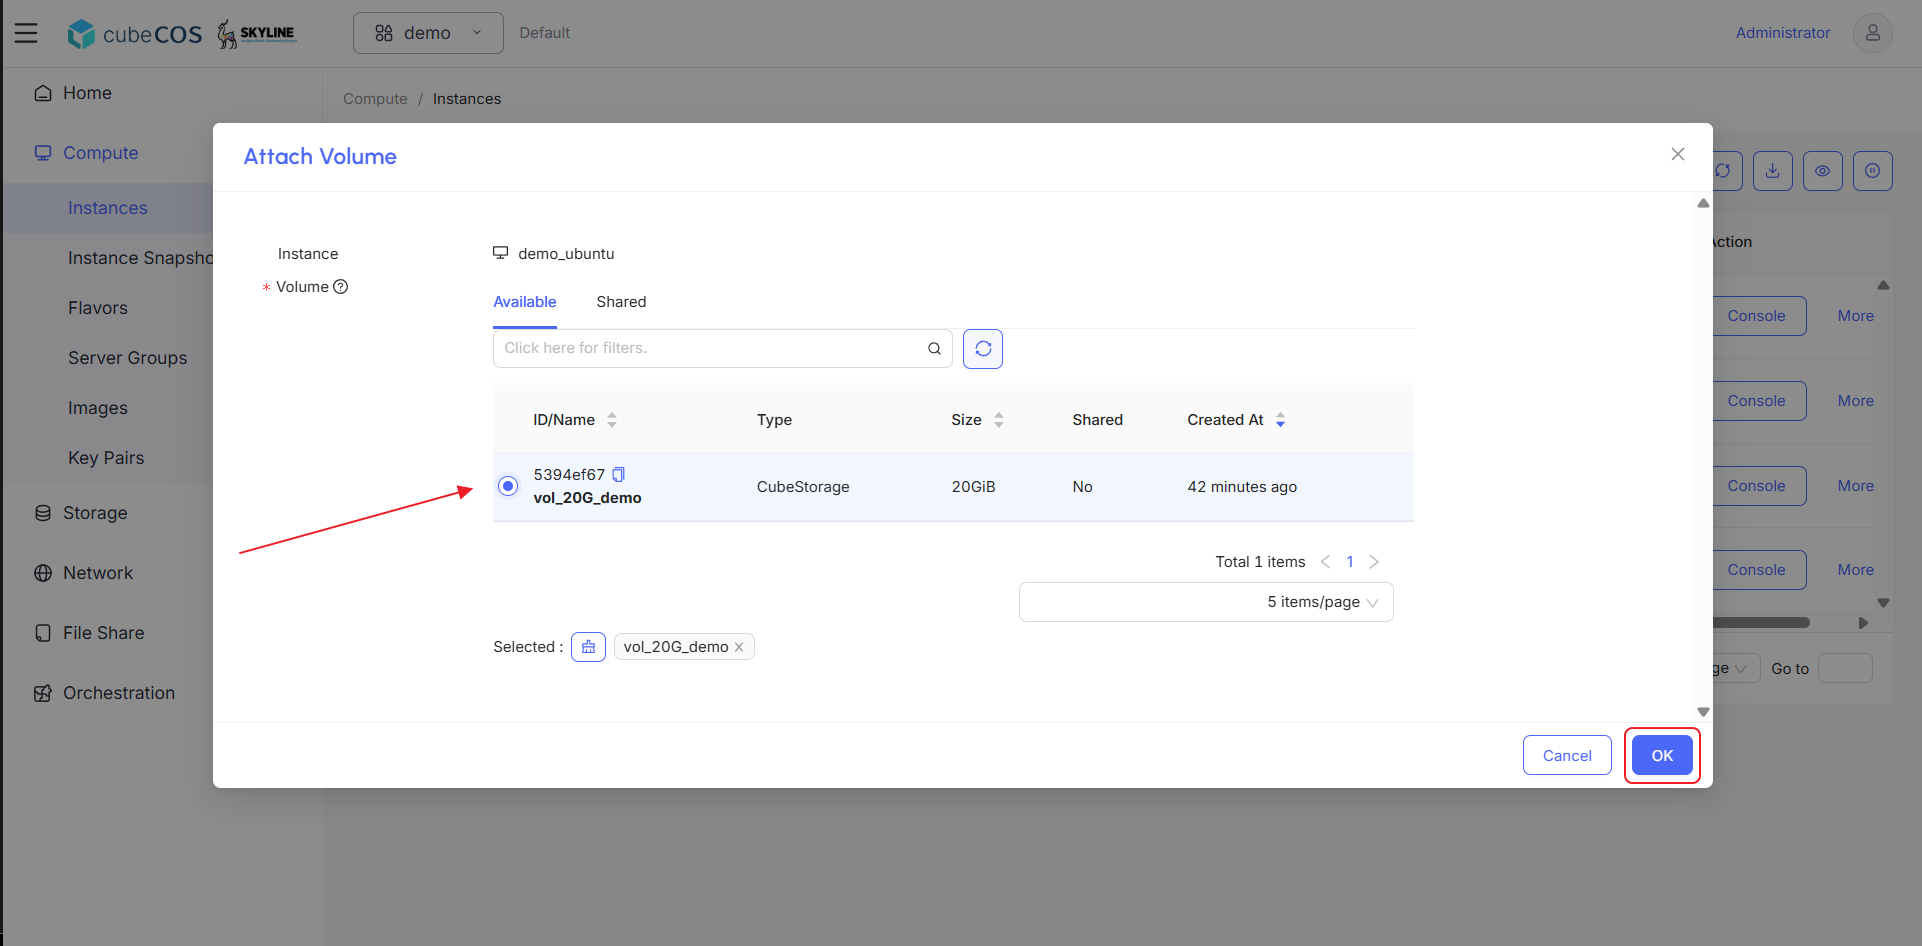
3. Select Volumes. Click `OK` button to proceed.

   ![/assets/volumes/attach_vol_2.png](/assets/volumes/attach_vol_2.png)

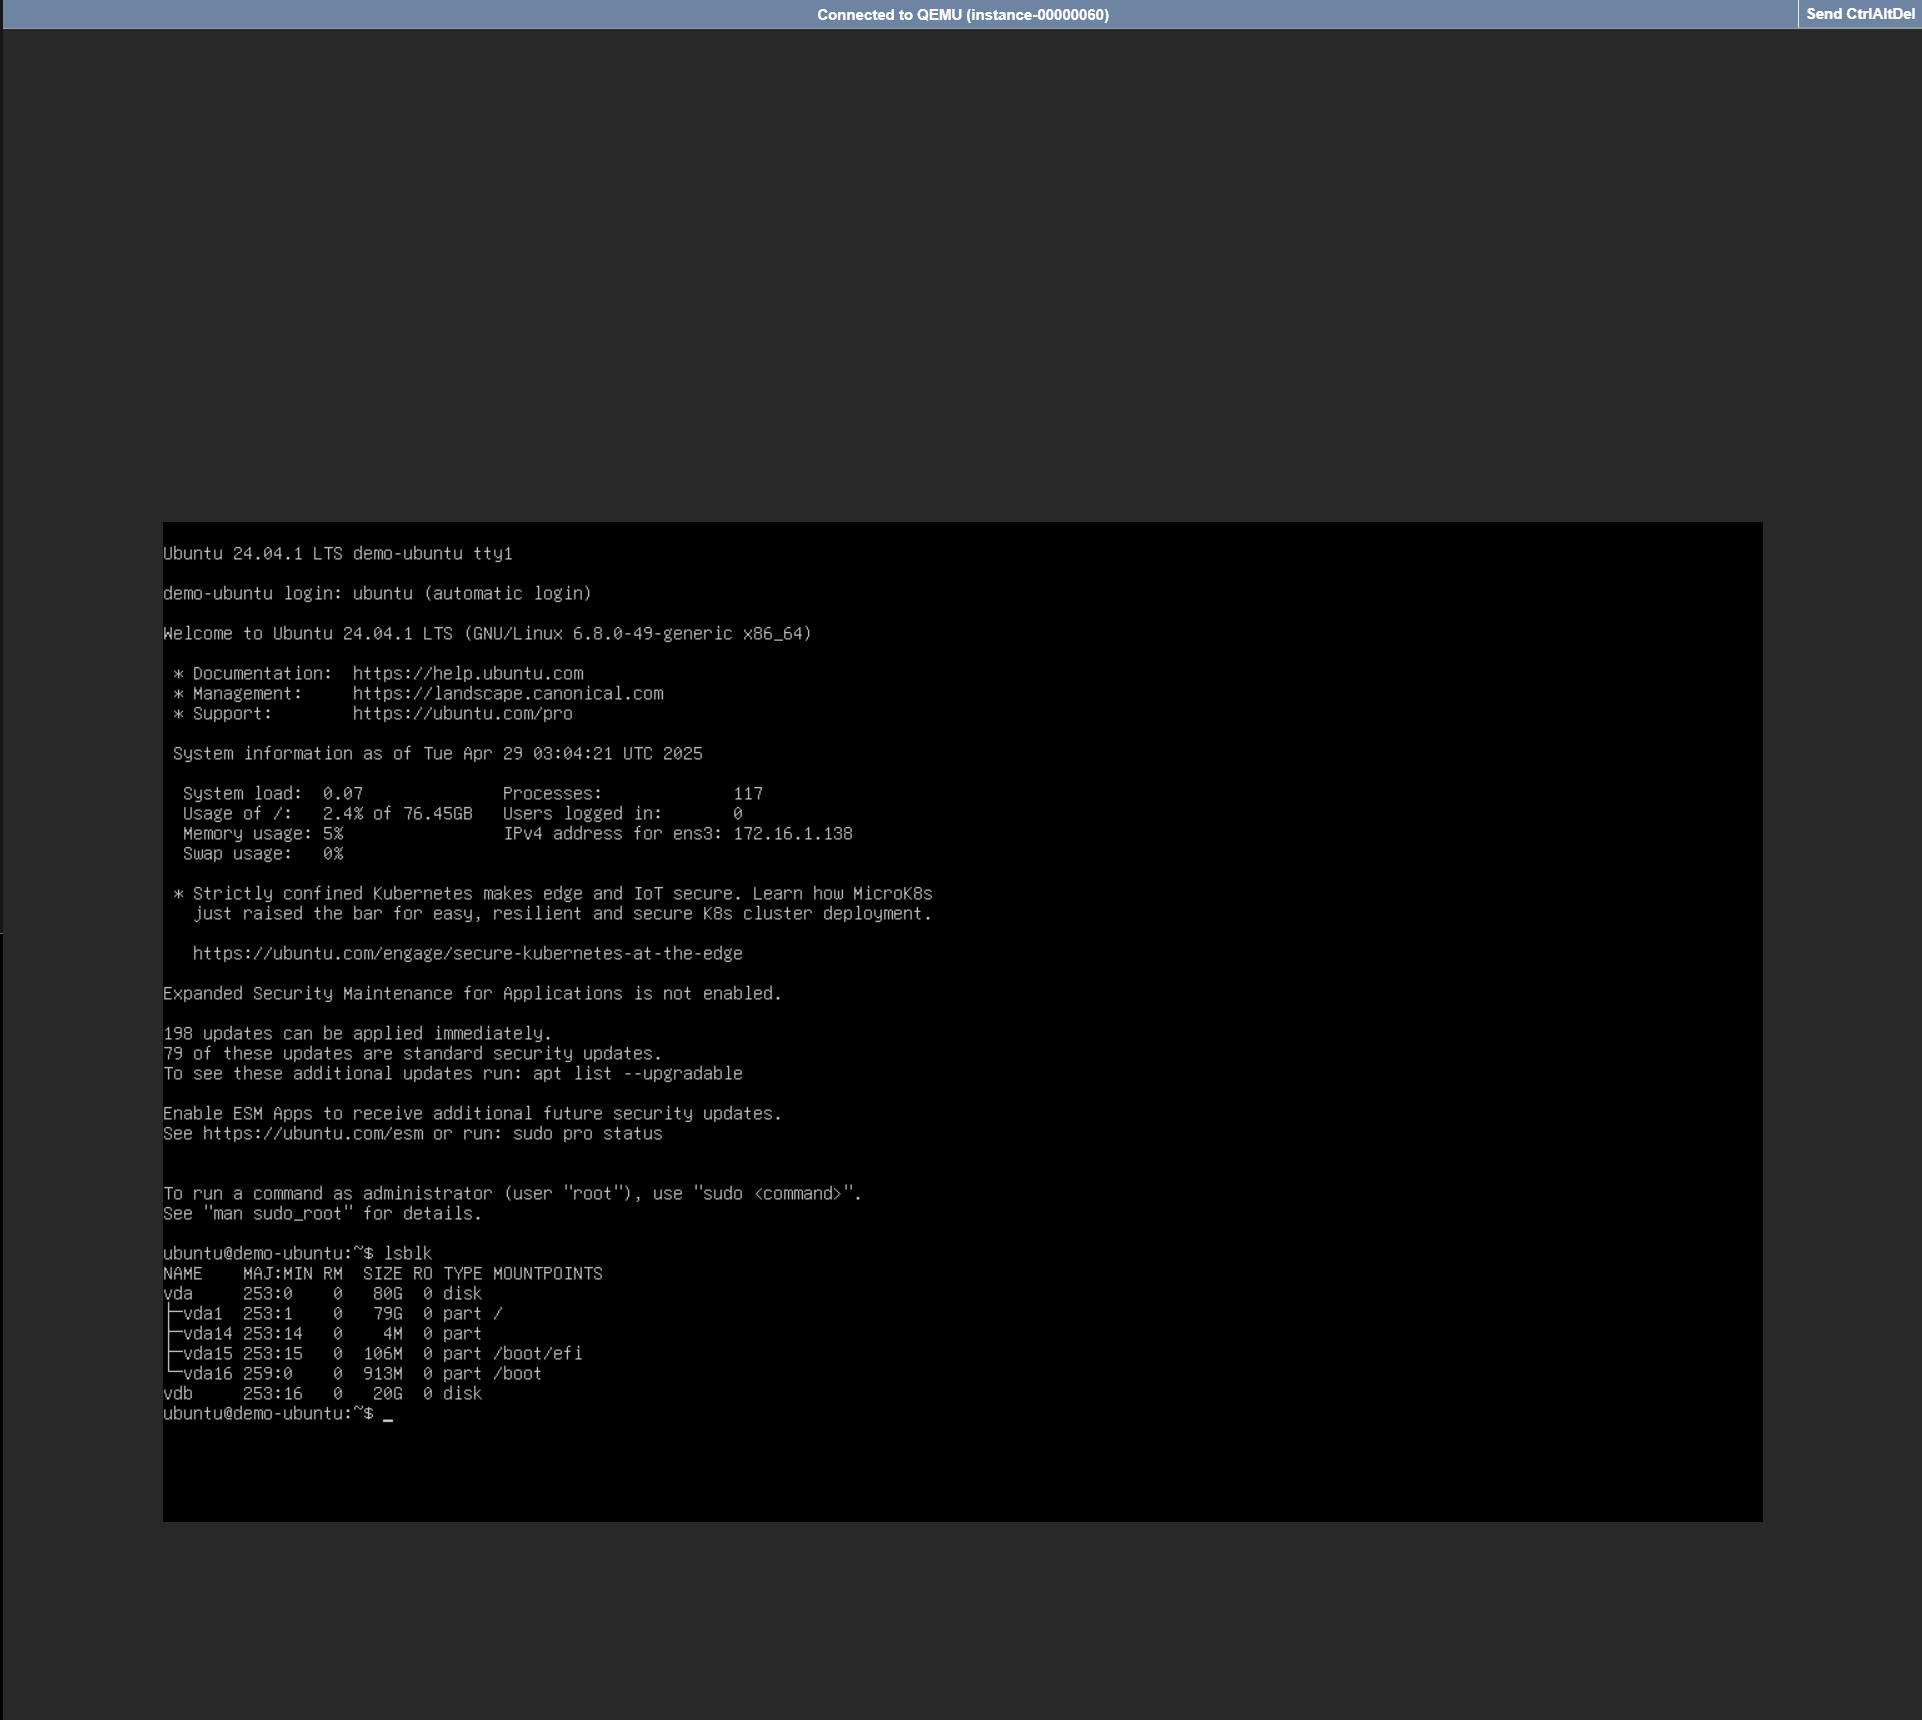
4. Verify the attachment through console. See **[Connect to Instance by noVNC](../../compute/novnc_console.md)** for more info.

   ![/assets/volumes/attach_vol_4.png](/assets/volumes/attach_vol_4.png)