Enable Virtual Trusted Platform Module (vTPM) for all virtual machines in the cluster
Summary
Trusted Platform Modules (TPMs) provide hardware-backed cryptographic support for system integrity, data encryption, and device authentication, and CubeCOS extends these protections to virtual machines through virtual TPM (vTPM) support.
Details
Issues description
Trusted Platform Modules (TPMs) perform cryptographic operations that enhance system security by providing hardware-backed support for system integrity, data encryption, and device authentication. CubeCOS extends these capabilities to virtual machines by providing virtual TPM (vTPM) support for cryptographic operations.
You configure options in the Nova compute service that orchestrate and support vTPM operations for virtual machines.
Applicable versions
CubeCOS 3.0.0.
This article applies to environments running CubeCOS version 3.0.0.
Resolution
Configure Nova computing service to support vTPM
In order to configure the Nova computing service with vTPM functionality, you must create a vTPM configuration file. This action must be performed with root privileges and applied to all compute service hosts within the cluster. Create a new vTPM configuration file, sync it across all nodes, restart the computing service, and configure vTPM-backed virtual machines.
-
Open a terminal session.
-
Log into the cluster VIP as the
rootuser via SSH.ssh root@<your-cluster-vip> -
Create a new configuration file to enable vTPM on all compute and control-converged hosts.
touch /etc/nova/nova.d/vtpm.conf -
Oepn the Nova configuration using the command:
vim /etc/nova/conf.d/vtpm.conf -
Enter the following value into
vtpm.conf.# Enable the emulated vTPM in virtual machines[libvirt]swtpm_enabled = trueovmf_path = /usr/share/edk2/ovmf/OVMF_CODE.secboot.fd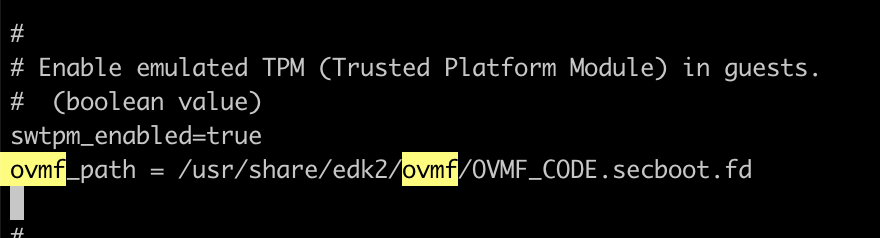
-
Save and exit the editor after making changes.
Sync the vTPM configuration file to all computing nodes
To ensure that all compute nodes can provide the vTPM service by syncing the vTPM with a cluster-wide synchronization task.
-
Sync the configuration file to all CubeCOS nodes.
cubectl node -r compute rsync /etc/nova/nova.d/vtpm.conf
Before proceeding you must check and confirm that the synchronization process has completed for all compute nodes.
Restart the Nova computing service on all computing nodes
In order to implement the vTPM configuration, finish syncing the configuration file and then execute the following command to restart the service:
-
Restart the Nova compute service on all nodes hosting the compute service.
cubectl node -r compute exec -p "hex_config restart_nova" -
Check the Nova service health on all compute service nodes.
cubectl node -r compute exec -p "systemctl status openstack-nova-compute | grep Active" -
The
openstack-nova-computeservice status must returnActivefor all compute role nodes.
Configure virtual machine images to support vTPM configuration
-
Import an image via CLI, see Import image (CLI) for more.
-
After importing the image via CLI, open the OpenStack Skyline UI. Select
Administratorin the top-right corner to enter administrator mode. For more information, see How to navigate to the CubeCOS Administrative panel for more. -
Navigate to
Compute > Imageand locate the target image, selectMoreto access the image details.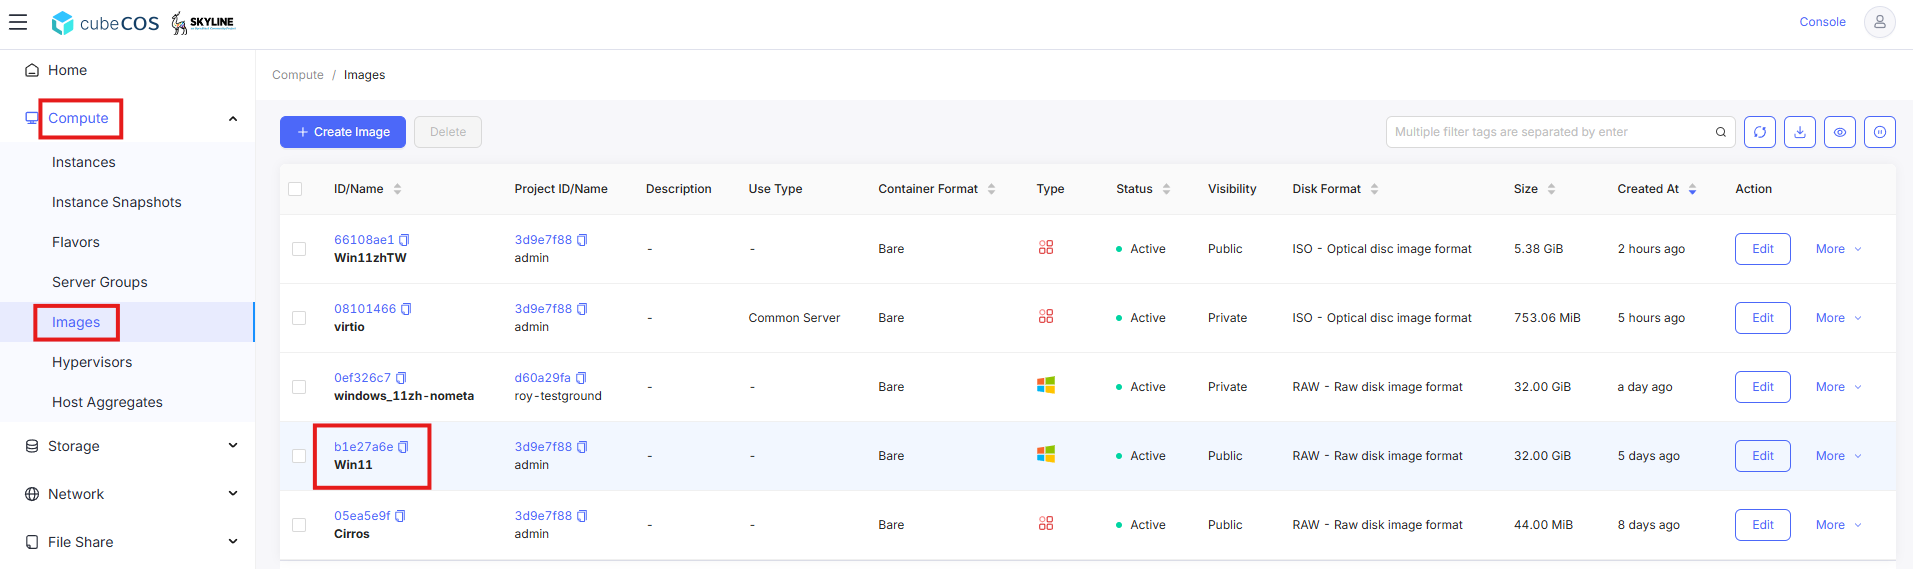
-
Under the
Moredrop down, selectManage Metadatato begin configuring the virtual machine image metadata.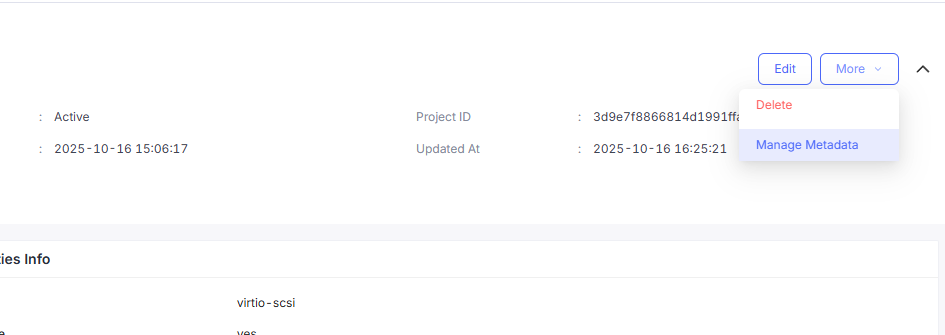
-
To support
vTPMs, set the following metadata for the new image.- hw_tpm_version = 2.0
- hw_tpm_model = tpm-crb
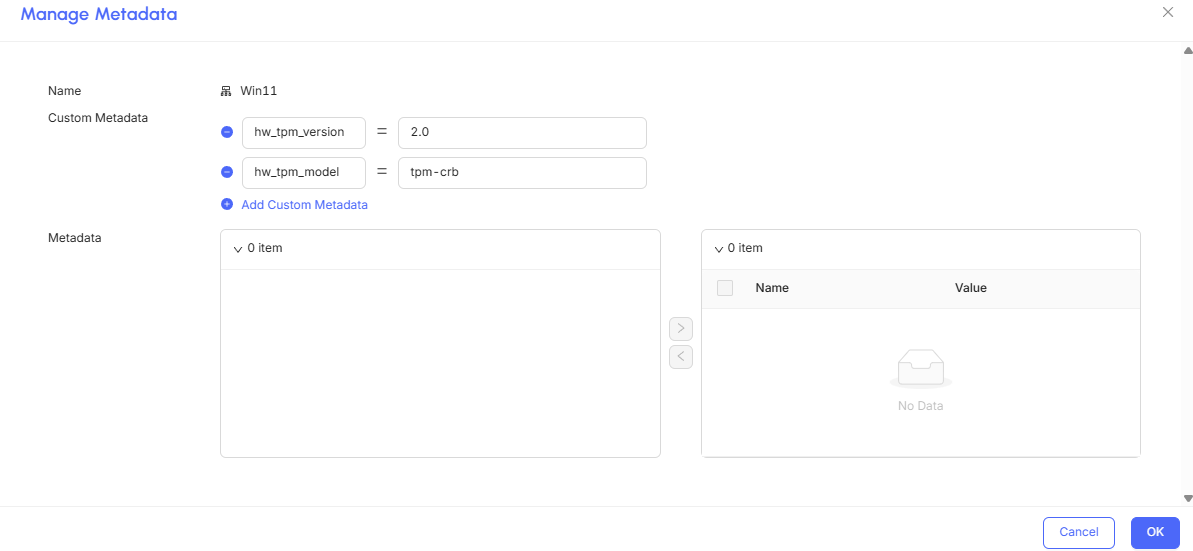
-
Click
OKto apply the configurations. -
Refresh the
Image Detailpage and verify that the vTPM metadata properties are set succcessfully.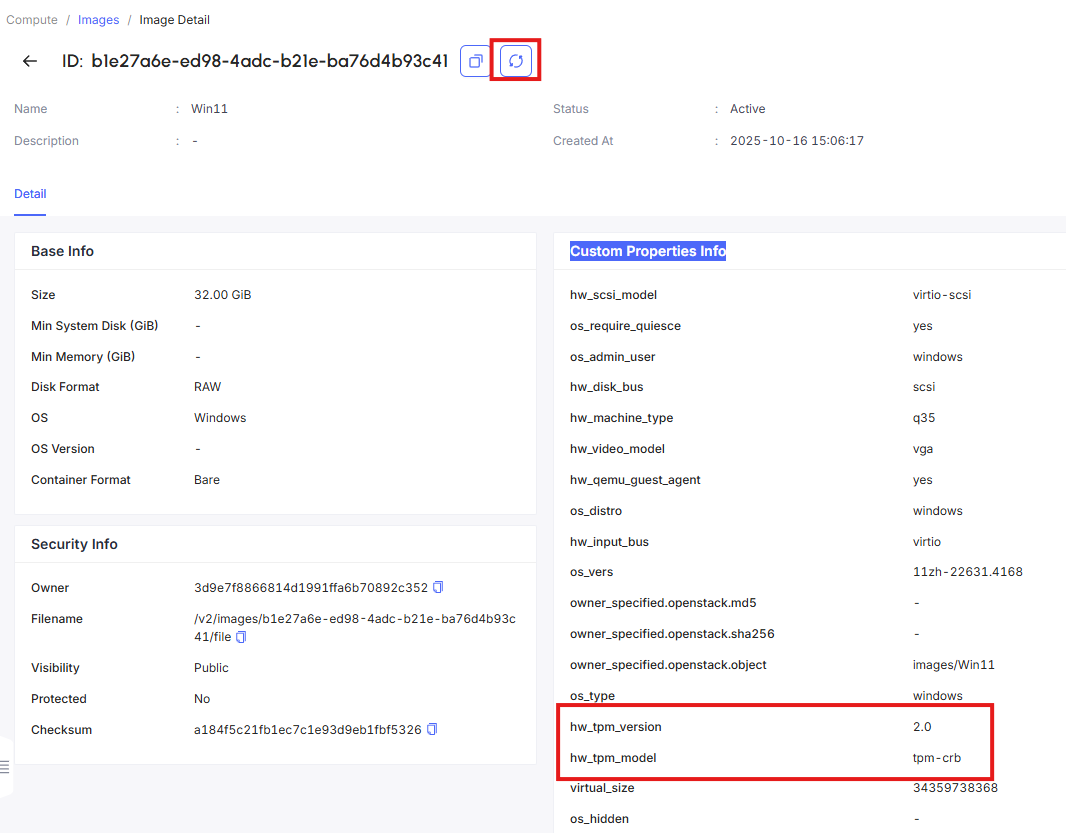
-
The configured image will now support vTPM usage.