遷移映像檔(VMware/Hyper-V)
將虛擬機器映像從 VMware 或 Hyper-V 遷移至 CubeCOS,涉及將虛擬機器映像轉換為與 CubeCOS 相容的格式,並將其上傳至 Glance 映像服務。
資訊
USB儲存裝置預設為被封鎖狀態。若需存取 USB 裝置,請以管理員身分登入後,透過 CLI > tuning > configure 指令將調校選項 cubesys.probeusb 設定為 true。
匯出 Windows 虛擬機器
請下載 Microsoft Disk2vhd 工具,將您的 Windows 虛擬機器匯出為 VHD 映像檔。
匯出 Linux 虛擬機器
在實體主機上執行以下指令,將硬碟匯出為原始映像格式。
root@ubuntu:/home/ubuntu# dd if=/dev/sda bs=1024k | ssh [email protected] "cat > /var/support/p2v-ubuntu.raw"
匯出 VMware 虛擬機器
將 VMware 虛擬機器以 OVA 或 VMDK 格式匯出。
將虛擬機器匯入CubeCOS
CubeCOS 支援的圖像格式:
- qcow2
- 原始
- vmdk
- vhd
- vdi
- 卵子
- ami
- img
- 核心
使用 import_efi 進行 VMware/Hyper-V 映像檔優化
將 Windows Server 2022 從 VMware 匯入為 Glance 映像檔
- 登入管理員命令列介面
- 開始使用
image import_efi匯入映像檔
cc1> image import_efi
1: usb
2: local
Enter index: 2
1: amphora-x64-haproxy_yoga.qcow2
2: manila-service-image-yoga.qcow2
3: rancher-cluster-image.vmdk
4: rhel9.5.qcow2
5: rocky8-1-exsi-build.vmdk
6: rocky8.qcow2
7: ubuntu2404.qcow2
8: Win11zh-22631.4168.vmdk
9: win2022zh-20348.2849.vmdk
10: win2025zh-26100.3194.vmdk
11: windows2022-esxi70u2-legacy.vmdk
Enter index: 11
Specify image name: windows2022_esxi
Select domain:
1: default
Enter index: 1
Select tenant:
1: demo
2: app-framework
3: bigstack
4: feature_test
5: admin
6: CMP-demo
Enter index: 5
Bootable image or volume:
1: glance-images
2: cinder-volumes
Enter index: 1
Visibility:
1: public
2: private
Enter index: 1
Importing...
[15:19:16] Converting image to RAW format ...
    (100.00/100%)
[15:20:22] Creating image windows2022_esxi ...
[=============================>] 100%
1b9d9f7f-8193-4371-a65a-b93583164f1a
[15:26:23] Finished creating image windows2022_esxi
Importing windows2022_esxi complete. It is safe to remove the local image
file.
將 Rocky Linux 8.1 匯入為 Glance 映像檔
- 登入管理員命令列介面
- 開始使用
image import_efi匯入映像檔
cc1> image import_efi
1: usb
2: local
Enter index: 2
1: amphora-x64-haproxy_yoga.qcow2
2: manila-service-image-yoga.qcow2
3: rancher-cluster-image.vmdk
4: rhel9.5.qcow2
5: rocky8-1-exsi-build.vmdk
6: rocky8.qcow2
7: ubuntu2404.qcow2
8: Win11zh-22631.4168.vmdk
9: win2022zh-20348.2849.vmdk
10: win2025zh-26100.3194.vmdk
11: windows2022-esxi70u2-legacy.vmdk
Enter index: 5
Specify image name: rocky8-1_esxi_glance
Select domain:
1: default
Enter index: 1
Select tenant:
1: demo
2: app-framework
3: bigstack
4: feature_test
5: admin
6: CMP-demo
Enter index: 5
Bootable image or volume:
1: glance-images
2: cinder-volumes
Enter index: 1
Visibility:
1: public
2: private
Enter index: 1
Importing...
[15:28:59] Converting image to RAW format ...
    (100.00/100%)
[15:29:20] Creating image rocky8-1_esxi_glance ...
[=============================>] 100%
27a36989-3c97-45b6-a83e-f35ad58188c1
[15:32:46] Finished creating image rocky8-1_esxi_glance
Importing rocky8-1_esxi_glance complete. It is safe to remove the local image
file.
將 VMware 中的 Rocky Linux 8.1 匯入為 Cinder 硬碟
- 登入管理員命令列介面
- 開始使用
image import_efi匯入映像檔
cc1> image import_efi
1: usb
2: local
Enter index: 2
1: amphora-x64-haproxy_yoga.qcow2
2: manila-service-image-yoga.qcow2
3: rancher-cluster-image.vmdk
4: rhel9.5.qcow2
5: rocky8-1-exsi-build.vmdk
6: rocky8.qcow2
7: ubuntu2404.qcow2
8: Win11zh-22631.4168.vmdk
9: win2022zh-20348.2849.vmdk
10: win2025zh-26100.3194.vmdk
11: windows2022-esxi70u2-legacy.vmdk
Enter index: 5
Specify image name: rocky8-1_cinder
Select domain:
1: default
Enter index: 1
Select tenant:
1: demo
2: app-framework
3: bigstack
4: feature_test
5: admin
6: CMP-demo
Enter index: 5
Bootable image or volume:
1: glance-images
2: cinder-volumes
Enter index: 2
Importing...
[15:35:15] Converting image to RAW format ...
    (100.00/100%)
[15:35:36] Creating image rocky8-1_cinder ...
Importing image: 100% complete...done.
[15:36:04] Finished creating image rocky8-1_cinder
Importing rocky8-1_cinder complete. It is safe to remove the local image file.
系統排錯
透過圖形使用者介面為上傳的圖片添加額外的元數據。此步驟建議執行,以確保與 VMware 或 Hyper-V 環境的正確相容性。
- hw_vif_model="e1000"
- hw_disk_bus="sata"
更新映像檔 metadata
-
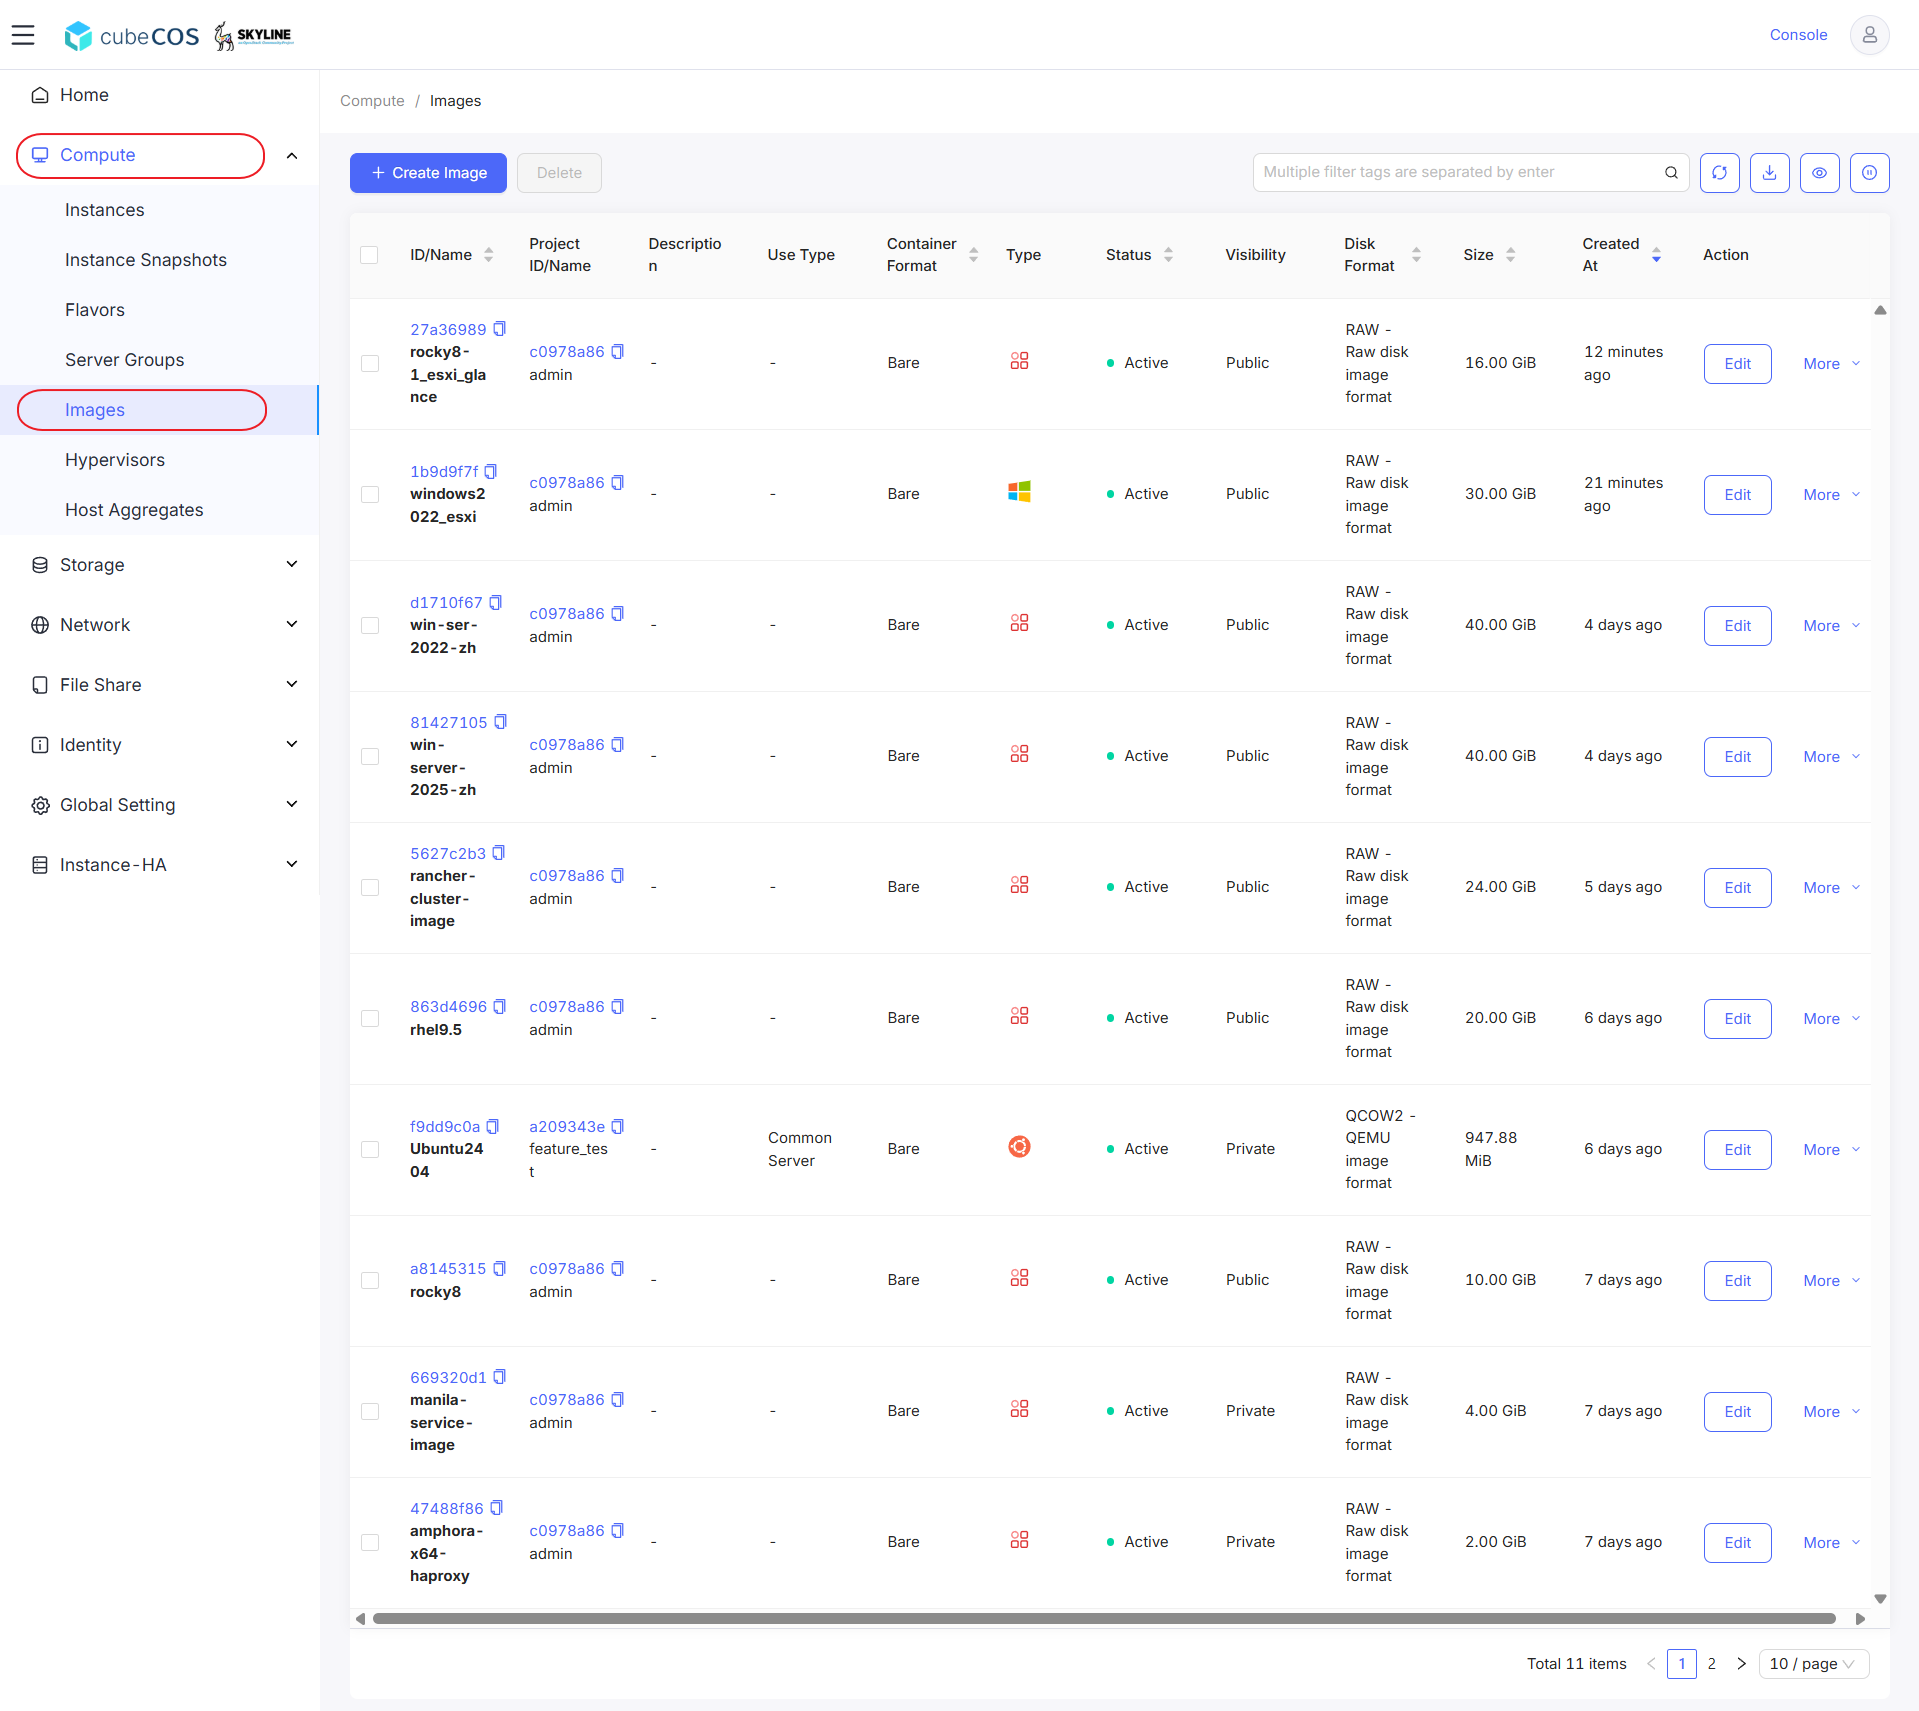
導航至管理員 > 運算 > 映像檔。
-
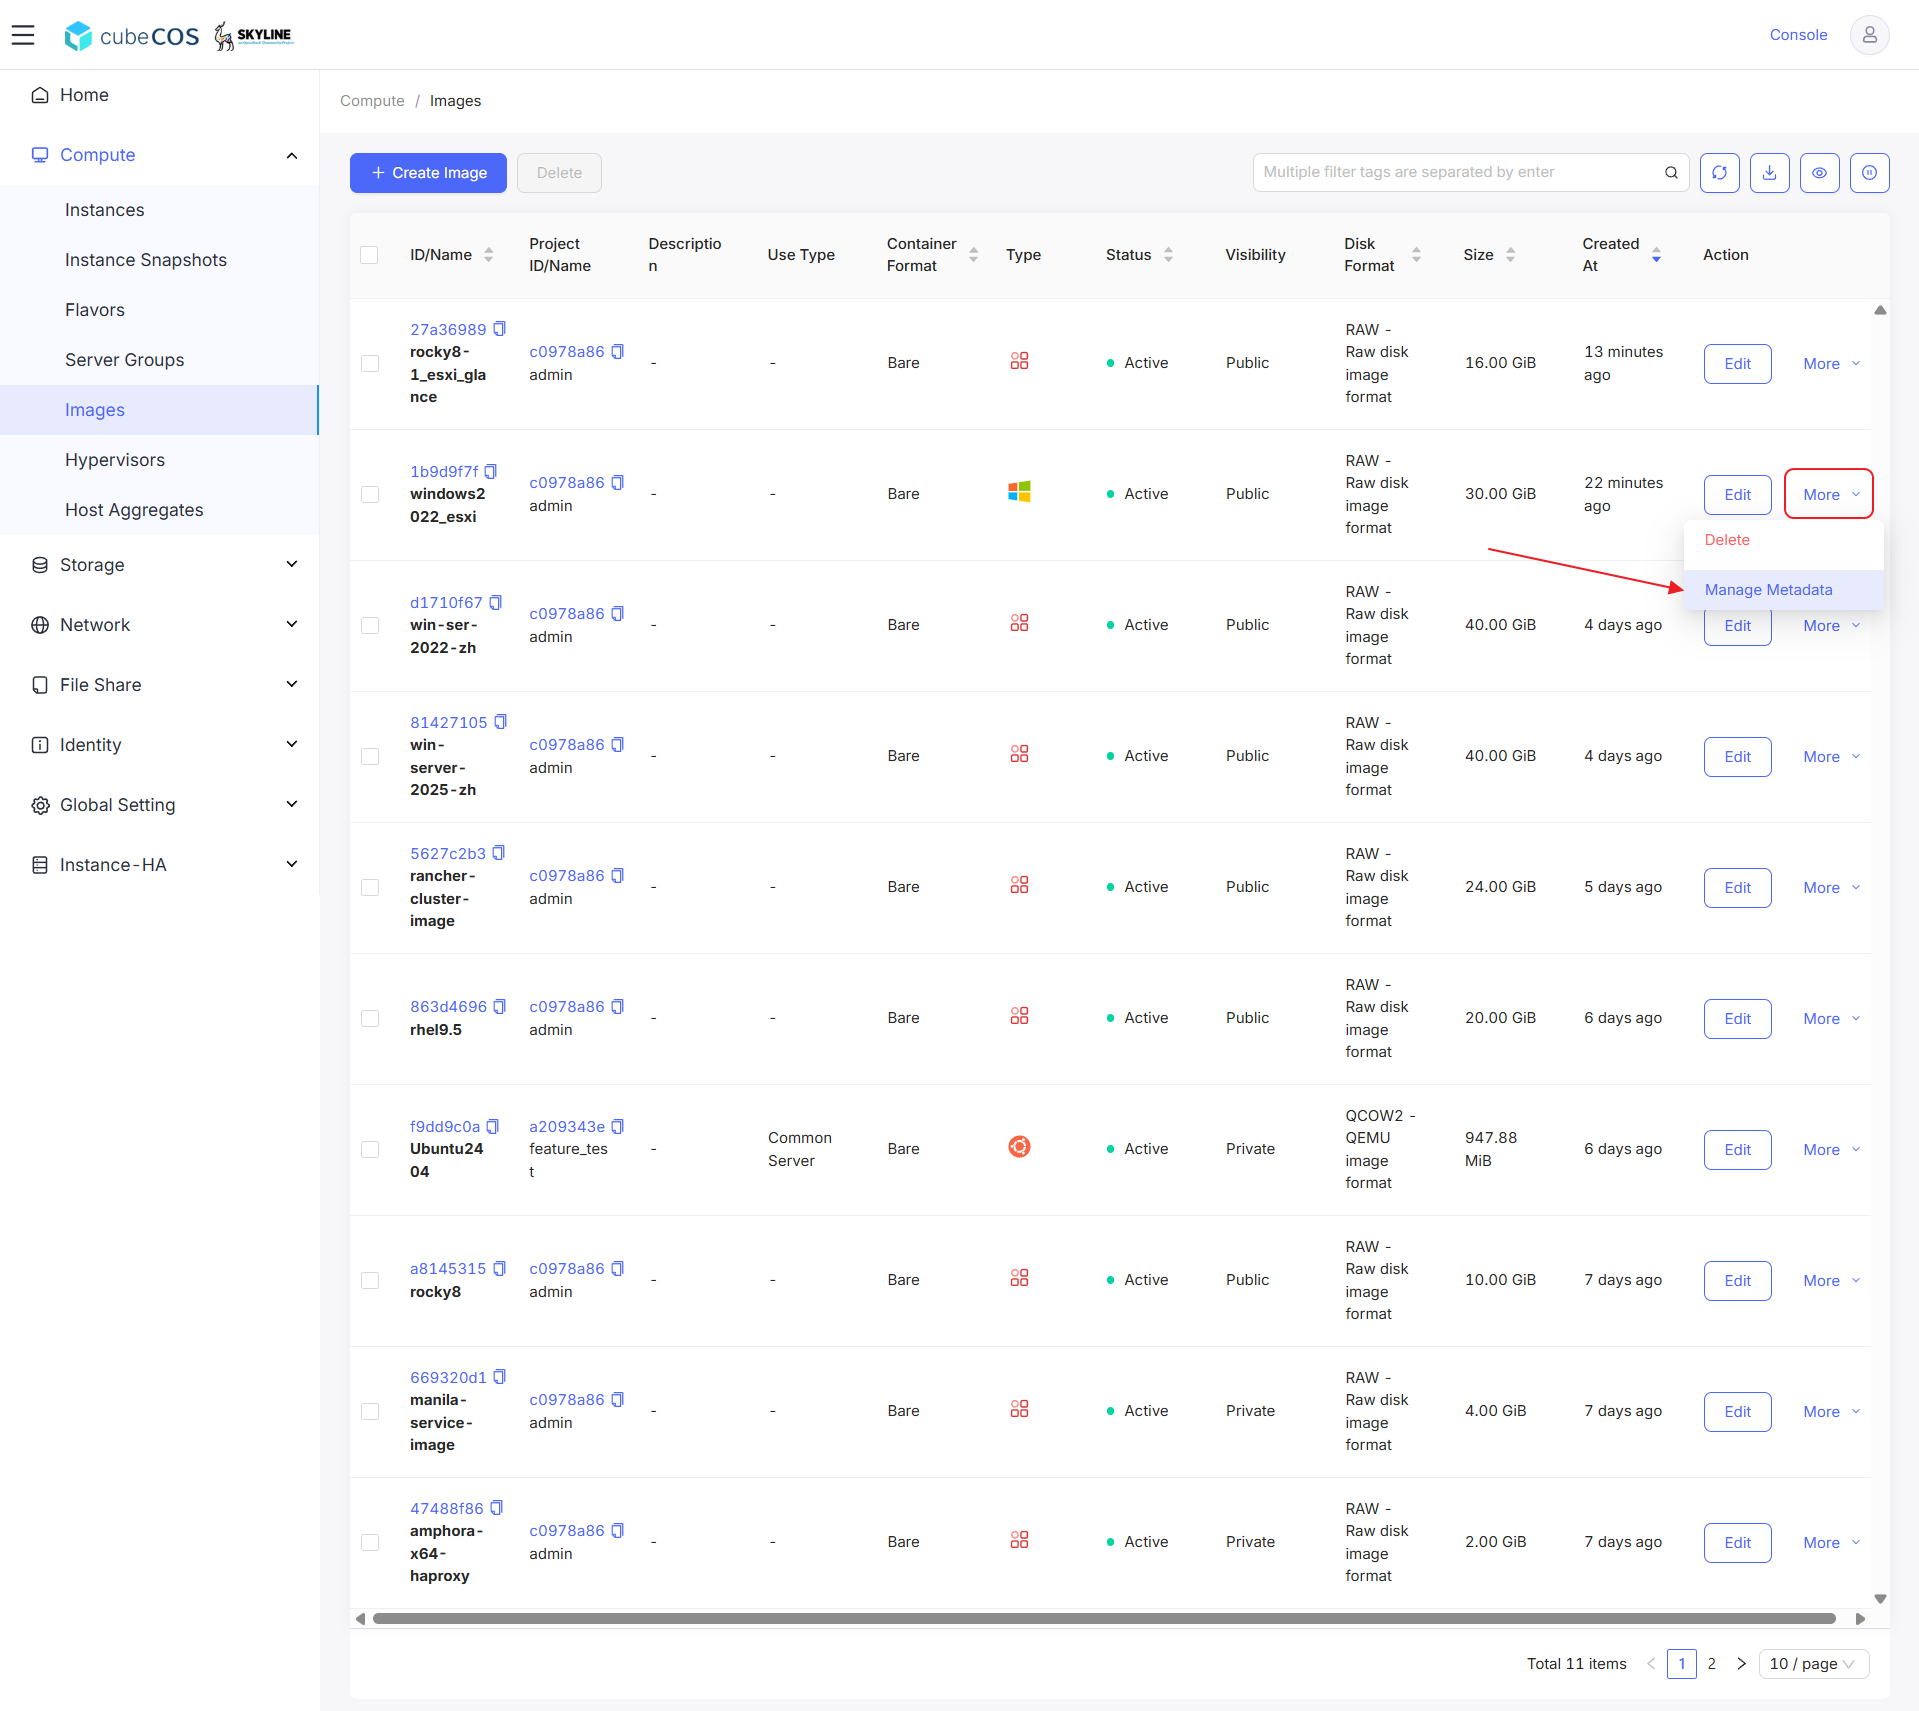
選擇所需專案,將游標懸停於「更多」選項上,點擊「管理元數據」以繼續操作。
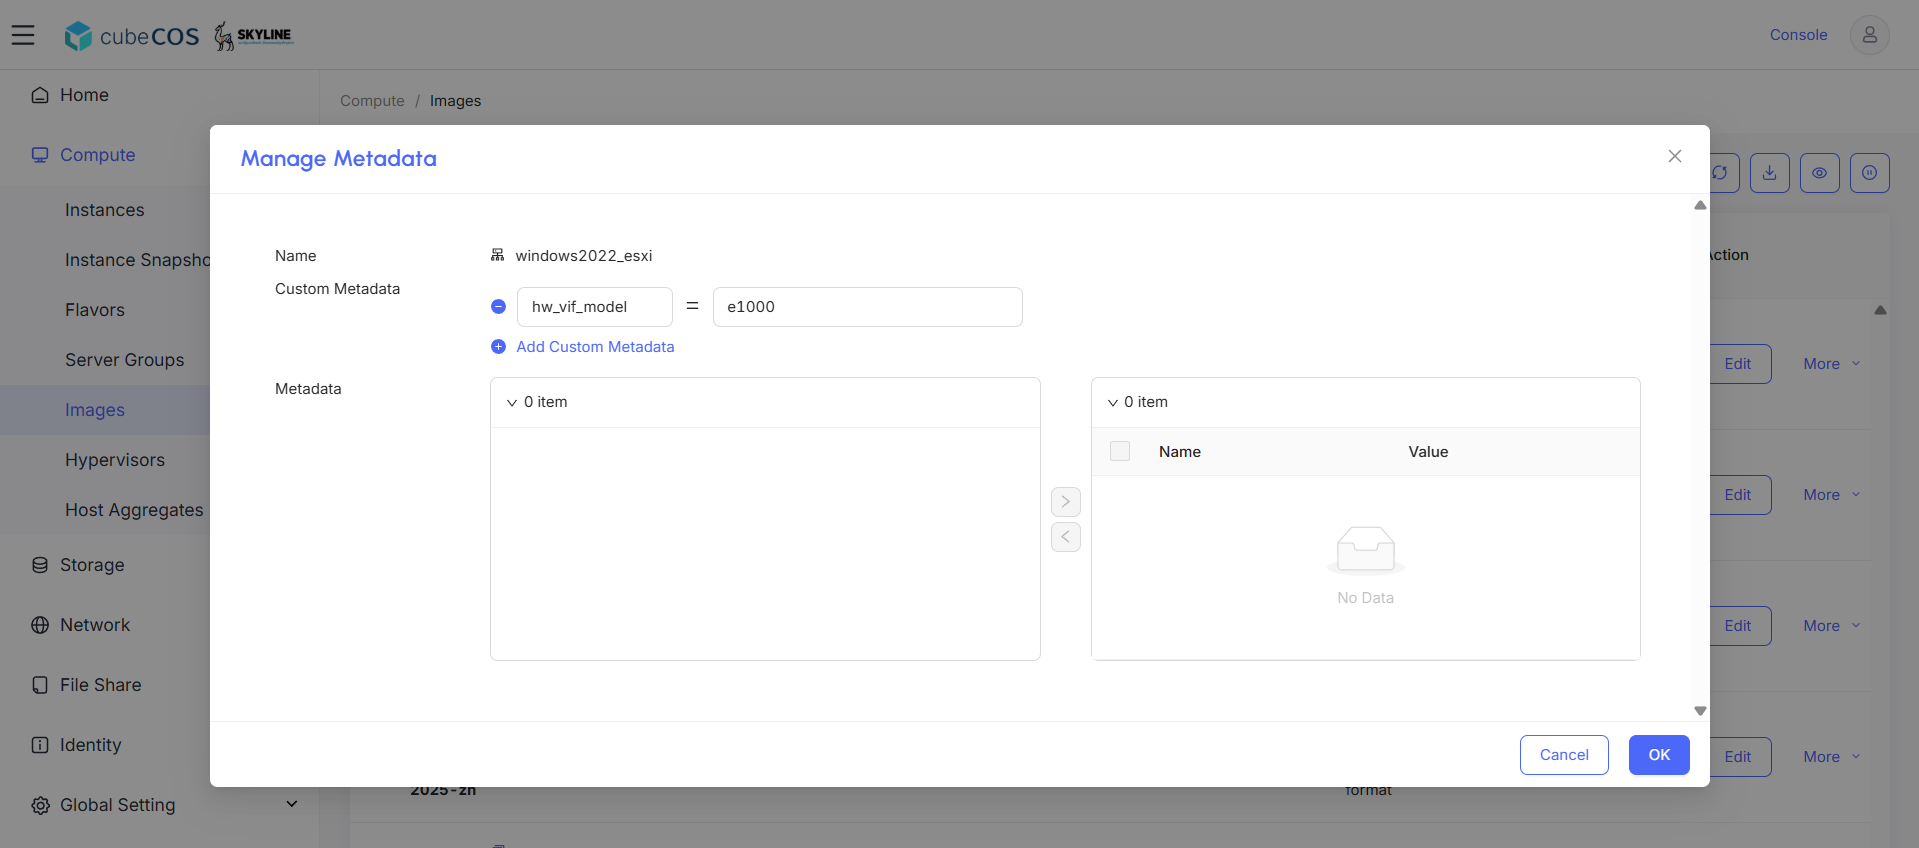
設定網路驅動程式
- hw_vif_model = e1000
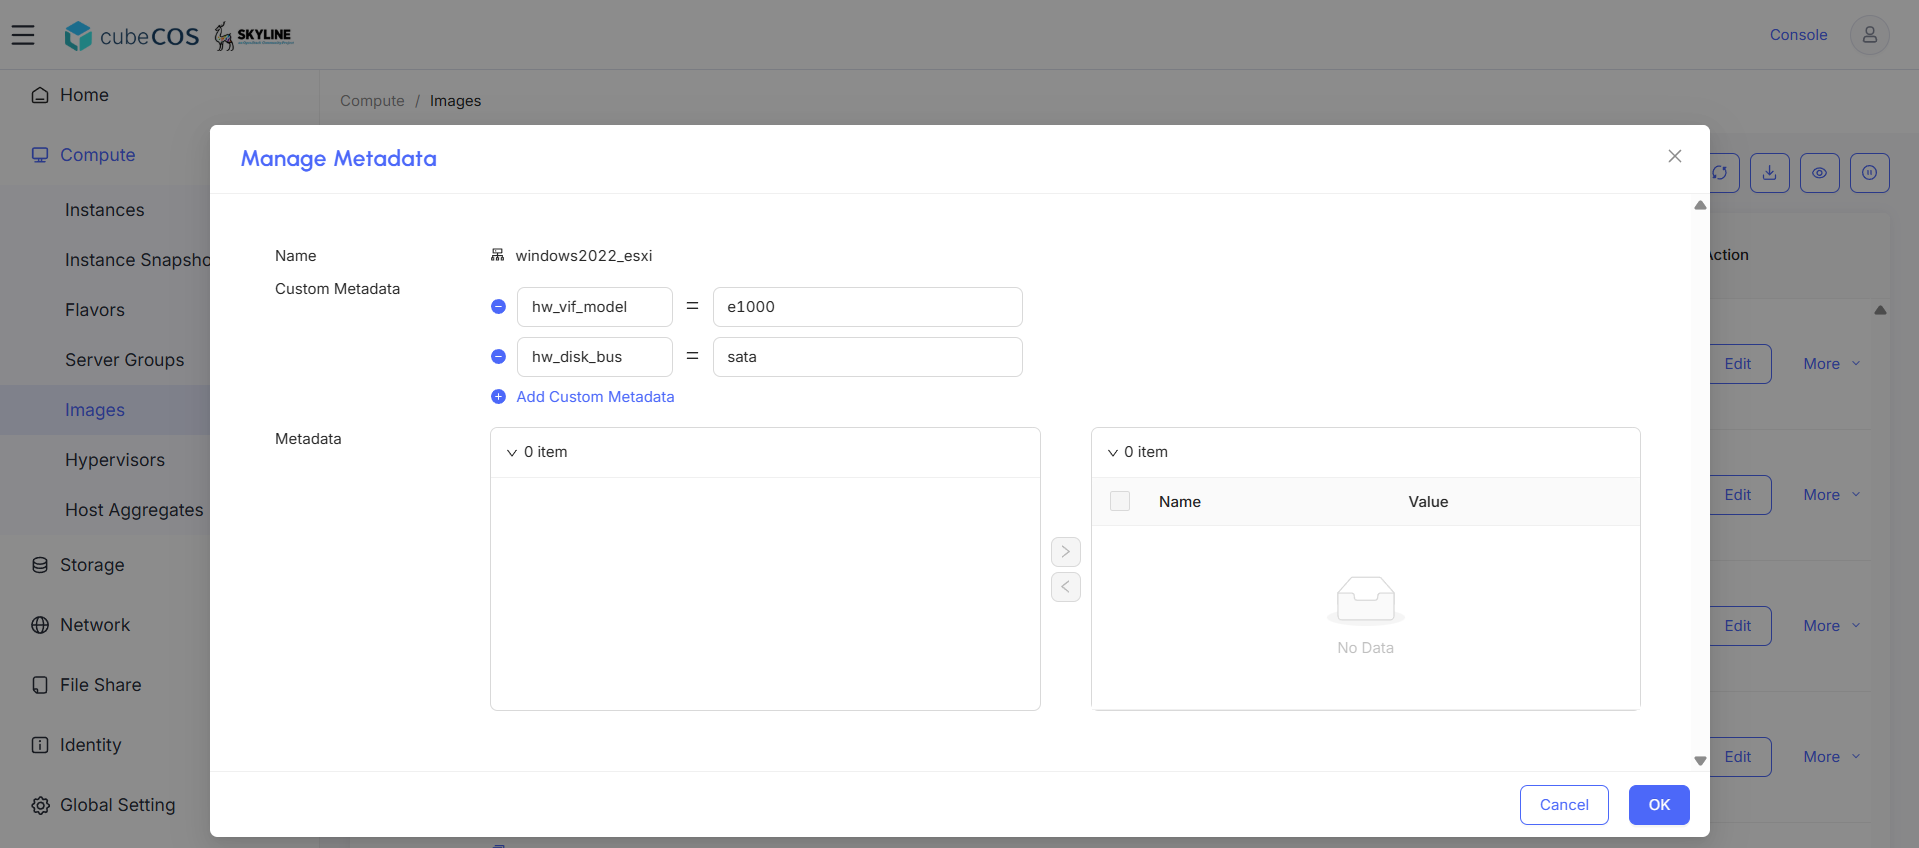
設定硬碟匯流排
- hw_disk_bus="sata"
檢視 UEFI 映像檔的Glance metadata
- hw_disk_bus='sata'
- hw_firmware_type='uefi'
- hw_machine_type='q35'
- hw_qemu_guest_agent='True'
- os_secure_boot='optional'
- hw_vif_model='e1000'
- hw_video_model='vga'