Create a Volume Transfer to another Project
Goto Current Project > Volumes > Volumes, choose the volume from the list you wish to transfer and select the
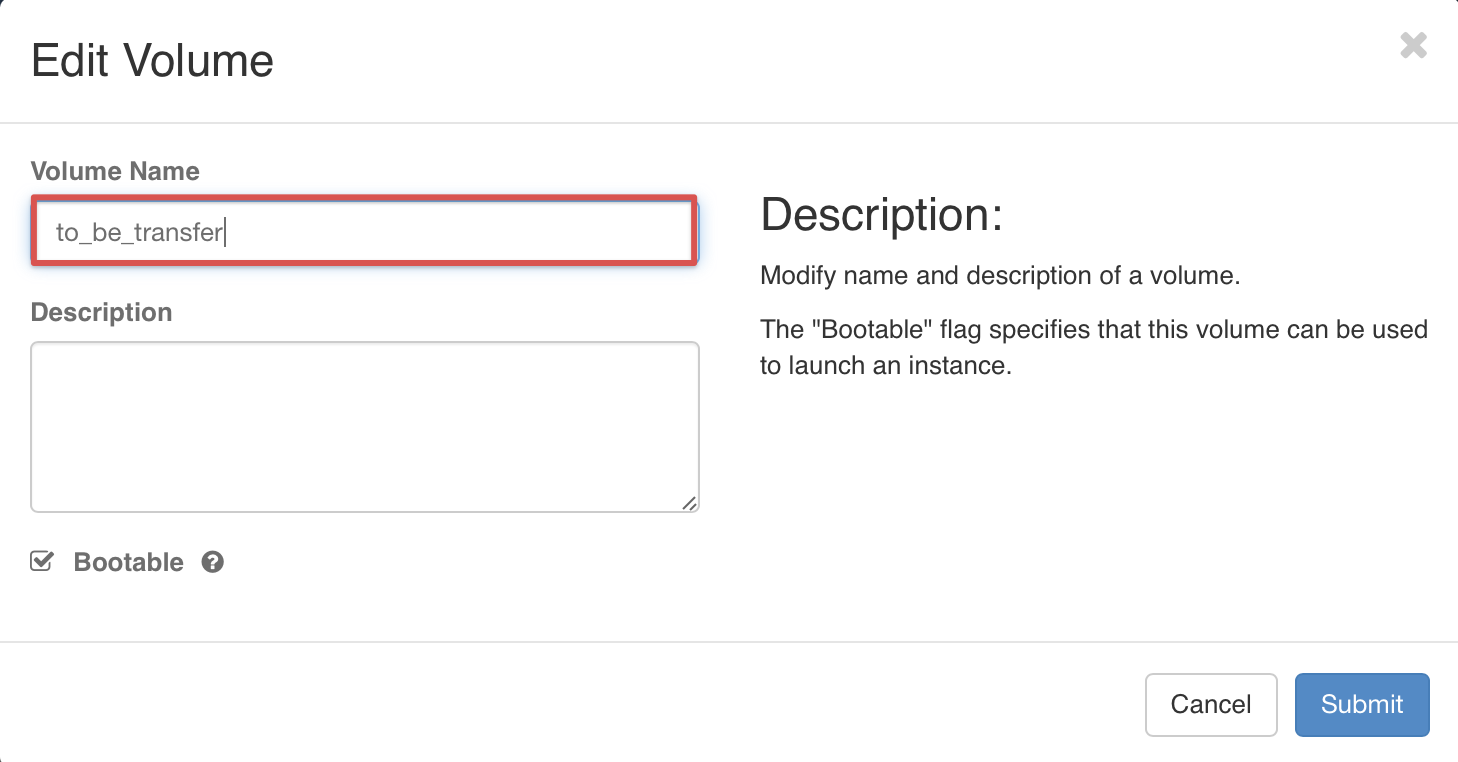
EDIT VOLUMEfrom the Actions column and rename it.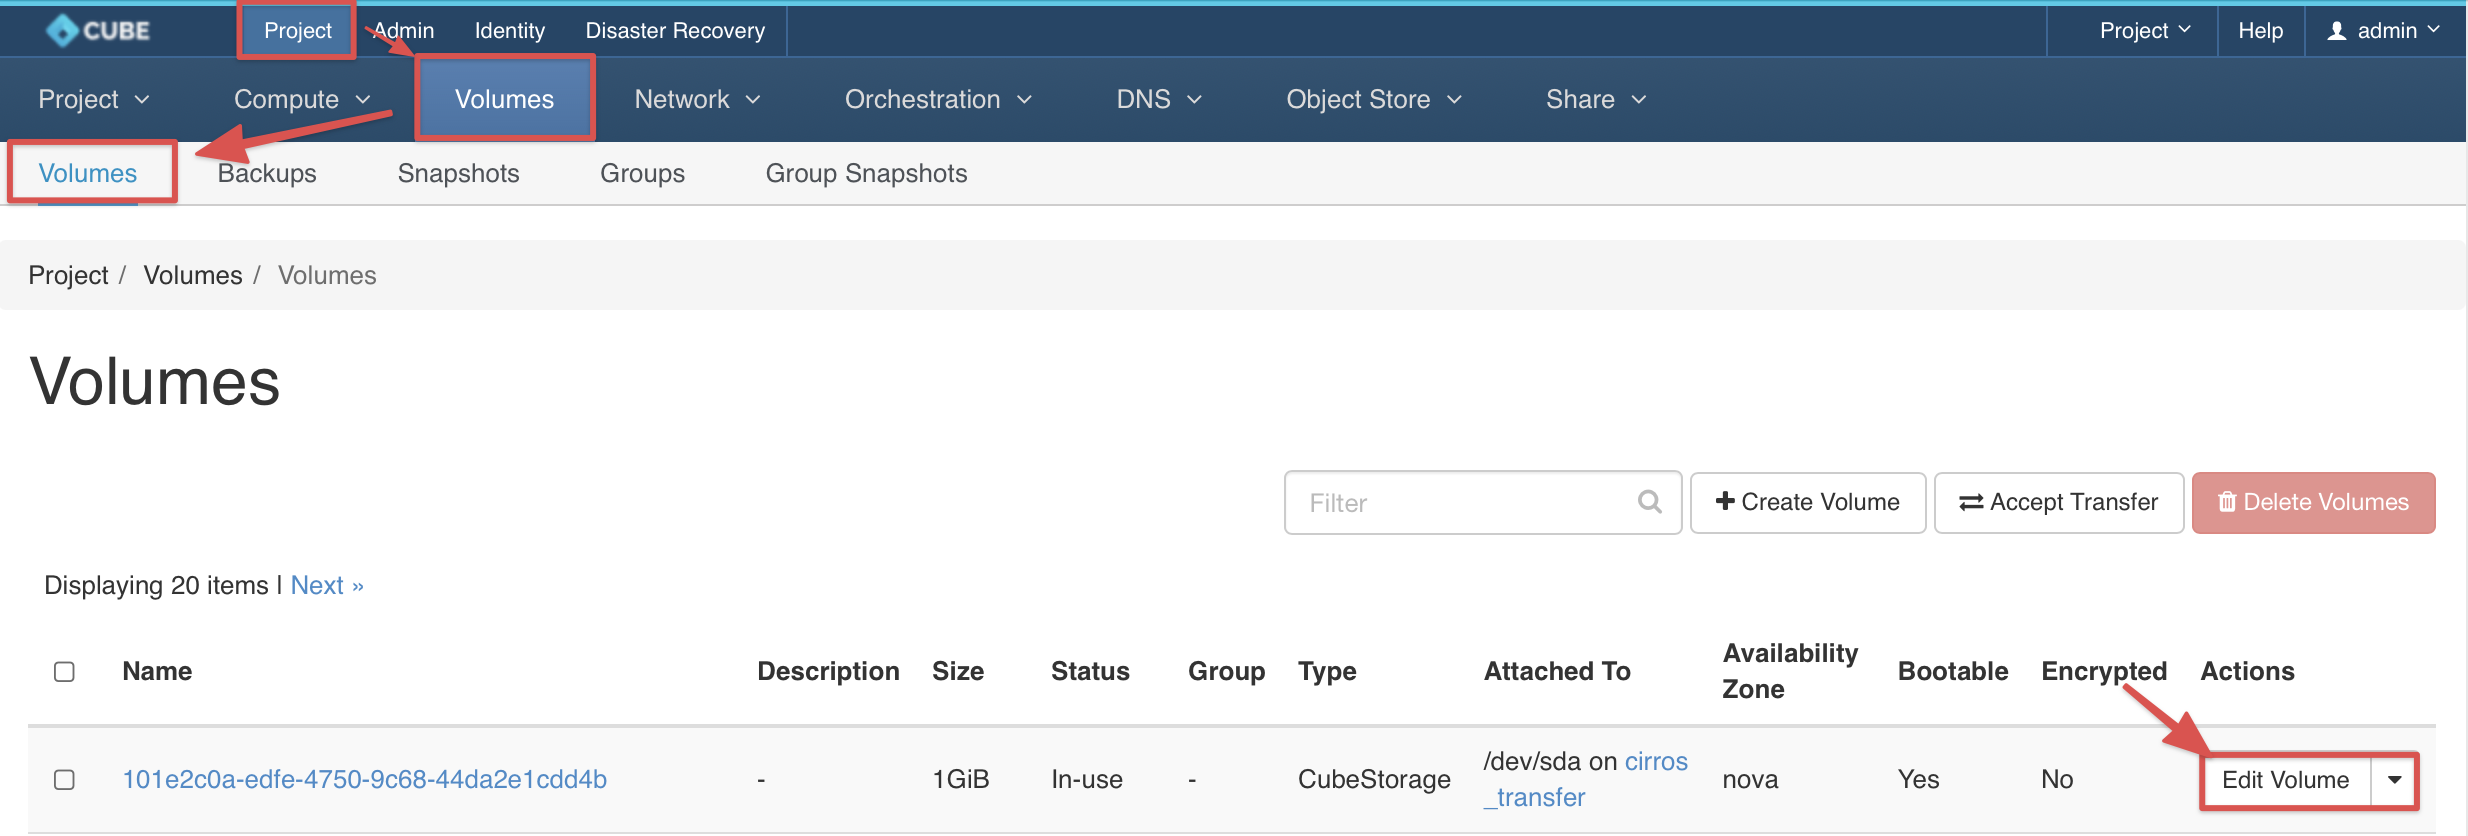
Enter a Volume Name & Submit.
Goto Project > Compute > Instances, Make sure the Instance is
Shutoff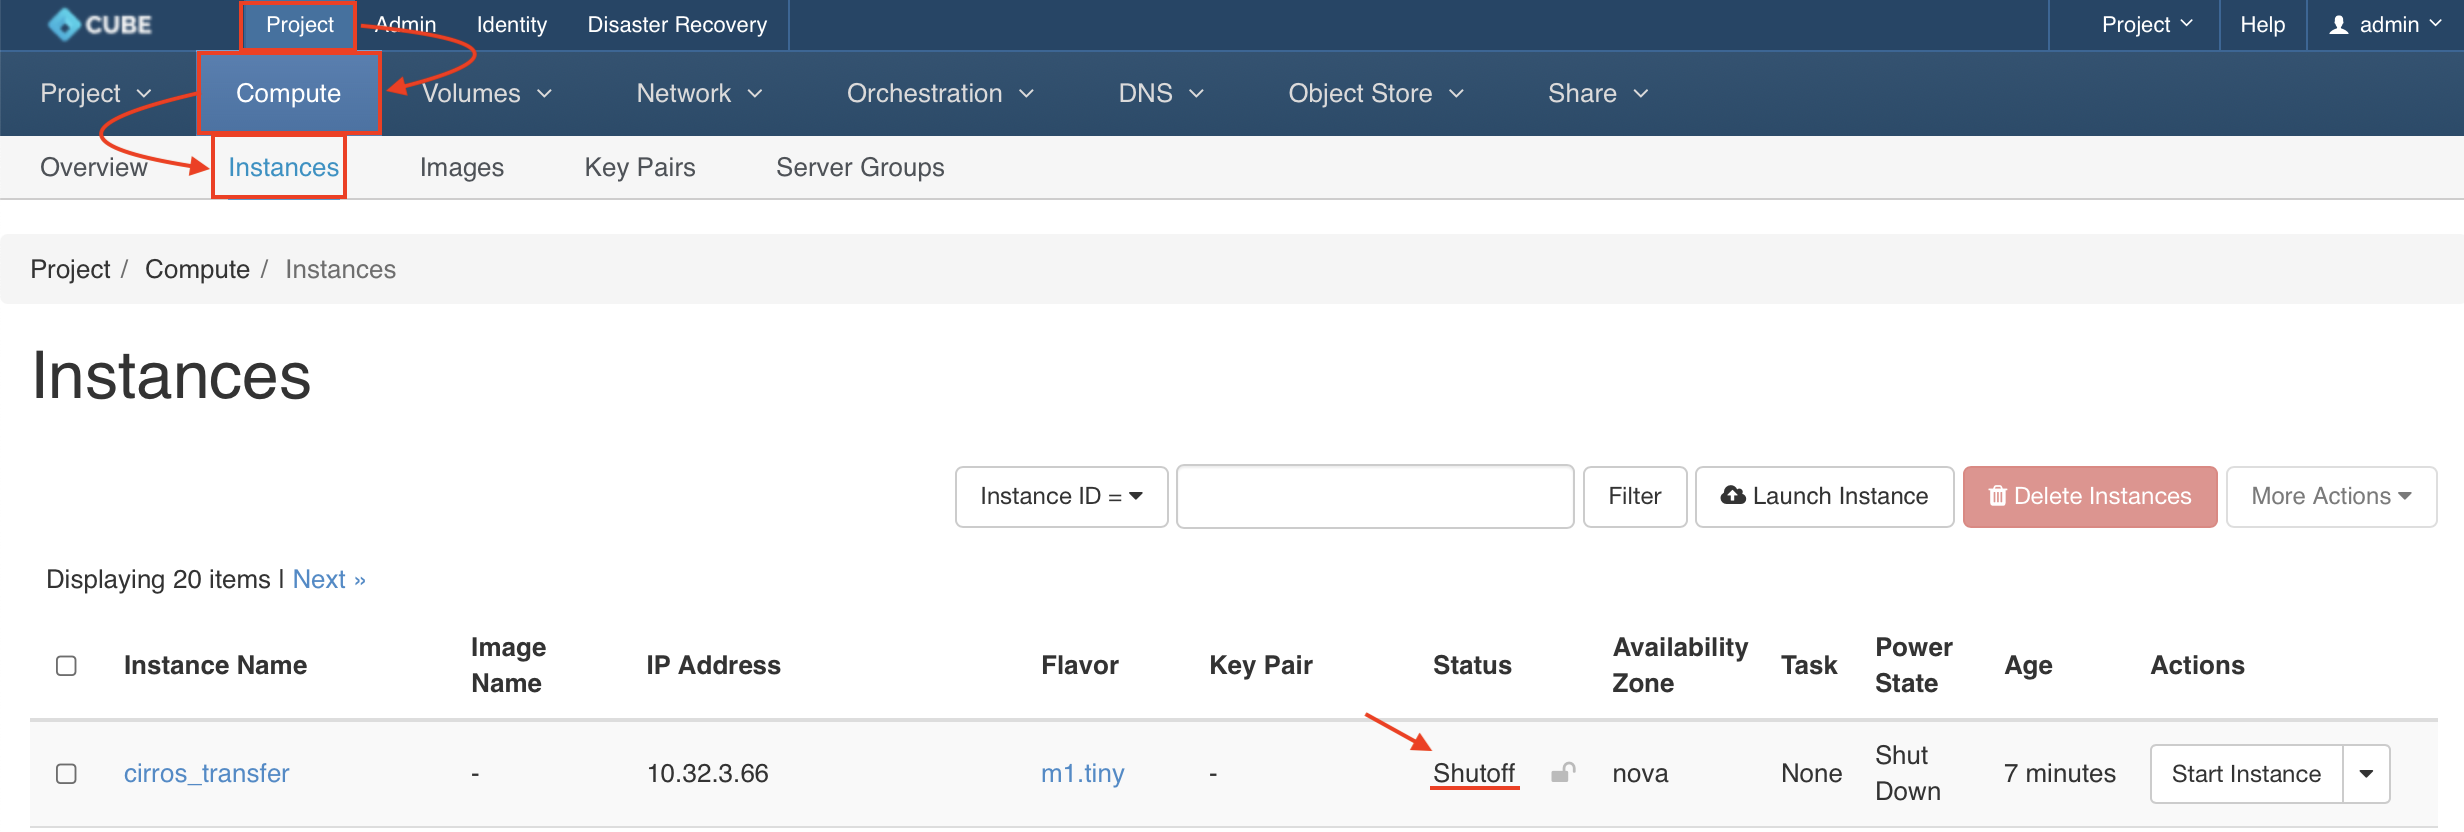
Delete the instance

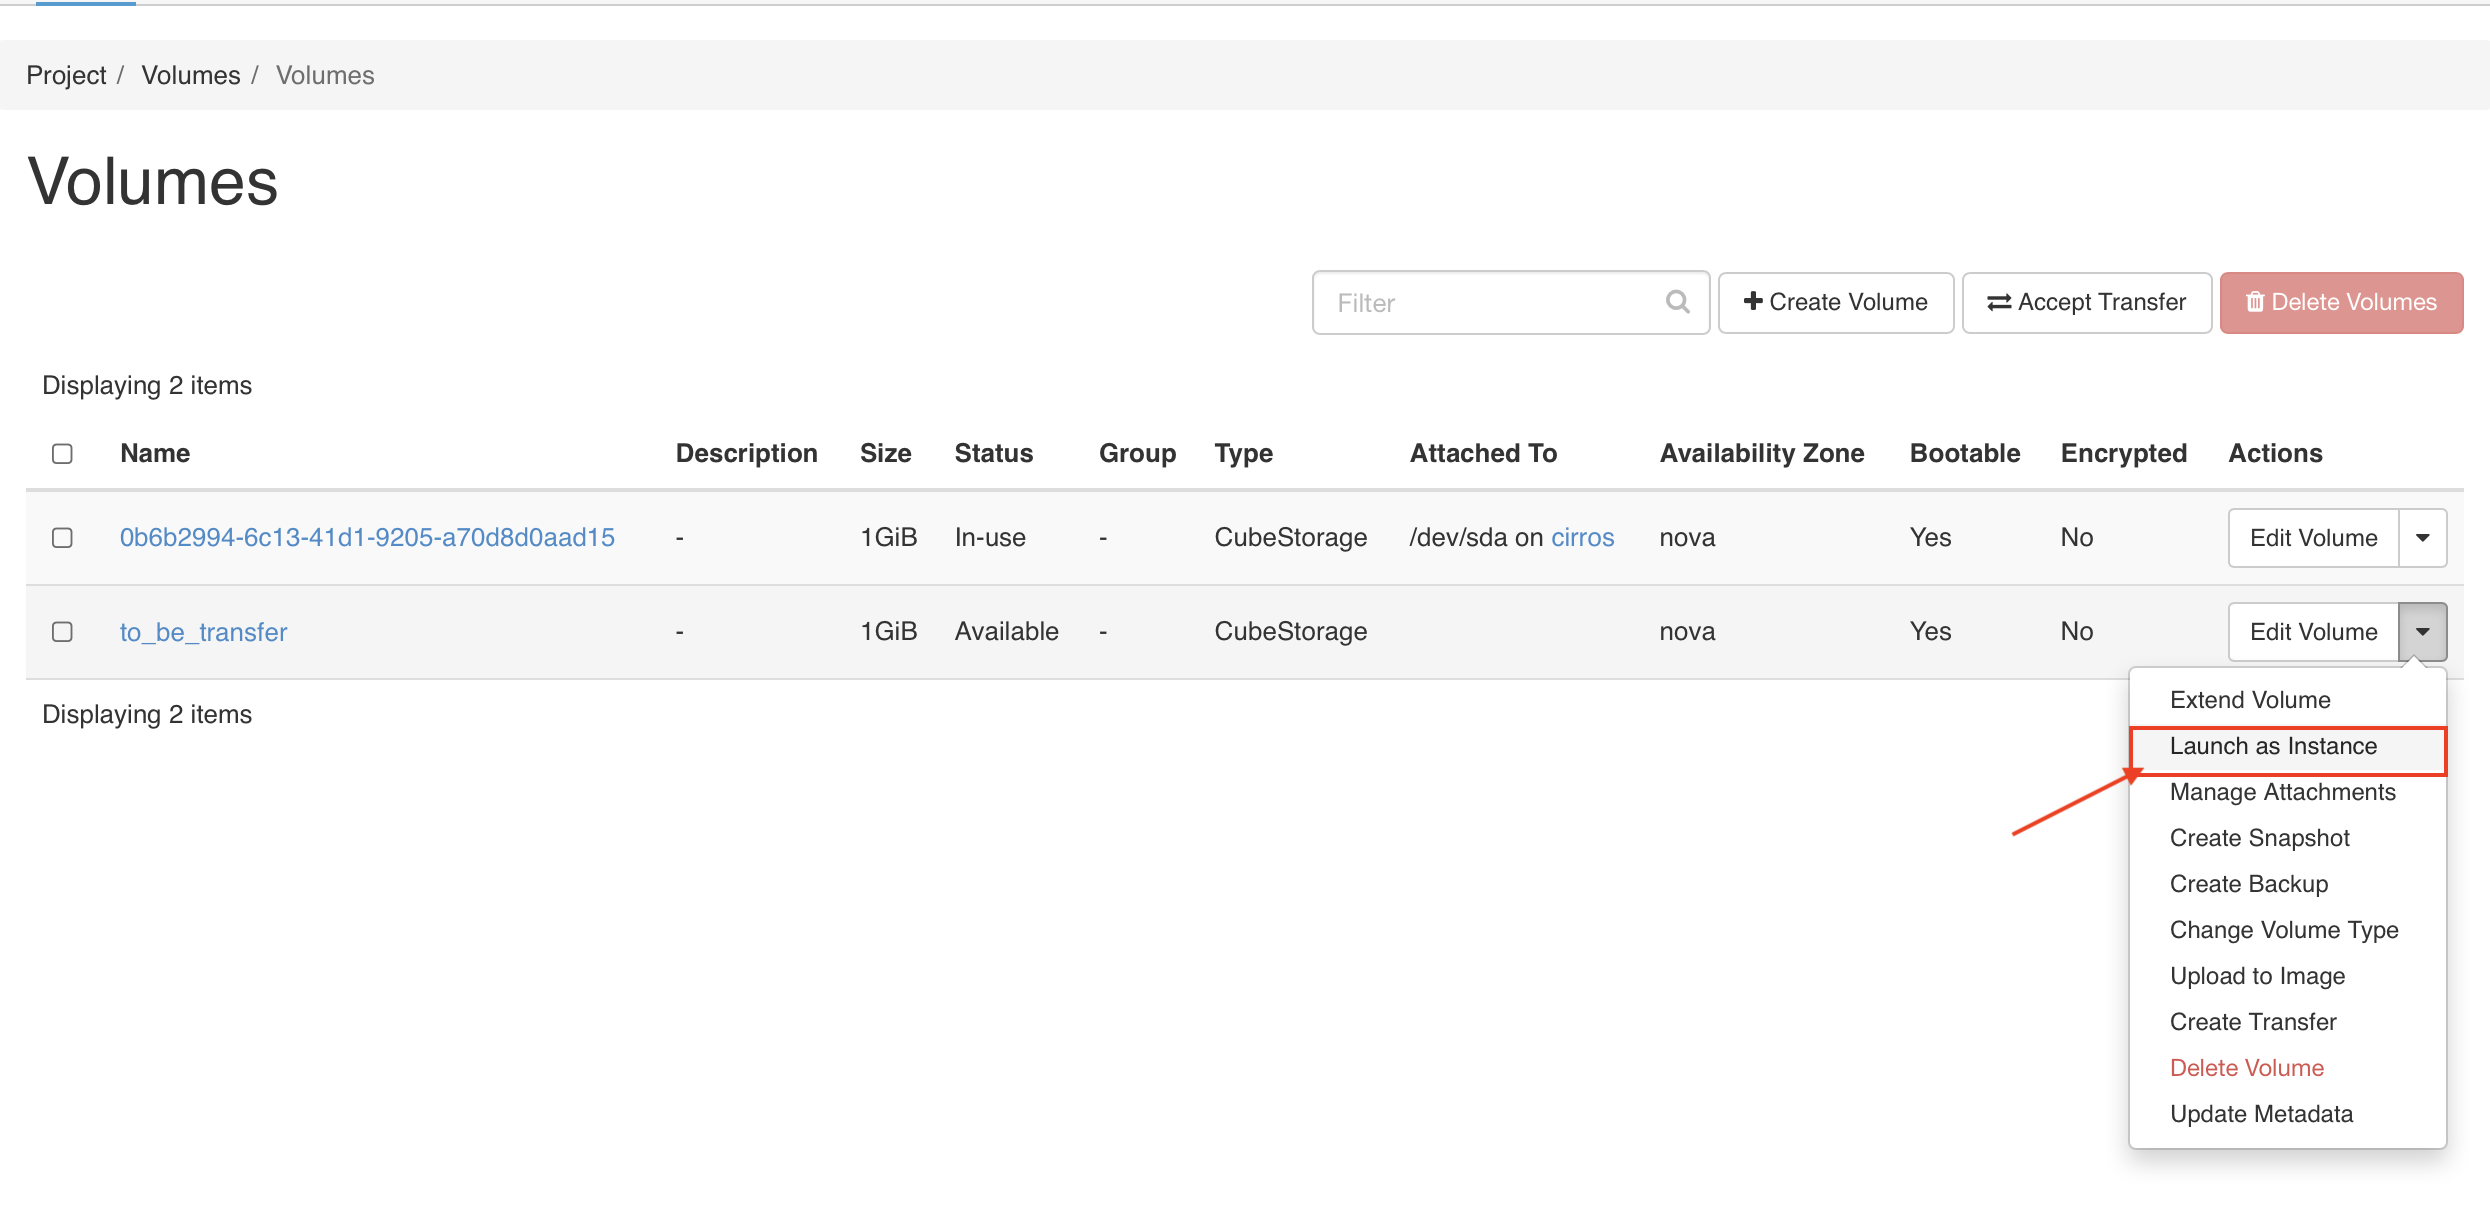
Go back to Project > Volumes > Volumes, choose the volume and select
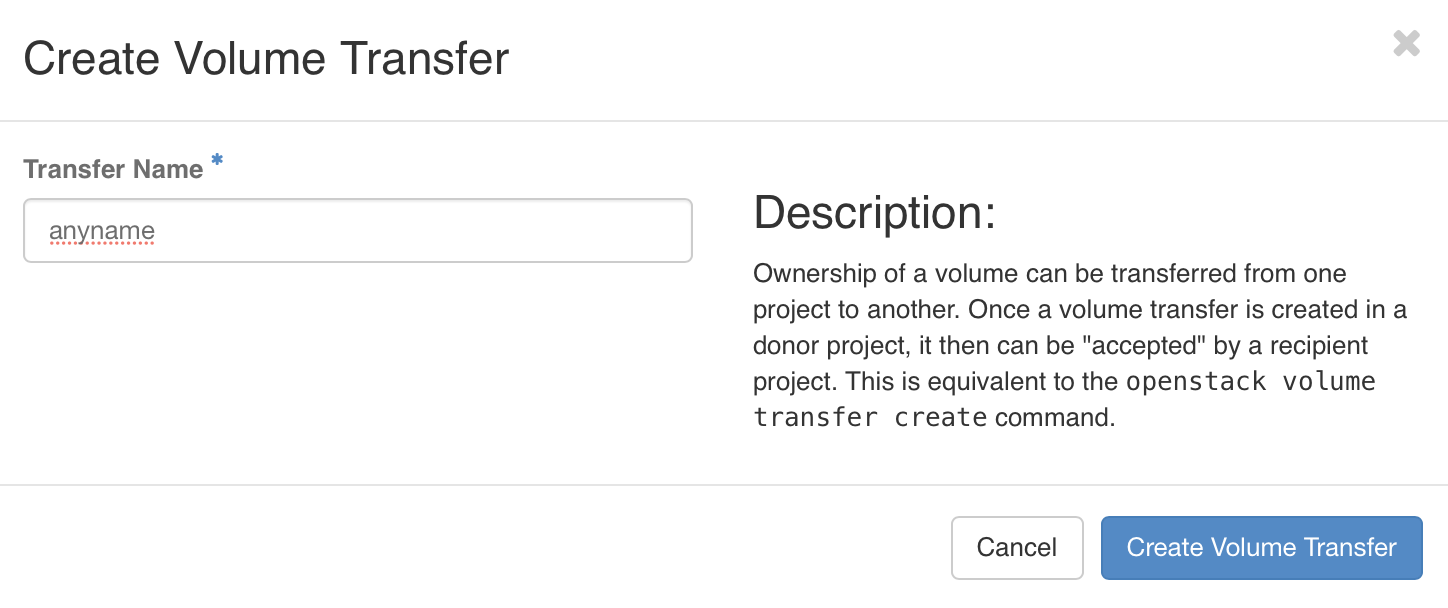
Create Transferfrom the Actions column.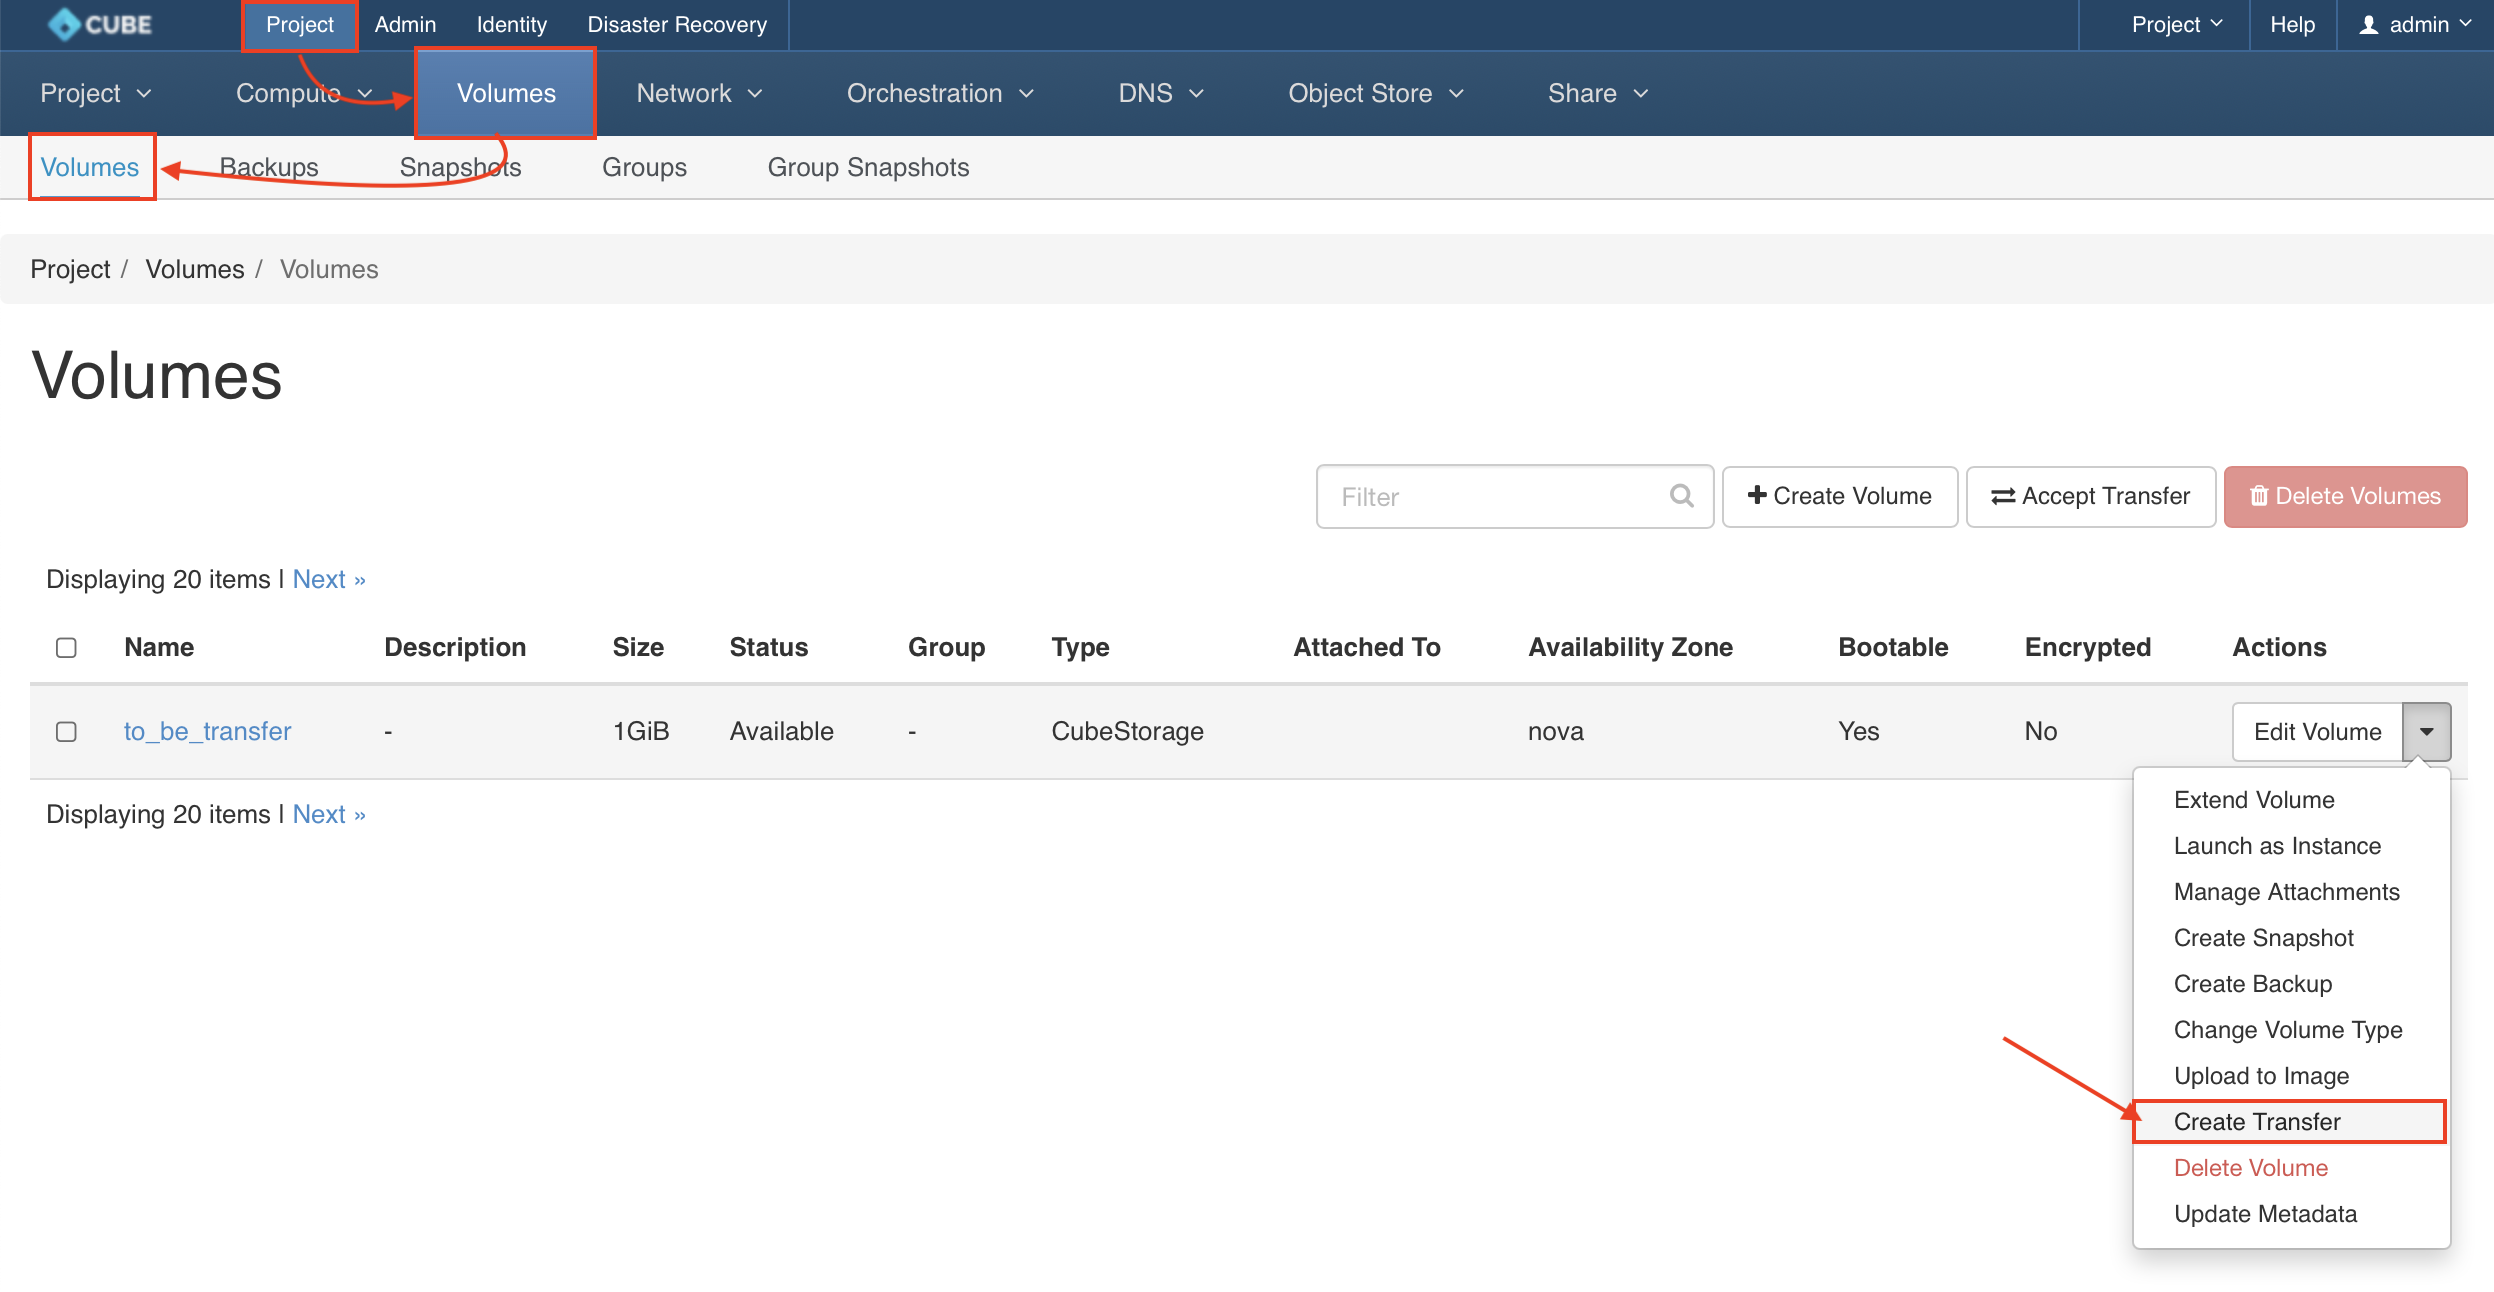
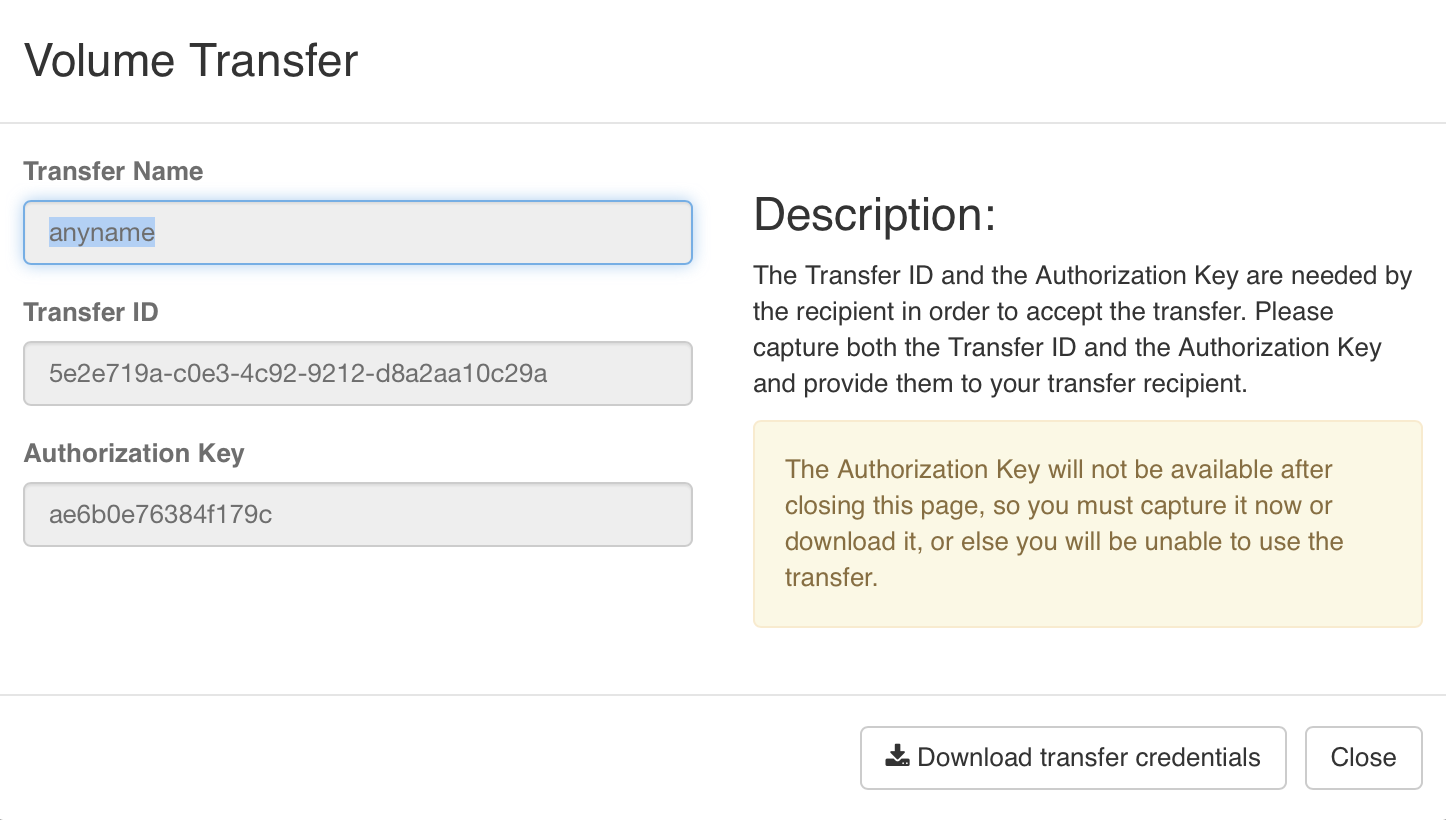
Download the transfer credentials and close the windows.
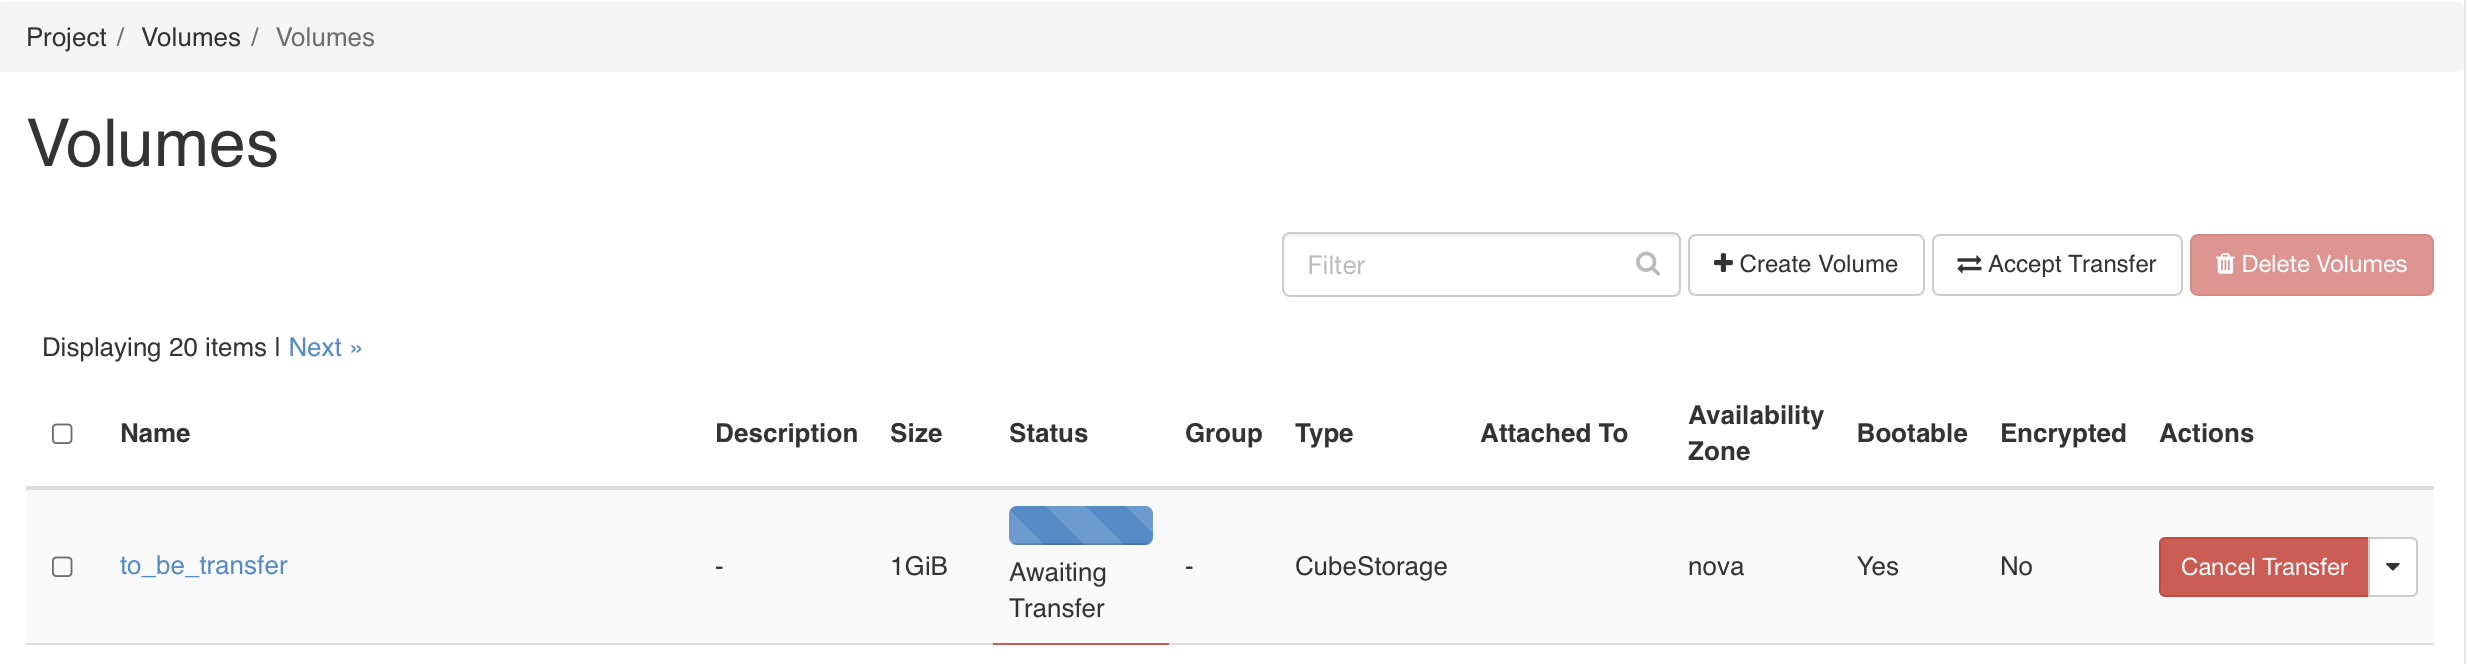
The Volume is ready to be transferred.
Switch to New Project, Goto Project > Volumes > Volumes, Click on
Accept Transfer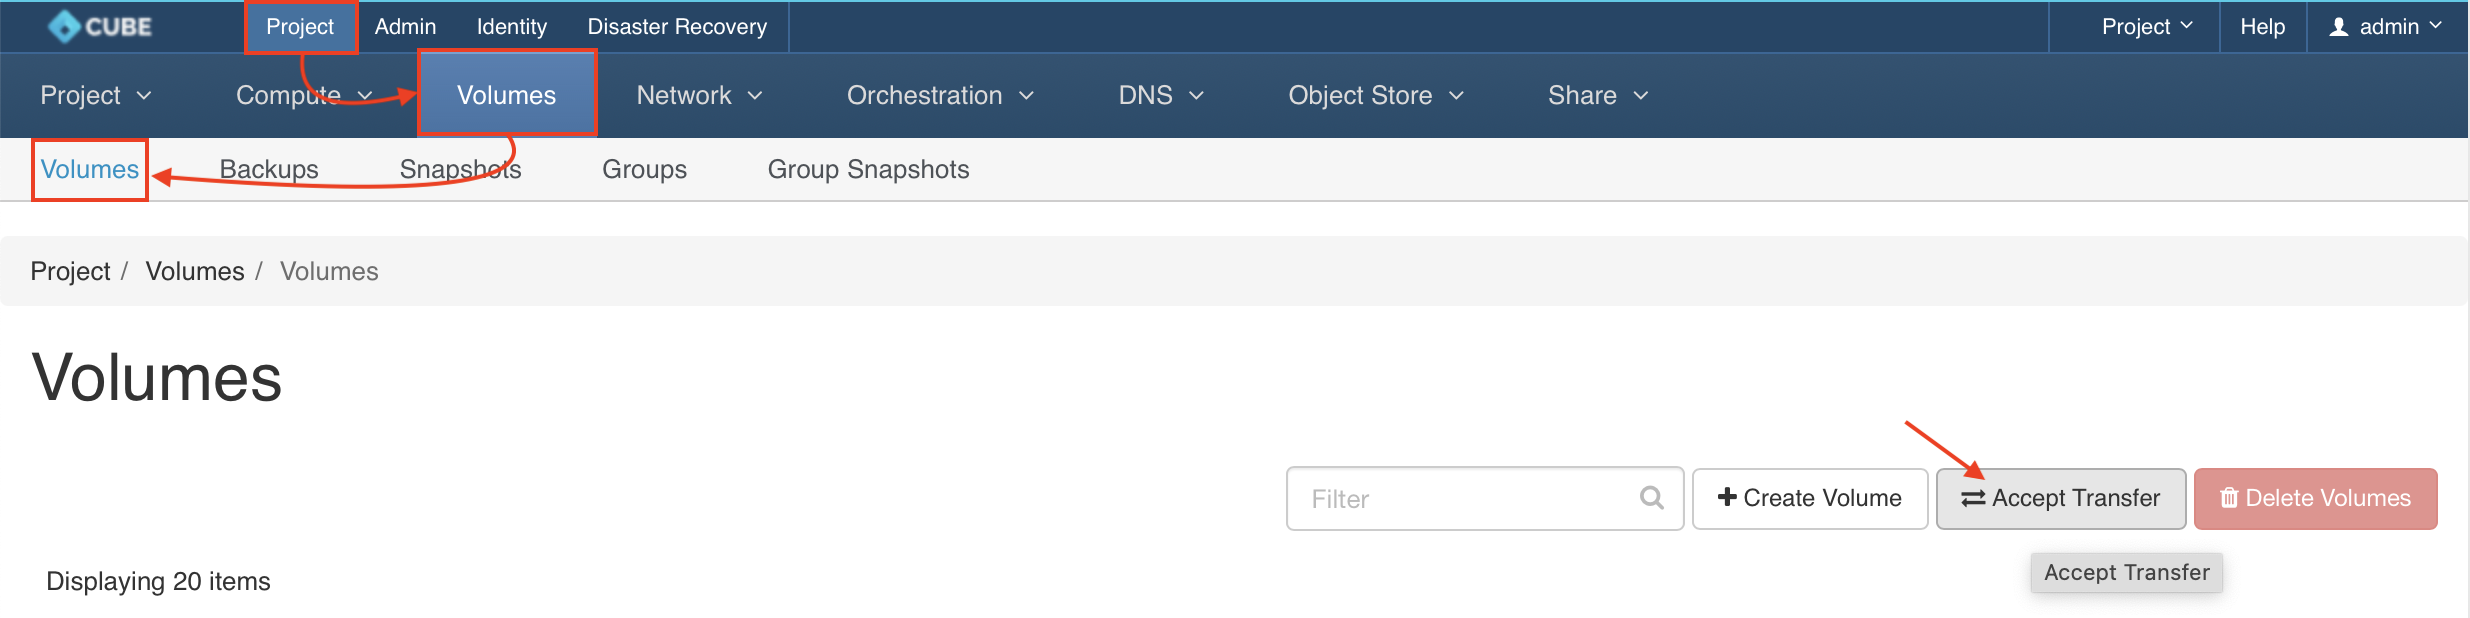
Input the
Transfer ID&Authorization Keyto accept the volume transfer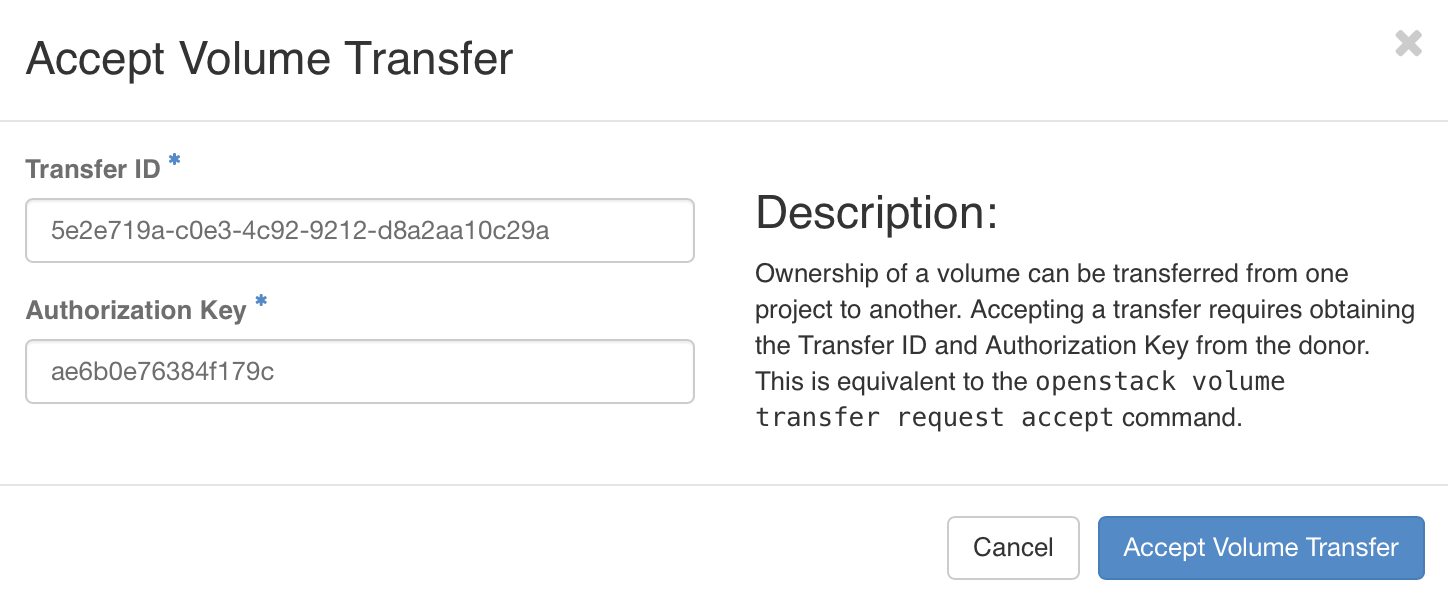
Now you can use the transferred volume launch as an Instance